THIS PAGE IS NOW AN ARCHIVE. FOR THE LATEST RECIPES, GO TO "MORE FROM THE COOK'S CORNER". THANKS!!!!
A Word about "The Cooks Corner"----since you asked!
Yes, I am often outside of my homes in Maine, and in fact outside of the U.S. But it has never been my intention to post every single meal we eat, every single night.
The intention of The Cooks Corner is to show how easy it is to cook well, and feed your family great food without a lot of effort. I don't post when we are, for example, just throwing a steak on the grill or doing a roast, because you already know how to do that!
I also have three homes that have black granite kitchen counters, which can make my photos a bit seamless.
And do I consolidate? Absolutely. In other words, it's possible I am in a different time-zone when I post a week of meals.....although I am all about keeping things seasonal and will continue to do so for you, my faithful readers. I just feel it is important for my personal safety that Liz McCusker does not know my specific whereabouts, so I often delay publication of certain recipes and photos until I am out of the country. I know my faithful readers understand that, also! Thanks so much!!!!!
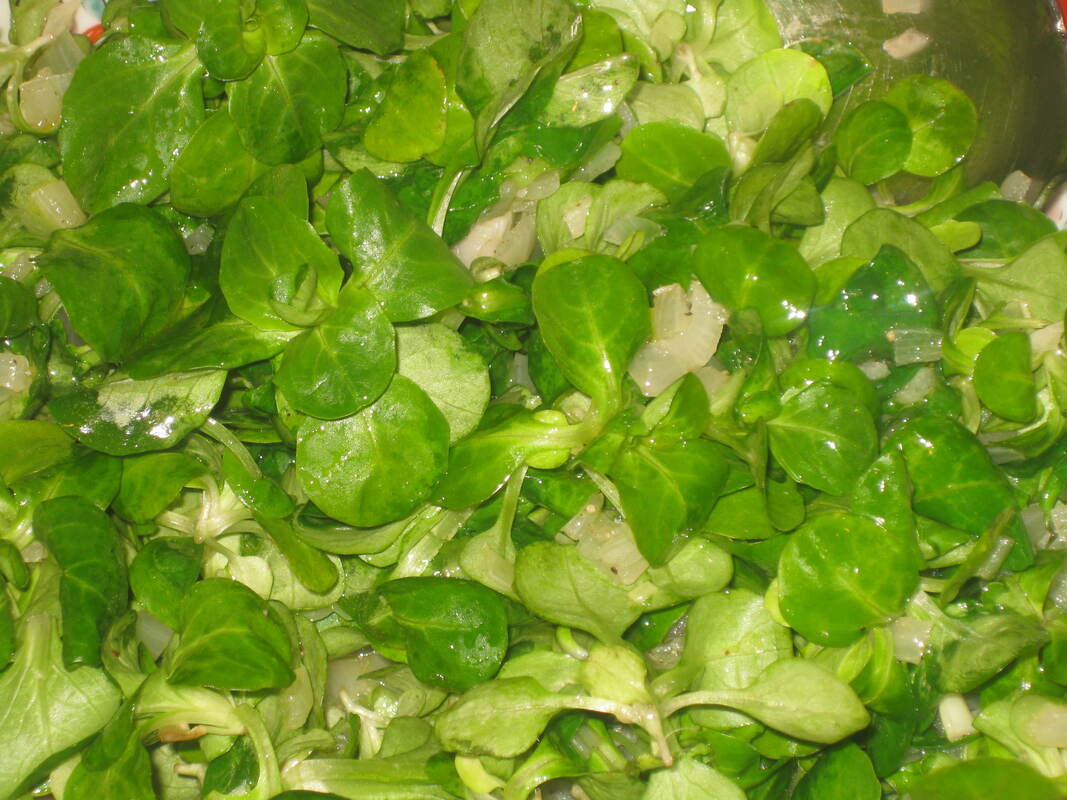
Think Spring!! This wonderful Wilted Lamb's Quarters Salad is just the side dish for things like the Vidalia Onion Pie (below).
Lamb's Quarters are called mache in France, and are in season now. It contains more protein and iron than even spinach!
You will need:
about 4 cups (packed) lamb's quarters
1 small onion, minced
2 large cloves garlic, minced
3 TBSP EVOO
1/4 cup cider vinegar
Optional, but gives a nice smoky flavour: 2 minced sunchokes.
Saute the onion and garlic in the EVOO until just tender. Add vinegar (and sunchokes, if using) and pour over lamb's quarters. Serve.
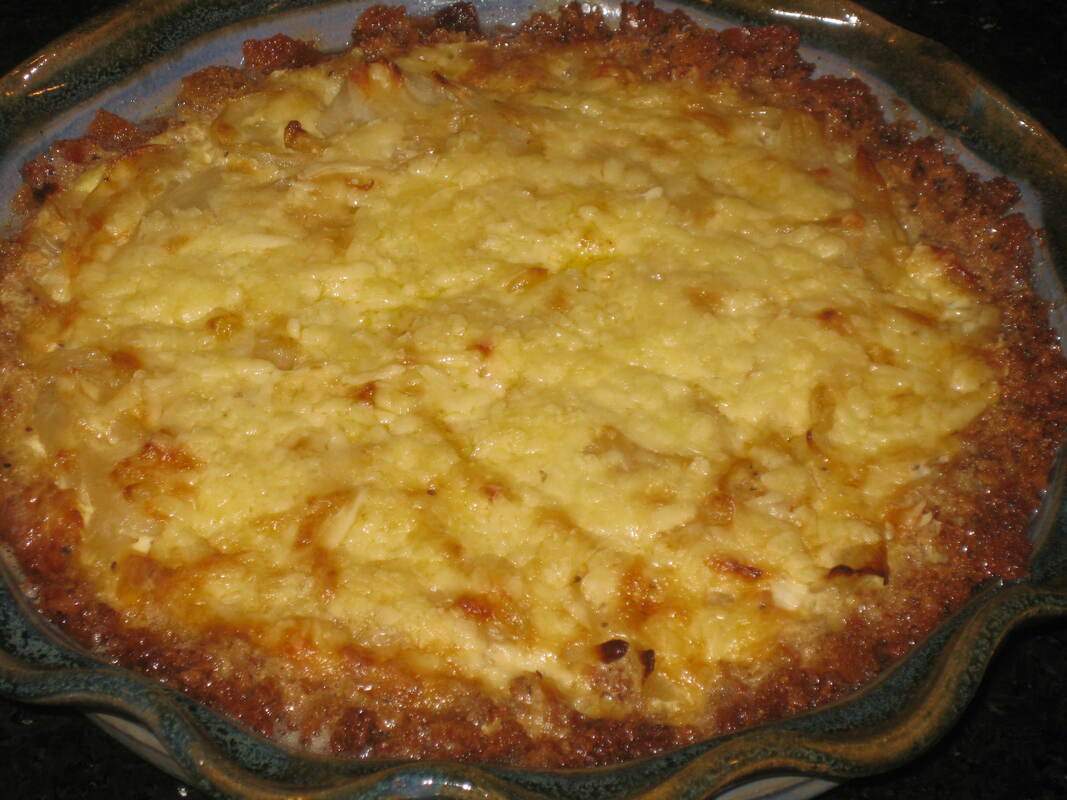
This buttery pie isn't exactly a quiche---it contains half as many eggs and half as much cream. It has a unique herb-stuffing-based crust, and Vidalia onions give it its wonderful, sweet & mellow flavour. Just be sure to cook the onions slowly so they don't brown but reduce and become ultra-tender.
For crust:
1 1/2 cups Pepperidge Farm herb stuffing mix
1/3 cup butter, melted
Combine butter and stuffing mix. Press into an 8 or 9 inch pie plate.
For filling:
2 TBSP butter
2 Vidalia onions, sliced thinly on the vertical
2 eggs
3/4 cup half-and-half
salt to taste
pepper to taste
3/4 cup shredded sharp cheddar
1. In a skillet, cook onions in butter very slowly, stirring occasionally. You don't want them to brown at all-----they should just slowly become more and more tender and reduce to about half or less of their original volume. Pour cooked onions into prepared pie plate.
2. Beat together eggs, half-and-half, salt, and pepper. Pour over onions.
3. Sprinkle cheese on top of pie. Bake in a 350 degree oven until a cake tester comes out clean; about 45 minutes.
"Schnitzel" is simply a word that indicates a meat that's pounded thin, breaded, and fried. "Wiener schnitzel" more specifically refers to a Viennese veal dish, which is usually served with a salad of bitter greens and lemon. My easy take on this features inexpensive boneless pork chops.
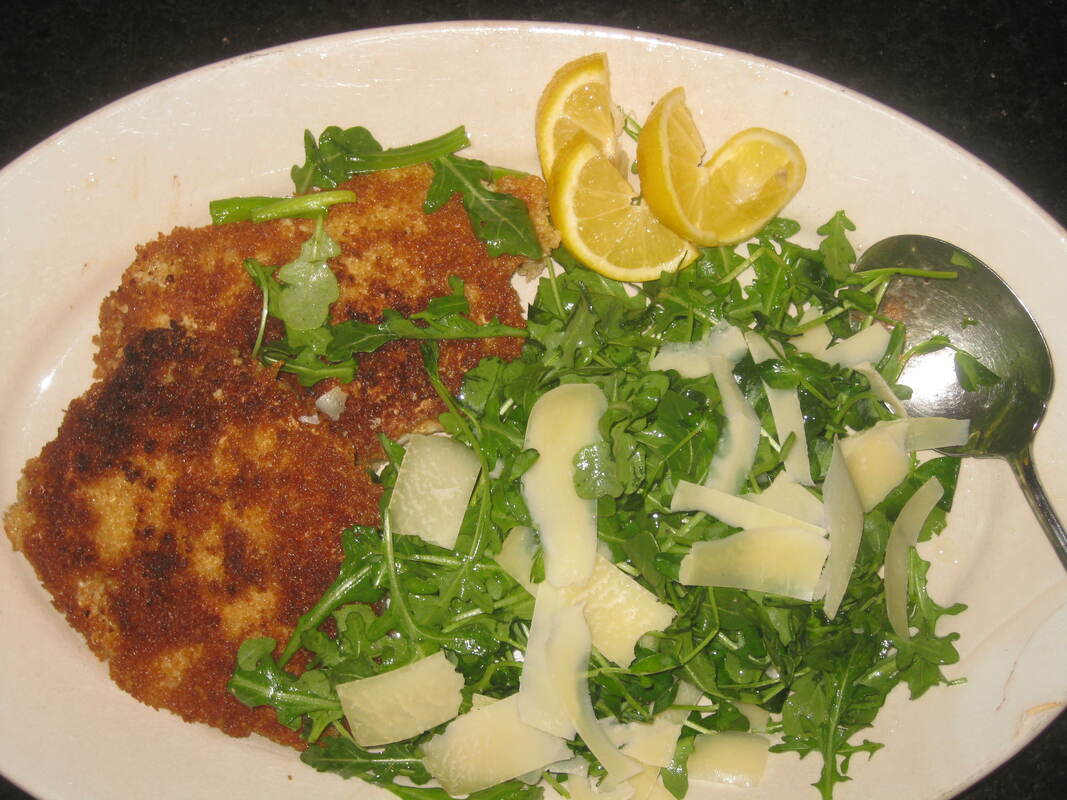
This classic pairing of thinly-pounded fried meat with a lemony arugula salad......oh, so good! I shaved some good fresh reg-parm atop the salad, which put the whole dish into swoon-category. Not another side dish is needed. The meat is so good with its coating of egg and breadcrumbs, and the salad with the lemon and its foil of a bit of good cheese........it's classic, and it's amazing.
Use the Contact Form for this easy recipe.
Use the Contact Form for this easy recipe.
The rich banana cupcakes taste like they have rum in them, but they don't! They're perfect for those who are dreaming of the Caribbean
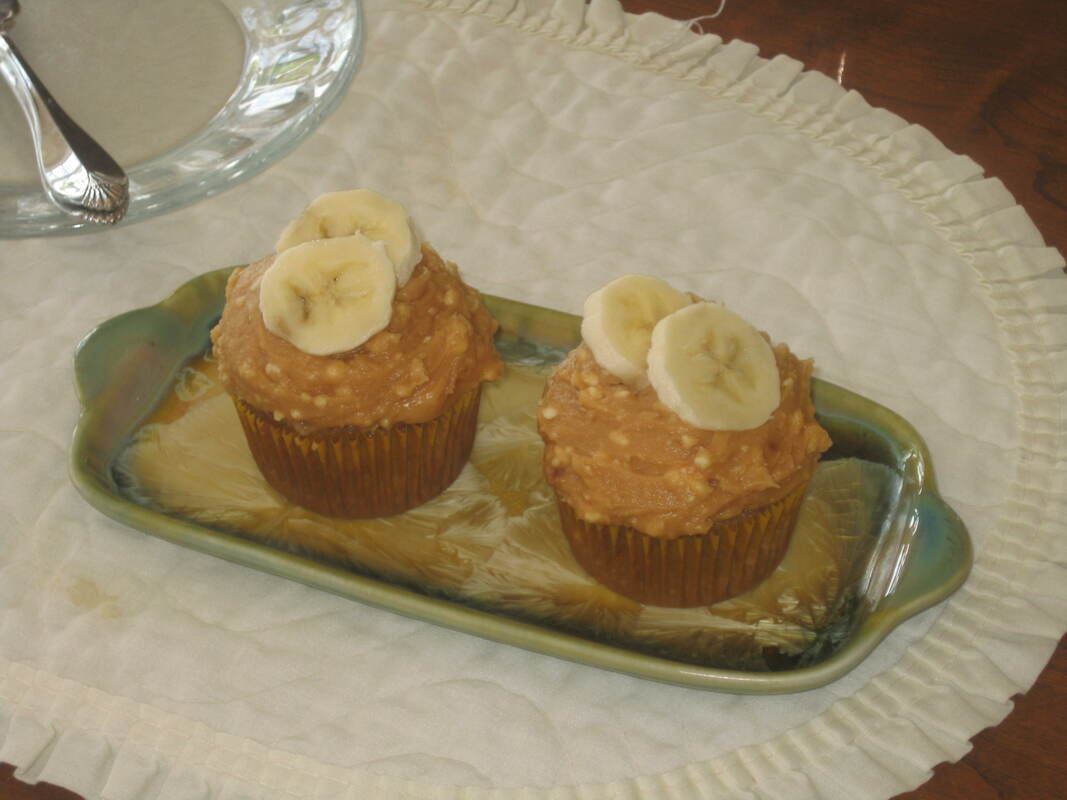
The cakes are like banana bread on a sweet cinnamon jag!!!! The frosting is a buttercream variation with rich dark caramel. They are just incredibly yummy, with the caramel cream having an almost rum-like flavour. Use the contact form for this easy recipe!!!!
Filet Mignon with Madiera and Prune Sauce
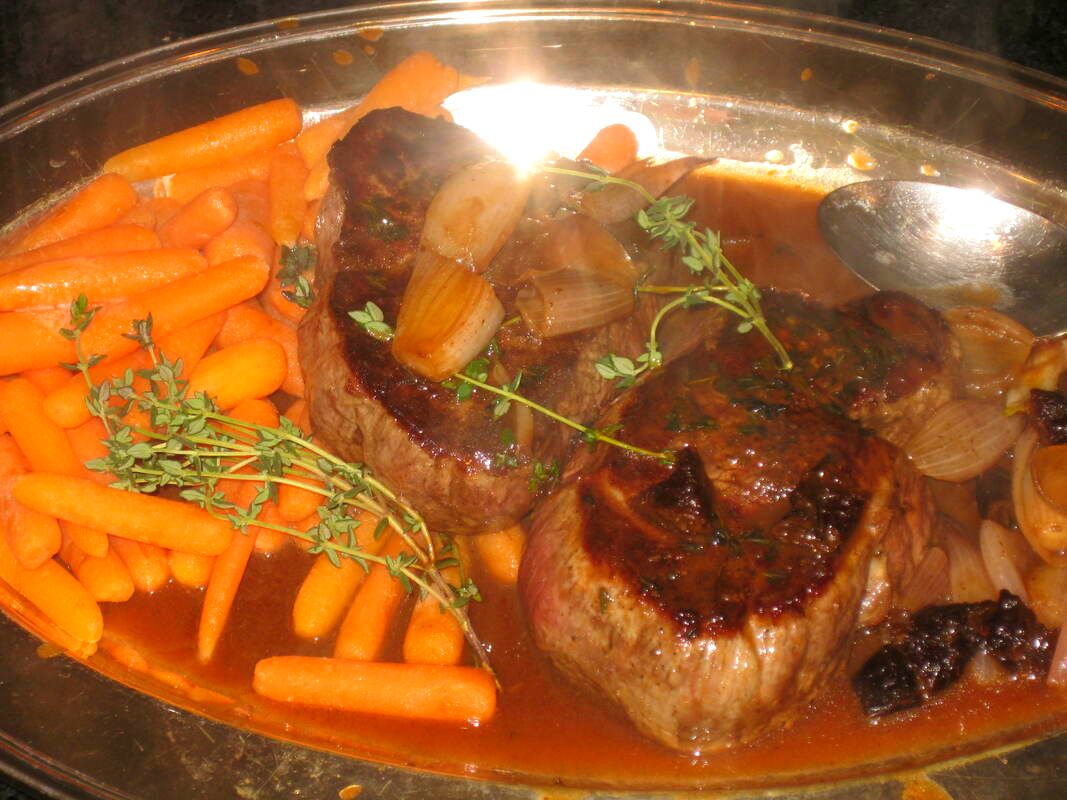
Do your filets the French way------in a cast-iron pan, on the stove. Don't use the barbeque grill for this fine cut!
a handful of pieces of shallot---very small whole ones, or larger ones cut bite-size
1 tsp olive oil
Toss shallot in oil and roast for about 20 minutes, until starting to turn golden. Remove from oven and set aside.
1/4-1/2 tsp kosher salt, depending on size of filets
1/4-1/2 tsp fresh ground pepper, depending on size of filets
1 TBSP fresh thyme leaves, less if filets are small
Mix together the salt, pepper, and thyme, and coat filets on both sides.
2 tsp olive oil
3/4 cups madeira
1 can College Inn low sodium beef broth
1 tsp butter
1 tsp flour
1 tsp tomato paste
1/4 cup finely chopped prunes.
Heat olive oil in cast iron skillet. Add ste
This is a quick weeknight spaghetti which comes together in no time and is just delicious
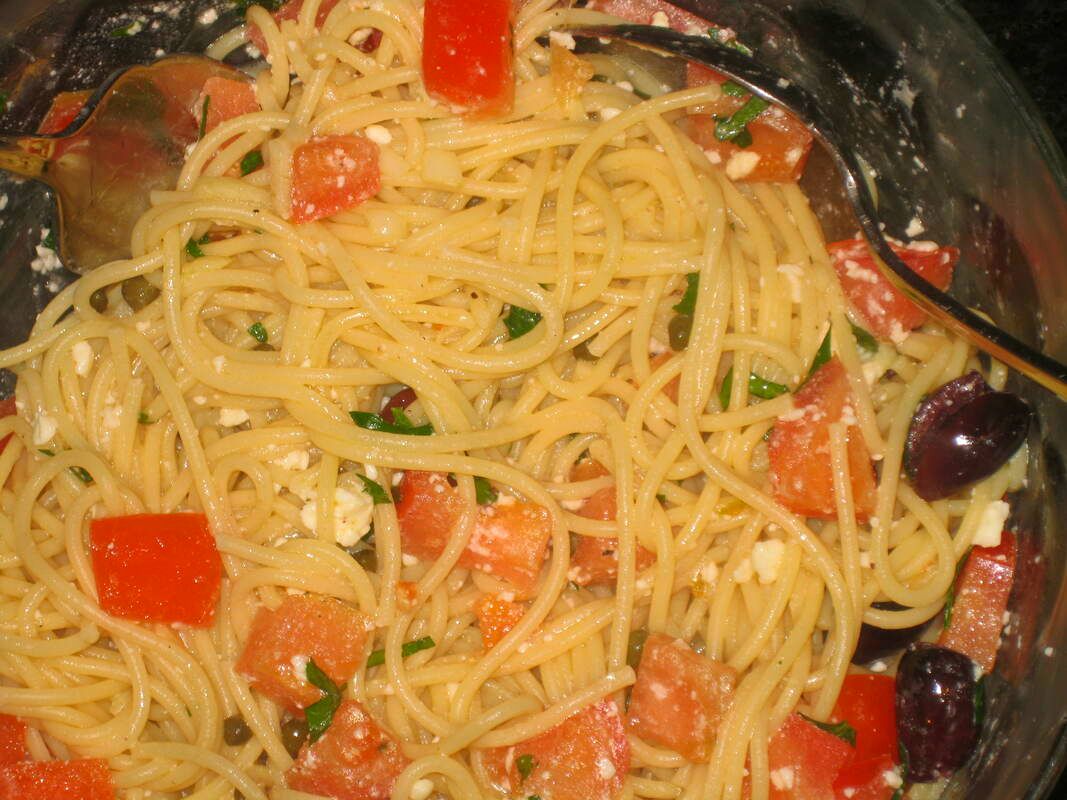
This recipe is another right out of Food & Wine. Be sure to use a flavourful and oily olive, such as kalamata. Here's the link:
https://www.foodandwine.com/recipes/spaghetti-tomatoes-black-olives-garlic-and-feta-cheese
This is a Pad Thai style dish that is actually vegan. It tastes similar to Pad Thai, but is lower in calories and fat.
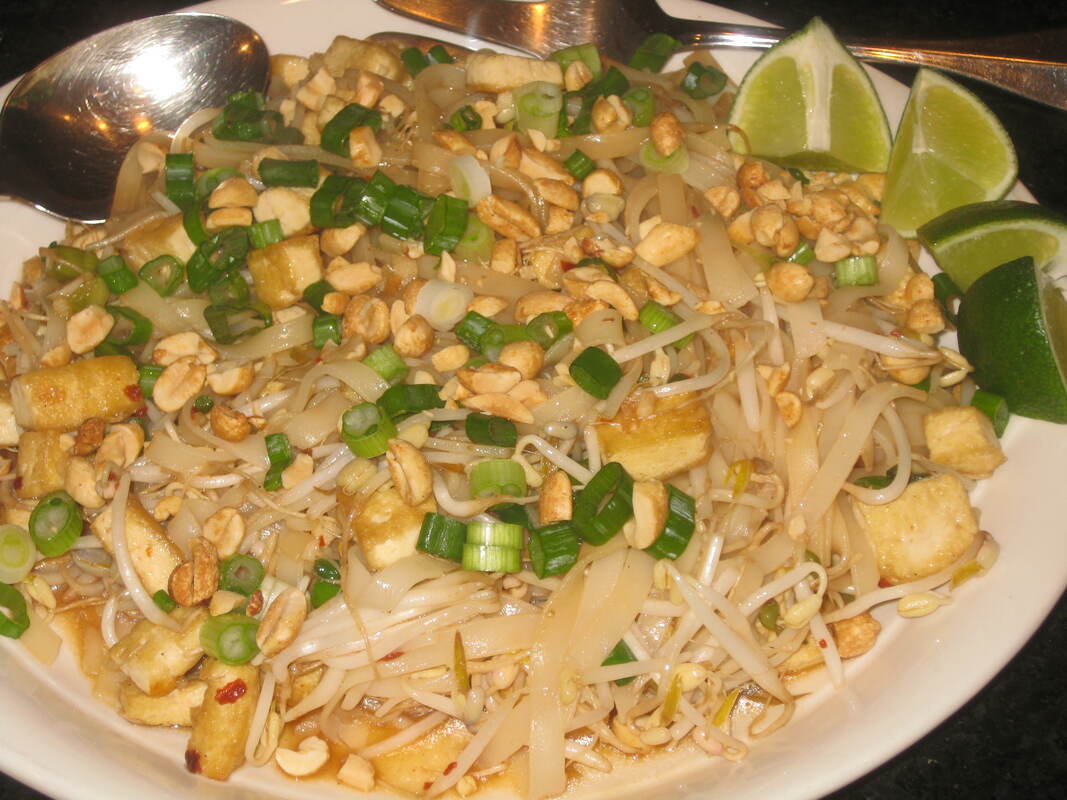
This nice, light recipe made plenty for two of us (with enough for lunch tomorrow). It's an enjoyable dish. Pad Thai it's not-----it doesn't have tamarind, eggs, nor nuac mam. But for an easy meatless meal, it's quite good.
4 oz wide rice noodles (often labeled "pad thai noodles")
2 TBSP peanut oil
9 oz extra-firm tofu, cut into bite-size pieces
2/3 cup sliced scallion
2 large garlic cloves, minced
5 oz mung bean sprouts
3 TBSP plain rice vinegar
2 TBSP soy sauce
4 tsp brown sugar
3/8 tsp nutritional yeast
1/4-3/8 tsp crushed red pepper
1/4 cup dry roasted peanuts
lime wedges, for serving
1. Boil noodles until done, about 5 minutes. Drain and rinse rinse rinse with cold water.....you don't want them to stick together, so keep rinsing with cold water until they don't.
2. Heat oil in a wok. Fry the tofu cubes until golden. Remove from wok.
3. Toss scallions and garlic in wok until fragrant, about 20 seconds. Return noodles and tofu to wok, along with all ingredients except peanuts and lime.
4. Cook until everything is heated through, and sauce is getting absorbed into noodles, constantly tossing.
5. Place on serving dish, tip with peanuts, and serve with lime wedges.
Brownies as cupcakes----YUM!

These densely chocolately, super-rich brownies are baked in cupcake cups and topped with rich buttercream. (I did tint the buttercream slightly with some blush pink from my Americolor Nifty Fifty box). A bit more brownie on top makes the cupcakes a special treat for those you love.
Use the Contact Form for this super recipe!
Use the Contact Form for this super recipe!

Here's a really authentic way to make the filling for bao buns-----it takes a while, but is soooooooo worth it.
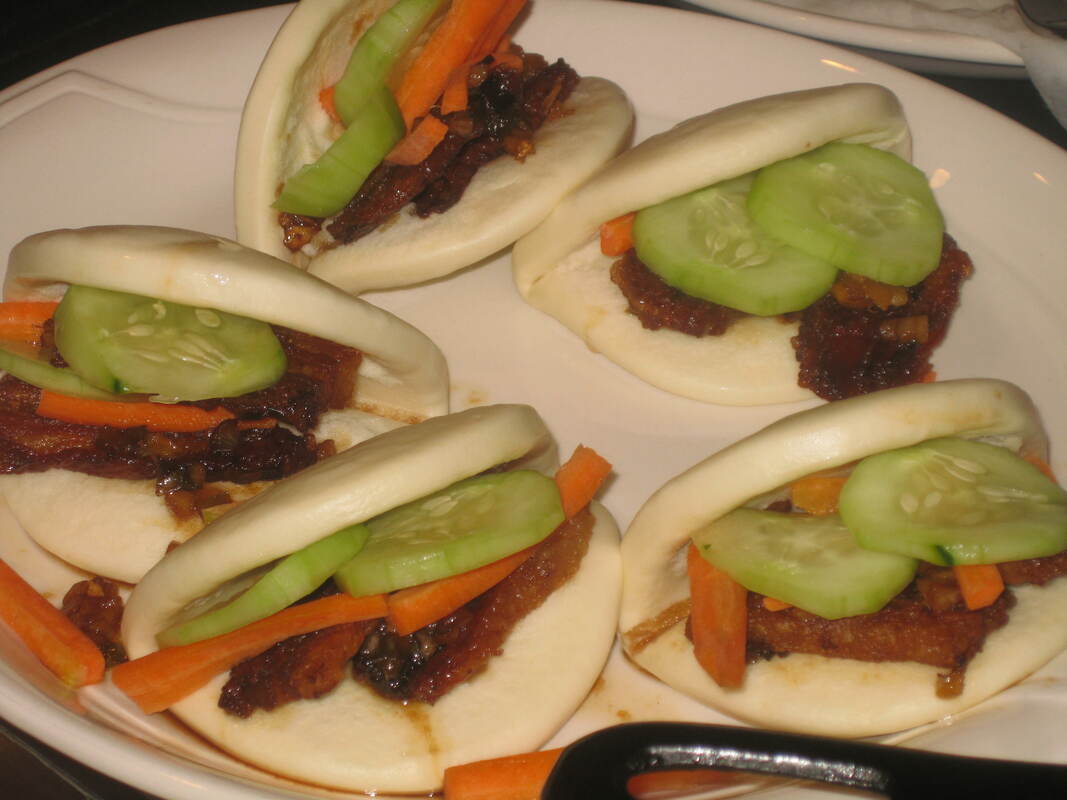
2 lb pork belly
1 TBSP vegetable oil
3 cloves garlic, minced
1 TBSP ginger, minced
1 scallion, minced
1/4 cup brown sugar
2 TBSP plain rice vinegar
3 TBSP nuac mam
1 TBSP soy sauce
1/2 cup water
steamed buns
carrots and cukes
1. Wrap pork belly in foil. Roast in 275 degree oven for 2 hours. Then put it in the fridge for about 2 hours (to make it easier to thinly slice). When you can do so, slice it thinly.
2. Mix together sugar, vinegar, fish sauce, soy sauce, and water, Set aside.
3. Heat oil over fairly high heat. Place pork slices in oil (in batches if necessary) and fry until crispy and golden. Remove from oil.
4. Add garlic, ginger and scallion to oil. Fry for about 30 seconds, then add sugar mixture. Cook to reduce it until it's nicely syrupy, and add the pork back to heat through.
5. Place some of the pork mixture on the hot steamed buns. Add the fresh veggies.
Ever had Kentucky Hot Brown at the Kentucky Derby (or a Derby party)? Here's a little bite-size hors d'oeuvre that's even better!

Oh, these are good-------even better than regular Hot Brown (which of course is made on toast) Here's the way to go to make a dozen:
Grated parmesan
cooking spray
2 TBSP butter
1 1/2 TBSP flour
3/4 cup milk
1/8 tsp kosher salt
1/8 tsp fresh ground pepper
1 oz grated cheddar
2 oz or so deli turkey, cut into 2 x 2 inch pieces
2 slices bacon, cooked and crumbled
1/4 cup chopped fresh tomato
flat leaf parsley
1. Cover a baking sheet with parchment and spray it with cooking spray (e.g. PAM). Place packed-1-TBSPs of grated parm on sheet. Bake at 350 degrees for about 7-8 minutes, or until beginning to brown but still soft.
2. Working very quickly, transfer parmesan piles to a mini-muffin tin, again coated with cooking spray. With your fingers, press the parmesan up the tin to form cups.
3. Make a roux with the butter and flour. Add the milk, salt, and pepper to make a white sauce, Add cheddar and melt it to combine.
4. Place a folded slice of turkey over each parmesan cup. Fill with the cheese sauce.
5. Bake at 425 for 5 minutes. Garnish with bacon, tomato, and parsley.

Truly better than take-away: Chinese Beef and Broccoli
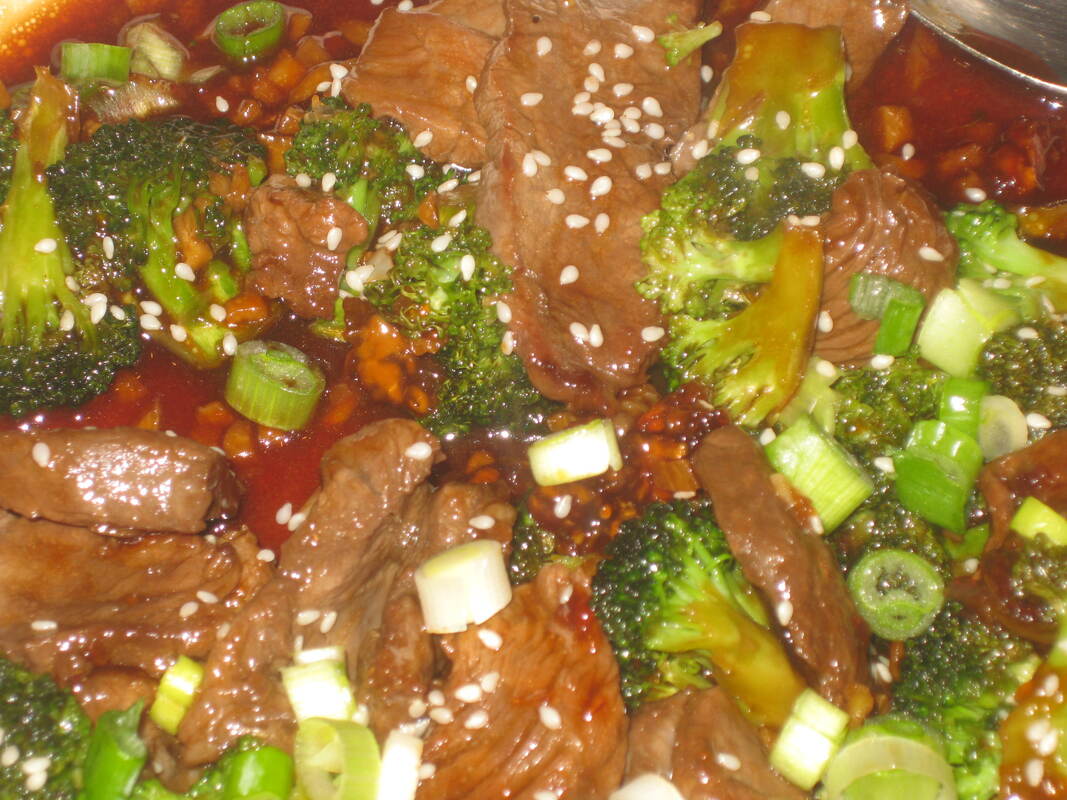
You can make this spicy or not, by the addition of a couple of tsp of sriracha. It's a salty dish, so be sure to use no-sodium beef broth. Use low-sodium soy if you like less salt.
For marinade:
1/3 cup soy sauce
1 TBSP lime juice
1 TBSP brown sugar
1 TBSP cornstarch
fresh black pepper
1 strip sirloin, 1/2-3/4 lb., cut in thin slices
Mix all ingredients together and marinate overnight.
For the dish:
2 TBSP oil
3 large cloves garlic, minced
1 TBSP cornstarch
2 TBSP brown sugar
1/3 cup no-sodium beef broth
1/3 cup soy sauce
2 tsp sriracha (if you like some heat)
1 broccoli crown, separated into bite-size florets
sesame seeds
1 scallion, sliced
1. Heat oil in a cast-iron skillet over high heat. Remove steak from marinade, pat dry. Fry quickly until browned on each side, about 1 minute per side.
2. Remove steak from skillet. Add garlic and cook 30 seconds.
3. Add cornstarch, brown sugar, broth, soy sauce (and sriracha, if using) to skillet. Combine. Add broccoli, cover, and cook about 2 minutes.
4. Return steak to skillet and heat until warmed through. Transfer to serving dish and top with scallion and sesame seeds.
Another Blue Ribbon winner-----my classic Buttermilk Rolls!
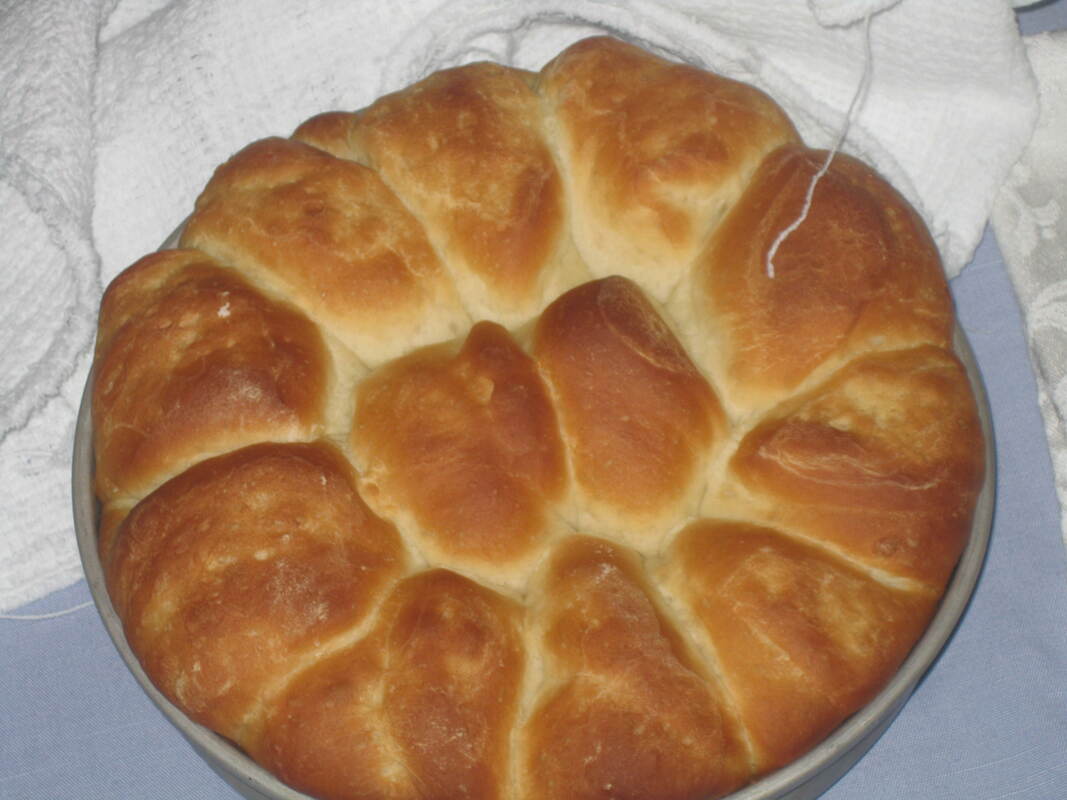
A few years ago I won a Blue Ribbon at a Maine county fair with these yummy dinner rolls.
1 package dry yeast
1/4 cup lukewarm water
1 tsp sugar
1 cup buttermilk
1/4 cup sugar
1/4 tsp baking soda
1 tsp salt
3 TBSP shortening
2 1/2 cups flour
1. Proof the yeast in the water with the 1 tsp sugar. Set aside
2. Heat buttermilk to 110 degrees (lukewarm). Add the 1/4 cup sugar, baking soda, salt, and shortening. Add yeast mixture.
3. Add enough flour to make a soft dough. Knead for 10 minutes. Let rise in a greased bowl until doubled in size. Punch down.
4. Form into Parker House rolls, or other shape of your choosing. Place in greased cake tin, and let rise again until doubled.
5. Bake at 275 degrees for 25-30 minutes.
Quiche Lorraine.....in the microwave? Yes!!!!!

If you've got a baked pastry pie shell in the freezer, you can make this classic entirely in the microwave, including cooking the bacon:
1/2 lb bacon (about 8 slices)
baked pie shell (in glass pie plate)
4 oz mushrooms (tinned are fine----even stems and pieces are fine)
1 1/2 cups shredded cheddar
3 scallions, sliced
1 1/4 cups light cream
3 eggs, beaten
1/2 tsp salt
1/8 tsp pepper
1. Arrange bacon in a glass baking dish. Microwave on high 9-15 minutes, or until crisp. When cool enough to handle, crumble into the bottom of the pie shell.
2. Sprinkle cheese, mushrooms, and scallions atop bacon.
3. In a 1-quart glass bowl, microwave cream until hot but not boiling. Beat in remaining ingredients, and pour into the pie shell.
4. Microwave on MEDIUM for 22-26 minutes until almost set in center. Let stand 5 minutes before serving.
Kofta is a Middle Eastern dish made from ground meats, usually lamb and beef. It's also found in the Caucasus, as well as the Indian sub-continent. The meats are always skewered, and always grilled.
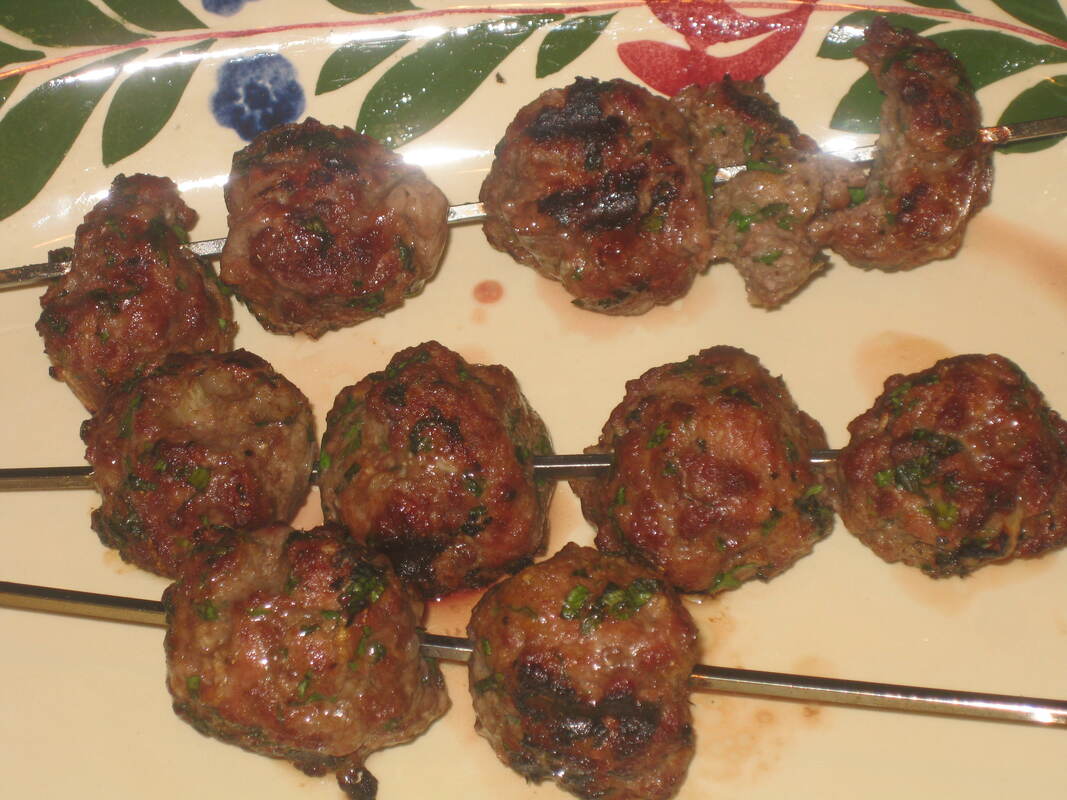
These are a breeze to make. Let dinner tonight be a little exotic for a change! The combination of herbs and spices is just wonderful.
1/2 lb ground lamb
1/2 lb ground beef
1/2 small onion, grated
2 large cloves garlic, put through a press
1/3 cup finely chopped fresh mint
1/4 cup finely chopped fresh flat-leaf parsley
2 tsp cumin
2 tsp ground coriander
1 tsp sumac
1/4 tsp allspice
1/2 tsp kosher salt
1/2 tsp pepper
Combine ingredients. Shape into 1 1/2 inch balls, and thread onto skewers. Heat barbecue grill to medium-high, and grill skewers, turning occasionally, until cooked through, about 7 minutes.
Are these cupcakes or are they miniature Boston cream pies? Either way they're delicious.

Classic vanilla cake is filled with vanilla cream and topped with a yummy chocolate ganache. These are loads cuter than a regular size slice of Boston cream pie. use the contact form for this recipe!
We just love lotus buns.....and these quick (half an hour) and low calorie (under 160) Korean-style buns make a good casual dinner or a filling hors d'oeuvre
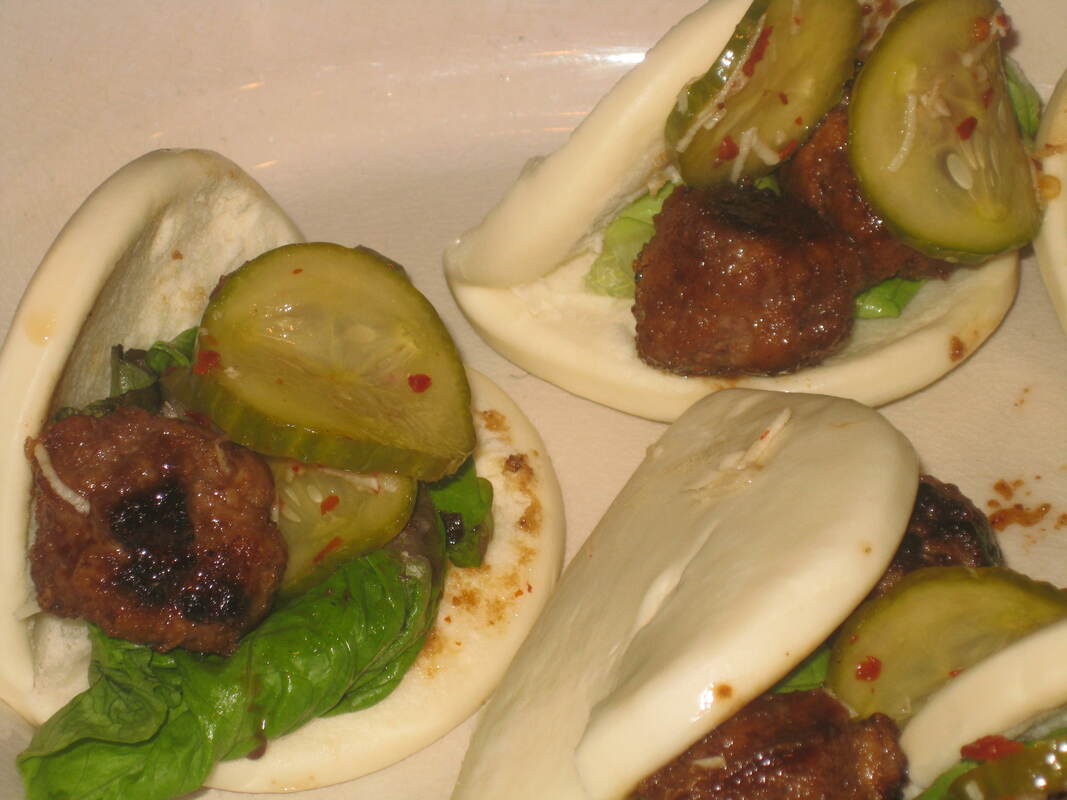
Lotus buns are squishy, slightly chewy, and downright delicious. In this case I've filled them with quickly pickled cukes, and a bulgogi-style meatball for a Korean twist.
FOR QUICK-PICKLED CUKES:
1/3 cup plain rice vinegar
1/3 cup water
1 TBSP light brown sugar
3/4 tsp crushed red papper
2 cloves garlic, grated
1 cup sliced European cucumber
Bring first five ingredients to a boil. Add cucumber slices and allow to cool. Drain.
FOR BULGOGI MEATBALLS:
1/2 lb 90% lean ground beef
1/4 cup panko
1 garlic clove, grated
1 beaten egg white
1 1/2 tsp soy sauce
1 1/2 tsp light brown sugar
cooking spray
Mix together all ingredients except cooking spray. Form into 16 small meatballs. Heat a skillet over medium, and spray with cooking spray. Add meatballs and cook until done, about 6 minutes. Remove to a plate and keep warm.
PUTTING IT TOGETHER:
2 tsp sesame oil
1 1/2 TBSP light brown sugar
1 1/2 TBSP soy sauce
green leaf lettuce
8 lotus buns
1. Layer several wet paper towels on a plate. Place buns on paper towels, and cover with a few more moistened paper towels. Microwave on high for about 1 minute. (Do not over cook. If not steaming after one minute, heat in 10-second intervals).
2. In same skillet that you cooked the meatballs, heat the oil, then add the soy sauce and brown sugar. Cook, stirring, until sauce is shiny and sugar is thoroughly melted,, about 1 minute. Add meatballs and stir to cover them with the glaze and heat them through.
3. Place lettuce, meatballs, and a few slices of cucumber on each bun. Serve immediately.
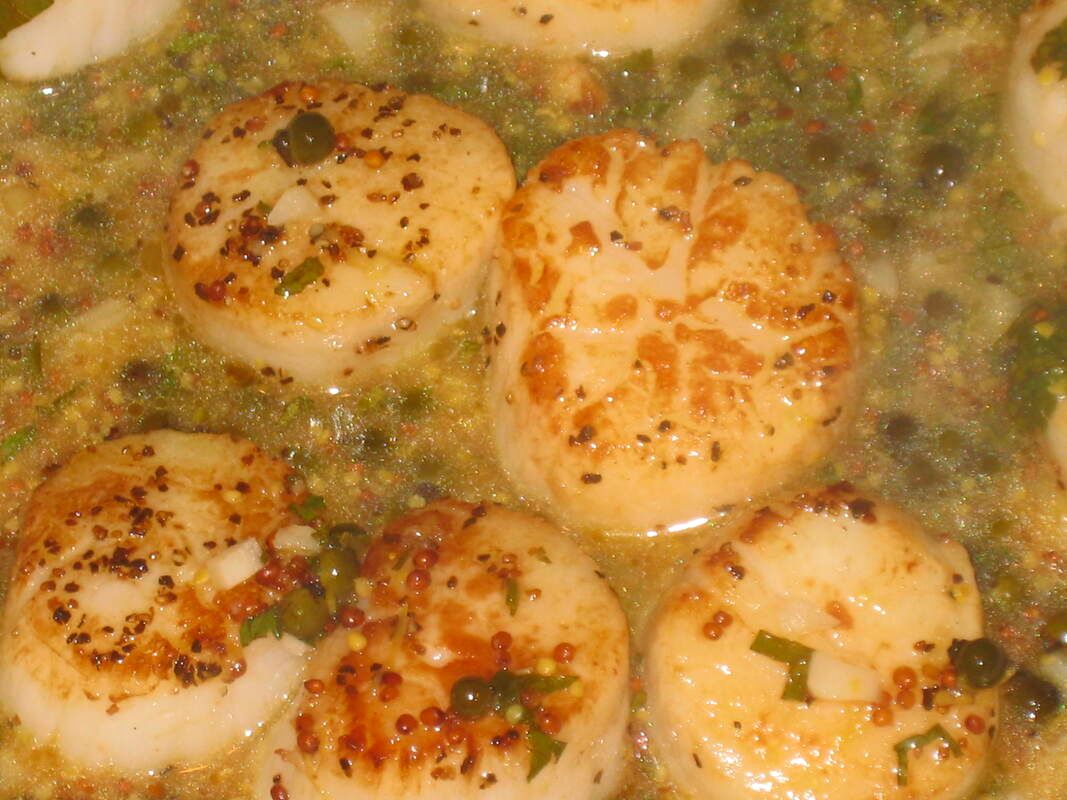
Quick, easy, elegant, and delicious----Scallops in Mustard-Caper Sauce
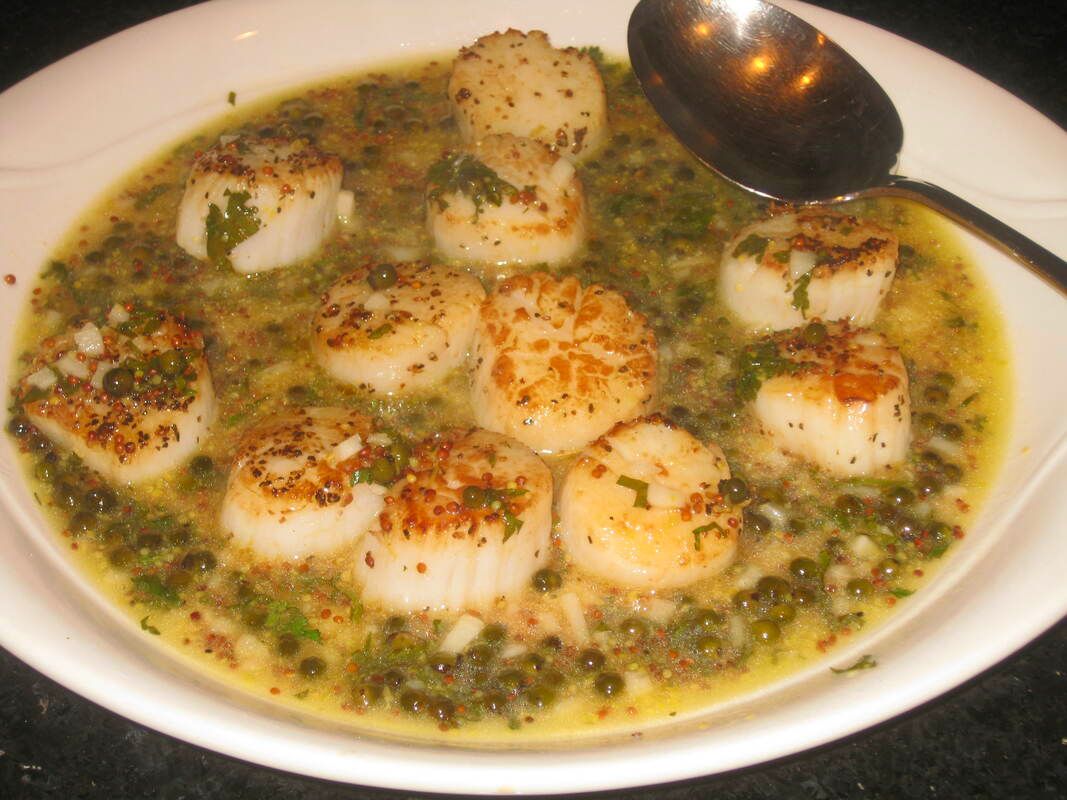
I stepped away from my usual bacon/pancetta-plus-citrus method of making scallops for this dish, though I did use a bit of lemon. The available dry scallops have been running a bit smaller than usual, so I decided to fry them then add a simple sauce. The capers add a real briny goodness, and butter with dijon mustard lends a creaminess to the sauce. Dry wine of course is a classic pairing.
This recipe serves two:
1 TBSP EVOO
4 medium cloves garlic, minced
3 TBSP capers, drained
1 TBSP whole grain dijon mustard
1 cup chardonnay
1 TBSP lemon juice
1 TBSP unsalted butter
1/2 tsp lemon zest
1 TBSP fresh parsley
1/2 lb dry scallops
1/2 tsp salt
1/2 tsp pepper
2 TBSP EVOO
1. Heat the 1 TBSP EVOO in a small saucepan. Add garlic and cook until fragrant, about 30-60 seconds. Add capers, mustard, wine, and lemon juice. Cook until wine is reduced by about 1/3, about 5 minutes. Whisk in mutter, parsley, and lemon zest, whisking until creamy. Set aside.
2. Heat the 2 TBSP EVOO in a non-stick skillet over moderately high heat. Season scallops with salt and pepper. Cook about 90 seconds per side until golden brown on the outside but still slightly underdone in the middle. Remove from heat and toss with sauce.
Peanut Butter & Jelly Cupcakes? With a peanut butter cream cheese frosting? Your favourite sandwich just became dessert

These are super, super good. You'll need two kinds of peanut butter to make them properly though------creamy natural peanut butter for the cakes, and regular (such as Jif) for the delicious frosting.
Of course any kind of jelly works; I think strawberry is a classic. Use the Contact Form for this recipe!
Of course any kind of jelly works; I think strawberry is a classic. Use the Contact Form for this recipe!

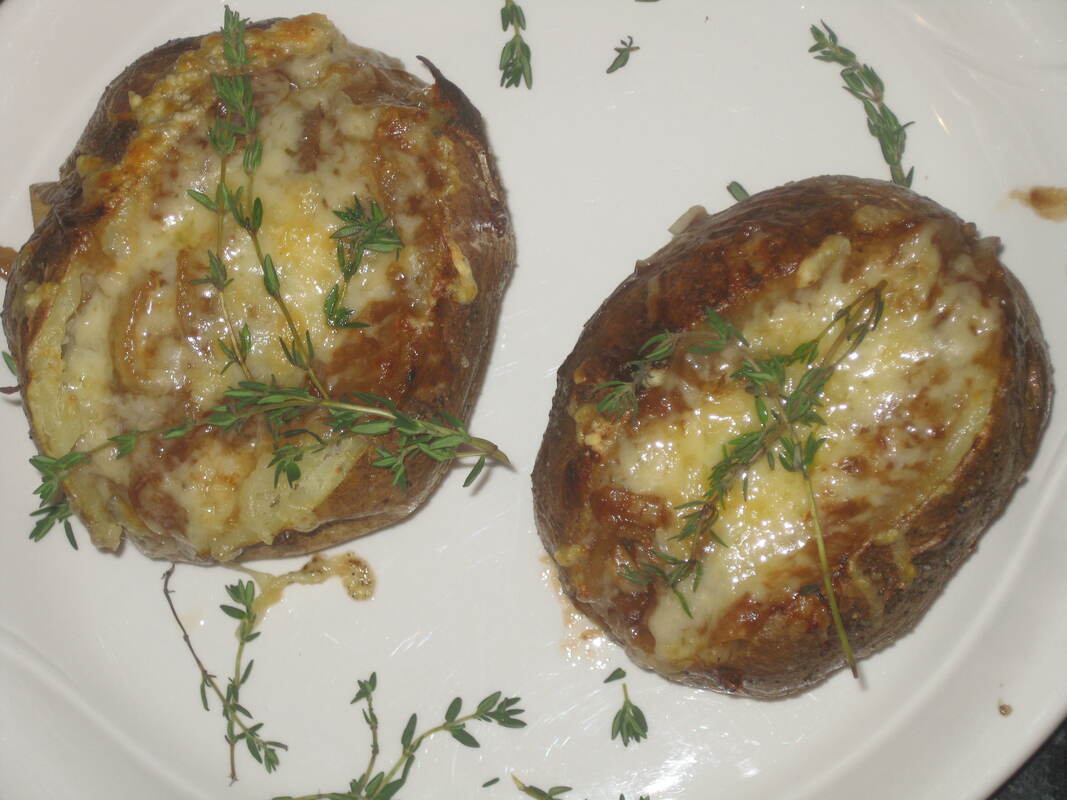
Yummy "French Onion" baked potatoes are a decadent main course
For the potatoes:
2 russets
olive oil
kosher salt
fresh ground pepper
Slit the potatoes and rub with olive oil Season generously with salt and pepper. Bake at 350 degrees (yes, I know that's low for a potato) on a parchment-lined baking sheet for 85-90 minutes or until tender.
For the filling:
1 TBSP butter
1 medium onion
big sprig of thyme
2 TBSP flour
2 TBSP red wine
1 clove garlic, minced
1 cup beef broth
kosher salt and fresh ground pepper to taste
several slices gruyere
1. Melt butter and add thyme and onion. Saute onion until tender.
2. Add wine and garlic and cook a minute until wine is almost evaporated. Add flour and cook about one-two minutes.
3. Add beef broth and cook until thickened. Season to taste.
4. When potatoes are cooked, squeeze the ends to make an opening. Spoon filling over them and top with cheese. Return to the oven and bake until cheese is melted.
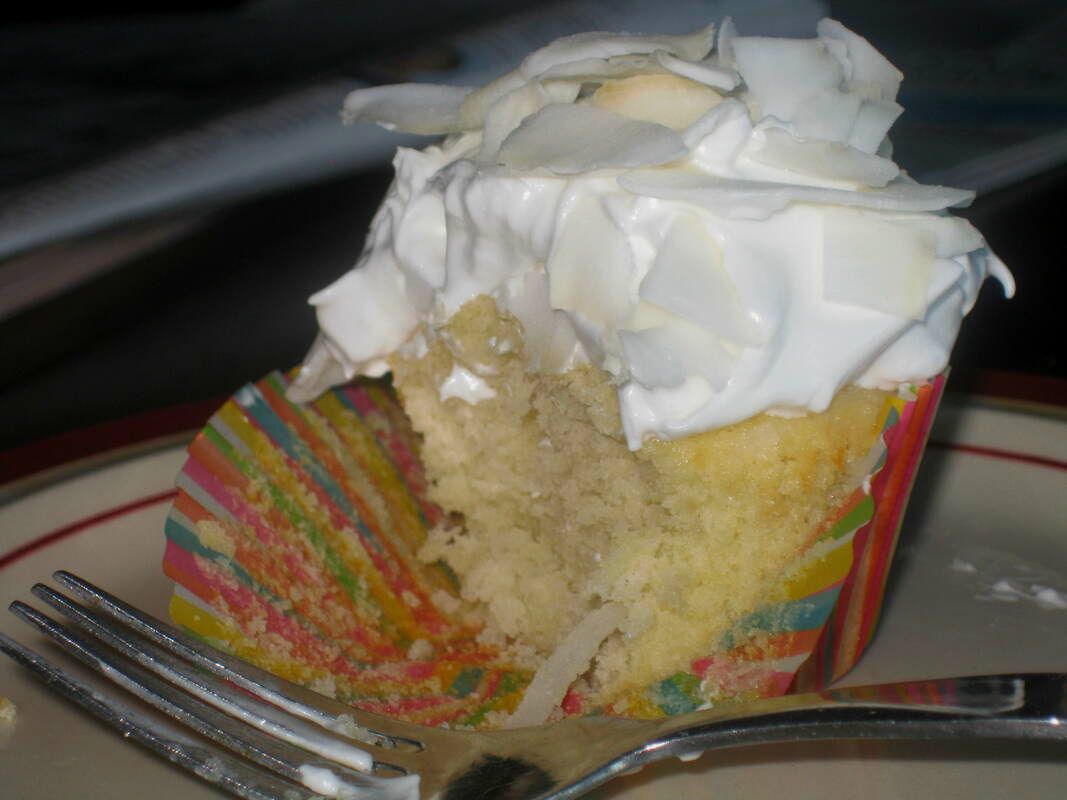
I'm surrounded by coconut palms, so it seems like the only thing to do is to make coconut cupcakes!!!!!!

Even if you don't live under palm trees, you can still make these delightful cupcakes using store-bought sweetened coconut, tinned coconut milk, and yummy shaves of unsweetened coconut. Use the Contact Form to get the recipe!
Let's call this "fondue" though technically it isn't. But it's got wine, it's got cheese......and oh, is it ever good!
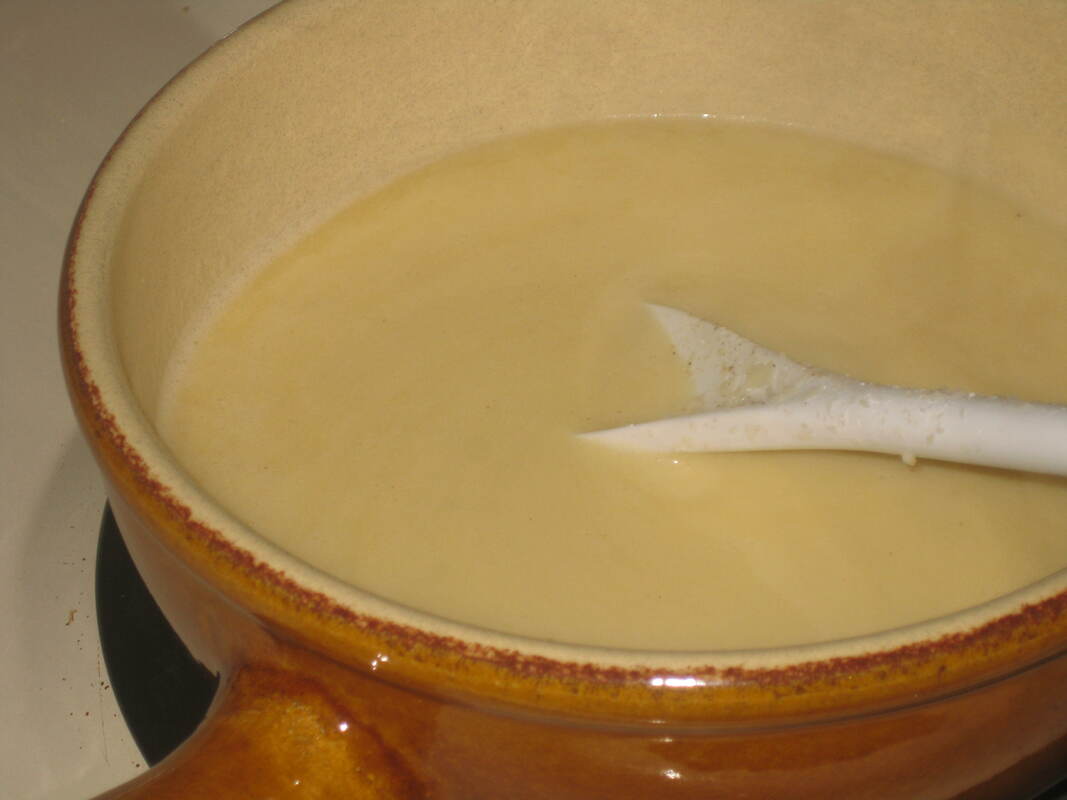
Real fondue is definitely not made with cheddar----when one thinks about melting cheddar, one is probably thinking of Welsh Rarebit. And cheddar is usually combined with beer.
But this super-good dish combines excellent cheddar (use the sharpest you can find) with half white wine and half apple cider. It's a master stroke of a dish. A little Applejack thrown in at the end makes it swoon-worthy.
1/3 cup apple cider
2/3 cup white wine
1 1/2 pounds sharp cheddar
4 tsp cornstarch
1/4 cup Applejack (can substitute brandy)
salt to taste
pepper to taste
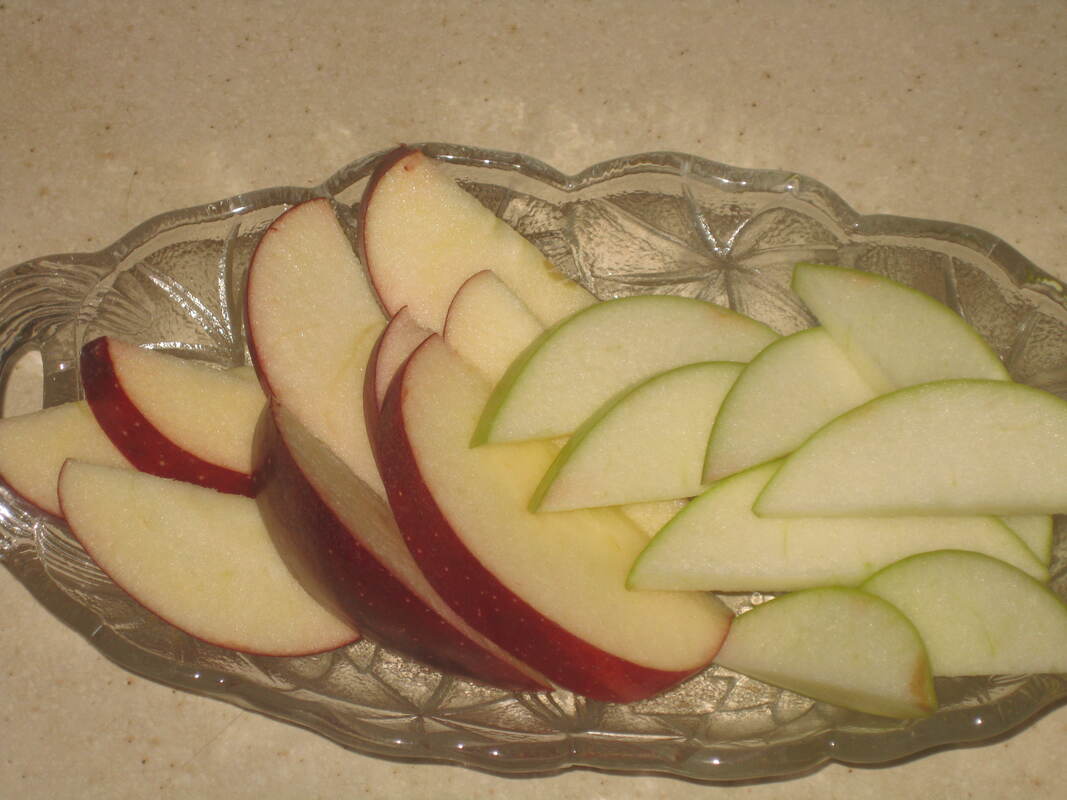
Good bread, and apples
1. Grate the cheese and toss it with the cornstarch, Set aside.
2. Bring cider and wine to a boil. Gradually add cheese mixture, stirring constantly as each handful of cheese melts.
3. When mixture is smooth, add salt, pepper, and Applejack. Pour into fondue pot and serve.
Don't forget to use both sweet and tart apples!!!!
But this super-good dish combines excellent cheddar (use the sharpest you can find) with half white wine and half apple cider. It's a master stroke of a dish. A little Applejack thrown in at the end makes it swoon-worthy.
1/3 cup apple cider
2/3 cup white wine
1 1/2 pounds sharp cheddar
4 tsp cornstarch
1/4 cup Applejack (can substitute brandy)
salt to taste
pepper to taste
Good bread, and apples
1. Grate the cheese and toss it with the cornstarch, Set aside.
2. Bring cider and wine to a boil. Gradually add cheese mixture, stirring constantly as each handful of cheese melts.
3. When mixture is smooth, add salt, pepper, and Applejack. Pour into fondue pot and serve.
Don't forget to use both sweet and tart apples!!!!
Chex mix with a Korean twist------your friends won't notice the Asian seasoning, they'll just talk about how it's "better than any other Chex mix I've had......what did you do?"

If you don't have a jar or tub of gochujang in your fridge, you ought to. I probably use it at least once a week for one thing or another. It's very versatile, and punches up the flavour of anything you stir it into. A little goes a long way, and it just enhances the flavours of the ingredients you are already using, as opposed to adding flavour of its own.
With Superbowl coming up (and the Roger Bill folks already fans of this Chex mix) here's one sure fire way to use it:
2 cups corn Chex
2 cups rice Chex
1 1/3 cups wheat Chex
1 1/3 cups melba toasts, broken into bite-size pieces
1 1/3 cups small pretzels
1 cup cashews
1 stick butter
2 TBSP worcestershire sauce
1 TBSP gochujang
2 tsps seasoned salt (I use Lawry's)
1 tsp garlic powder
1/2 tsp onion powder
1. Stir together first 6 ingredients
2. Melt butter and combine with the rest of the ingredients, then pour over the dried ingredients and gently mix. Pour onto a parchment-paper-lined baking sheet.
3. Bake at around 250-275 degrees, stirring every half hour or so, until golden, about 1 1/2 hours. Let cool, and store in an airtight container.
A reader just contacted me asking for a "lighter" onion rings recipe than the one that appears elsewhere on this page. Although I'm not sure there is such a thing as "light" onion rings, it is indeed possible to make them using a crumb-based batter rather than the thicker batter I showed you a few months ago. (scroll down for the more classic recipe!)
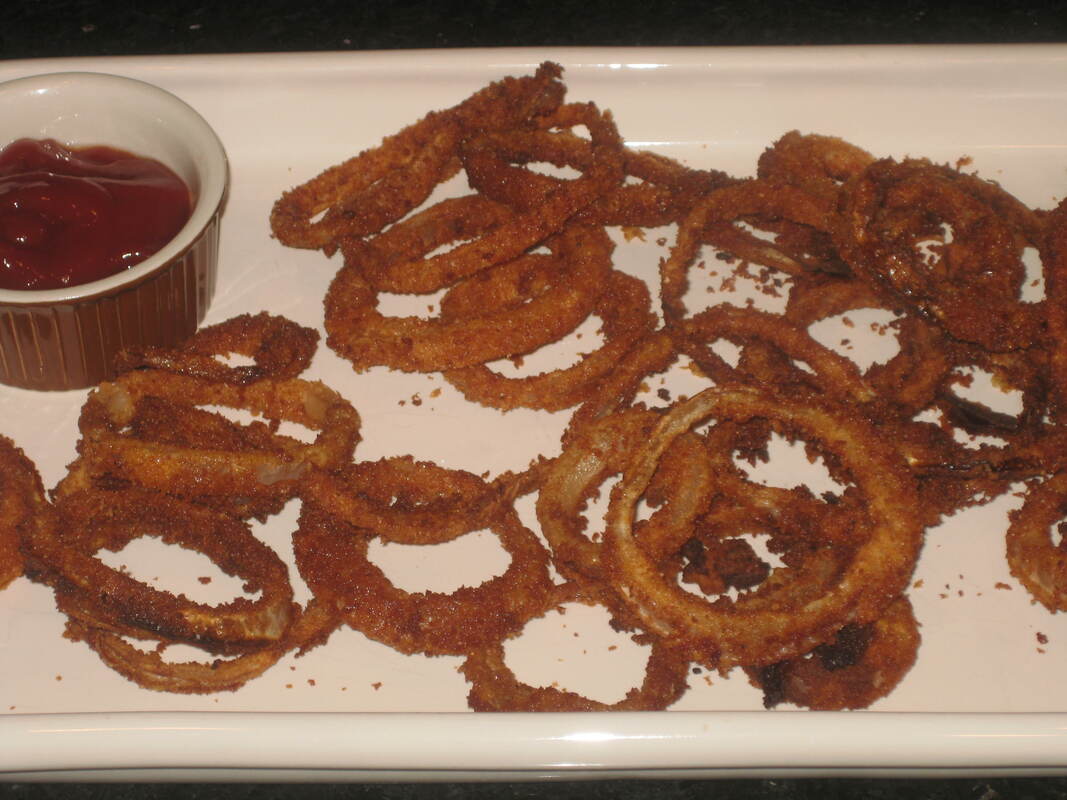
In Maine there's an ongoing debate about fried clams. Which are better; clams fried in batter, or clams fried in crumbs? [For the record, I wouldn't know, as a clam has never passed my lips. I find them gross]. Out there in the rest of the world, there's a similar debate about onion rings. And when it comes to o-rings, I'm firmly in the batter-camp. But these crumb-based ones are pretty good, and they are super-crunchy.
1 large onion, very thinly sliced
1 1/4 cups flour
1 tsp baking powder
1 tsp baking soda
1 tsp salt
1 cup milk
1 egg
3/4 cup dry bread crumbs
oil for frying
more salt
1. Mix together flour, baking powder, baking soda, and salt. Beat egg and milk together, then add to flour mixture.
2. Dip onion slices in the batter, then into bread crumbs. Deep-fry at 350 degrees for 2-3 minutes. Drain on paper towels and salt while still very hot.
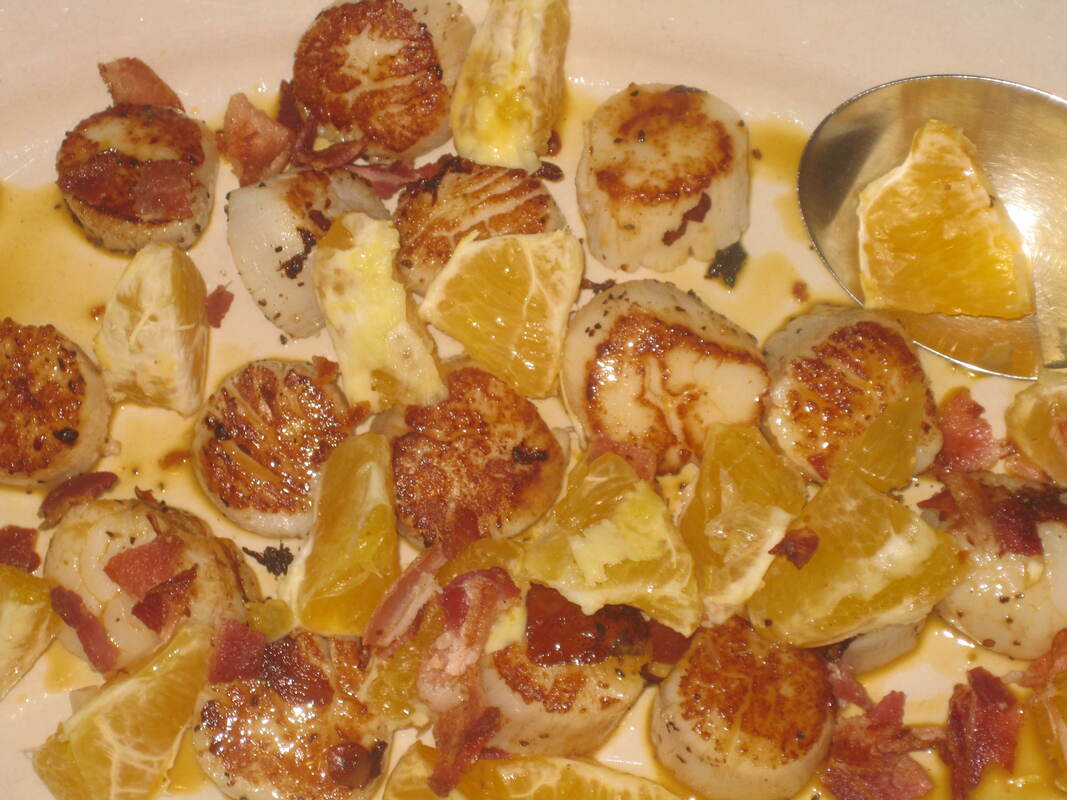
The classic combination of scallops, bacon and citrus:
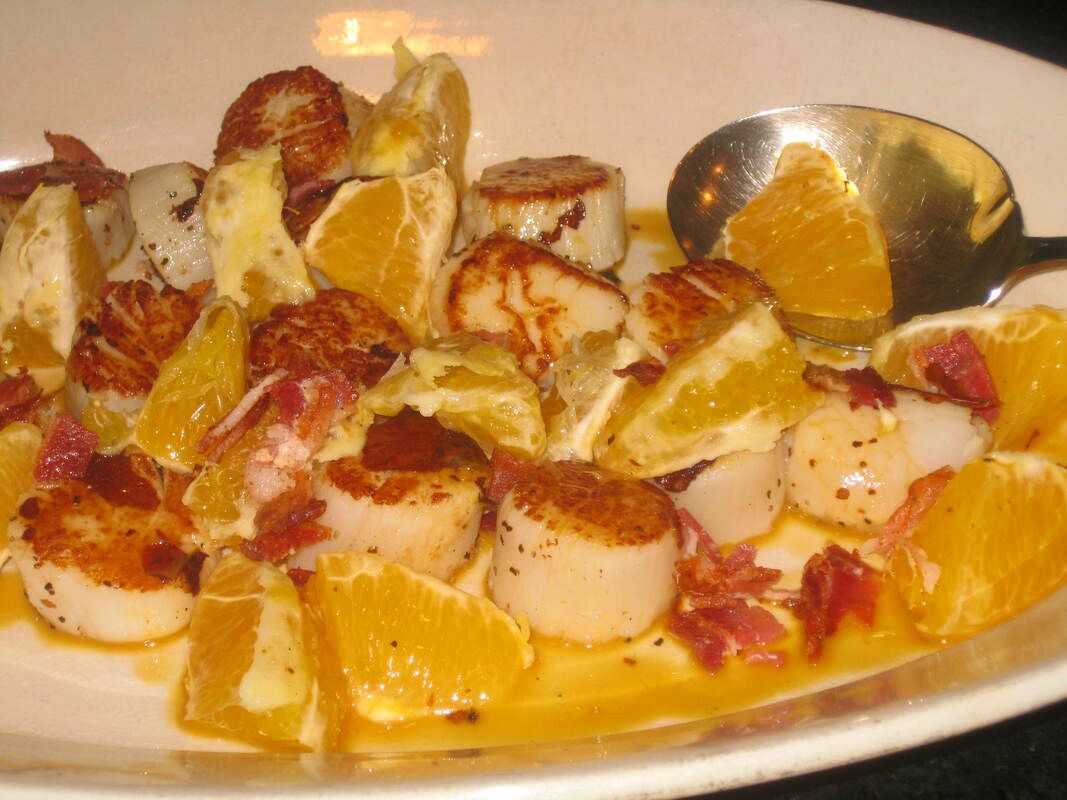
First of all, this recipe only takes about 20 minutes. Second, it's delicious. Third, it comes in at less than 200 calories per serving. What's not to like?
2 slices center-cut bacon
1 large navel orange, sectioned
3/4 lbs scallops (always use dry scallops!)
1/4 tsp kosher salt
1/4 tsp pepper
3 tsp cider vinegar
1/4 cup OJ
1/4 tsp more kosher salt
1 tsp fresh thyme
1. Fry bacon until crisp. Crumble and set aside.
2. Being sure scallops are very dry, sprinkle with 1/4 tsp salt and 1/4 tsp pepper. Over medium-high heat, fry the scallops in the bacon fat until crisp and brown on the outside but still slightly raw in the inside; about 2 minutes per side. Place on serving platter with orange sections and bacon.
3. Add vinegar, OJ, and salt to pan. Deglaze pan, and cook until sauce is bubbling. Pour sauce over scallops and sprinkle with thyme.
If you like the classic combination of fruit and cheese, you will love this easy sandwich. A bit of caramel sauce truly brings out the sweet/savory combination.

4 slices Pepperidge Farm Hearty White
Ghiradelli Salted Caramel Sauce
8 oz brie, rind removed
Honeycrisp apple
2 TBSP butter
confectioners' sugar
1. Spread about 1 1/2 tsp caramel sauce on each bread slice. Top each of 2 bread slices with slices of brie, then thinly sliced apple. cover with remaining bread slices, caramel side down.
2. Melt butter on a griddle over medium heat. Grill sandwiches until golden brown and cheese is melted, about 3 minutes per side. Dust with confectioners' sugar. Serve with additional salted caramel sauce on the side (for dipping!)
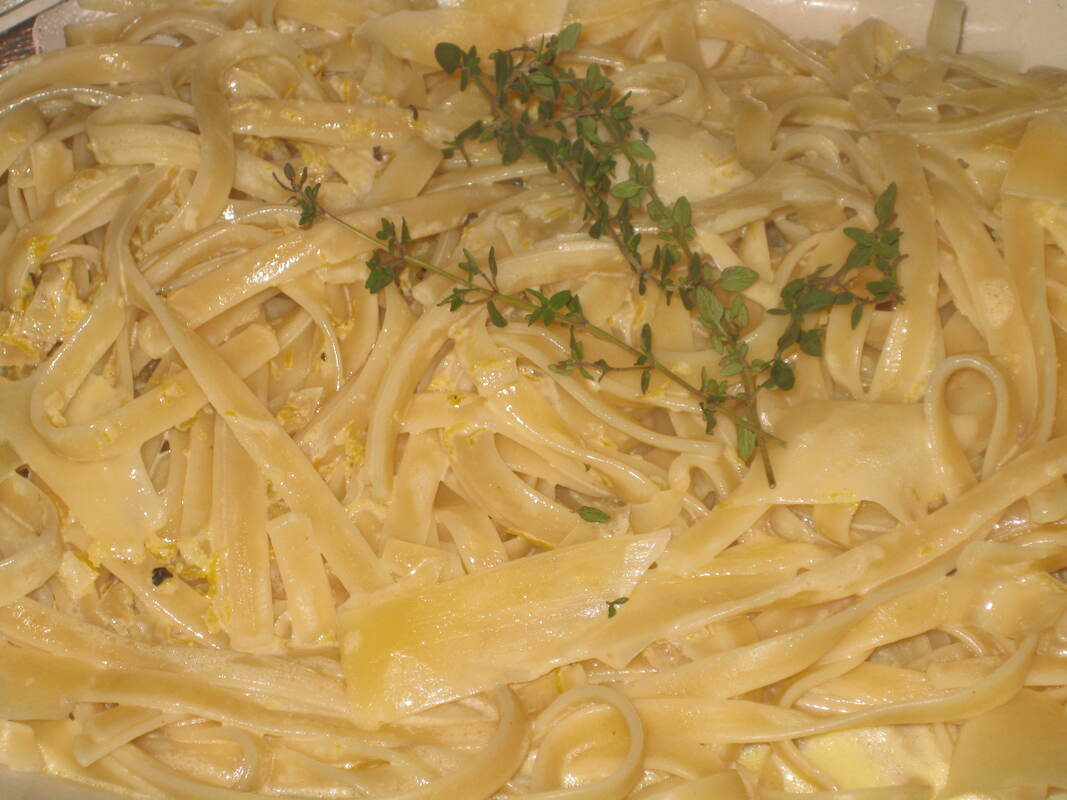
Oh......oh......this is soooooooo good. Fettucini in a Meyer lemon cream sauce.
Water
kosher salt
2 TBSP EVOO
1 1/2 tsp grated Meyer lemon zest
1/2 tsp honey
4 1/2 tsp minced shallot
1/2 cup heavy cream
1/2 lb dry fettucini
1 TBSP Meyer lemon juice (from the one you zested)
1 1/2 oz fresh parmesan, shaved
a few grinds of fresh pepper
fresh thyme
1. Bring water to a boil---don't skimp! Use 1 TBSP salt per every half gallon of water.
2. Using a small skillet, heat oil over moderate heat. Add zest to oil. Add shallots and cook gently until soft, about 2 minutes. Add honey and stir until blended. Whisk in the cream and bring briefly to a simmer.
3. Cook pasta and drain, reserving 2 TBSP cooking water.
4. Toss pasta with lemon juice (the pasta will quickly absorb the juice).
5. Add the 2 TBSP pasta cooking liquid to the cream sauce and toss with the pasta. Add the parm, the pepper, and the thyme and toss again.
So many of you faithful readers are asking for keto recipes.
I hate the concept of keto, and think it's a sham-----not to mention bad for you.
But once in a while I cook something that qualifies under keto's strange rules, and if it's good I'll post it.
So here you go-----Keto Dogs.

1 cup mozzarella
2 oz cream cheese
1 egg, beaten
1 1/4 cups almond meal
1 tsp baking powder
1/2 tsp kosher salt
4 hot dogs
2 TBSP melted butter
1 1/2 tsp chopped parsley
1/2 tsp garlic powder
1. Melt cheeses together in microwave. Add next 4 ingredients, and form into dough.
2. Divide dough into four pieces, and roll each piece into a log. Wrap a log around each hot dog. Place each wrapped hot dog on a parchment-paper-lined baking sheet.
3. Stir together butter, garlic powder, and parsley. Brush over the dogs.
4. Bake in preheated 400 degree oven for 10-15 minutes until golden. YUM!
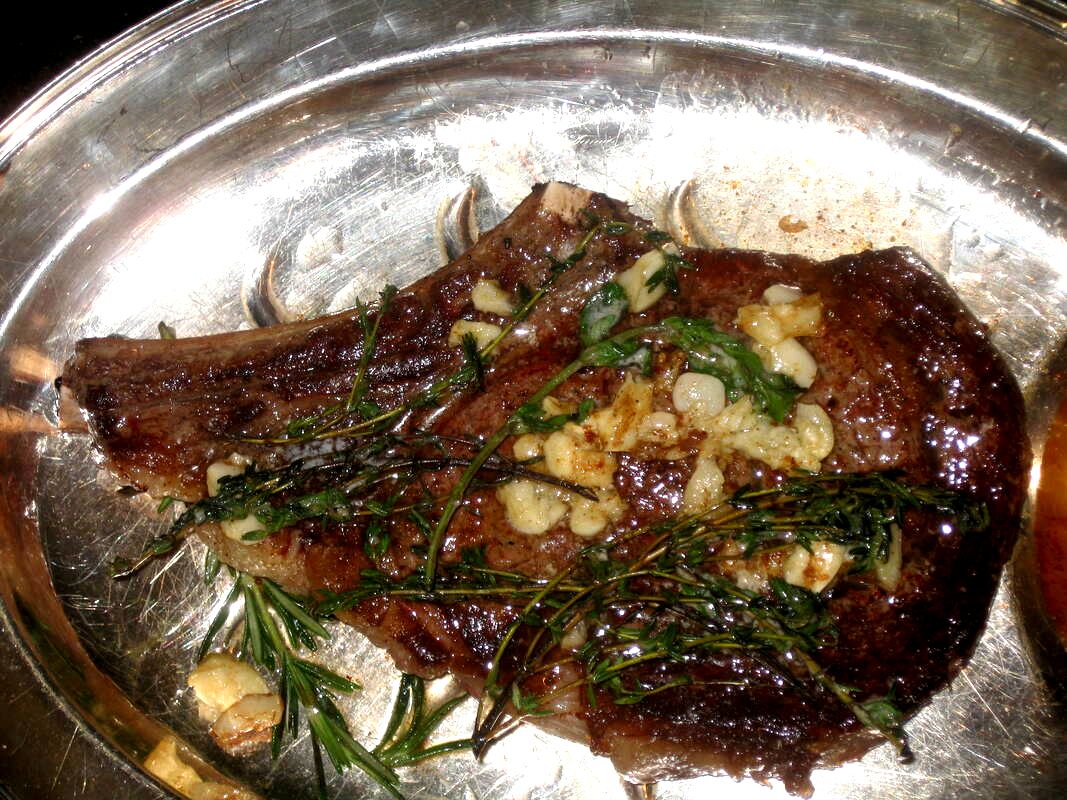
A good steakhouse steak has almost a crust on the outside, while being cooked to your style on the inside. Mmmmm....a black crust, and medium rare inside?
This isn't going to happen on your bbq grill unless you learn to do it right. And oh.....bone-in rib eye; always.
"You can't fake steak" says an American teevee commercial for ......Outback Steakhouse I think. And they're right. The commercial then shows a bone-in rib eye being flipped with tongs. The steak sizzles, and one can see it's perfectly done---and it has that crust!
Well, your bbq grill isn't going to do this without a little help. That help is your cast-iron frying pan.
You will need a decent grill for this----your grill needs to be able to heat to at least 450 degrees. But it's pretty easy to make this great steak:
1. Light your gas grill. Put a cast iron fry pan on the grill and close the lid. Heat for at least 15 minutes, until the grill is 450 degrees.
2. Pour 1 TBSP oil into fry pan. It will smoke like crazy. Immediately toss a bone-in rib eye, which has been generously seasoned with kosher salt and fresh ground pepper, onto the fry pan. Leave the grill open, and cook for about 8 minutes.
3. Using tongs, flip the steak. Close the grill now, and cook until steak is nearly done (about 115-120 degrees on a meat thermometer).
4. Open grill and add 3 TBSP butter, 3 large smashed garlic cloves, 4 large sprigs thyme, 3 large sprigs oregano, and 3 large sprigs rosemary. As butter melts and herbs begin to brown, continuously spoon over steak for about 2 minutes. Remove from heat and let rest about 5 minutes.
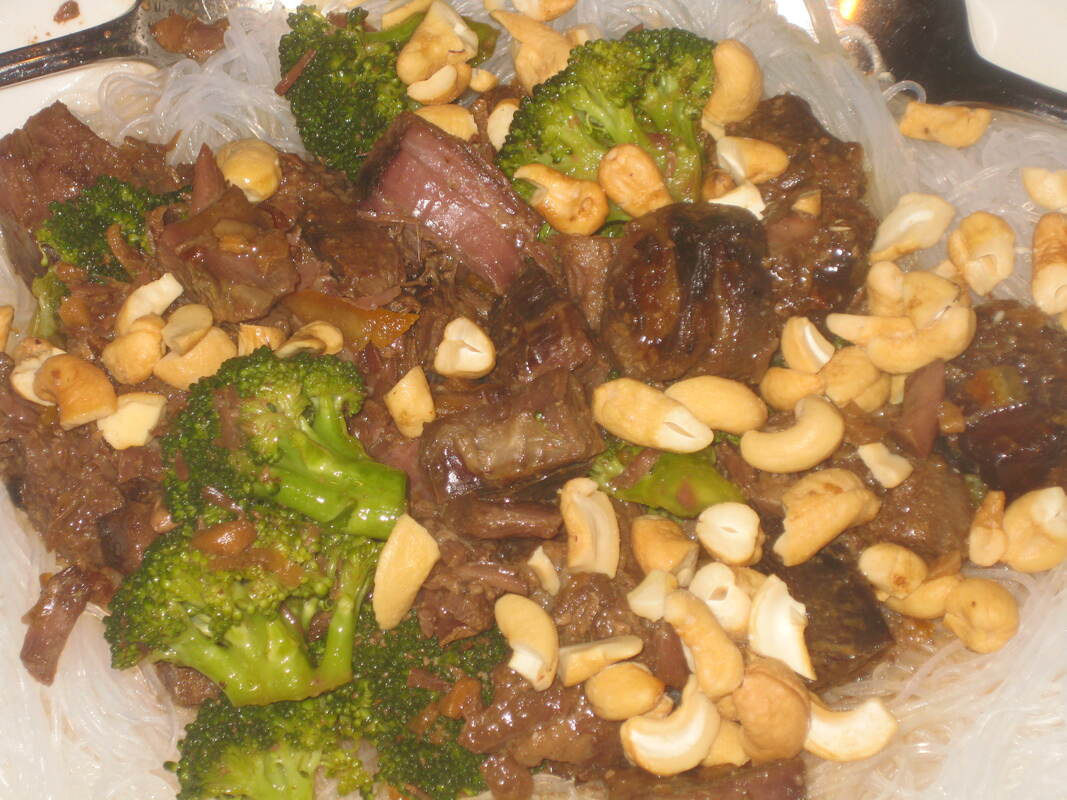
A nice Asian recipe that comes together in the crock pot. Served with cellophane noodles and very low in calories, this one works for just about everyone
1 lb chuck stew beef
1/4 cup soy sauce
1/4 cup OJ
1 TBSP minced ginger
2 cloves garlic, minced
1/8 tsp cayenne
1/4 tsp sesame oil
1 1/2 cups broccoli
2 TBSP cold water
1 TBSP corn starch
1 TBSP orange marmalade
1/3 cup chopped cashews
Cellophane noodles, for serving
1. Place beef in crock pot. Combine next 6 ingredients (through sesame oil) and pour over beef. Cook for 8-10 hours on low.
2. About 15 minutes before serving, increase heat to high and add broccoli. Cook for 15 minutes or until tender.
3. Remove beef and broccoli from crock pot, keep warm. Strain cooking liquid into a small saucepan. Stir together water and cornstarch, add to saucepan. Cook until thickened. Add marmalade.
4. Pour sauce over broccoli and beef, and toss with cashews. Serve over cooked noodles.
Really cute cupcakes!!!

Oh, I had a few messages for my husband and my friends!
These may look like Hostess Cupcakes, but they definitely are NOT--------the chocolate glaze is to die for. And of course the messages are written in pure white chocolate, which is so damn good.
Use the Contact Form for this great recipe!!!!
These may look like Hostess Cupcakes, but they definitely are NOT--------the chocolate glaze is to die for. And of course the messages are written in pure white chocolate, which is so damn good.
Use the Contact Form for this great recipe!!!!
No mayo-based goo holding this potato salad together------This one is a take on a German-style potato salad, updated for today's tastes. The maple syrup is sooooo good!

1 1/2 lbs small red potatoes
2 TBSP canola oil
salt
6 slices bacon, chopped
1 small onion, chopped
1 small clove garlic, minced
1/4 cup cider vinegar
1/4 cup maple syrup
1 tsp fresh thyme
1. Halve or quarter potatoes so that they are of fairly even size. Preheat oven to 400 degrees.
2. Toss potatoes with oil and salt. Bake on for 25-30 minutes, turning once half way through.
3. While potatoes are cooking, fry bacon until very crisp. Drain on paper towels. Remove all but about 1 TBSP bacon grease from skillet.
4. Saute onion in bacon grease until soft and translucent. Add garlic and cook until fragrant, about 30 seconds. Add vinegar, maple syrup. thyme, and bacon, and cook until slightly reduced, about 5-7 minutes.
5. When potatoes are cooked, place in a serving bowl and toss with dressing.
Incredible!
More black-tie party hors d'oeuvre that you can practically make in your sleep: Chicken Salad Tarts
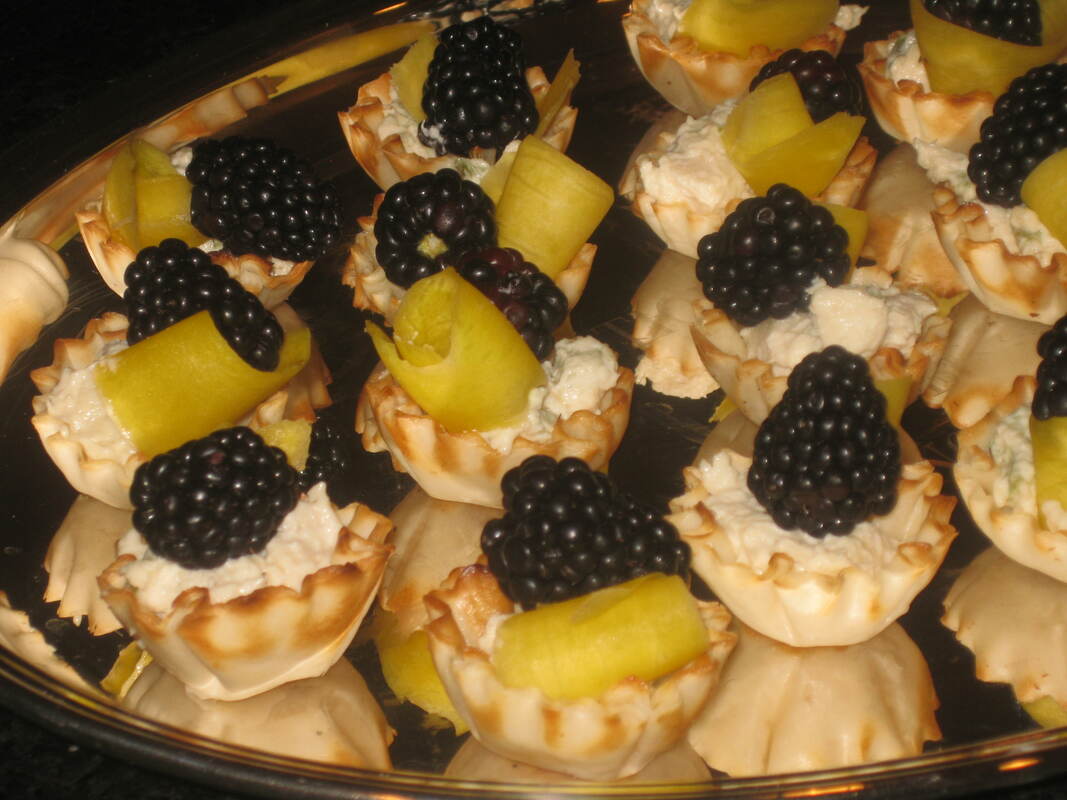
Chicken and fruit is a classic combination. All you need to make these little beauties are some mini-phyllo cups, a container of chicken salad from the deli, a mango, and blackberries. A touch of green, such as tiny basil leaves, would make them even nicer!
Another fabulous hors d'oeuvre for your black-tie cocktail party: Roasted and marinated red peppers (the 19th century fork from Cartier will cost you extra.....)
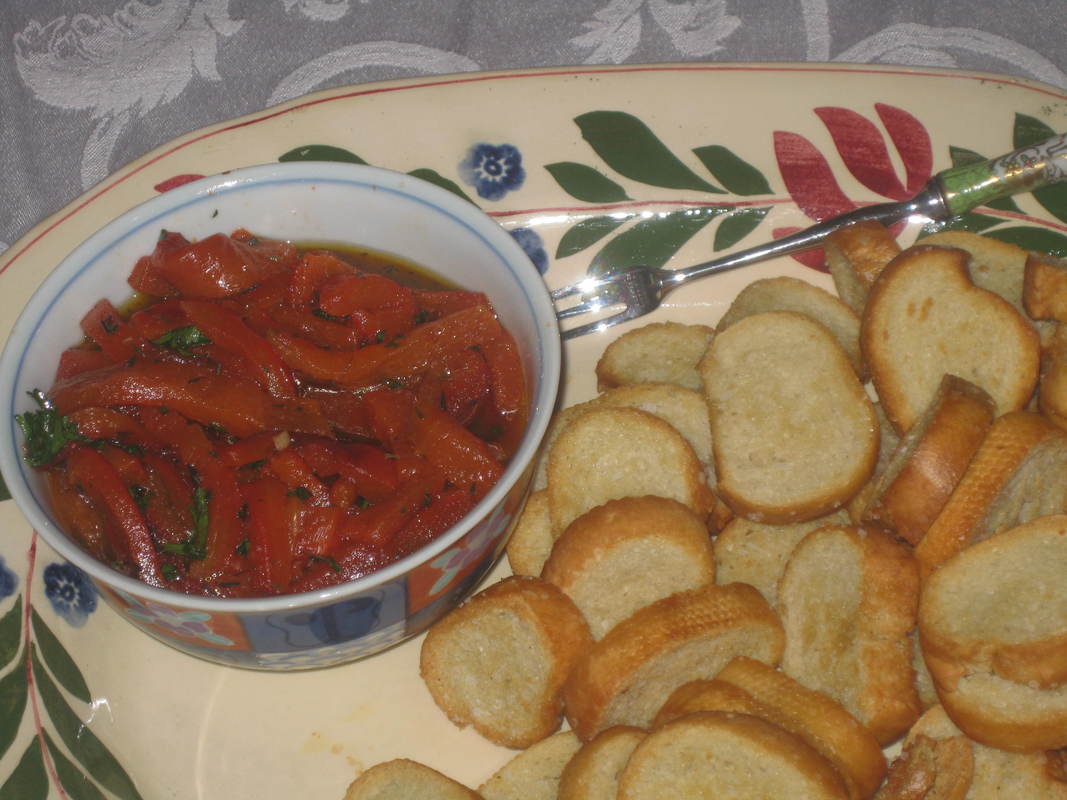
This can be served on anything------they're good on a slice of ham, an anchovy or sardine, or a piece of cheese. I prefer them on a toasted slice of a baguette. My local supermarket sells bags of pre-sliced and toasted baguette, making this a super-easy hors d'oeuvre.
It can also be made days....maybe even weeks....in advance. Make it and store it in tupperware in your fridge, and with sturdy crackers you will always have something elegant to serve drop-in company.
4 medium bell peppers
3 TBSP EVOO
2 tsp sherry vinegar
1 garlic clove, minced
1 tsp minced fresh thyme (IMPORTANT! Do not use dried)
1/2 tsp salt
2 TBSP chopped fresh parsley
1. Adjust oven rack to top position and preheat broiler. Line a jelly roll pan with foil. Slice peppers in half vertically. Seed and core peppers. Lay pepper halves skin-side down on pan. Press peppers flat with the palm of your hand.
2. Broil peppers 8-10 minutes until spotty brown. The flesh should still be firm. Dump the peppers into a bowl or a paper bag, and allow them to steam as they cool (30 minutes).
3. Remove skins from peppers. Cut the peppers into strips. Try to keep the juices and add them to a bowl with the pepper strips.
4. Combine EVOO, vinegar, garlic, thyme, and salt. Pour over peppers. Allow peppers to marinate at least overnight, and up to several weeks.
5. IMPORTANT! Allow to come to room temperature before serving. Garnish with chopped parsley prior to serving.
Something easy and yummy for your New Year's Eve cocktail party----Salty Black & White Sesame Cocktail Cookies
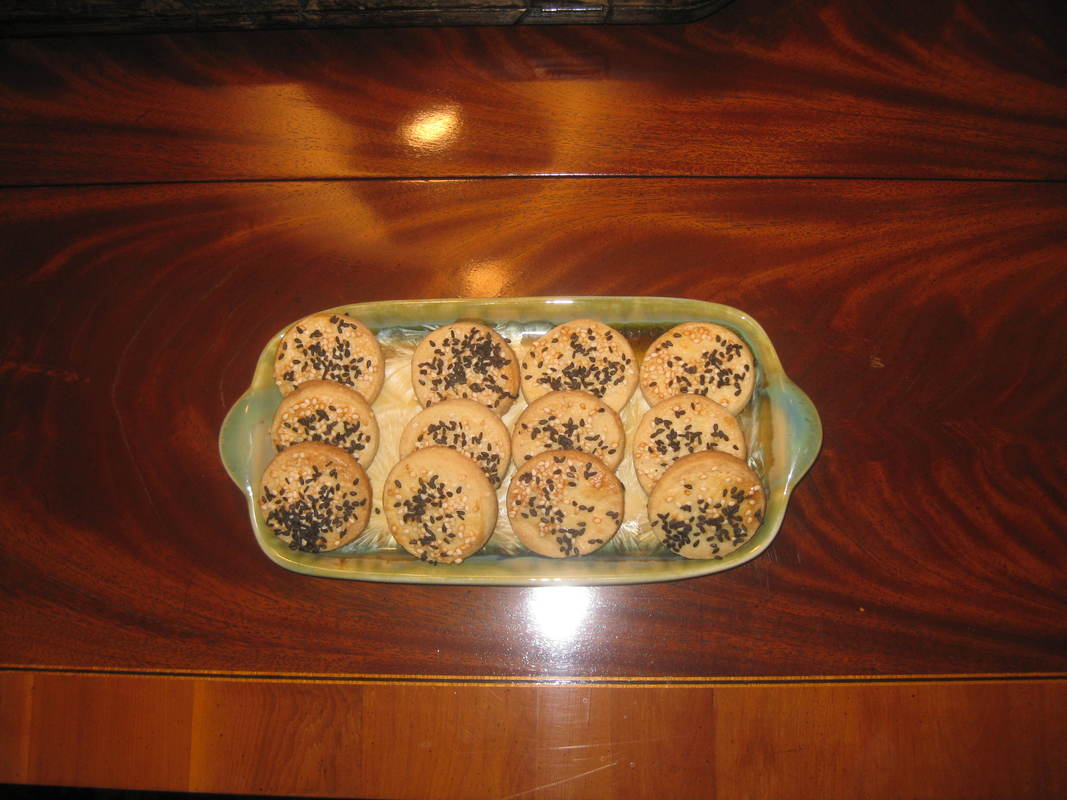
We served these tonight at our New Year's celebration!! They are absolutely perfect with wine and other cocktails----a bit of sweetness, and then the hit of salty-savory. They disappeared in no time!!!!!
1 cup flour
3/4 cup almond meal (I bring Red Mill brand here from the States)
1/3 cup sugar
1 tsp fine sea salt
1 stick unsalted butter, cut up
1 egg, beaten
black sesame seeds (available at Asian grocers)
white sesame seeds
1. Using food processor, pulse together first four ingredients. Then add butter and pulse until the dough comes together.
2. Divide dough in two, and roll each half between two sheets of wax paper, into a 1/4 inch disk. Freeze until firm, at least 1 hour.
3. Line baking sheets with parchment paper. Using a 1 1/2 round cookie cutter, cut circles out of frozen dough and place on parchment.
4. Brush with egg wash, and sprinkle with both kinds of sesame seeds. Bake in preheated 350 degree oven for 17-20 minutes.

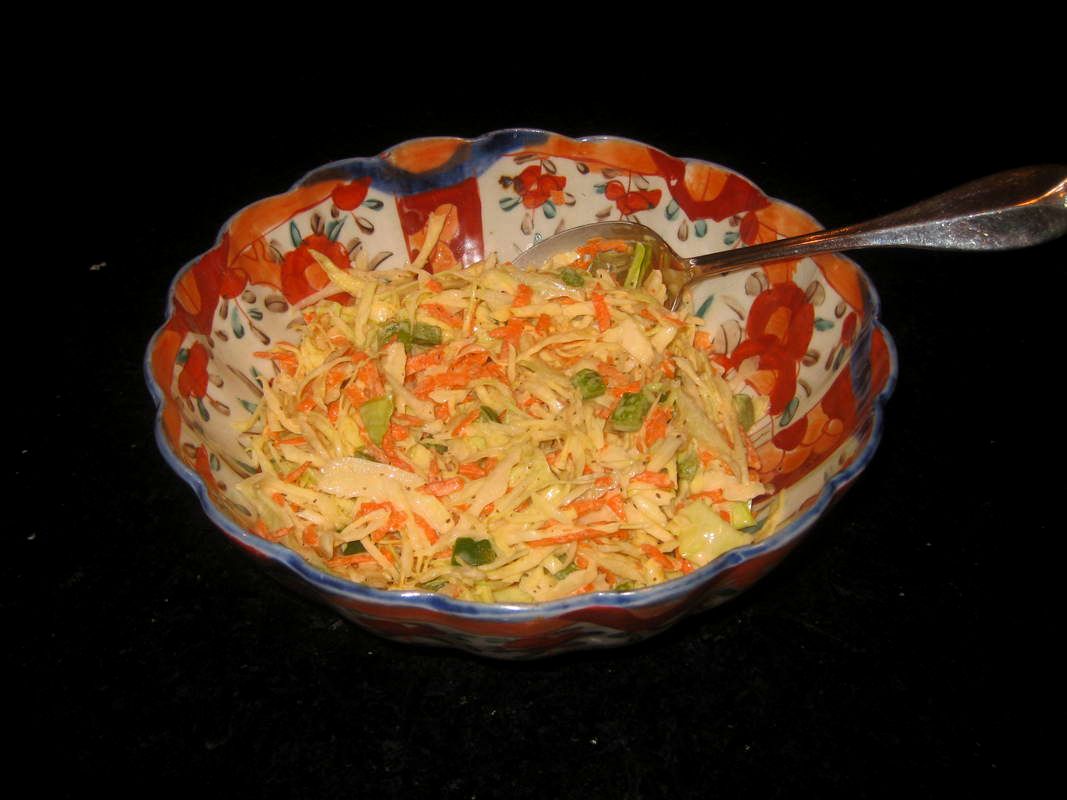
Watching cholesterol? Think you can't eat mayonnaise-based dishes? This delicious cole slaw has an incredible fresh taste. Make your own zero-cholesterol mayo with Egg Beaters. and enjoy!
For the slaw:
3 cups finely shredded cabbage
1/2 cup shredded carrots
1/4 cup chopped green pepper
Toss all the veggies together.
For the dressing:
1/3 cup Blender Mayo (recipe follows)
1 TBSP sugar
3/4 tsp salt
1/4 tsp celery seed
1 TBSP lemon juice
Blend dressing ingredients together. Pour over slaw and toss. Chill before serving.
For the Blender Mayo:
1/3 cup Egg Beaters
3/4 tsp salt
1/2 tsp dry mustard (Coleman's is best)
1/4 tsp paprika
1/2 tsp sugar
2 TBSP white vinegar
1 cup corn oil
Using a blender, combine all ingredients except oil. With blender running, pour oil in a slow, steady stream through the blender cap. Be sure to pour very slowly. The mayonnaise will thicken and be the best and freshest mayo you've had in years.
This is another really good, Asian-style orange chicken. Although I have my go-to standards, I like to try new ones and this one, given to me by a Chinese friend, is authentic and excellent.

This recipe may feel a little fussy if you aren't accustomed to Chinese frying techniques. But just go for it-----it's not really hard to do, and is very tasty!!!
Use the Contact Form for this wonderful recipe!!!!
Use the Contact Form for this wonderful recipe!!!!
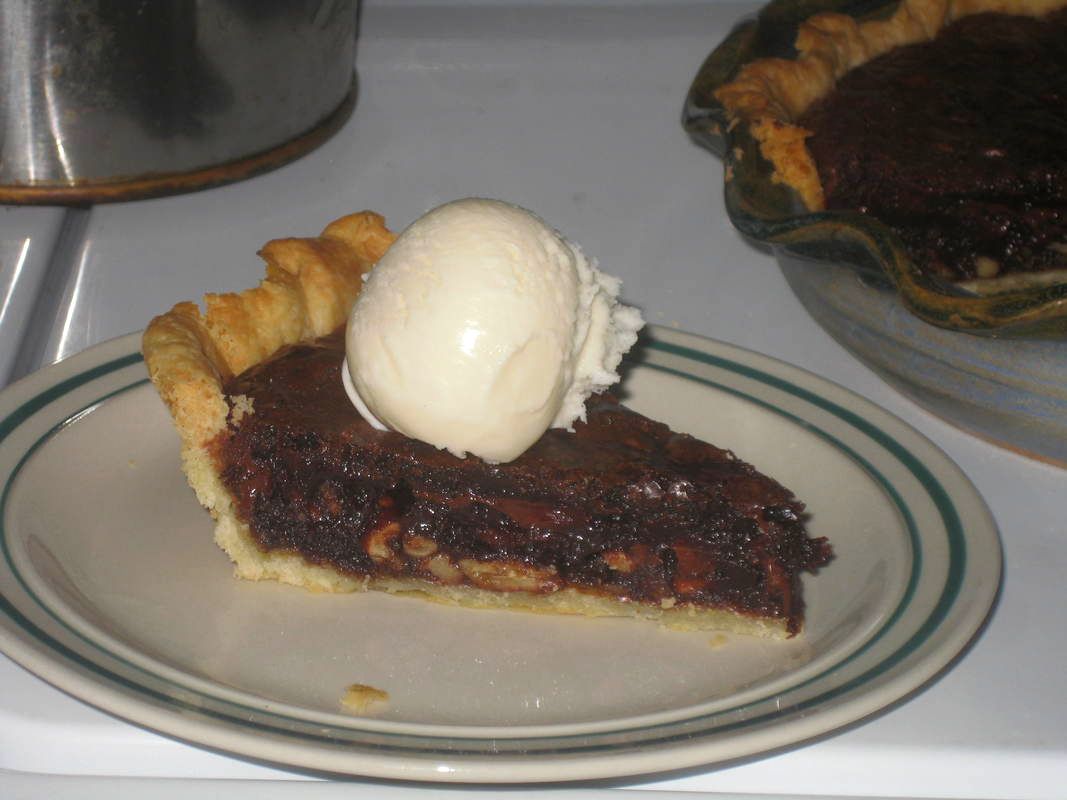
I adore classic Southern (U.S.) cooking. And it doesn't get much more classic than Fudgy Tar Heel Pie.
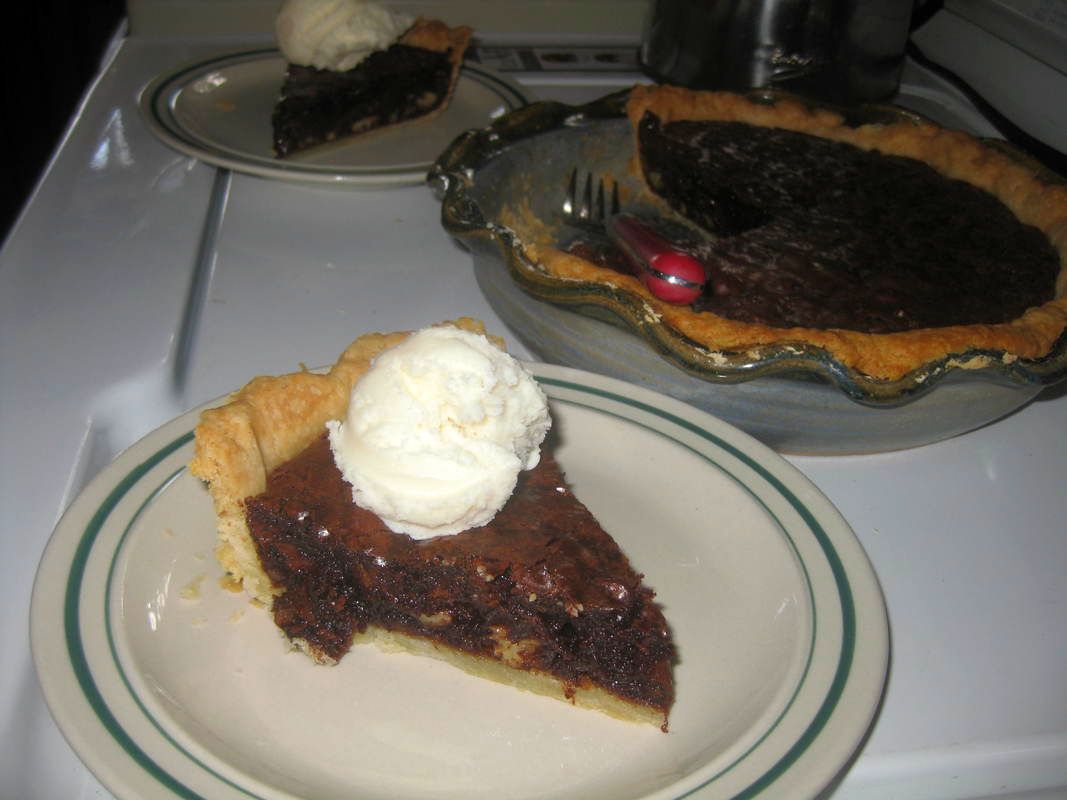
But too often this dessert has filling that is sweet and gloppy rather than fudgy. And there's a lot of underdone crusts out there, which get pasty under the weight of the fudgy interior.
To correct these common problems, I turned as usual to Cook's Illustrated. Their recipe isn't complicated, but it's a little complex. Nothing you can't handle! The results are amazing.
Because the recipe is very, very long, I will not reprint it here. Use the Contact Form, and I can share it with you!
Here's a classic pepperoni pizza with an easier dough and three cheeses:

For the dough:
2/3 cup water
1 1/2 tsp INSTANT yeast
2 cups flour, more if necessary
4 tsp olive oil
1 1/2 tsp salt
1 tsp sugar
Combine ingredients and knead until smooth. Let it rise until doubled.
For the pizza:
Pizza sauce
about 1 TBSP parmesan
about 1 cup mozzarella
about 1/2 cup monterey jack
about 1/2 cup provolone
1/2 tsp Italian seasoning
pepperoni
Preheat pizza stone in 500 degree oven for at least 45 minutes.
Once it is preheated, stretch the pizza dough onto the stone----it doesn't have to be a perfect circle. Quickly cover with about 1/2 cup sauce, the cheeses, the seasoning, and finally the pepperoni. Return to oven and bake for 8-10 minutes until bubbly.
It's the holidays....that time of year when Chet's nuts are roasting on an open fire. Oh wait, I mean chestnuts!
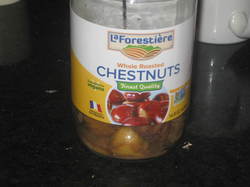
The trees in the south of France that yield chestnuts are 400-500 years old. So no wonder a jar like this---only available at this time of year-----will set you back $U.S. 17.
But they are so wonderful and unique. Little-known fact: They are also grown in China! In China they are used in desserts, particularly the one called "Peking Dust". Use the Contact Form to learn how to make this incredible dessert!
But they are so wonderful and unique. Little-known fact: They are also grown in China! In China they are used in desserts, particularly the one called "Peking Dust". Use the Contact Form to learn how to make this incredible dessert!
An easier okonomiyake. Elsewhere on this page, I discuss the most authentic version. This one is a bit easier.
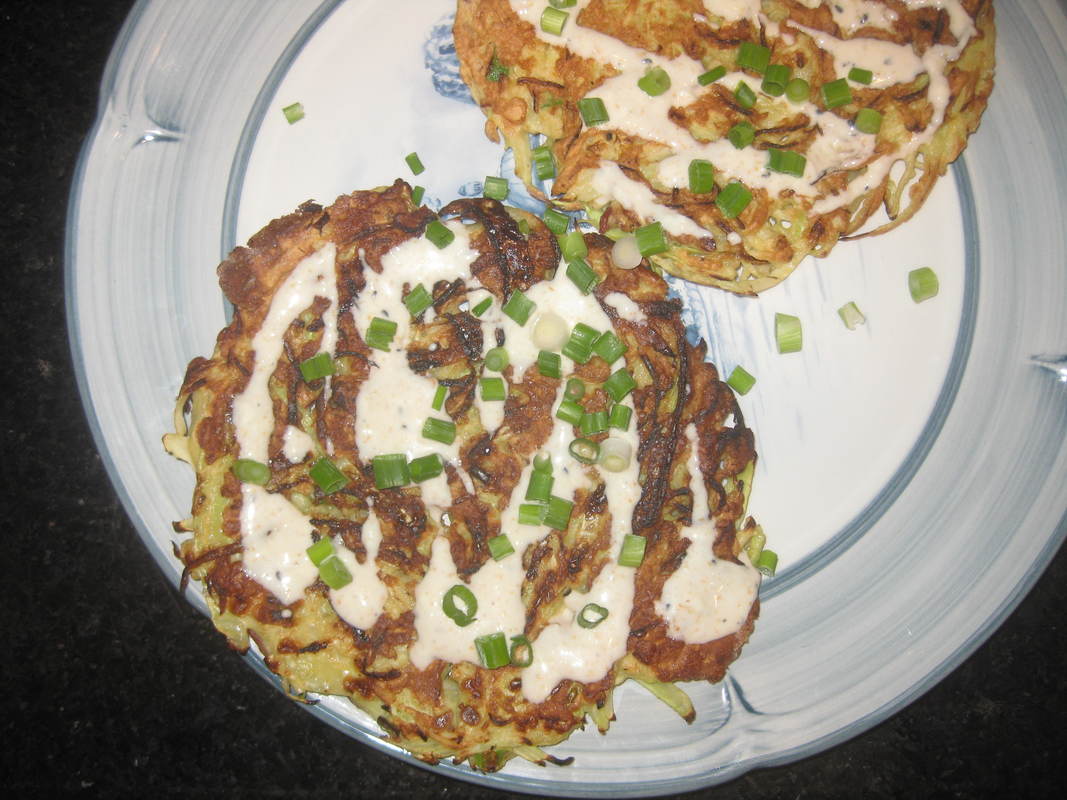
This is a little bit less traditional, but easier to make than the authentic okonomiyake found further down this page. I put a very small amount of bacon in this one, which is totally non-traditional, but brings out the flavour of the eggs very nicely.
This recipe serves 1; increase it by whatever factor you need.
1/4 lb shredded cabbage
3/4 tsp shichimi togarashi
3/8 tsp sugar
dash kosher salt
1 strip center cut bacon, cooked and crumbled
1 scallion, sliced
1/2-2 TSP flour
1 1/2 tsp canola oil
1. Toss together cabbage, togarashi, sugar, and salt; let stand 15 minutes. Toss in scallion and flour.
2. Heat oil in an omelet pan over medium-high heat. Cook 2-3 minutes per side until golden brown. Top with sauce.
For the sauce, combine 1 TBSP canola mayo, 3/4 tsp unseasoned rice vinegar, and 3/4 tsp water. Pour over pancake, and sprinkle with a little more sliced scallion.

Vietnamese food is just delicious. And what could be more fun than grilling some marinated pork tenderloin, then letting everyone at the table wrap it up their own way? With fewer than 350 calories per serving?

You'll need to marinate the pork overnight. It's then a breeze to cook it quickly on the grill.
This recipe serves four people GENEROUSLY. Here's what you'll need:
2 TBSP sugar
1 tsp (not kidding!) fresh ground black pepper
2 cloves garlic
a 4" piece of fresh lemongrass
1 shallot
1" piece of fresh ginger
Pulse the above ingredients in a mini-food-processor until coarsely ground. Then add:
1 TBSP soy sauce
1 TBSP fish sauce (such as nuac mam)
1 TBSP canola oil
Process until pasty. Place mixture in a large ziploc bag and add
1 lb pork tenderloin, cut into 1/4' slices
Mush this around so that all the pieces are coated. Refrigerate overnight.
For the sauce, combine the following:
1/3 cup grated carrot
2 TBSP sugar
1/4 cup lemon juice
1/4 cup plain rice vinegar
1 tsp minced garlic
1 1/2 TBSP fish sauce
very thinly sliced serrano or fresh bird chili, to taste
Mix all of the above in a bowl, and set on the table for serving.
Then cook according to package directions:
2 oz rice vermicelli
When about ready to eat, remove the pork from the marinade and place onto skewers. Cook on a very hot grill about 2 minutes per side, until slightly charred.
The idea here is to roll up the pork in lettuce with each person using his/her own add-ons. Traditional Vietnamese add-ons would be (as you can see on my table):
Bibb lettuce (for rolling)
the rice vermicelli
mung bean sprouts
chopped fresh mint
fresh basil leaves
roasted peanuts
fresh cilantro leaves
thinly sliced European (seedless) cucumber
the sauce you made with the carrots
thinly sliced serrano or bird chili (if you have people around who like heat)
Asian food is incredibly healthy, with its many fresh ingredients and low, low fat. The blend of tastes is so delicious.....and just a bit of meat goes such a long way.

Do you think that food colouring just comes in a cheap four-pack at the supermarket? If you want to have really nice colour on your baked goods, welcome to the "Nifty Fifty" by Americolor

Mauve? Watermelon? Terra cotta? Electric orange?
This collection has you covered!!!!!!!!
This collection has you covered!!!!!!!!
So you can make pretty little mini-cupcakes like this!

These colours are AMAZING!!!!!!!!
I made these mini-cupcakes and everyone was saying, "how in the world did you get these cool colours????
It's the nifty fifty, man! So fun!!!!
I made these mini-cupcakes and everyone was saying, "how in the world did you get these cool colours????
It's the nifty fifty, man! So fun!!!!
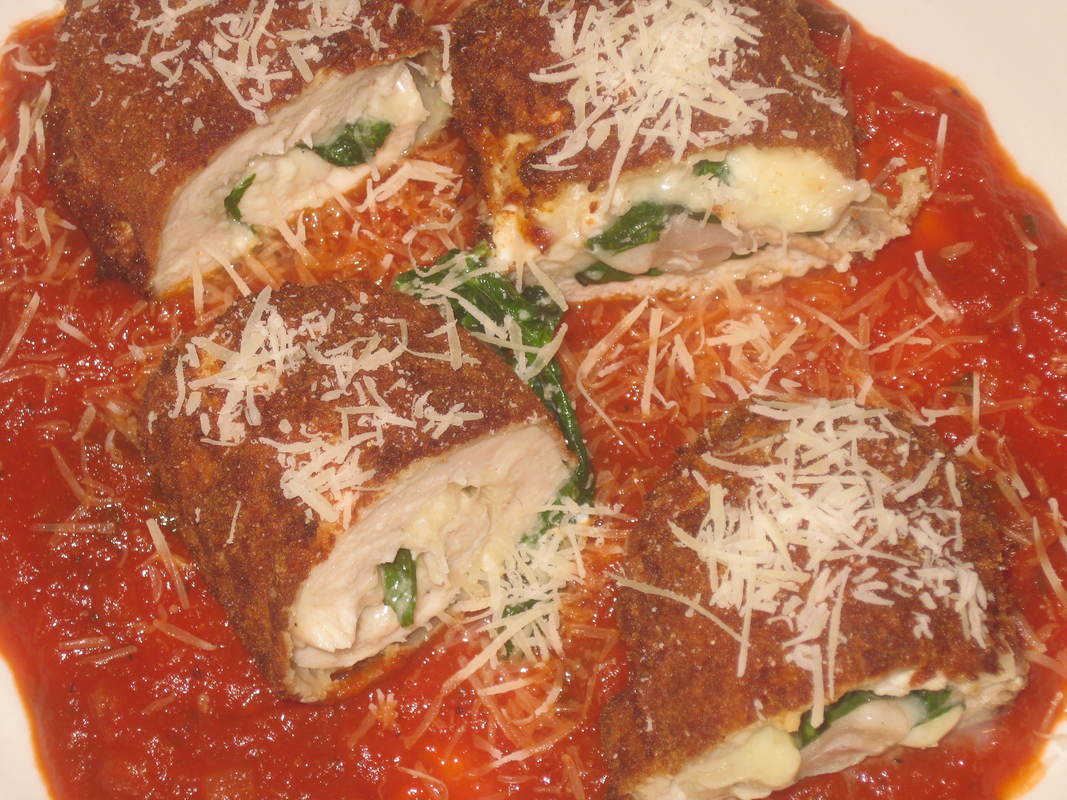
A wonderful way to make Chicken Parmesan even better is to stuff it with cheese, a tiny bit of prosciutto, and fresh basil......YUM!

This is a tiny bit more work than just putting cheese and sauce on a chicken bosom, but totally worth it. More tasty, and more elegant-------how can you go wrong feeding your family this wonderful dish?
I'm not giving amounts here, because it depends on how many people you are serving. Use amounts that look right. For the picture above (that served two generously) I only needed one chicken bosom----they tend to be large in my supermarket.
Boneless bosoms of chicken, sliced horizontally (i.e., into 2 cutlets)
Kosher salt
fresh ground pepper
a slice or two of prosciutto
a handful of grated mozzarella (about 1/2 cup per bosom)
freshly grated parmesan (about 1/8 cup per bosom, plus more for garnish
fresh basil leaves (3 per bosom)
flour
egg(s), beaten
dry bread crumbs
1 cup grapeseed oil
1 cup olive oil
marinara sauce
1. Pound cutlets to 1/4" thick. Season GENEROUSLY with salt and pepper. Place a bit of prosciutto, some mozzarella, a bit of parmesan, and 3 basil leaves on each cutlet. Roll up, and secure with a toothpick.
2. Season both the flour and the bread crumbs with some salt and pepper. Set up a dredging station, dipping each of the rolls first in the flour, then the egg, then the breadcrumbs. Dip in the egg once more, and back in the breadcrumbs.
3. Heat oils to 350 degrees. Place the rolls in the oil and fry about 3 minutes per side until brown and crispy. Drain on paper towels.
4. Place rolls on a rimmed baking sheet and bake in 400 degree oven until they read 165 degrees on an instant-read thermometer. remove from oven and let stand about 5 minutes.
5. Meanwhile, heat marinara sauce. Spoon marinara sauce onto a serving platter and top with rolls. Sprinkle rolls with fresh parmesan.
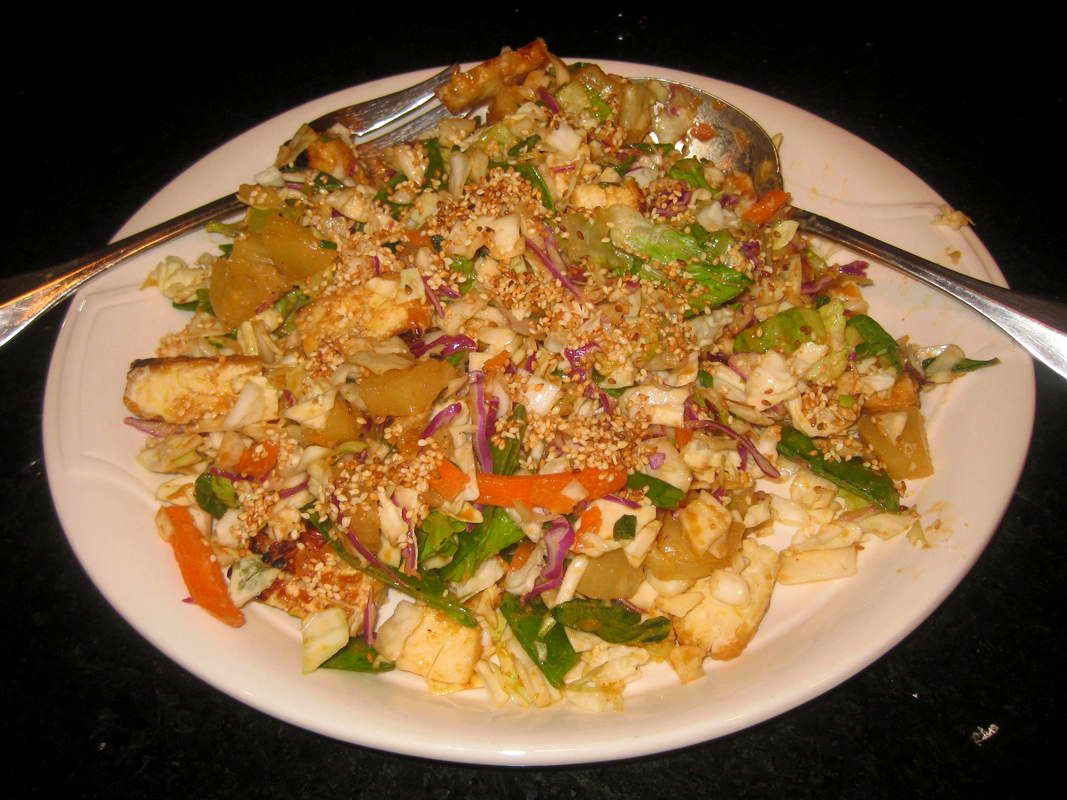
This salad with grilled tempeh, pineapple, and Asian flavours is just so good.
You will need:
For dressing:
2 TBSP OJ
4 1/2 tsp sesame oil
4 1/2 tsp white miso
4 1/2 tsp (unseasoned) rice vinegar
1/2 inch piece of ginger, grated
3/4 tsp sriracha
Shake all that together in a jar.
For the salad:
4 oz tempeh
several slices (rings) of fresh pineapple
a handful of snow peas, sliced
a bag of Asian mixed greens (you can substitute other bitter greens)
1 TSP sesame seeds, toasted
Light a grill and bring to medium-high heat. Grill tempeh until charred, about 4 minutes per side. Grill the pineapple until charred, about 1 minute per side. Slice tempeh into bite-size pieces, and coarsely chop pineapple.
Toss tempeh and pineapple with greens and snow peas. Toss in dressing. Top with sesame seeds.
DELICIOUS!!!!!!
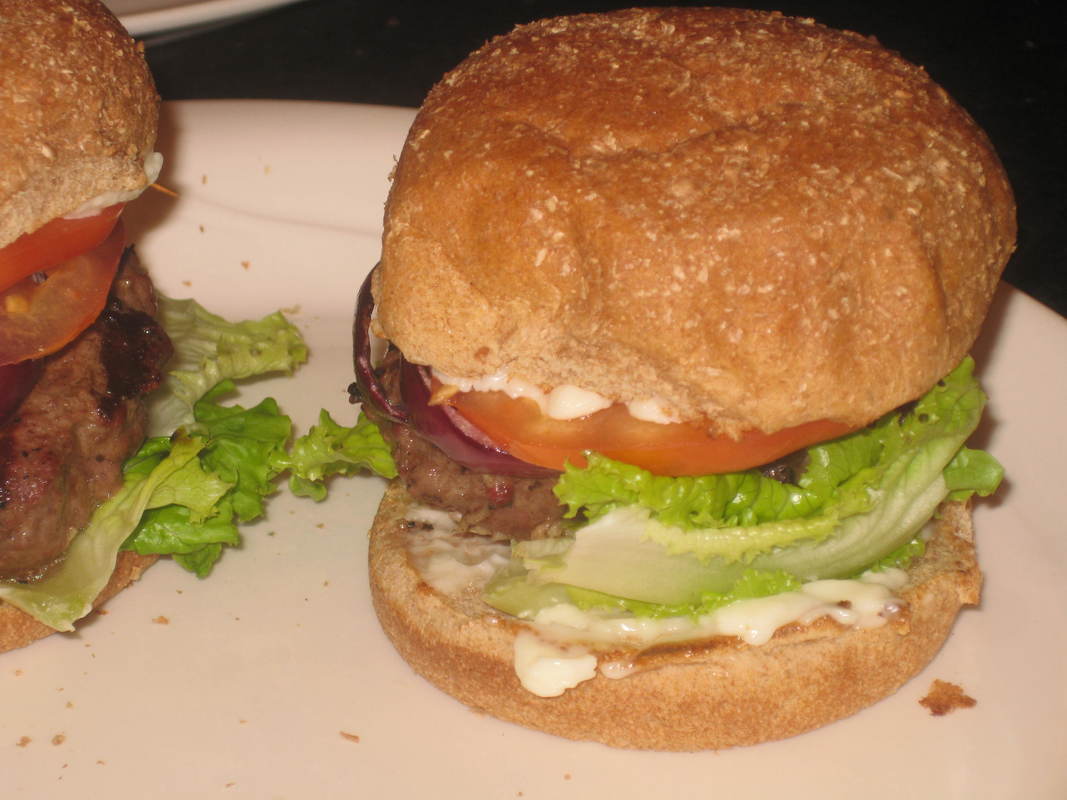
These burgers are real umami-bombs, in spite of being made with 91% lean ground sirloin. Yeah, I know----burgers shouldn't be made with beef that lean. But don't stop reading!!!!

We eat burgers less than once a month. We love them! But we don't eat them very often, because burgers with fat will kill you, and burgers without fat aren't worth eating.
But I had just 1/2 pound ground sirloin in the freezer, and was wondering if I could make it taste halfway decent in a burger. I found that nuoc mam, which I always have in the fridge, really wakes up the flavour of the sirloin (don't worry-----it adds no fishy taste whatsoever). I used 1 1/2 tsp for my half-pound of ground sirloin. Adding GRATED garlic (I used one large clove) is essential for sirloin (don't try to use garlic powder). Additionally.....and this is counter-intuitive------add about 1 1/2 tsp EVOO (and of course some salt and pepper).
These are amazing burgers........at least for decent burgers that are about as low calorie as one can get at 365 calories per serving----that includes the bun and a bit of mayo.
"Yakitori" is yummy street food that is everywhere in Tokyo----not just in street stalls, but in little hole-in-the-wall restaurants that specialize in it. Yakitori literally means "grilled bird" because in Japan it's chicken.
So by that definition, yakitori cannot be made of anything but birdies (i.e., chicken!!!!) But it's always grilled on sticks with scallions, and occasionally mushrooms. The marinade/basting sauce is always the same.
I thought of applying this marinade and cooking method to beef, and it turned out fantastic!
I thought of applying this marinade and cooking method to beef, and it turned out fantastic!
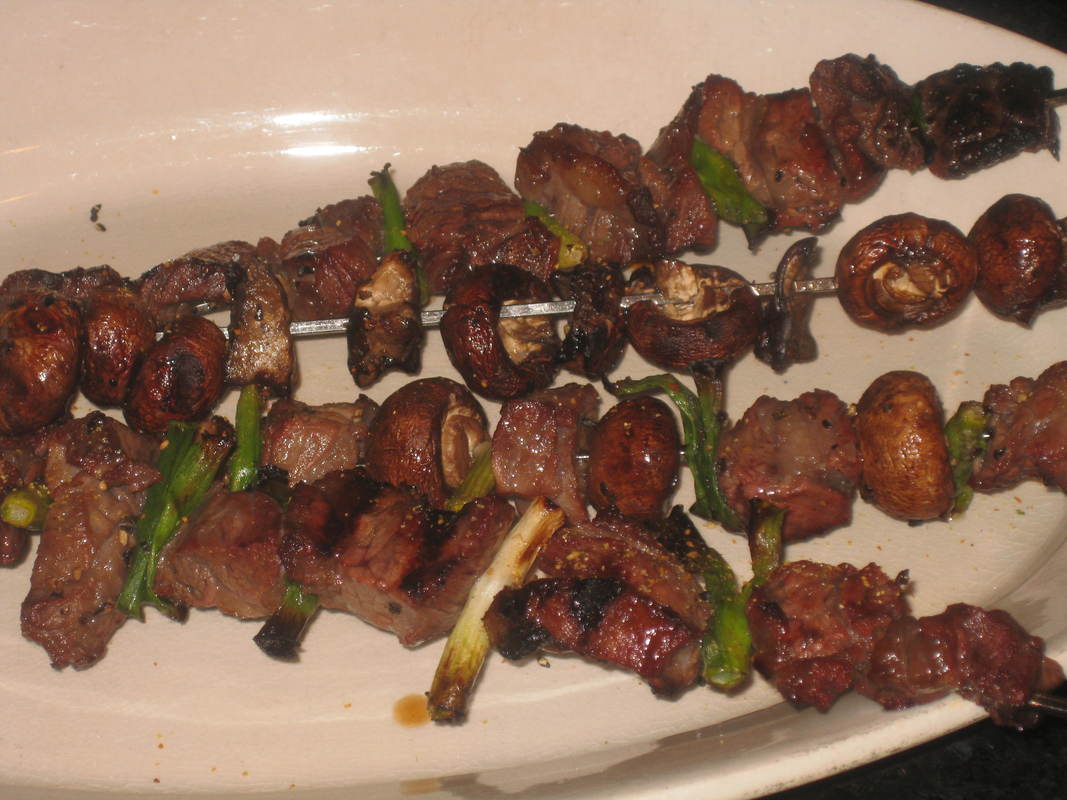
If boneless short ribs aren't available at your supermarket, DO take the time to go to your butcher to get them. You won't regret it....it's the best possible meat to use for these.
This is the marinade----MARINATE THESE OVERNIGHT!
1/4 cup mirin
1/4 cup (unseasoned) rice vinegar
1 TBSP light brown sugar
1 TBSP soy sauce
You will also need (for 2 people):
3/4 lb boneless short ribs
about 5 scallions, cut into 1 /1/2-2" lengths
mushrooms---about a half pound or less
oil
salt and pepper
togarashi
Once the meat is marinated, thread it on the skewers with the scallions and mushrooms. Brush with oil. Grill over a hot fire about 2 minutes per side. Remove from grill and shake on some togarashi.
Voila! Beef "yakitori"!
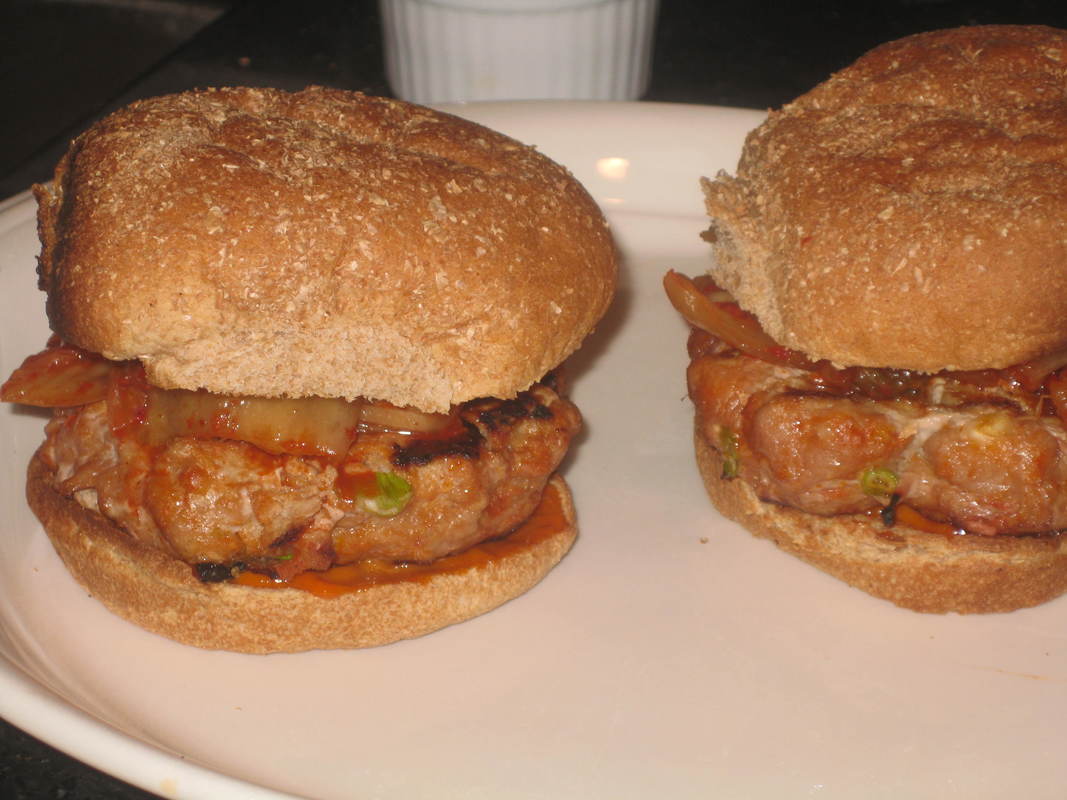
Oh yum. Korean Turkey Burgers with Kimchi.
Don't think of these as a substitute for hamburgers, they aren't! They are just uniquely yummy.
For two:
For the burgers:
1/2 pound ultra-lean (at least 93%) ground turkey
2 small scallions, sliced
2 tsp gochujang
1/2 tsp sesame oil
Mix all that together, and form 2 4" wide burgers. Oil the grill rack, and grill 3 minutes per side or until done. LET REST 5 MINUTES.
To put it all together:
1 TBSP mayo
2 tsp gochujang
whole wheat hamburger buns,toasted
English cuke, sliced
1/2 cup kimchi
Spread mayo mixture on buns. Top with burger, slices of cuke, and kimchi.
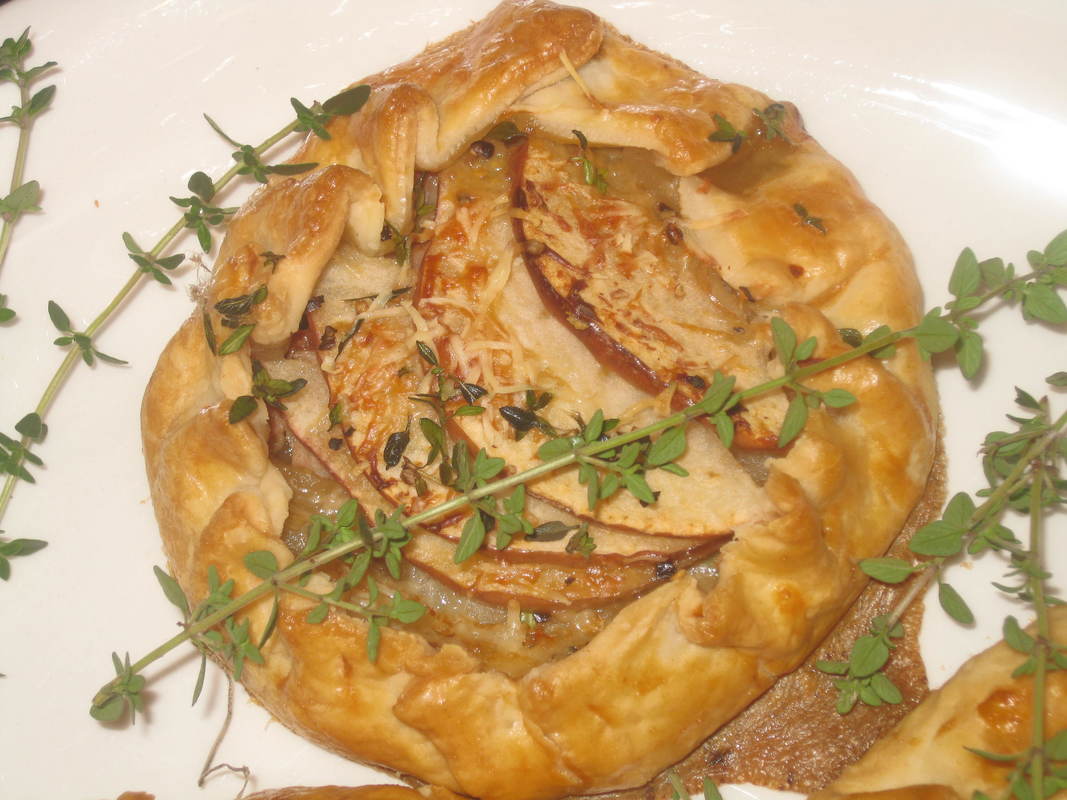
Oh, these little ham, gruyere, and apple gallettes are a delicious light dinner

These are a snap to make if you are pressed for time and use the Pillsbury pie crusts.
Even though they are fairly low in calories, they are quite filling. Here's the quick recipe:
Cooking spray
1 pie crust from the Pillsbury package of two
2 TBSP apple butter
1 TBSP whole-seed mustard
1 crisp apple, sliced thin
2 oz deli ham, sliced very thin
3 TBSP grated gruyere
1 tsp fresh thyme leaves
1/8 tsp pepper
egg and water wash
1. Roll out pie crust to about a 12" circle. Cut out two 6" circles, then gather scraps, and roll them out into a third 6" circle.
2. Mix together apple butter and mustard. Spread on each crust circle.
3. Arrange ham and apple on each circle. Sprinkle with cheese, thyme, and a bit of pepper.
4. Fold up the edge of each circle about and inch or so, and crimp decoratively.
5. Brush with egg wash if desired. Place on a baking sheet coated with cooking spray. Bake at 400 degrees for about 30 minutes.
This is an old 1970s recipe from Better Homes and Gardens. They called it "Pecan Pizza Coffee Bread". It really is a deconstructed sticky bun....but with much more sticky, and less bun.
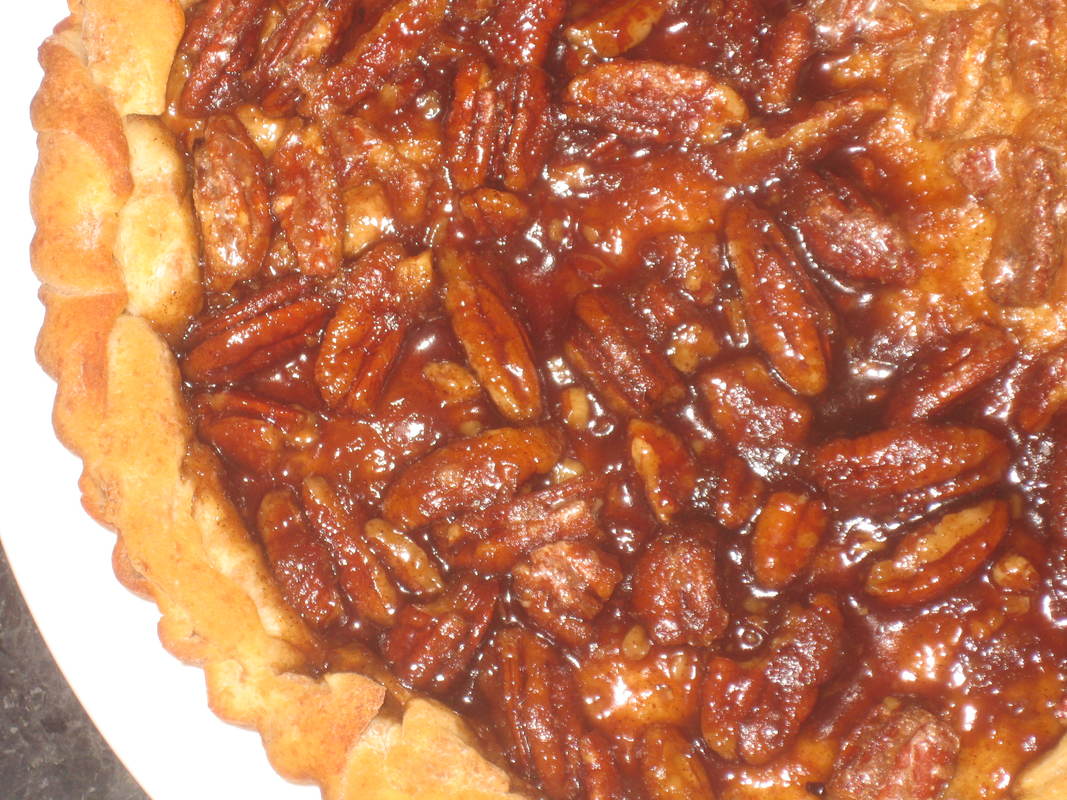
It's really delicious! Use the Contact From for this easy, old-fashioned recipe.
Here's another great lunch for fall: Hot Ham and Pear Melts on a multigrain baguette
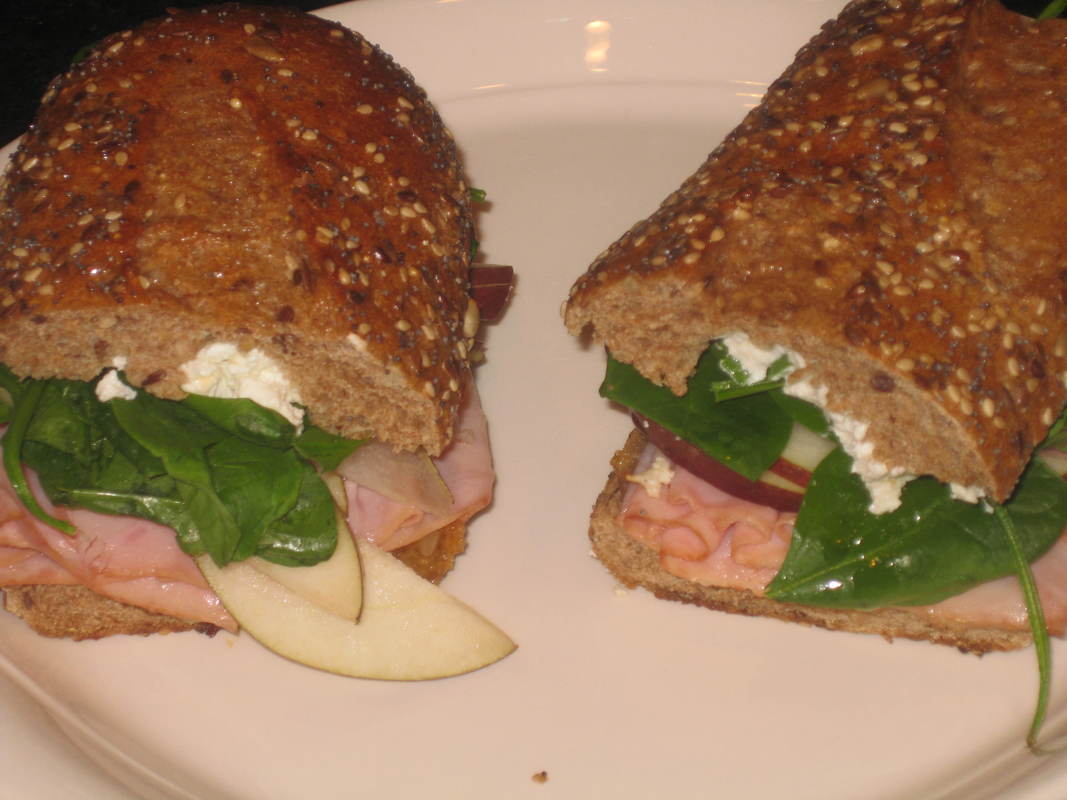
These go together a bit easier if you hollow-out some of the bread----otherwise they get a bit too tall. They're also a bit better if you make them in France, where great quality bread is available everywhere!
This recipe serves 4.
3/4 lb whole grain baguette
2 TBSP apricot preserves
6-8 oz very thinly sliced deli ham
1 pear, cut into thin slices
2 cups baby spinach
4 oz log chevre
tsp fresh chives
Cooking spray
1. Cut baguette in half lengthwise. Hollow out bread. Spread preserves on both slices.
2. Top with ham, pear, and spinach. Combine chevre and chives and spread on top portion of bread. Spray tops of bread very lightly with cooking spray.
3. Bake, covered at 350 degrees for about 15 minutes. Serve warm.
Mmmm. This easy dinner has something for everyone. Steak? Check. Pasta? check. Veggies? Check. Creamy sauce? Check!!!!!!!
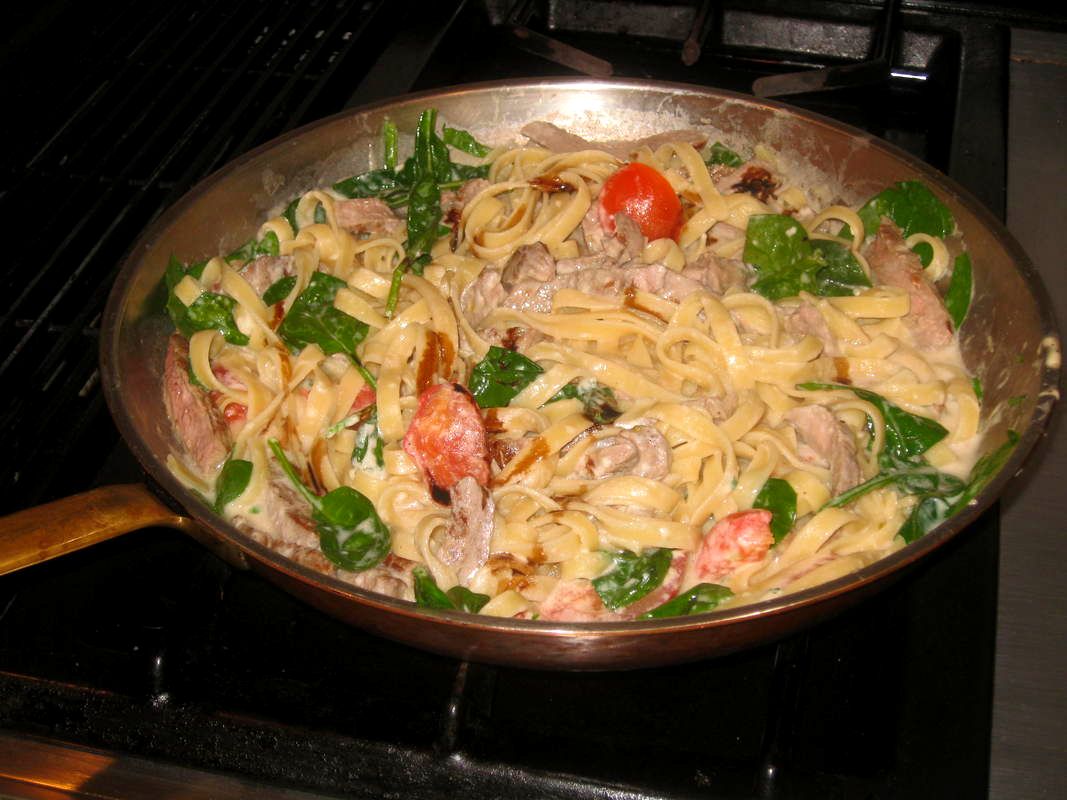
This is such a good dinner---and so very easy to make.
6 oz fettuccine
1/2 pound sirloin steak
kosher salt
fresh ground pepper
1 TBSP butter
1 large clove garlic, minced
1 TBSP flour
1 cup milk
1/4 cup freshly grated parmesan
1 1/2 tsp fresh parsley, chopped
3/4 cup cherry tomatoes, halved
1 cup fresh spinach
Balsamic glaze
1. Cook fettuccine in salted water. Drain and set aside.
2. Season steak generously with salt and pepper. Fry for about 3 minutes per side (no oil necessary). Allow to rest for 10 minutes, then thinly slice.
3. Melt butter in skillet. Add garlic and cook until fragrant, about 1 minute. Make a roux with the flour, then add milk. When slightly thickened, add parsley and parmesan. Add tomatoes to this sauce and cook until slightly wilted, about 5 minutes.
4. Add pasta to sauce and toss until warm. Add spinach and toss until wilted.
5. Transfer to serving platter and toss in steak.. Top all with a drizzle of balsamic glaze.
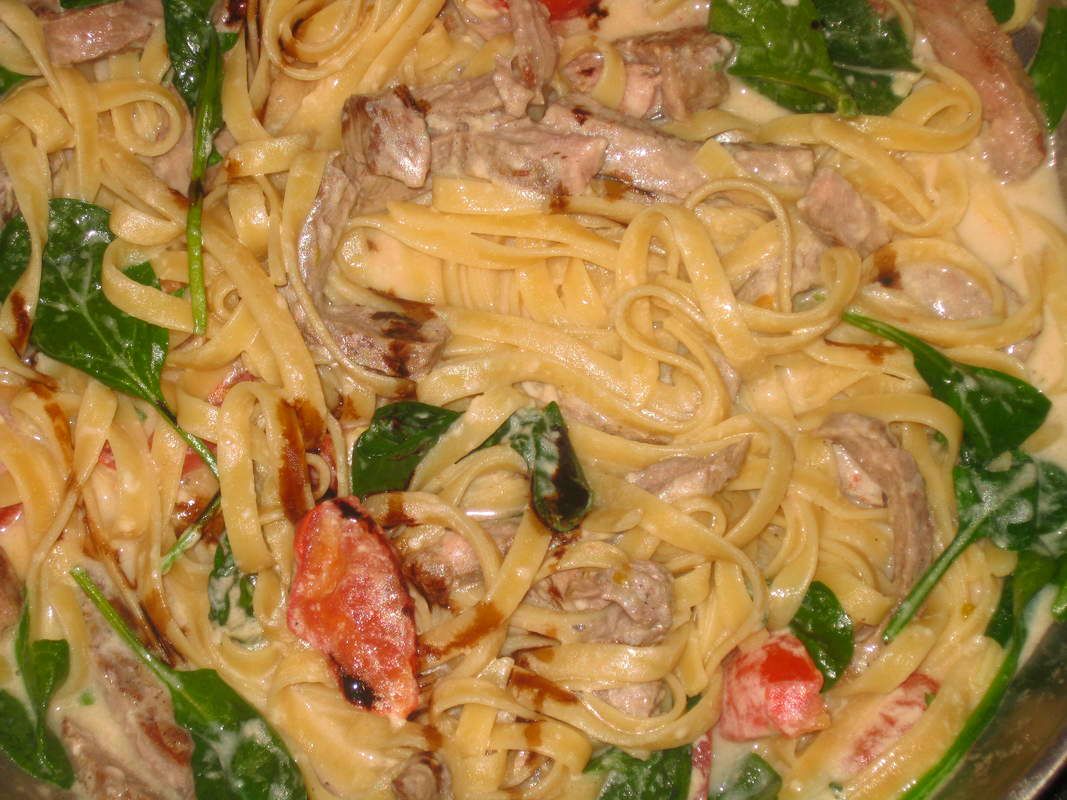
A different cupcake------not my normal animals or flowers.
So delicious! These are decorated with a disk of white and dark chocolate, that looks wood-grained.....
Chocolate, chocolate, and more chocolate!!!! These "wood-grain" ornaments are both cool-looking and delectable.
I never would have thought of using a wood-graining tool in my kitchen! Contact me for the simple way to make these little white and dark chocolate "chips of wood".
I never would have thought of using a wood-graining tool in my kitchen! Contact me for the simple way to make these little white and dark chocolate "chips of wood".


Here's a nice luncheon sandwich for the fall season: Grilled Apple and Cheddar Sandwiches
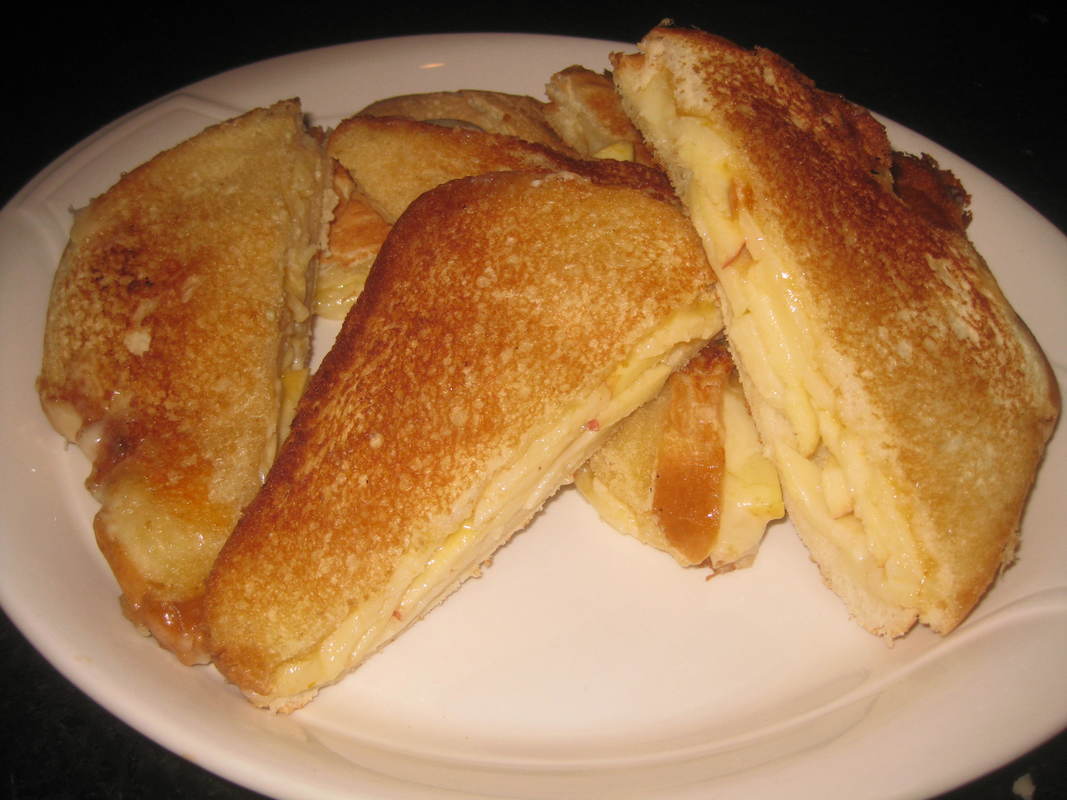
A yummy cut above boring grilled cheese, and perfect for fall:
Combine 1 TBSP Dijon mustard, 1 TBSP apricot preserves, 2 1/2 tsp EVOO, and 1 tsp lemon juice. Spread this on each of two pieces of bread. Top that with several slices of extra-sharp cheddar (as much as you like) and several thin slices of apple. Fry in a TBSP or 2 of unsalted butter, weighting down sandwiches.
Combine 1 TBSP Dijon mustard, 1 TBSP apricot preserves, 2 1/2 tsp EVOO, and 1 tsp lemon juice. Spread this on each of two pieces of bread. Top that with several slices of extra-sharp cheddar (as much as you like) and several thin slices of apple. Fry in a TBSP or 2 of unsalted butter, weighting down sandwiches.
I've said it before here------our family loves composed salads. This one is super-easy because I cheated.
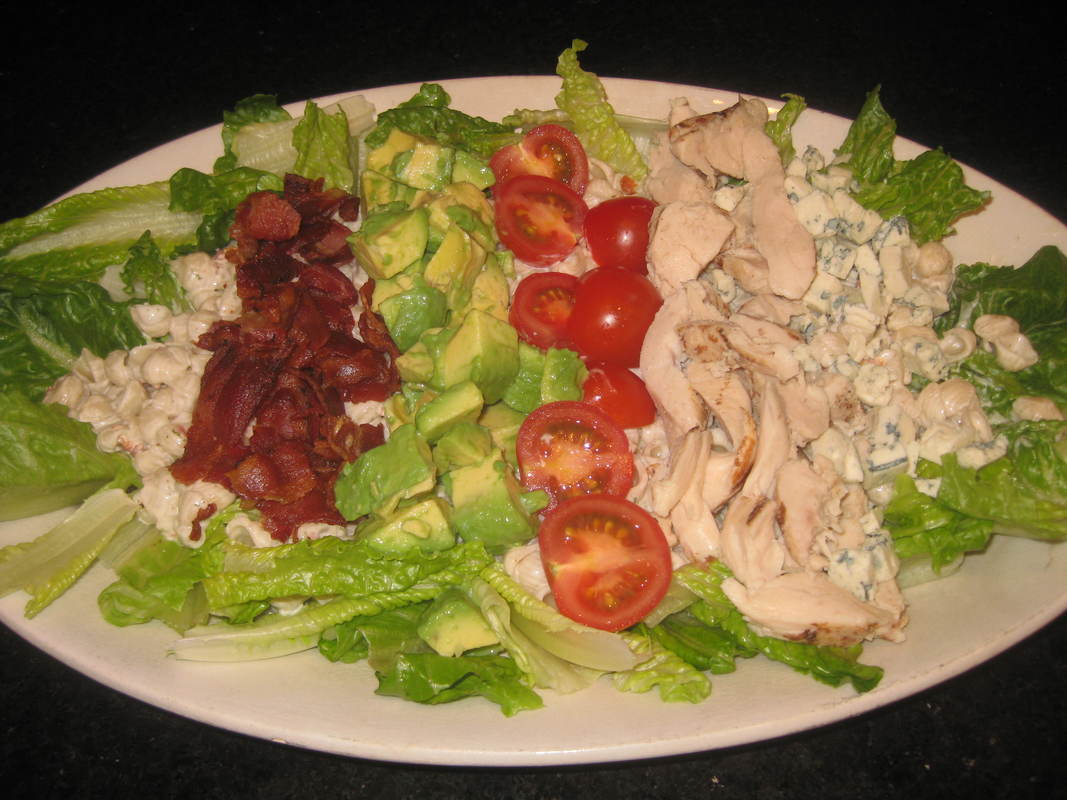
There I was a couple of weeks ago, in Paris of all places to get advice like this, when a friend said to me, "Marjorie, tu ne croirez pas a quel point cet aliment emballes est bon". When I asked which "aliment emballes" [packaged food] he was talking about he said........get this......"Il s'appelle Suddenly Salad".
Suddenly Salad!!!!!! What??????? That crap that was first marketed by in the 80's or something?
I decided to try it, for the first time since 1990 (at least). I will admit, I didn't read the label-------I was too nervous to do so, figuring it probably contained my entire week's worth of sodium.
But it was quite good! Could I have made the same thing on my own from scratch? Hell yes. But my aim that night was just to get dinner on the table in a flash.
I put the Suddenly Salad (which I tossed with canola mayo and lemon juice) on a bed of romaine, and then put on classic Cobb salad ingredients. I should have put on a couple of chopped hard-boiled eggs, but didn't. Otherwise it was classic Cobb-----bacon, avocado, cherry tomatoes, cooked chicken, and crumbled blue cheese.
Dinner in a flash!!!!!!
"Everything bagel".....well, everything-bagel-everything.....is trendy right now. What's meant by this is a very simple blend of a few dried herbs and seeds. It's easy to make, and then you can put it on.....yeah, "everything".
To make this seasoning, simply stir together:
1 TBSP poppy seeds
1 TBSP dried minced onion
1 TBSP sesame seeds
1 tsp garlic powder
1/2 tsp kosher salt
You can use this seasoning on any bread dough. Recently we used it on puff pastry that we wrapped around hot dogs.
Remember to dip your dough in a combo of water and baking soda 3/4 cups water to 1 TBSP baking soda. This will give the outside of your dough that crunchy bagel exterior.
For these dogs I also put a smear of cream cheese on the dough before rolling up the dogs------for that true bagel experience!
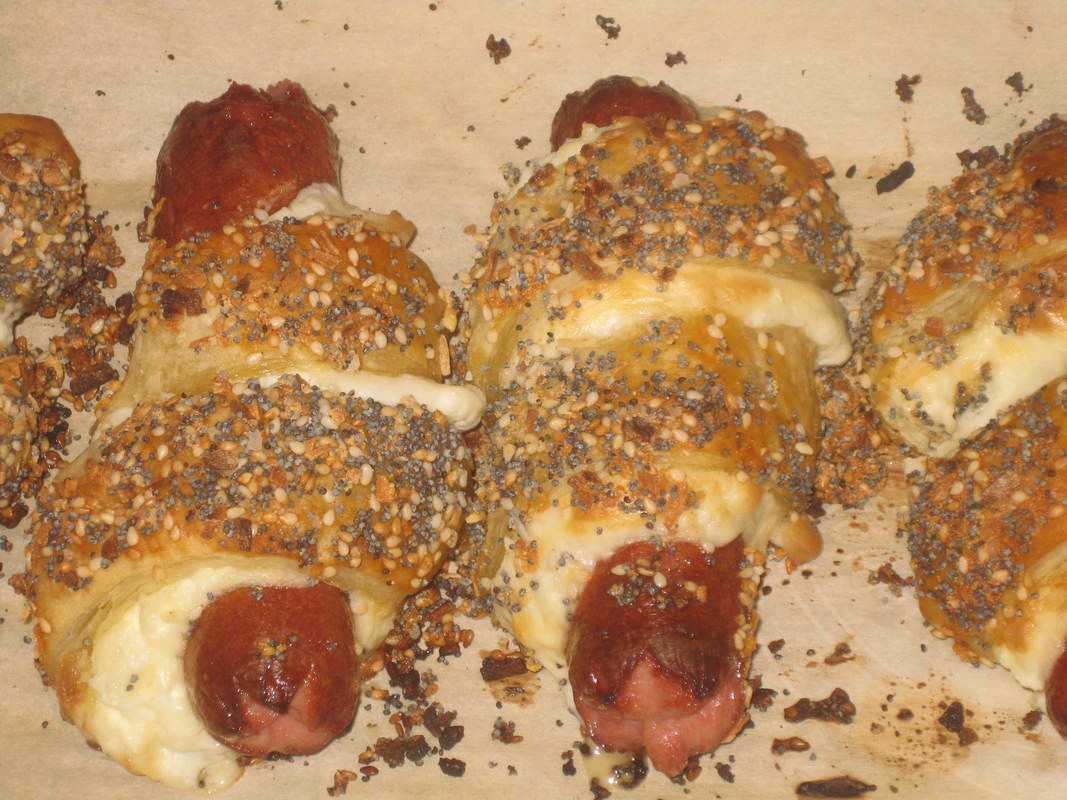
This red cabbage salad------NOT a cole slaw!------is a perfect November side dish. Blue cheese and a handful of candied walnuts make it perfect.
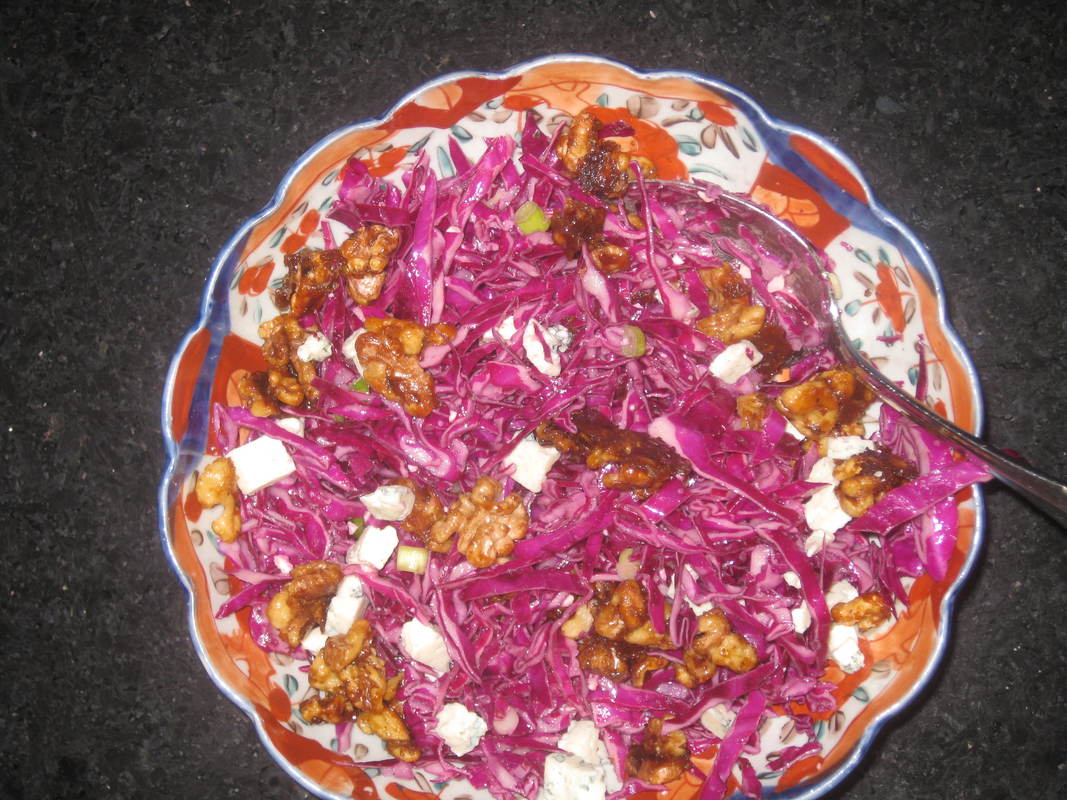
For the salad:
About 4 cups thinly sliced red cabbage
1 scallion, finely sliced
3 TBSP blue cheese
Toss all of the above together.
For the dressing:
1 1/2 tsp blue cheese
2 TBSP EVOO
4 1/2 tsp red wine vinegar
1 1/2 tsp dijon
1/8 tsp salt
1/8 tsp fresh ground pepper
Blend together. The easiest way to do this is in a mini-food processor, though it may be done with a mortar and pestle.
For the candied walnuts:
1/2 cup walnuts
1/2 tsp butter
1 1/2 tsp olive oil
1/8 tsp salt
1/8 tsp fresh ground pepper
4 1/2 tsp maple syrup
Melt butter and oil in a small skillet (such as an omelette pan). Add walnuts and cook about 2 minutes. Add salt, pepper, and maple syrup, cooking and stirring until caramelized, about 5 minutes. Pour onto parchment paper to cool, then separate.
Toss dressing and walnuts with salad ingredients. You'll love this!

Thicker-crust pizza isn't usually our thing------we eat pizza in Italy so often we've come to prefer the medium---to even thin---crusts. And those are the recipes I usually post.
But earlier this fall in Maine, we were craving something that was more comfort-food. I made this blond pizza with an excellent bread crust and all 3 of us just swooned.

The toppings of this blondie are to die for-------fontina cheese! Proscuitto! Crimini mushrooms! Fresh thyme! And as if that wasn't enough......Marsala wine!!!!!!!!
Everyone from my daughter to my husband is here to tell you------this is one amazing pie. The crust is complicated to make. Use the Contact Form for step-by-step instructions on this one!
Everyone from my daughter to my husband is here to tell you------this is one amazing pie. The crust is complicated to make. Use the Contact Form for step-by-step instructions on this one!
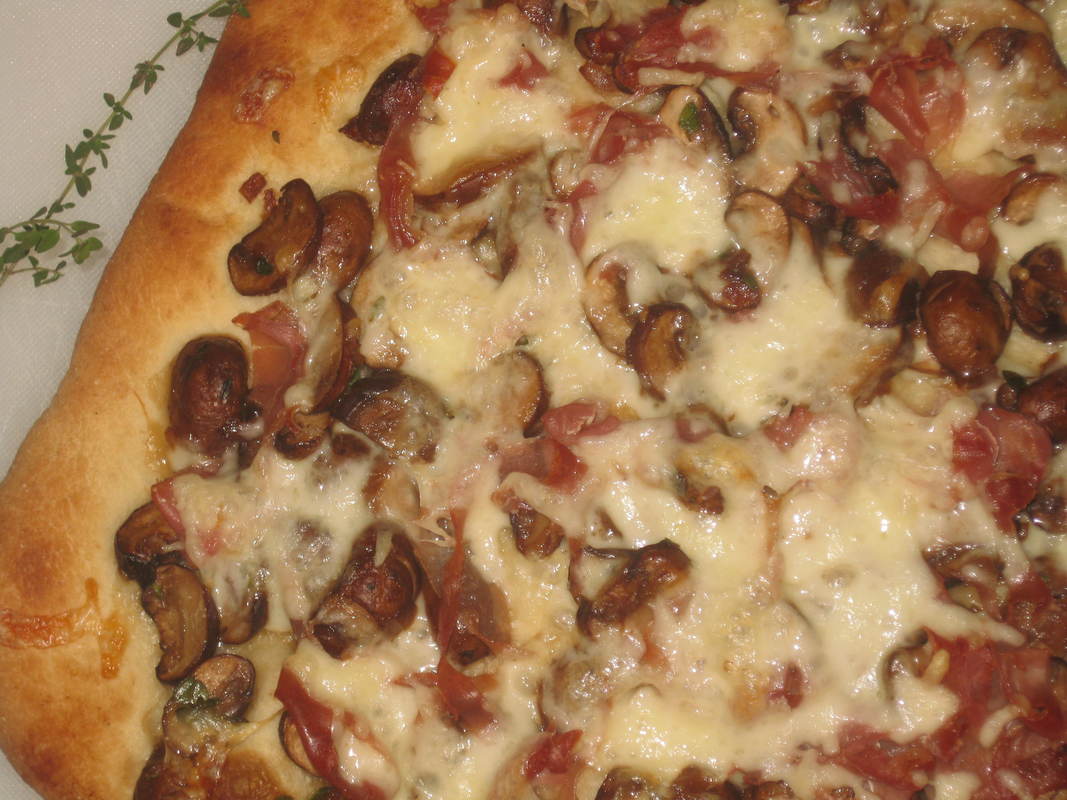
This is an easy, classic date-and-walnut quick bread. I needed more than one loaf because we were having company for brunch, but two loaves was too many. The answer? Multiply the recipe by 1.5, and bake in a tube pan.
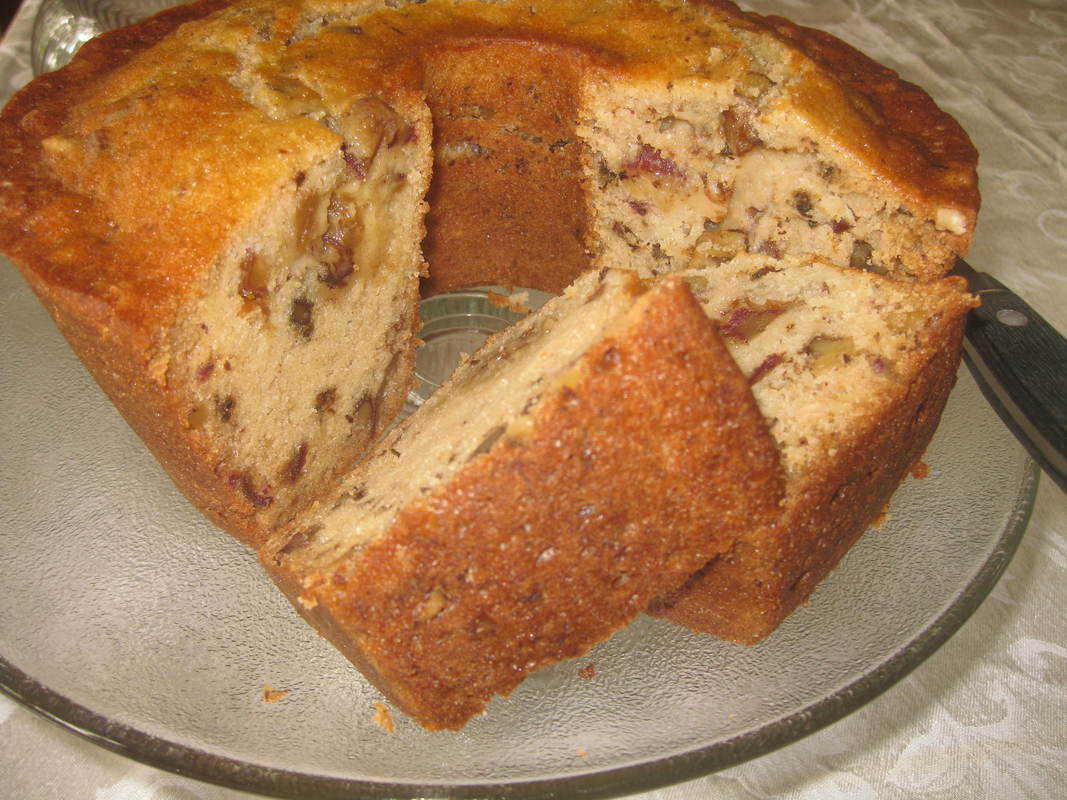
I'm happy to provide you with my recipe, but frankly it's just an old one out of Better Homes & Gardens (use the Contact Form if you'd like me to send it to you).
It's a delicious recipe, but very much like most other date-nut breads. Today's posting is more about a technique to increase the amount of a recipe without having to double it.
It's a delicious recipe, but very much like most other date-nut breads. Today's posting is more about a technique to increase the amount of a recipe without having to double it.
It's easy to make a whole roast chicken teriyaki-style, if you remember to start marinating it the day before. I then roasted this in my convection oven rather than my regular oven, so it cooked (reasonably) quickly----for a roast chicken, anyway.
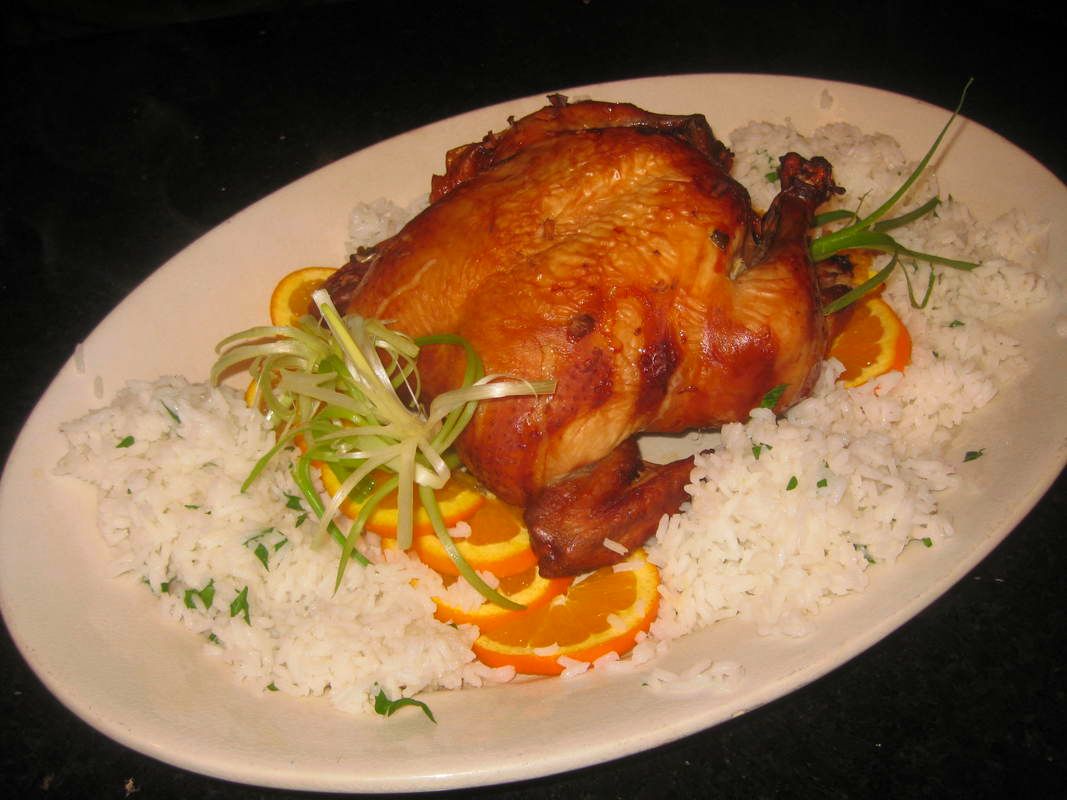
There were only two of us at home that night, and we really didn't want to be eating this all week. For that reason I bought an organic-raised chicken because they are smaller. Most of the whole chickens available in my area are too large. This little organic 3-pounder was perfect for two of us for dinner, with leftovers for my husband to get a couple of lunches out of it-----sandwiches and chicken salad.
1 small (3 lb) whole chicken
1/2 cup soy sauce
2 TBSP dry sherry
2 TBSP sliced scallion
1 TBSP brown sugar
1 clove minced garlic
1/2 tsp grated fresh ginger
Wash and dry chicken. Prick all over with a toothpick. Combine marinade ingredients, and marinate chicken for 24 hours in a ziplock bag in the fridge. In my convection oven at 350 degrees, this chicken was perfectly done after 45 minutes. In a conventional oven I suspect it would take more like 1 1/2 hours. Use a meat thermometer!
It was very nice served with parsley rice.
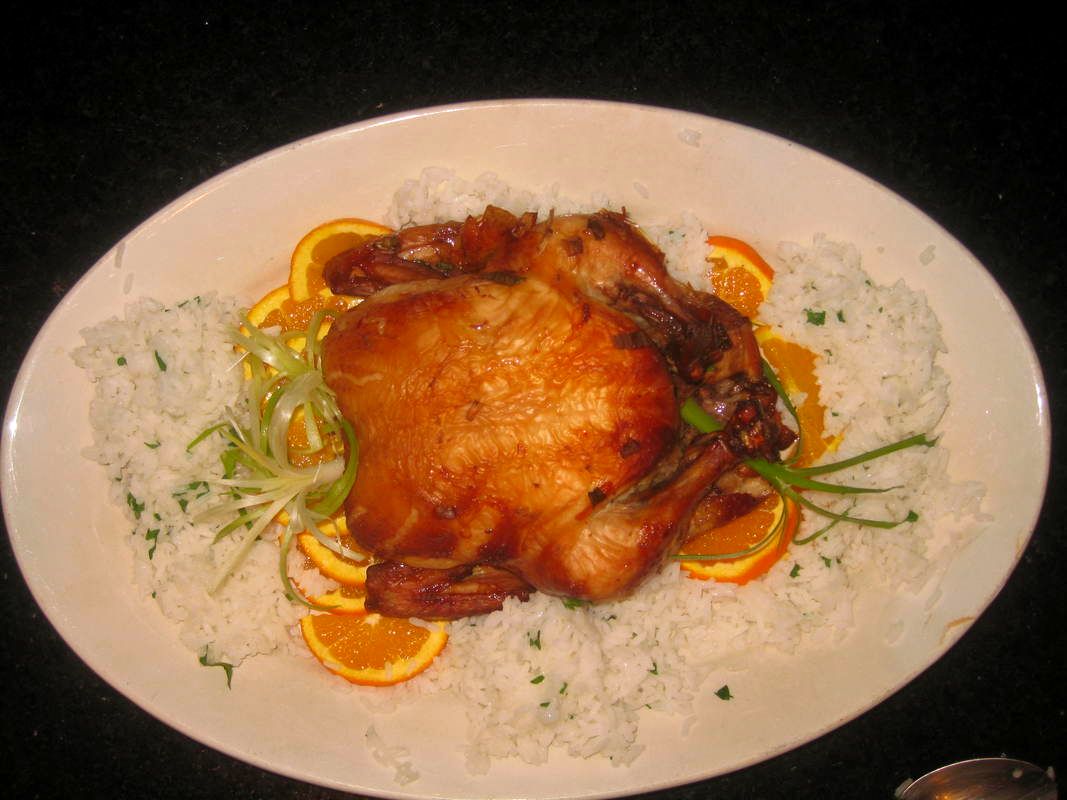
Simple and classic pork dumplings. These use both pork tenderloin and pork sausage, classically paired with fresh ginger, water chestnuts, and soy.
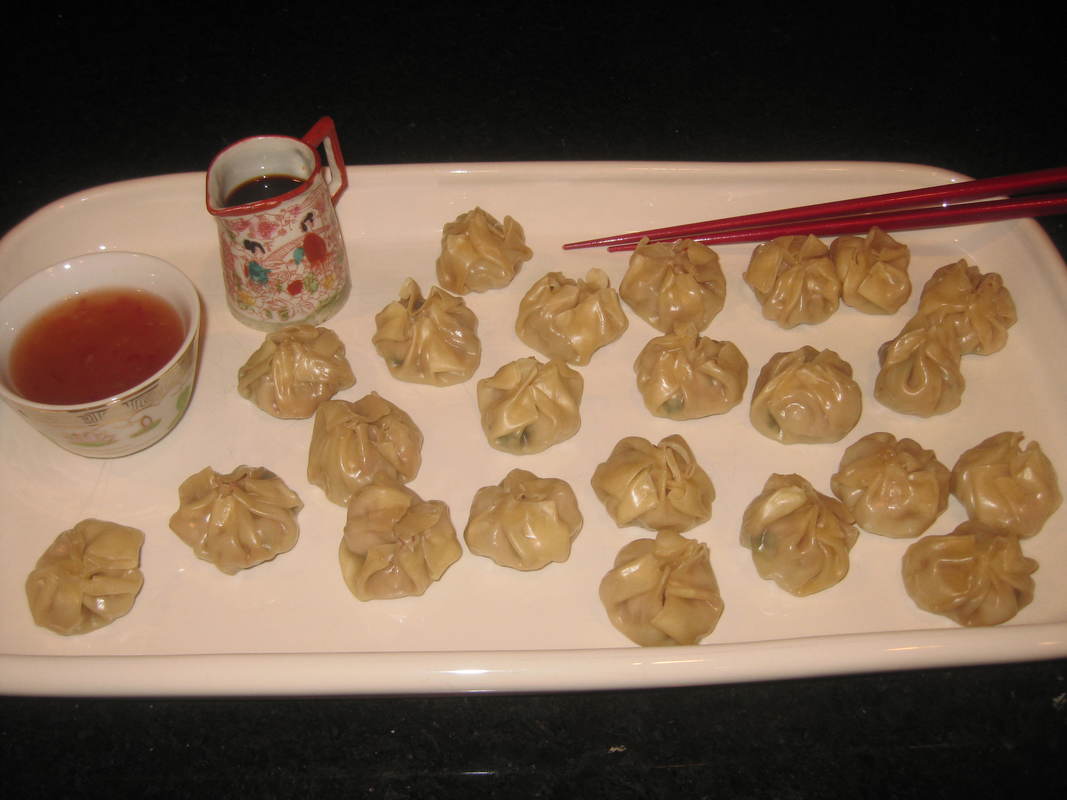
6 oz boneless pork loin (from a chop)
3 oz pork sausage
1/4 tsp salt
3 or 4 water chestnuts, finely chopped
2 TBSP cornstarch
1/2 tsp soy sauce
2 TBSP low sodium chicken broth
1 TBSP sugar
1/4 tsp teriyaki sauce
1/4 tsp sesame oil
1 TBSP chopped fresh parsley
1 scallion, finely chopped
Gyoza skins
Dipping sauces, such as Thai sweet chili sauce, soy-based sauce, or anything else you like
1. Process the pork loin in a food processor until finely chopped. Place in a bowl, and combine with next 11 ingredients (through scallion).
2. Place about 1 TBSP mixture in each gyoza skin. Gather into purse-shaped wontons.
3. Place in a bamboo steamer over simmering water and steam for 20-25 minutes. Serve with sauces.
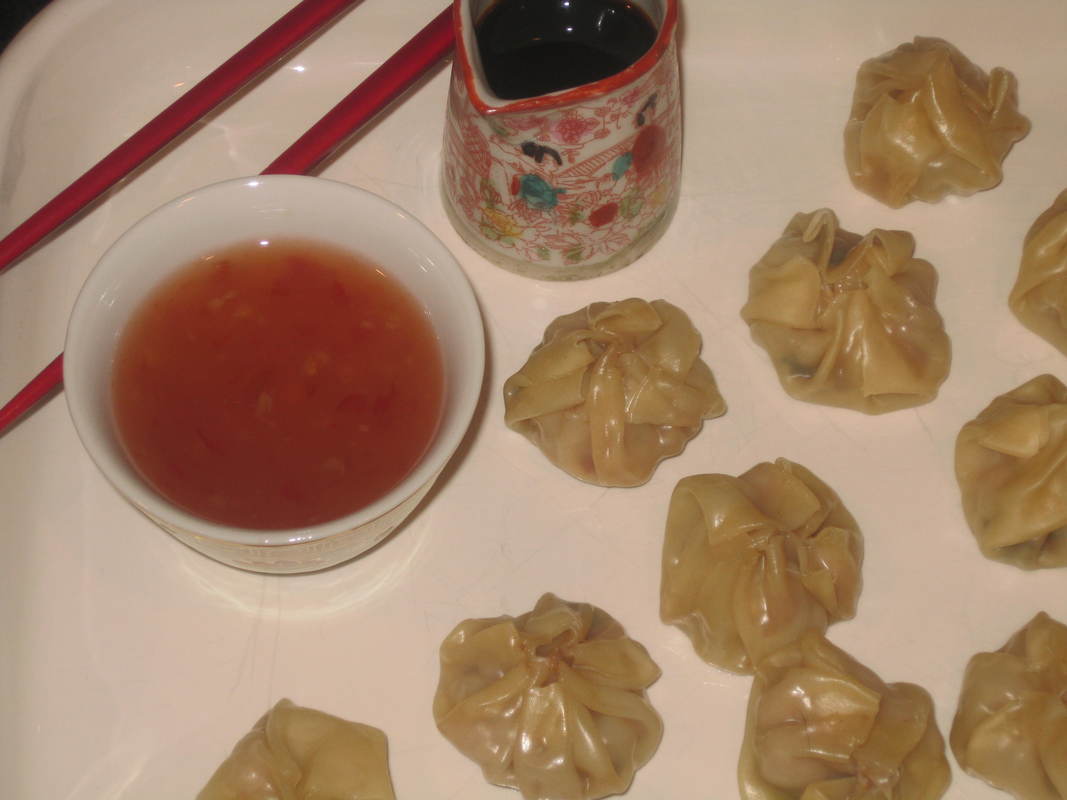
Happy Halloween!!! Time for "Mummy Dogs" (and no, I'm not talking about your Mom!!!!)

These are easy-peasy. Simply roll out some crescent dough (like Pillsbury's) and cut it into strips. Roll these around hot dogs (easiest to do if you dry the hot dogs first with a paper towel). If you like, you can add a piece of American cheese inside the "bandages". Spray them lightly with cooking spray and bake at 375 degrees for 13-17 minutes.

A wild mushroom infused meatloaf to change-up your habits. This one uses any kind of wild mushrooms that you like; and if you like the taste of buffalo, this is great with buffalo meat. But however you make it, it's a delicious change from the usual.
And mmmmm, that buttery sauce!
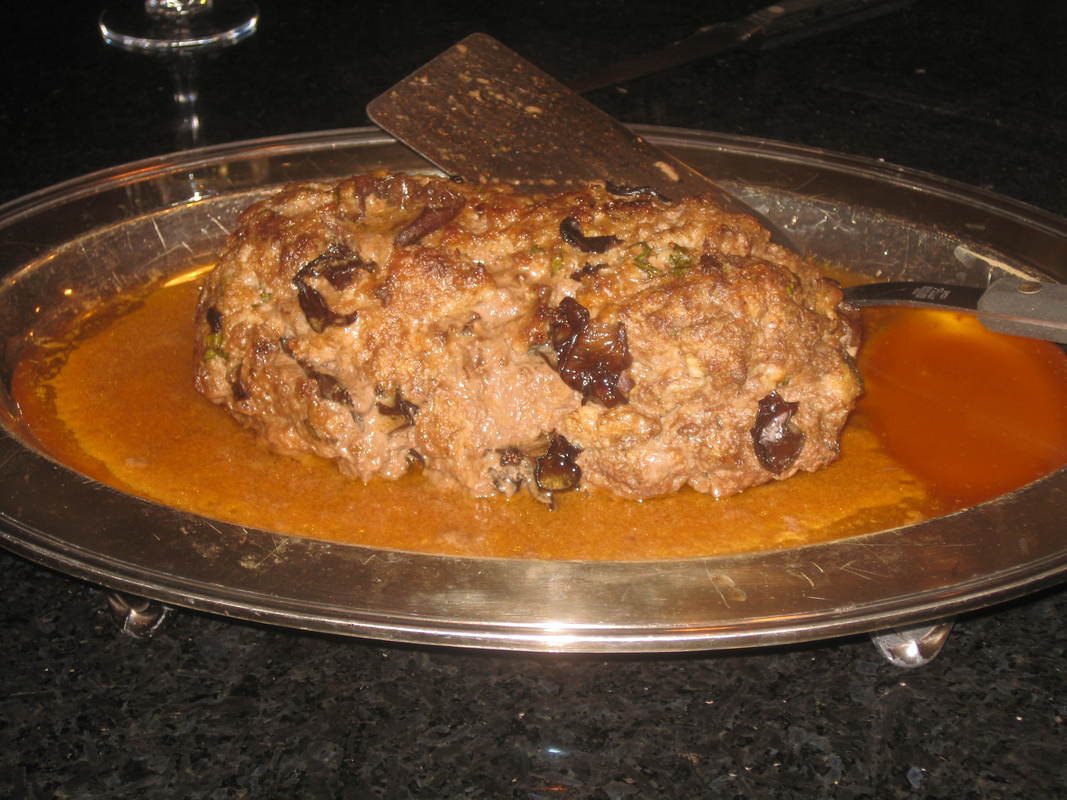
1/2 oz of dried mushrooms of your choice (I used a mix of porcini and Chinese black mushrooms)
1 cup warm water
6 TBSP butter; 2 TBSP softened and 4 TBSP melted
4 TBSP finely minced onion
1 lb lean ground beef or buffalo meat
1/4 lb salt pork (ONLY IF USING BUFFALO MEAT), blanched, rinsed, and diced
1/2 ground pork
1/2 lb. ground veal
1 slice white bread, crust trimmed, and soaked in a little milk
1 egg yolk
1 tsp lemon juice
1/2 tsp freshly ground black pepper
1 TBSP tomato paste
2 TBSP finely minced fresh parsley
pinch of dried thyme
1/2 cup white wine
1/ tsp salt
1. Soak mushrooms in warm water for at least 1 hour.
2. Heat 1 TBSP of the softened butter in a small skillet and saute the onion until soft and translucent, about 5 minutes.
3. I an large bowl combine the meats, bread, remaining TBSP of softened butter, egg yolk, lemon juice, salt, pepper, tomato paste, parsley, thyme, and sauteed onion along with its butter.
4. Drain the mushrooms, and add to the meat mixture. Mix thoroughly. Shape into an oblong and place in dutch oven.
5. Combine white wine and the melted butter.
6. Bake loaf in a 400 degree oven for 1 hour (or until juices run clear). Occasionally while it bakes, pour spoonfuls of the butter-and-wine mixture over it.
7. Transfer to a platter and serve with the butter-wine sauce from the dutch oven.
Do you need a light lunch or a delicious appetizer? You'd be amazed at how fast these little beauties come together.
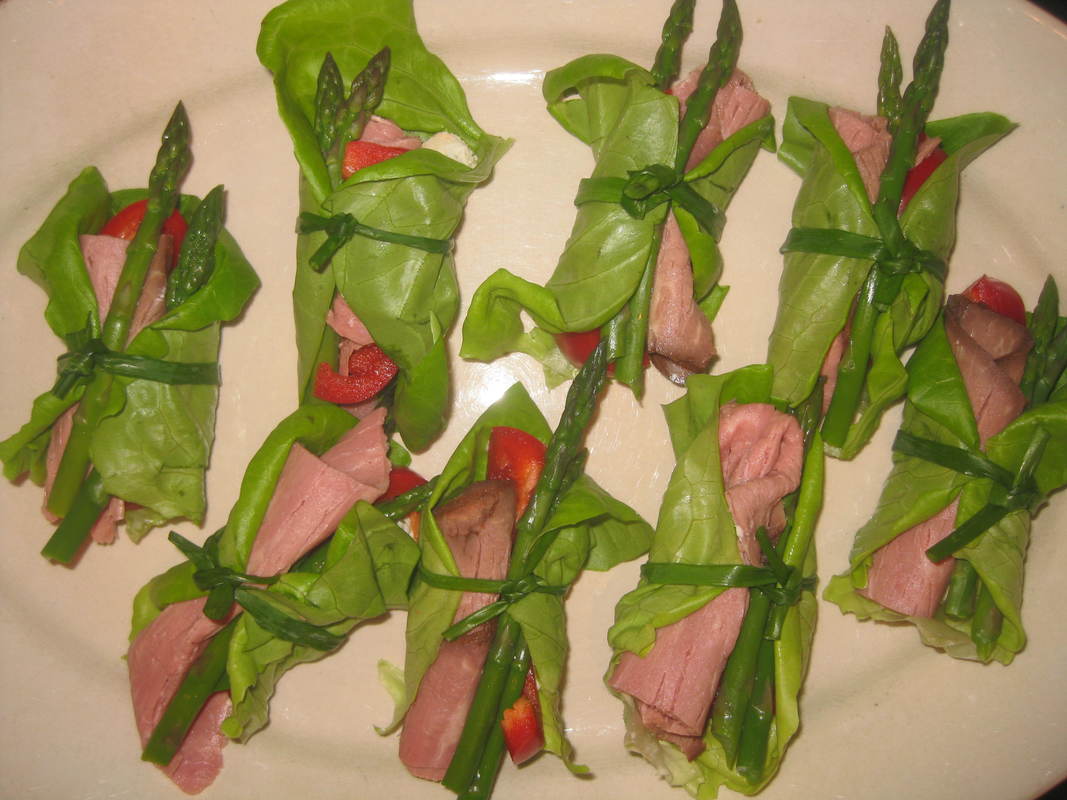
People just LOVE these. They're attractive, and easy to handle at a cocktail party.
They are so good we sometimes eat a few as a light lunch. They are super easy and fast to make:
8 asparagus spears, blanched and shocked
2-3 oz Boursin
8 leaves of Boston lettuce
8 very thin slices red bell pepper
4 slices deli roast beef, cut in half
8 chives
How to make these is pretty obvious. On each lettuce leaf, put some Boursin-----the easiest way to do this is by putting the Boursin in a small plastic baggie and cutting a corner off the baggie. You can then pipe it onto the lettuce. top with a slice of beef, an asparagus spear, and a slice of bell pepper. Roll up, and tie with a chive.
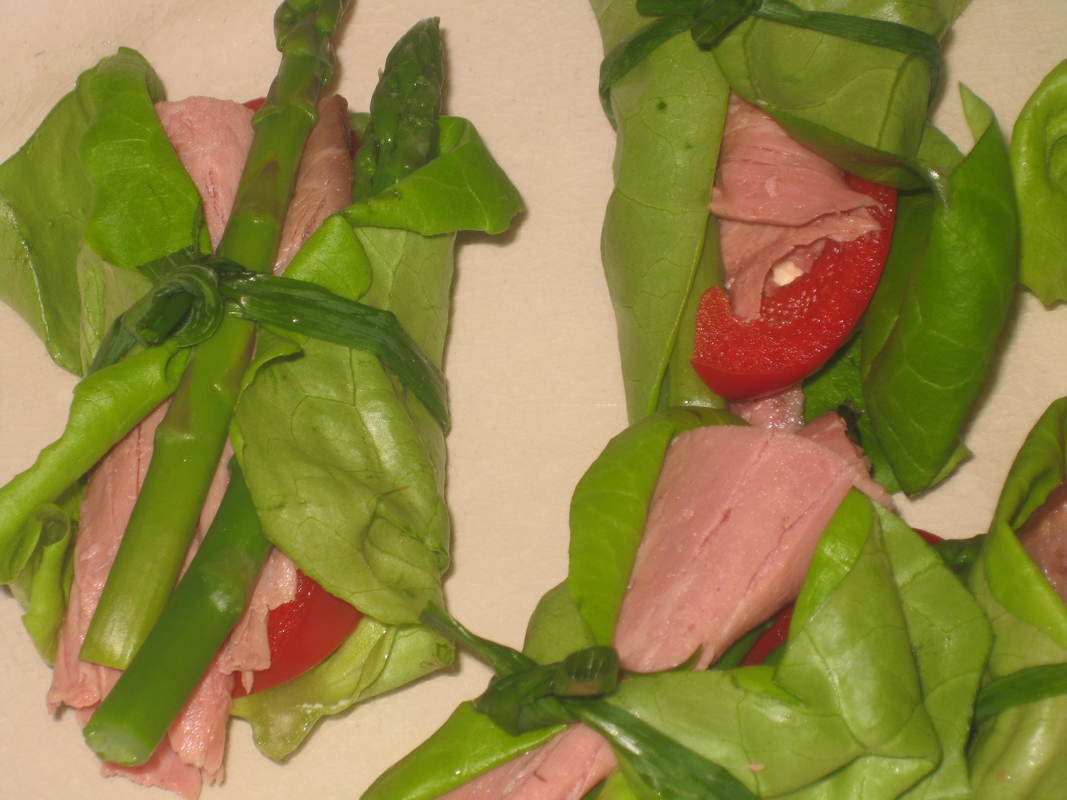
A vegan chimichanga that is so good---and so full of good stuff, like meaty portobellos. It's crunchy from the broiler, served with salsa and guacamole, and you won't miss the grease one bit.

1 can black beans, rinsed and drained
1 cup cooked brown rice
1 cup sliced portobello
1/4 cup black olives (sliced if you like)
1/3 cup corn kernels-----frozen works fine
1/2 can chopped green chilis, such as Old El Paso
1/4 cup chopped scallions
1/2 tsp taco seasoning
1/4 cup chopped cilantro
3 whole wheat tortillas (9")
olive oil, for brushing
salsa
guacamole
1. Stir together first 9 ingredients. Divide among tortillas, and roll up (egg-roll-style; i.e folding in edges).
2. Preheat broiler. Spray a cooking sheet with cooking spray. Place chimichangas on prepared sheet.
3. Brush with olive oil Broil in the middle of the oven for 5 minutes.
4. Turn, brush other side of chimichangas with olive oil, and broil another 3 minutes or until crispy.
5. Serve with salsa an guacamole.
OMG-----the quintessential calzone for people who like "Meat Lover's Pizza"
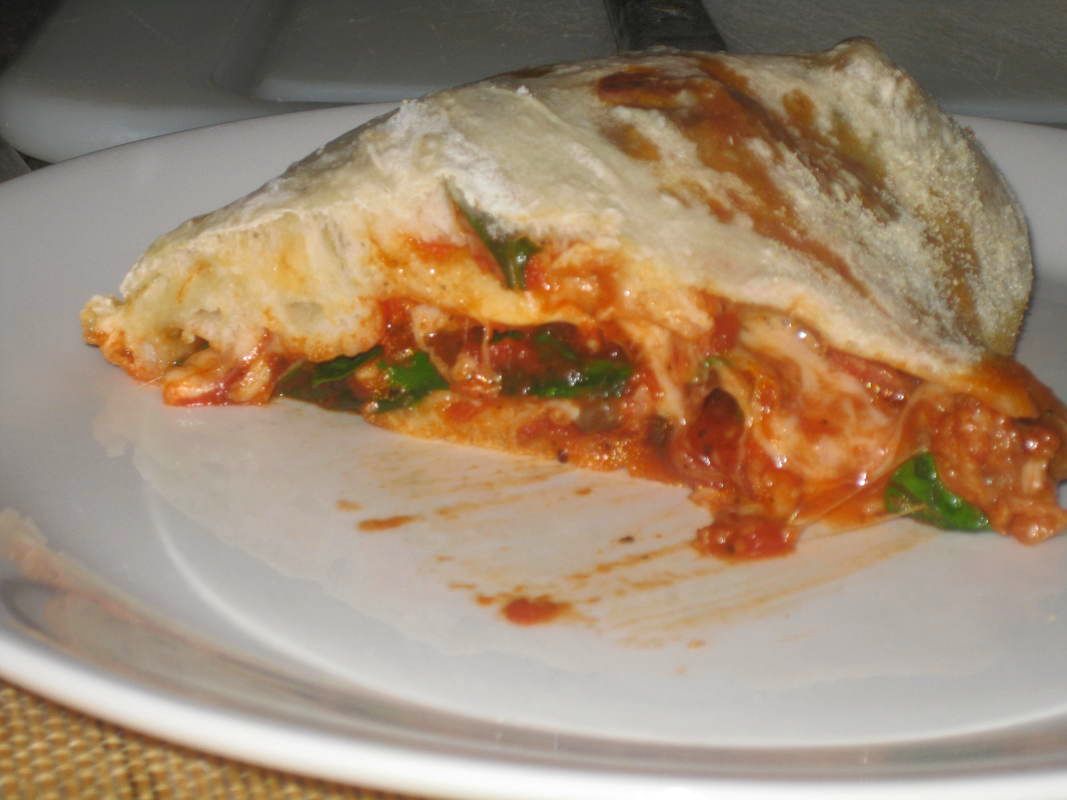
Whatever you do, don't eat this every day!
For the dough:
1 cup warm water
1 1/2 tsp dry yeast
1 1/2 ttsp salt
about 2 1/2 cups flour
2 TBSP EVOO
1. Proof the yeast in the water---this takes about 5 minutes. Using the dough hook on a stand mixer, gradually add the salt, olive oil and flour. Knead for 7-10 minutes, or until smooth and elastic. Place in an oiled bowl, and cover. Let rise until doubled.
2. During the last hour of rising, place a pizza stone in the over. Preheat the oven to 500 degrees, heating the stone for that whole hour.
2. Punch dough down, and shape it into a circle. You can make it thick or thin, depending on how you like your pizza crust.
For the filling:
1 cup provolone
1 1/4 cups mozzarella
4 oz sliced pepperoni
4 slices bacon, cooked and chopped
1 cup Italian sausage (we prefer the hot variety, but use sweet if you prefer) cooked and chopped
1 cup sliced mushrooms
3/4 cup baby spinach
1 cup of your best pizza sauce
Place all the ingredients, one at a time, on half of the rolled-out dough. Leave about a half inch border. Flip the unfilled side of the circle over the fillings, and crimp to seal. Place on the stone and bake for about 9-10 minutes, or until golden.
Scallops, perfectly seared. A bit of pancetta. Vermouth and a little orange.
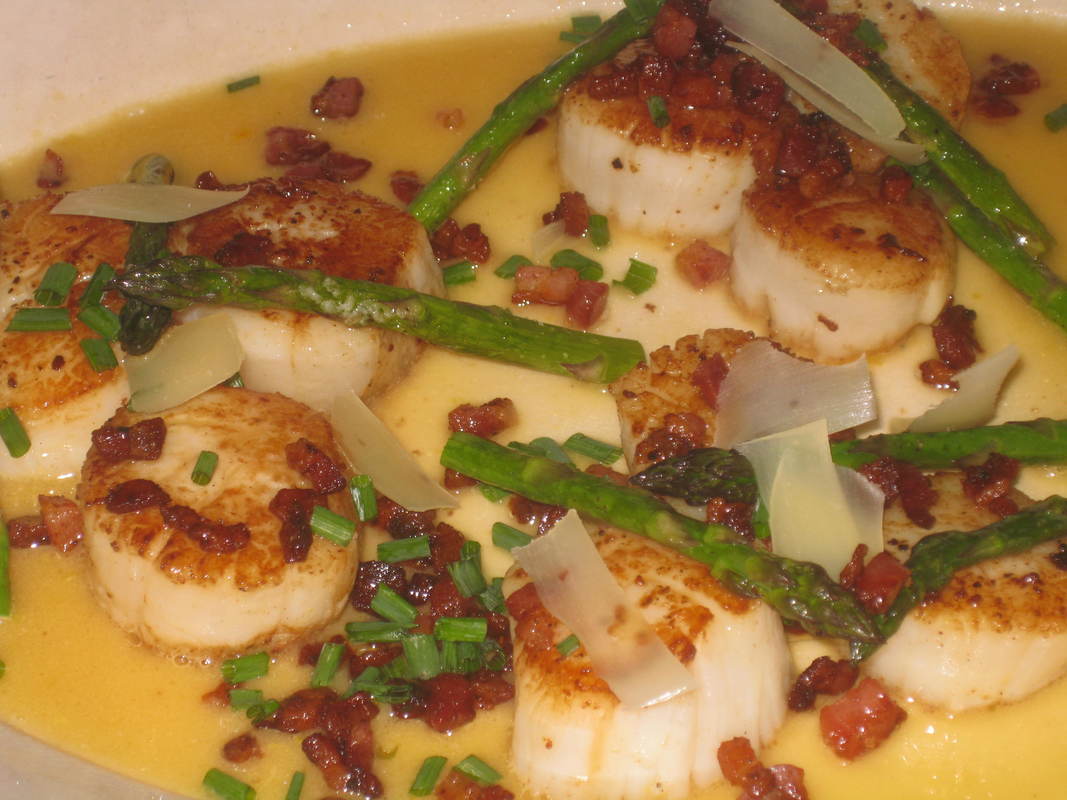
The secret to cooking scallops properly is very hot fat to sear the outside before the inside cooks through. You want a little crust on them, but the inside needs to be just warm.
Scallops and bacon are natural partners, but in this case I upped the crunchiness factor by using pancetta. Cooking the pancetta first, then using the fat left in the pan to sear the scallops is an easy way to get the scallops cooked properly. An easy pan-sauce of vermouth and OJ works perfectly-----citrus and scallops are also natural partners. I then gilded the lily further by shaving some fresh Reg-parm over the top.
And always buy dry scallops (unless you are a big fan of sodium triphosphate). Not only will other scallops not have a pure taste, they won't sear on the outside.
This recipe feeds two people. I added some capellini on the side-----it's good for mopping up the sauce!
For the asparagus:
9 medium stalks asparagus, trimmed
1 tsp olive oil
scant 1/4 tsp salt
scant 1/4 tsp fresh ground pepper
Toss ingredients together and roast in a 475 degree oven for 6 minutes.
For the scallops:
About 1/2 cup or less diced pancetta
9 dry scallops
3/8 tsp salt
3/16 tsp fresh ground pepper
1/2 cup OJ
4 1/2 tsp dry vermouth
1 TBSP butter
4 1/2 tsp chives
a few shavings of fresh Reggiano Paramesan
capellini
1. Cook pancetta in a large skillet, preferably cast iron. Remove from pan with slotted spoon. Check how much fat is left in the skillet, if necessary add a bit of olive oil---you want to have about 2 TBSP.
2. Sprinkle scallops on both sides with salt and pepper. Cook from 3 to 5 minutes total, (turning once) depending on size. Remove from pan and cover with foil.
3. Add OJ and vermouth to pan, and reduce to about 6 TBSP. Whisk in butter.
4. Place scallops on serving platter and sprinkle with asparagus, pancetta, sauce, chives, and cheese. Serve with capellini.
Calabacitas means "little squash" in Spanish. Several different versions exist, depending on the region. You can make it as a side dish or main course----it's also good wrapped in tortillas.
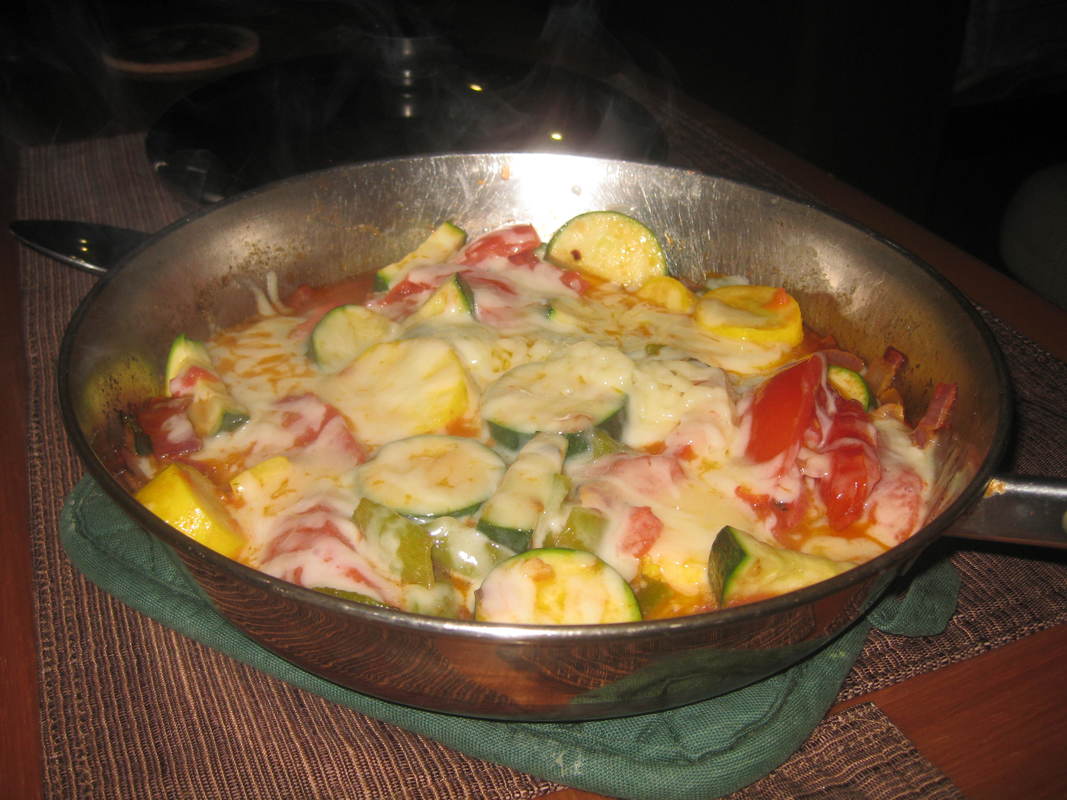
This dish is served a lot in New Mexico, particularly in restaurants in Santa Fe.
It's particularly good in the Spring, when made with baby zucchini and yellow squash that still have their blossoms attached. I'm wondering if making it that way is the genesis of the name, "little squash"?
I made it with zucchini, yellow squash, tomatoes, and anaheim peppers----I also used a ton of dried New Mexico chili (though you can substitute crushed red pepper). It of course uses both cheddar and jack cheeses. There are lots of other seasonings added, such as Mexican oregano and cumin....and getting them just right is key to this dish.
Use the Contact Form for this one!
I'm fairly certain it's impossible to take a decent picture of North Atlantic haddock.....
But I tried anyway, to illustrate this classic recipe for Haddock Amandine. This is a classic French dish that is easy to make in your own kitchen:
Brown some sliced almonds in butter until golden. Set aside. Butter a casserole dish and place fish filet in it. Combine 1 part lemon juice with 2 parts butter, brush over fish. Season with salt and freshly ground pepper. Bake in a 350 degree oven until it flakes easily with a fork, about 15-20 minutes. Remove from oven and sprinkle with the almonds. Add more lemon juice to taste-----or some places in Paris instead brown a bit of minced garlic in butter, though I prefer instead a bit of chopped fresh parsley.
Brown some sliced almonds in butter until golden. Set aside. Butter a casserole dish and place fish filet in it. Combine 1 part lemon juice with 2 parts butter, brush over fish. Season with salt and freshly ground pepper. Bake in a 350 degree oven until it flakes easily with a fork, about 15-20 minutes. Remove from oven and sprinkle with the almonds. Add more lemon juice to taste-----or some places in Paris instead brown a bit of minced garlic in butter, though I prefer instead a bit of chopped fresh parsley.
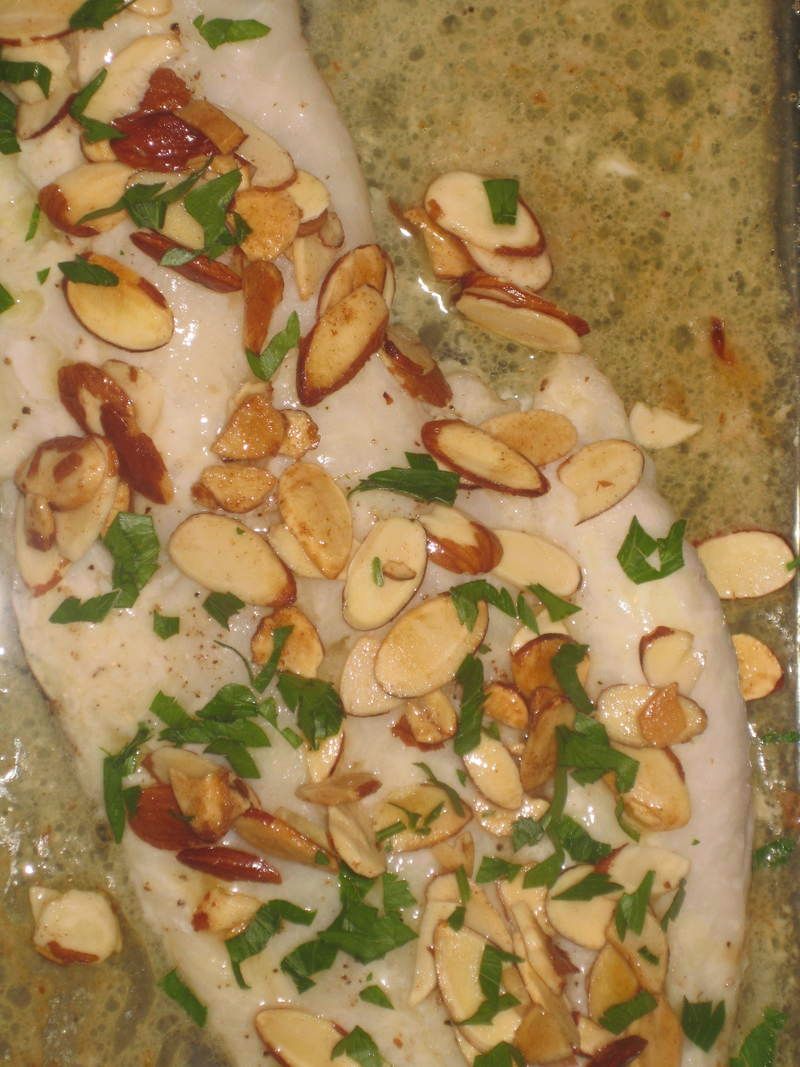
Blond pizza-------got 15 minutes? It's almost too easy.

Did someone say "alfredo sauce"? And....uh....."bacon"? I'll be right there.
You can make this the hard way or the easy way. In this case I did it the easy way, because I was pressed for time. But you have to admit, It's pretty amazing that with 15 minutes of active time, you can have this amazing dish on the table and save at least ten bucks compared to a pizza parlour.
Here's how to do it, and what you need:
Pizza dough (your own or refrigerated)
1/3 cup Alfredo sauce ( your own or......well, you know!)
4 chopped scallions
3 cloves garlic, minced
1 1/2 cups baby spinach
1 1/2 cups shredded mozzarella
1/2 cup cooked chopped bacon
DO I really need to explain this? Stretch out the pizza dough, cover it with the sauce and then the rest of the toppings.
Bake it at your highest oven temp for 10-15 minutes, depending on how high you can get your oven temp.
Voila!!!!!!
I was just feeling silly, so made these "flowers and bees". Not one of my better efforts, though my friends loved them
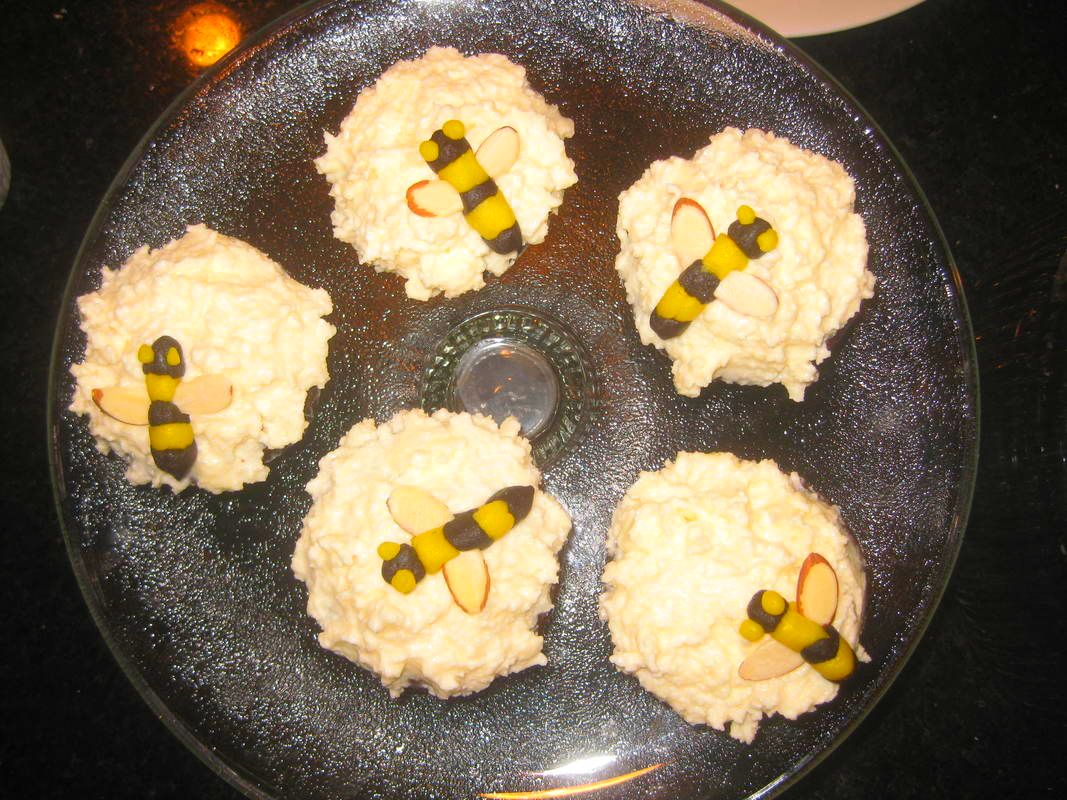
I'm still having fun experimenting with Americolor's Nifty Fifty, so used the black and the lemon-yellow to dye marzipan. I had a blast making them, but wasn't pleased with the result.
But so what if they came out wonky?? The point is to have fun!!!!!!
But so what if they came out wonky?? The point is to have fun!!!!!!
Natchitoches, Louisiana is justly famous for its meat pies.
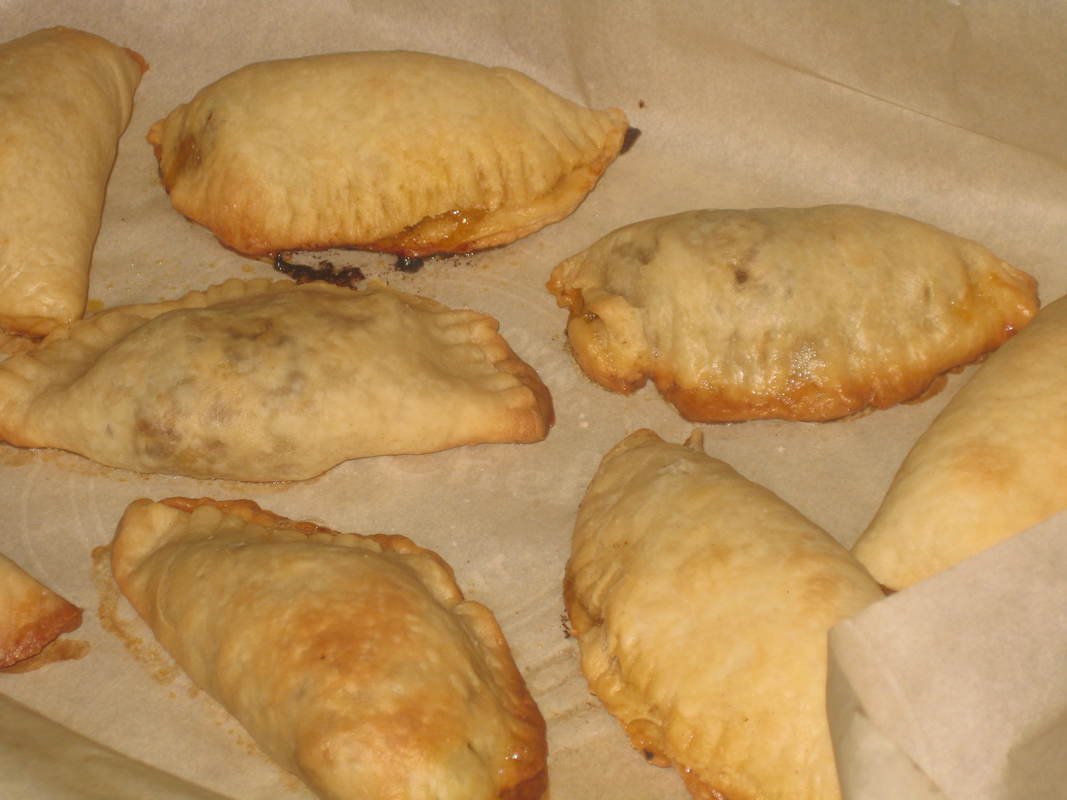
Food & Wine has a good hand-pie version that uses all the spices you'd expect.....coriander, cloves, allspice, etc....in a traditional filling. I served these as they suggested, with a dipping sauce that combined two essential southern ingredients-----buttermilk and hot sauce.
They're truly authentic tasting, as either an appetizer or main course. Find the recipe here!
www.foodandwine.com/recipes/natchitoches-meat-pies-spicy-buttermilk-dip
They're truly authentic tasting, as either an appetizer or main course. Find the recipe here!
www.foodandwine.com/recipes/natchitoches-meat-pies-spicy-buttermilk-dip
Marbled Rhubarb Orange Bread---so good I won a baking contest with it!
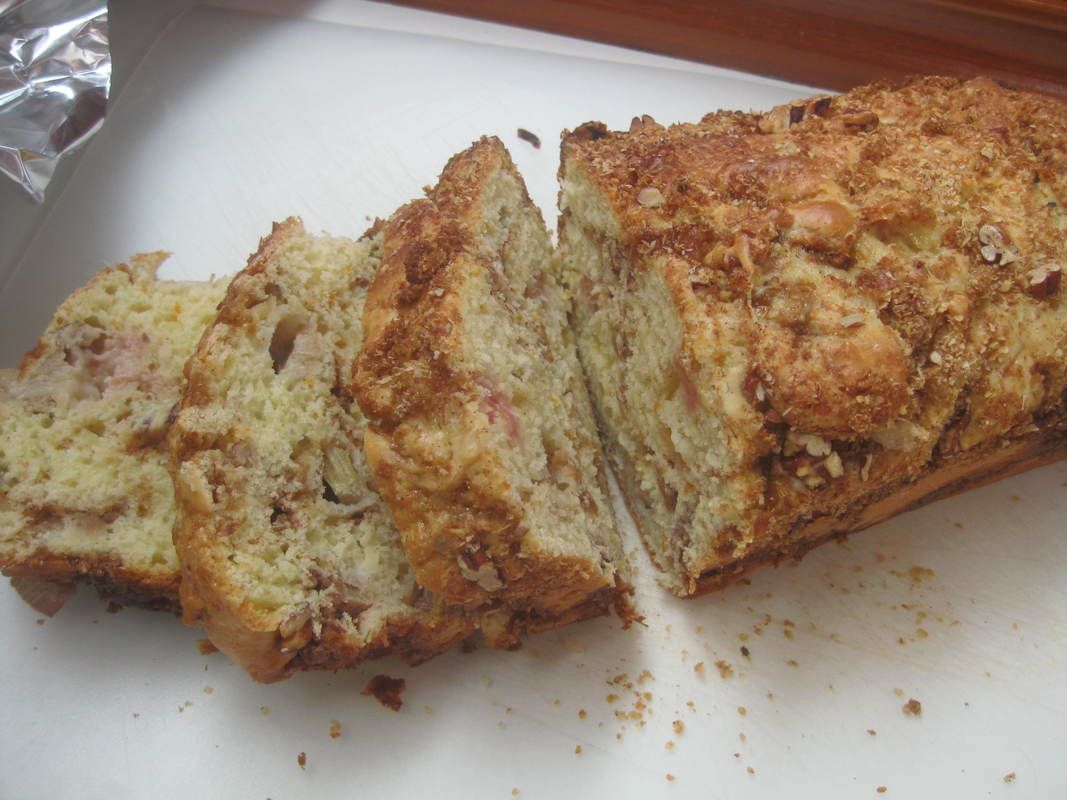
There is a country fair tradition in Maine, particularly in the Fall. Most fairs have livestock contests aimed at kids and teenagers, and there are almost always baking contests that attract the adults. I thought it would be fun to try my skills against other bakers, and to my astonishment I won the blue ribbon over 44 others!
I had been at the farmers' market in Portland a few days beforehand and was surprised to find rhubarb, which of course is a spring crop. But the farmer I bought it from said that he plants what amounts to a "second picking" for harvest in September, so I bought some. I hadn't decided before that on what I would bake for the contest, but when I found the rhubarb it was easy to make up my mind.
This quick bread has a steusel-like swirl of cinnamon and sugar, along with jewel-like flecks of rhubarb. There's a slight twist of orange. It all comes together beautifully.
Use the Contact Form for my [never thought I'd be able to say this] Award Winning Recipe!!!!
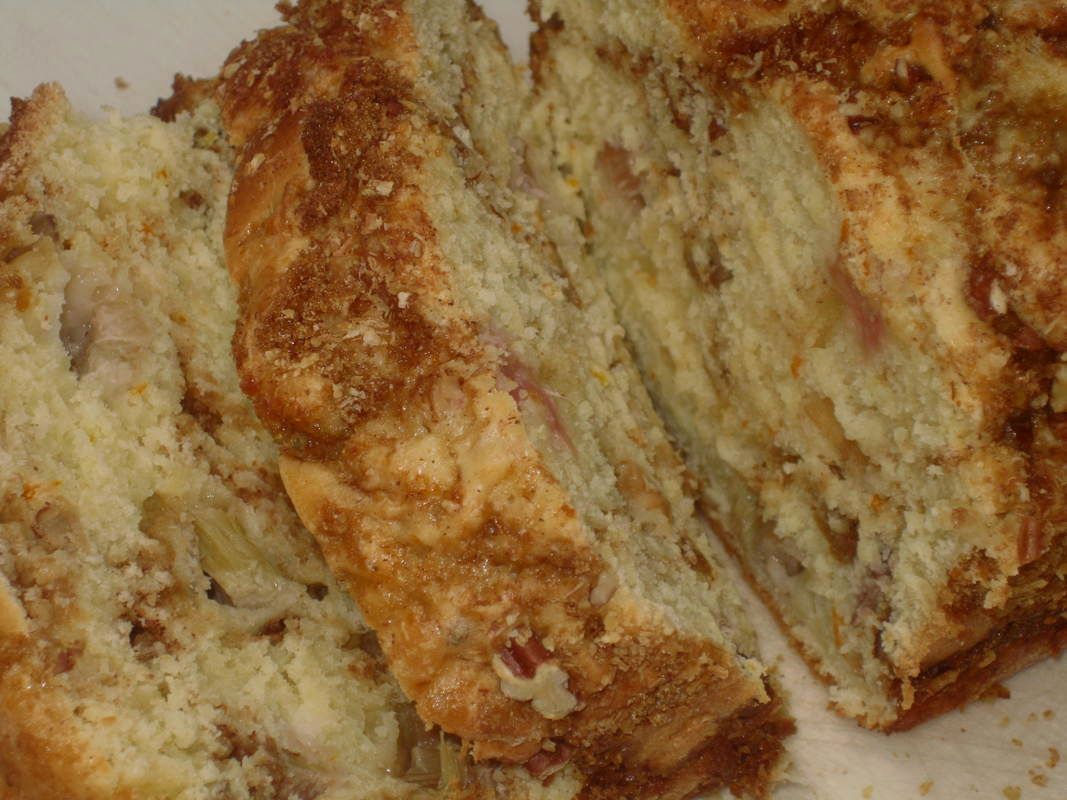
On some level, it's easier to make a healthy calzone than a healthy pizza. Neither one is exactly like eating a salad, but there is something about stuffing a calzone that is better than pizza.
For example, I stuffed these with some leftover chicken, sun-dried tomatoes (the oil-packed kind), kalamata olives, and fresh basil leaves. Just put all this in your best pizza dough, and bake. An easy, practically instant dinner. It's not pizza but it's delicious.
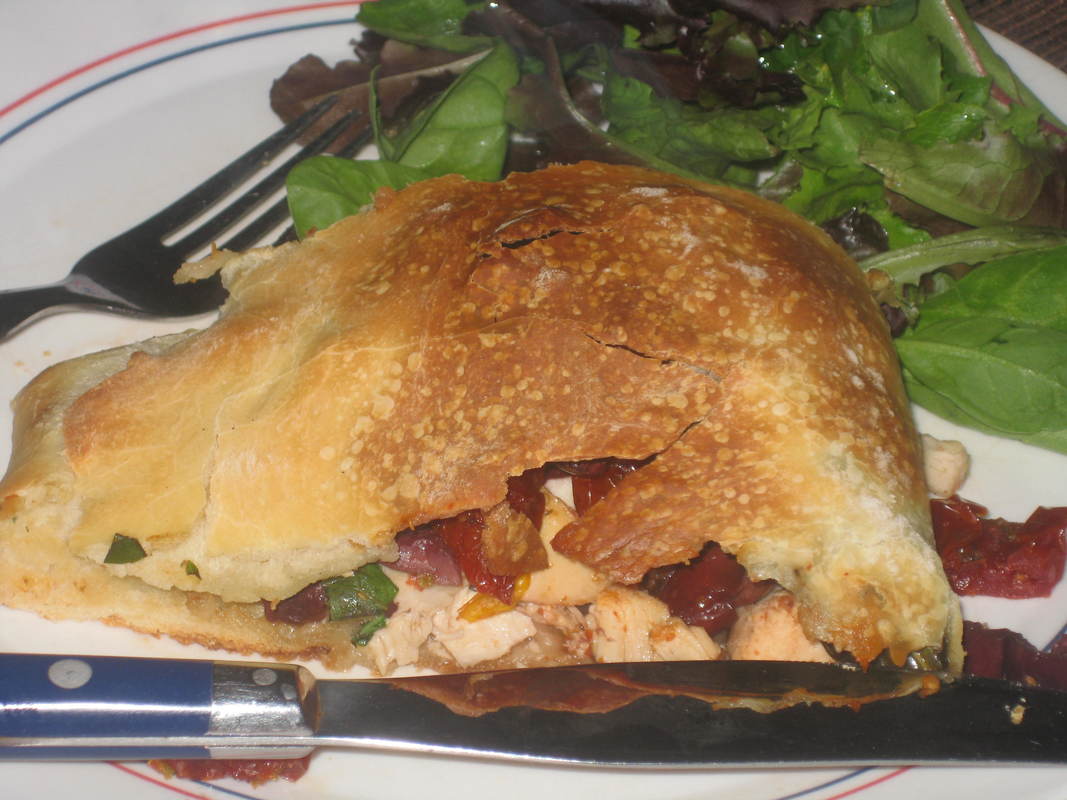
I'm thinking about my home in Paris, as I get ready to go next week.
I'm just crazy about food shopping there at the nearby markets, one of which is a butcher named Arnaud Nicolas.
The guy is a real virtuoso of charcuterie. I recently came across a recipe in Food & Wine, which the magazine says is one of Nicolas's own.
I've eaten at his small restaurant on the Right Bank-----it's a bit of a trek to the 7th arrondissement from my home in the 4th, but worth the trip. If you are in Paris and in the mood for meat or poultry (especially duck) his is the place to go. Plan early and make a reservation----they aren't that easy to get.
I tried the recipe Food & Wine published, and it was OUTSTANDING!!!! Called "Pork Pies with Pine Nuts with Dried Fruit", it was indeed the perfect ratio of protein to fat, and "studded with jewel-like nubs of pistachio, cherry, and apricot".
This was just incredibly delicious. However I can't say it's too beauteous, but one bite and you won't care. You gotta make these!
https://www.foodandwine.com/recipes/pork-pies-pine-nuts-and-dried-fruit
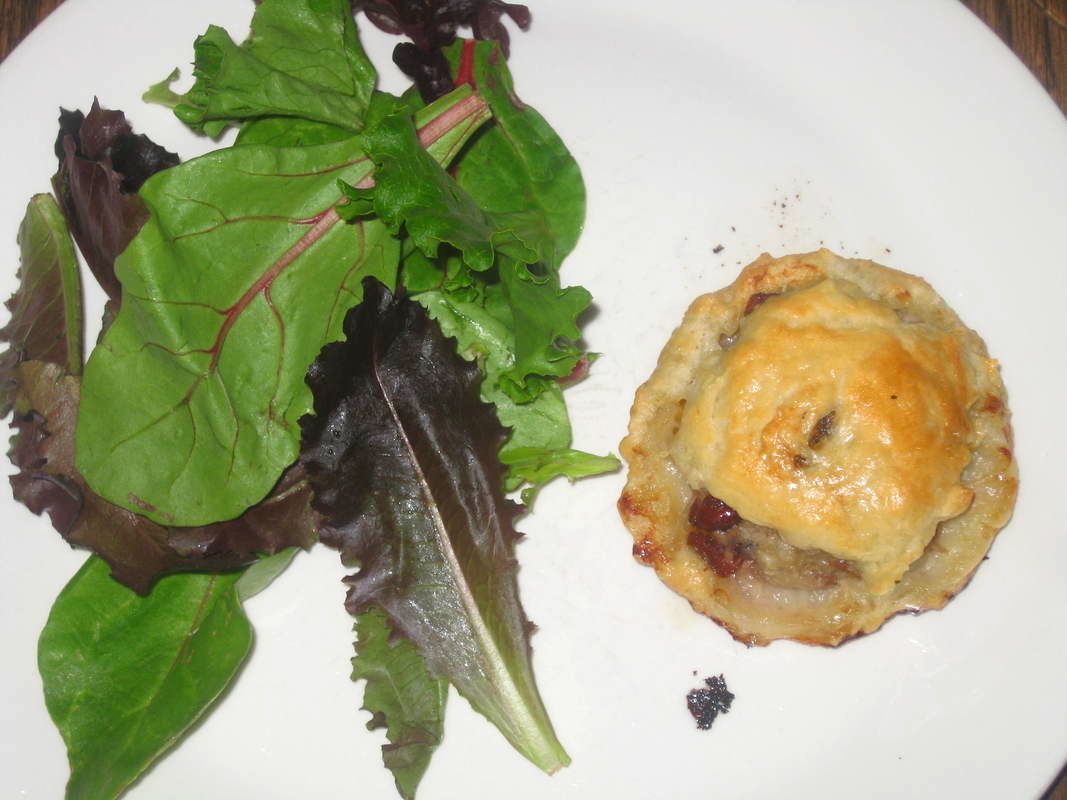
Only those of a certain age will recognize what this is

You might say, "My grandmother had one of those". This, Dear Reader, is what was used before food processors were invented to grind meat at home. Old fashioned kitchen gadgets can be fun to use once in a while----though you won't see me giving up my Cuisinart any time soon!
After that brief digression, here's a look at today's dessert. This is an extraordinary pie made with plenty of Kahlua-----so it's not for the kids. But it makes a lovely presentation with its candied violets, mimosa, fresh mint, and marzipan fruits.
Believe it or not, it's easy to make! Use the Contact Form for this one-------you'll need step-by-step directions
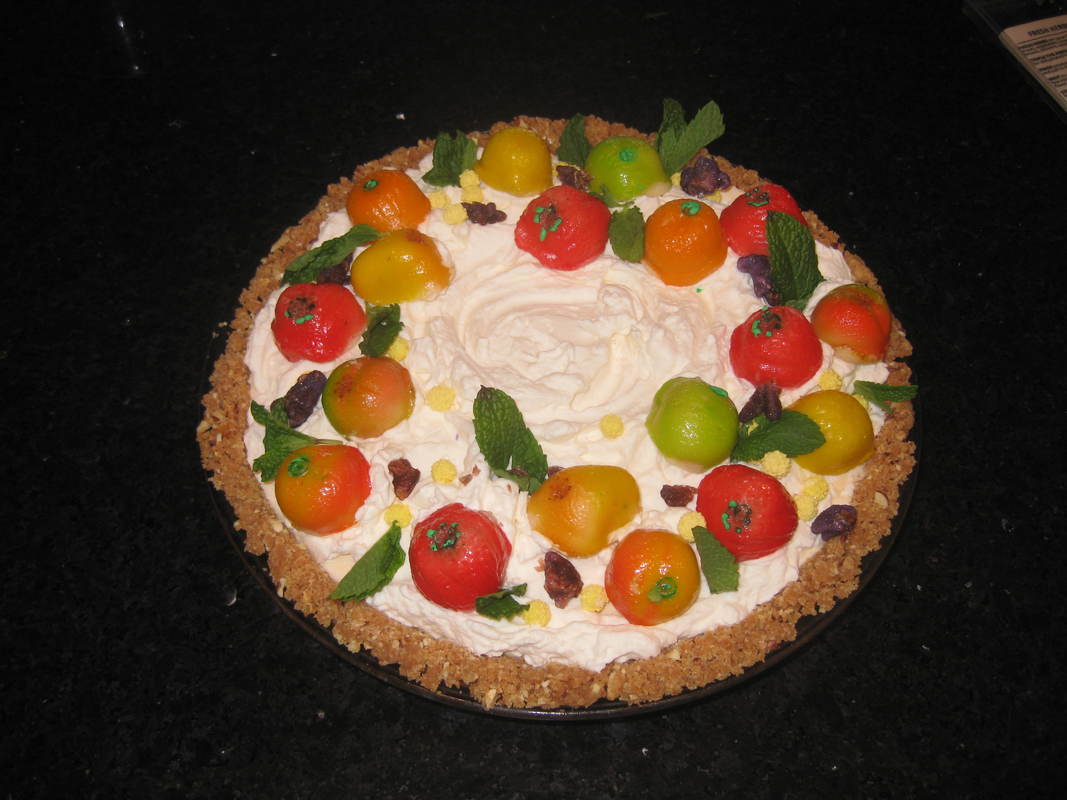
Cook's Illustrated calls these "The Perfect Chocolate Chip Cookie". They weren't kidding.
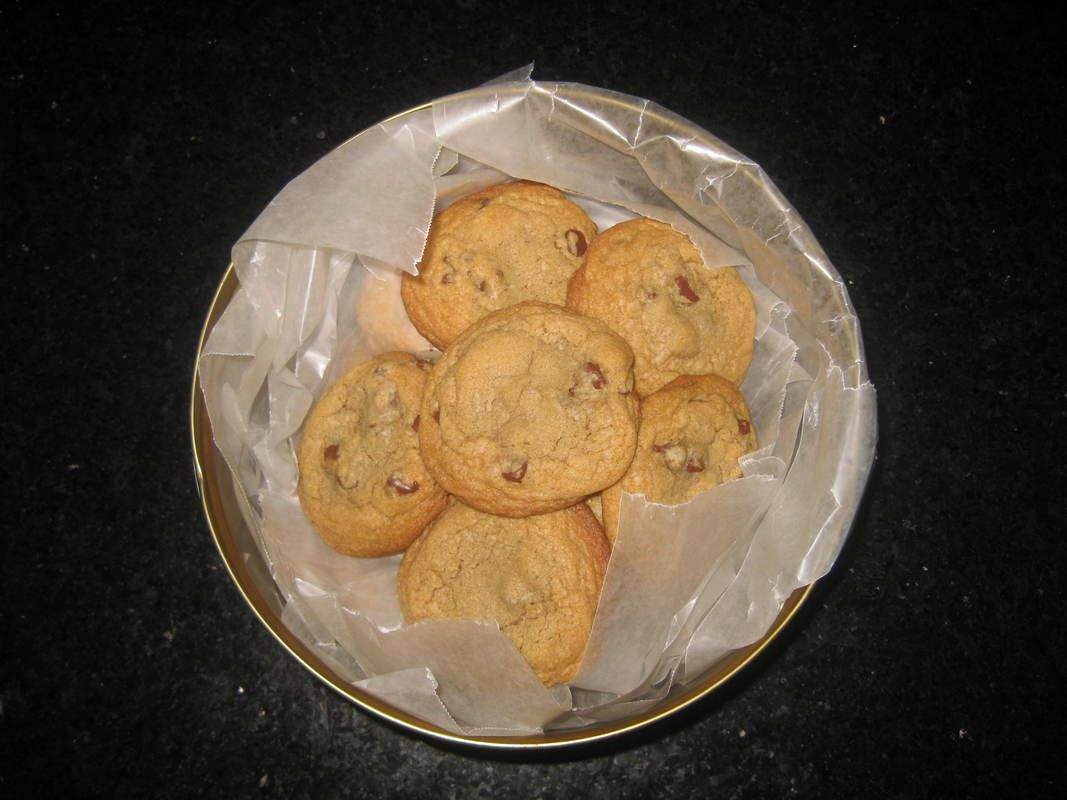
Crispy on the outside, chewy on the inside. These really nail it. My only regret is that I didn't double the recipe. Use this link for the recipe.
theapronarchives.com/2011/05/08/americas-test-kitchen..
theapronarchives.com/2011/05/08/americas-test-kitchen..
A vegan dinner for Autumn: Acorn Squash with Apples, Spices, Dried Cherries, and Pepitas
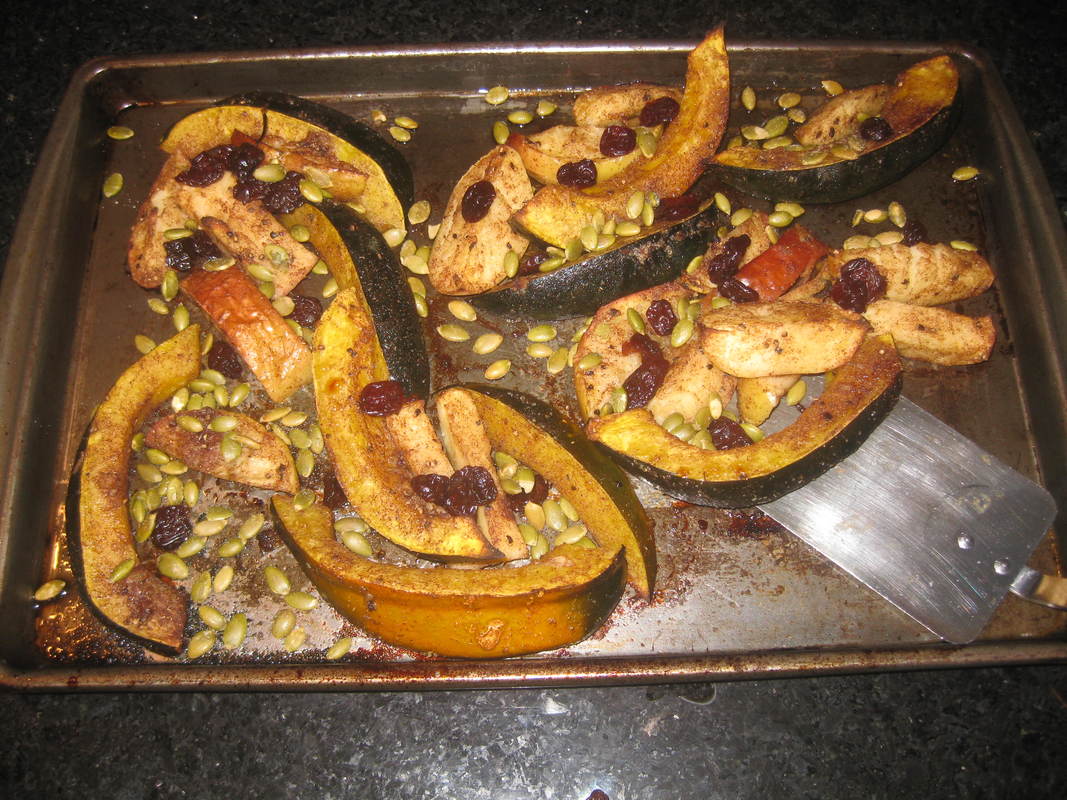
This absolutely delicious dish is a perfect, easy Fall supper---perhaps round it out with a green salad or long-grain rice on the side. It will even please any vegan friends who happen to be hanging around!
The only real work here is cutting the squash. Always be careful when cutting winter squashes! Good knives are a cook's best investment----make sure to keep yours sharp, and they will last a lifetime and actually keep you safer. A dull knife is actually hazardous to use.
You will need:
Cooking spray
an acorn squash (about 1 1/2 lbs)
2 crisp apples (use a type that holds it's shape when cooked; e.g. braeburn or winesap)
3 TBSP EVOO
3/4 tsp cinnamon
1/2 tsp allspice
1/2 tsp coriander
1/2 tsp salt
1/2 tsp pepper
1/4 cup dried cherries
1/4 cup pepitas
Spray a baking pan with cooking spray. Cut squash and apples into wedges.
Whisk together oil and spices. Toss with the squash and apples. Bake at 425 degrees for 25-30 minutes.
Remove from oven and toss with cherries and pepitas.
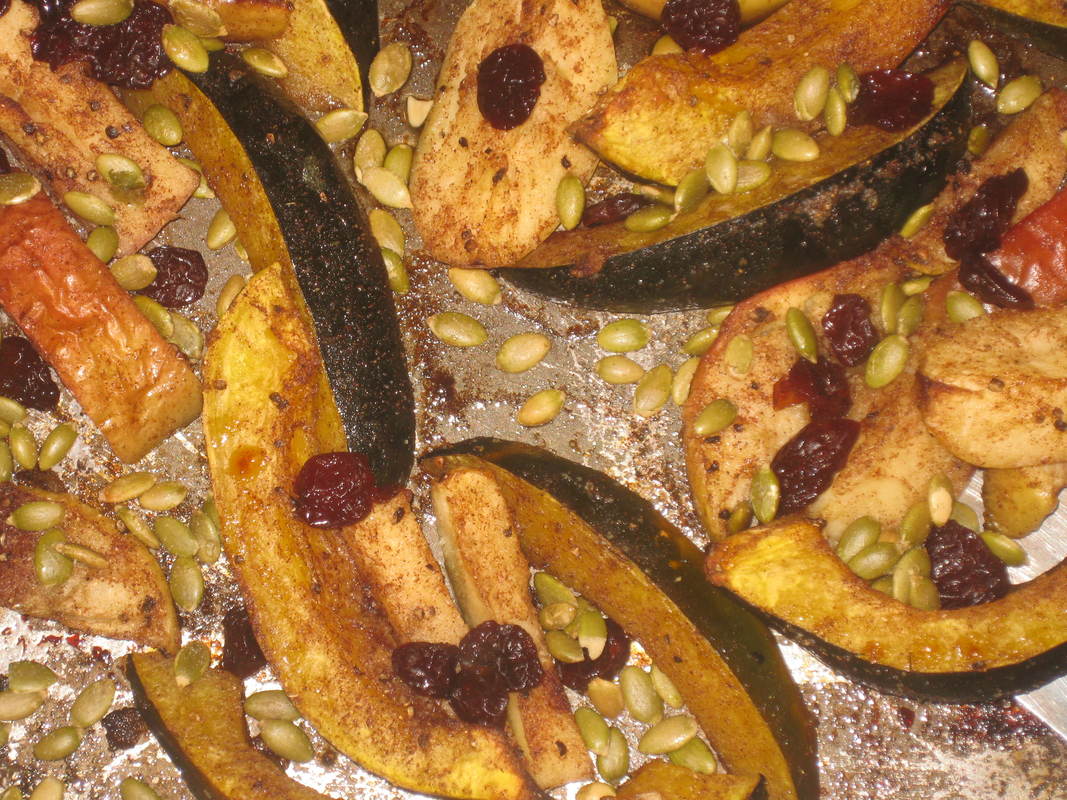
I just love these rich recipes from the U.S. South. Pimiento cheese is a "thing" down there, and it makes an incredible mac & cheese. And the use of cavatappi is a master stroke.
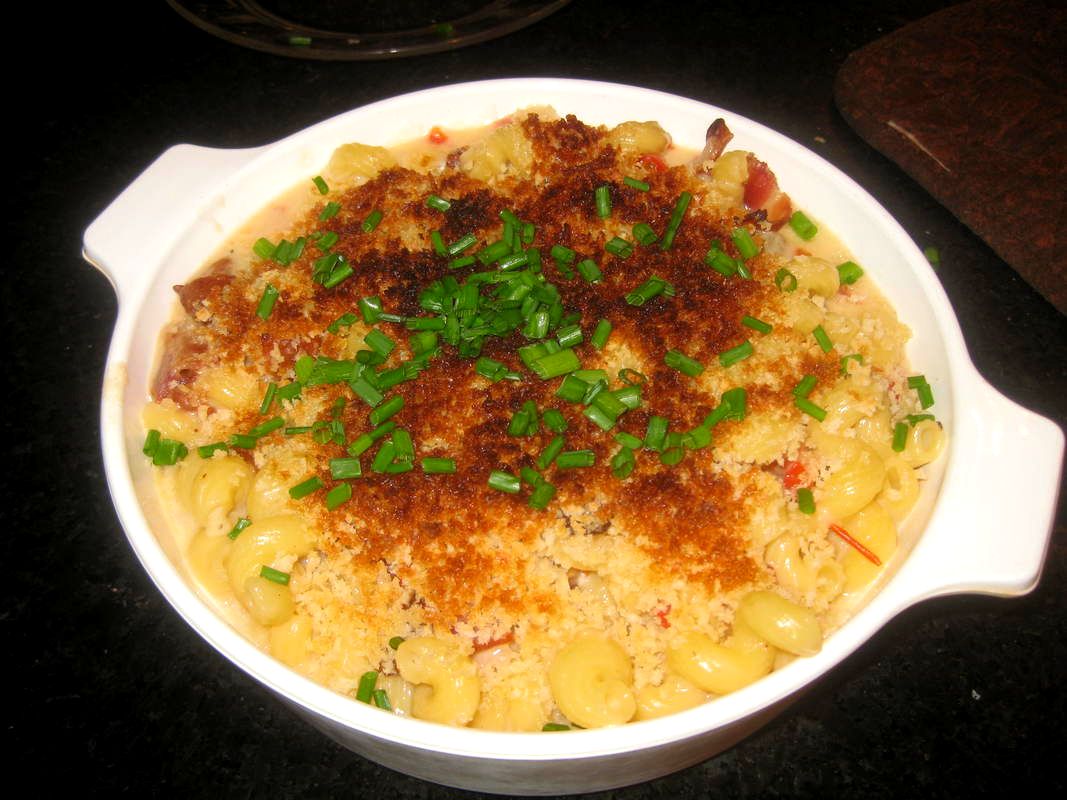
Here's what Southern Living Magazine says about this delicious dish:
"Mouths will water when you bring this deliciously creamy mac and cheese to the table. This recipe combines extra-sharp cheddar, pimientos, bacon, cavatappi, hot sauce, and panko. Southern pimiento mac and cheese will please guests of all ages, and is a warm, filling entree for cool winter nights".
I cut the recipe back to serve just us three. The recipe is available at https://www.southernliving.com/pasta/types/southern-pimiento-mac-and-cheese-video
Good hot or cold, these little bites of fried chicken are perfect for tailgating or an easy dinner. They taste absolutely super with some blue cheese dressing on the side for dipping. Just remember to start marinating them the day before!
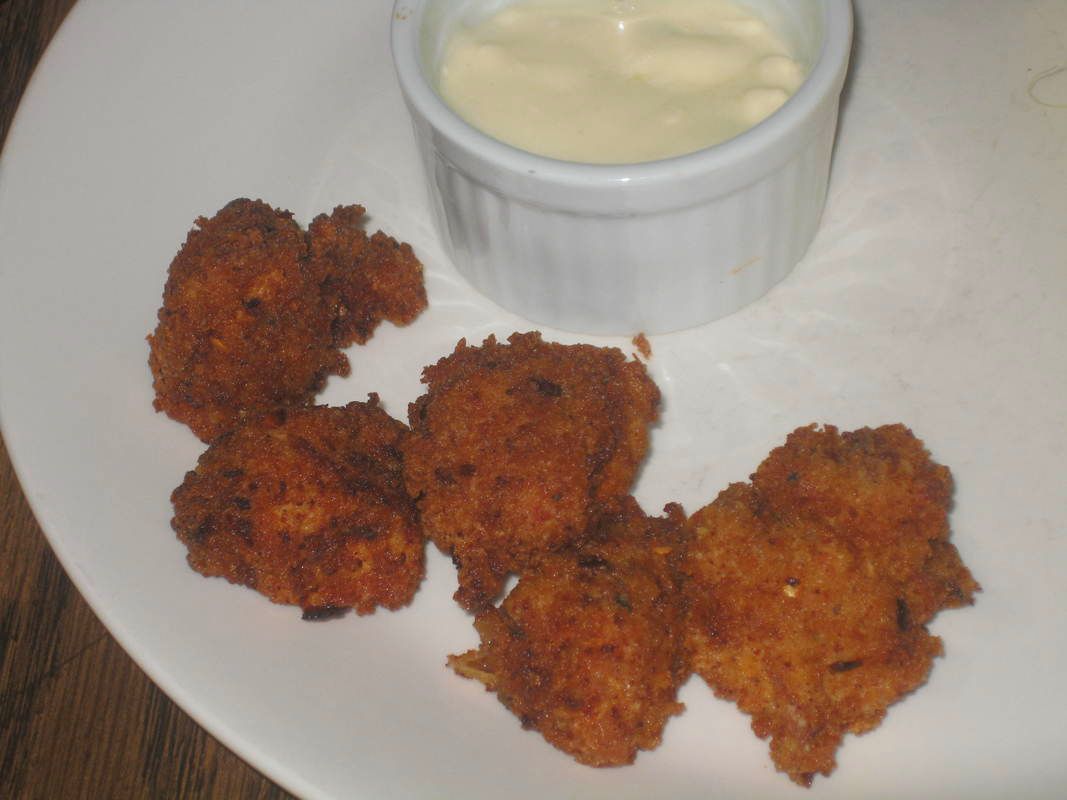
Around here I can by strips of chicken sold as "chicken tenders", which makes this recipe a real breeze because they are so simple to cut up. Of course you can can cut up a regular boneless bosom o' chicken, or even boneless thighs if you prefer.
Stir the following together:
1 tsp cayenne
3/4 tsp chipotle chili powder (available in the spice aisle)
3/4 tsp garlic powder
3/4 tsp crushed red pepper flakes
3/4 tsp ground black pepper
3/8 tsp salt
1/4 tsp paprika.
Set aside half of mixture for cooking the chicken (tomorrow!)
Add the other half of the spice mixture to:
1 cup buttermilk
Then add cut-up boneless chicken (a pound or so), shake around to coat, and refrigerate overnight in a zip-lock bag or in a covered bowl.
The following day, put 1 to 1 1/2 slices of toasted bread (depending on size) into your food processor. Add the reserved spice mixture, along with 1/2 cup flour. Drain chicken from the buttermilk mixture (discard buttermilk mixture) and dredge in the bread/flour/spice mixture. Deep fry in oil at 350 until done (around 10 minutes). Serve with blue cheese dressing.
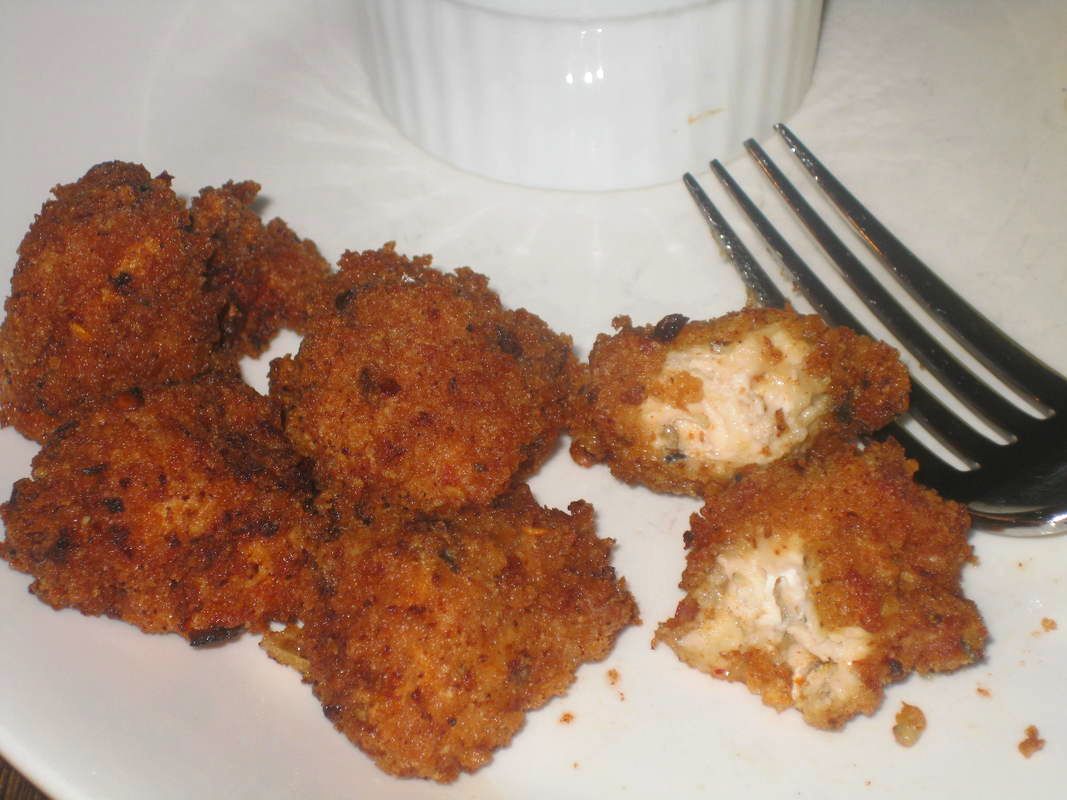
Scallops seared to perfection------crusty brown on the outside, tender and slightly raw on the inside.
Filets mignon that are so tender they melt in your mouth.
Simple, incredibly creamy, mashed potatoes.
A cabernet wine sauce redolent of fresh rosemary.
Mmmmmm.......surf and turf, anyone?
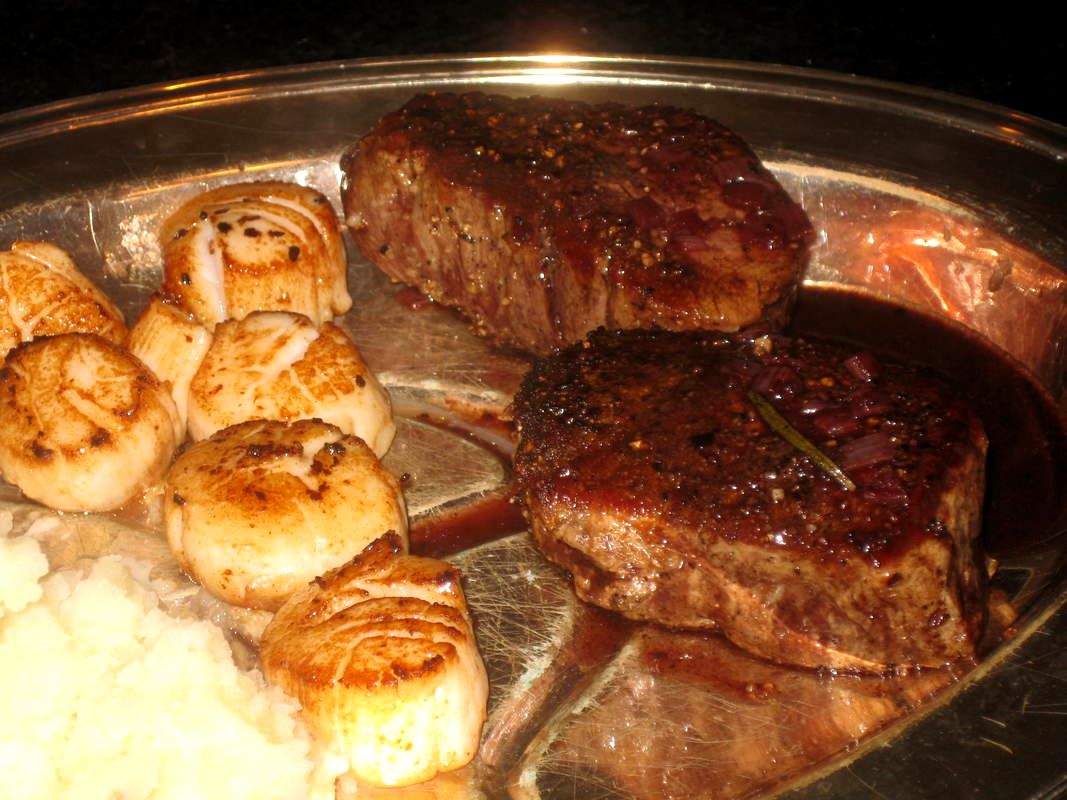
The way to do this isn't complex, but it does involve timing and a deft hand. Timing, timing, timing.
You don't want to overcook either the meat or the scallops-----maybe particularly not the scallops, which take a grand total of about 3 minutes. But the pan must be blazing hot, so that the scallops sear on the outside very quickly. With a slower heat, the scallops will cook through too much------and for that matter, never develop that bit of outside char.
And for that matter, ALWAYS USE "DRY" SCALLOPS!!!!!! Other scallops are preserved in sodium tripolyphosphate. This not only takes away some of the pure flavour (I find the taste a bit soapy), but the scallops will never get that sear that you want on the outside.
Use the Contact Form if you are a novice and need complete and extremely specific directions. I'm happy to provide this.
For my regular Cook's Corner readers, here's how to think about the process:
1. Get the mashed taters going. For two people, you really only need one big russet------this is a very rich dinner, so you don't need a ton of mashed potatoes. Cook the cut-up russet until very tender, then add a couple TBSP butter, about 1 TBSP milk, and salt. Mash it together when the potato is done-----it can be covered and set aside if you get this done too early. But try to time it!
2. While the potato water is heating, rub the steaks with a simple rub-----kosher salt, black peppercorns (lots!), fennel seed, dry minced onion, and even a tiny bit of hot pepper flakes works well. I generally put all this together in my spice grinder, but a mortar and pestle works too. Then rub them with olive oil. The outside of the steaks needs to be very oily so that the filets will quickly develop a nice brown crust, while staying tender on the inside (like the scallops, right?????).
3. So cook the steaks, in a cast iron skillet over high heat with a bit of butter that is slightly burning. Quick, quick, quick------about 2 minutes. Then flip them over and put the skillet into your preheated 400 degree oven. They'll take about 8 minutes (for 2-inch-thick filets to medium rare). Take them out and cover them with foil to rest. You know not to cut into a just-cooked steak, right?
4. Now life gets complicated. Take that steak pan and make a classic red wine sauce. This should involve several sprigs of fresh rosemary. Generally I first saute a minced shallot, then add garlic and the rosemary sprigs, along with a half cup of cabernet. Reduce this. Then add about a cup of rich beef broth. Cook to reduce, reduce, reduce. Add a bit of butter at the end and whisk to give you that creamy consistency.
5. Meanwhile, in another pan, melt a couple TBSP butter. Heat to BLAZING hot. Add scallops and cook about 90 seconds per side.
6. Serve to you and your loved one, or be a glutton and eat it all yourself. Either way, believe you have achieved cooking Nirvana.
Bright sunflower cupcakes for a rainy day:
These sunflower cupcakes feature actual chocolate-covered sunflower seeds!
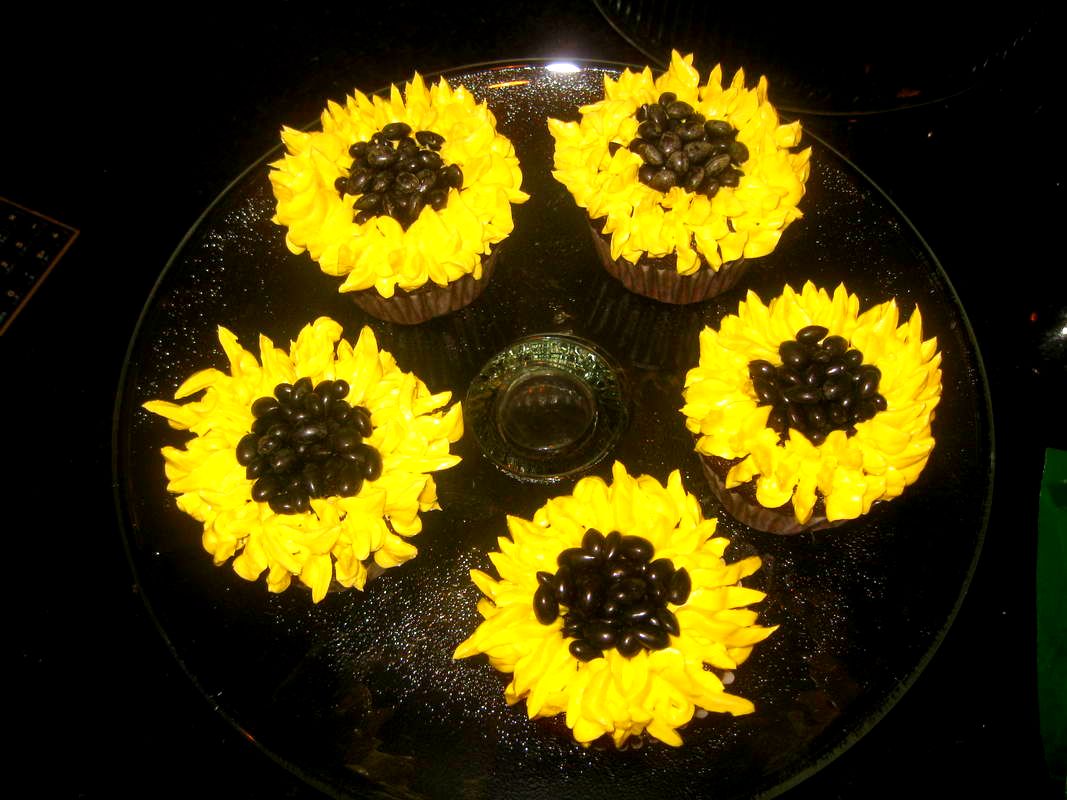
Soft gel paste food colouring is far superior to the liquid type. It has colour strength greater than other types, and won't weep or harden.
Because I do a lot of baking, I actually have Americolor's "Nifty Fifty", which is just amazing fun to use. It's available on Amazon.
These sunflowers are simple to make with the cupcake flavour of your choice, and a good Swiss meringue buttercream icing. I used a leaf-tip to make the petals. So bright and cheerful on this dull day!
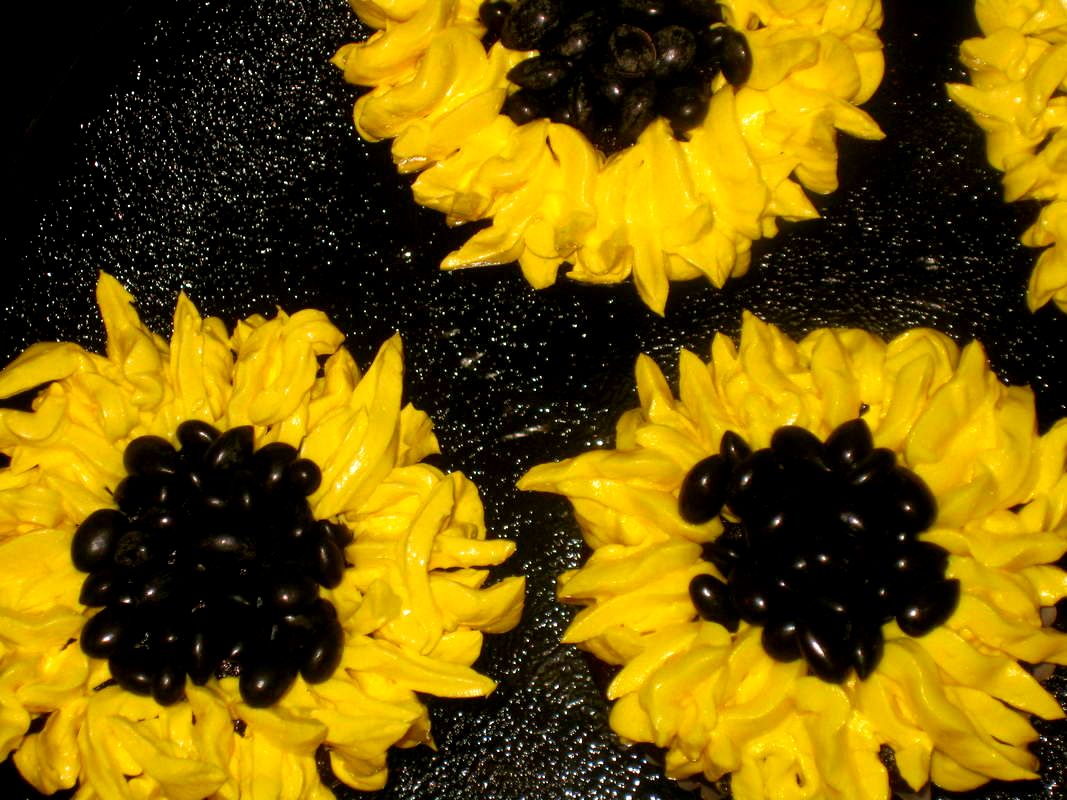
In season right now: Stuffed Eggplant Parmesan
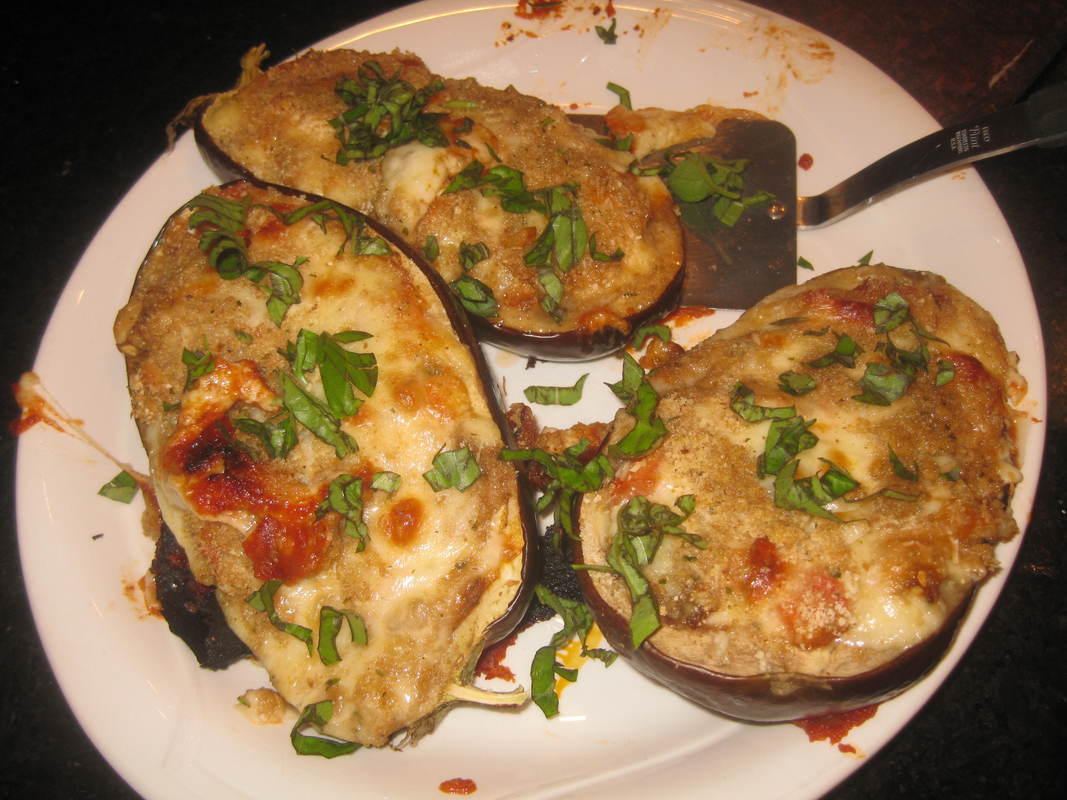
We are getting wonderful local aubergines (eggplants, for my U.S. readers) right now before the first frost. They tend to be a bit smaller than the caveman-perfect clubs that we get over the winter. Stuffing them is a much easier way to make eggplant parmesan than the usual labour-intensive method of slicing, breading, and frying.
This is also good for using up some of that overabundance of basil!
You will need:
2 medium aubergine
jarred or homemade marinara sauce
1 TBSP EVOO
2 cloves garlic
1 medium onion
1 tsp oregano
1 cup chopped fresh tomatoes
1 egg, beaten
2 1/2 cups mozzarella
1/4 cup parmesan
1/4 cup Italian-style breadcrumbs
kosher salt
fresh basil
fresh ground pepper
1. Spread one cup of marinara over the bottom of a glass baking dish.
2. Halve the aubergines, then scoop out pulp leaving about a 3/8 inch shell. Place shells in prepared dish, and roughly chop the pulp.
3. Heat oil over medium heat and add onion, cooking until translucent. Stir in aubergine pulp and oregano and cook, stirring frequently until golden, about 4 minutes. Add garlic and cook about one minute more.
4. Remove from heat. Stir in tomatoes, 1 cup mozzarella, egg, and remaining 1/2 cup marinara. Season to taste with kosher salt and fresh ground pepper. Scoop into the aubergine shells.
5. Top with remaining mozzarella, bread crumbs, and parmesan. Bake at 350 degree until tender but not falling apart-----about 50 minutes.
6. Top with fresh basil and serve. Delicious!

In season right now: Cauliflower and carrots, for this wonderful savory supper-pie with an easy crouton crust!
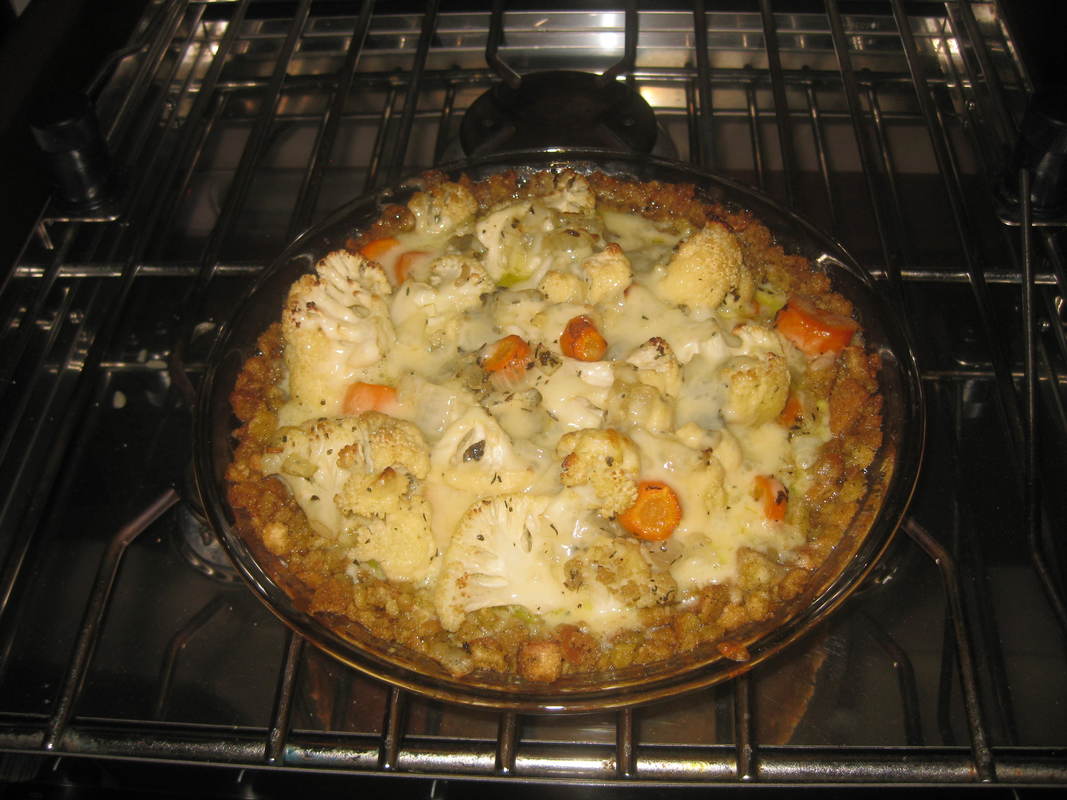
You will need:
For the crust:
2 cups herb-seasoned croutons, crushed
4 TBSP butter, melted
Combine above and press into 9" pie plate. Bake in 375 degree oven for 8-10 minutes, until golden. Set aside.
For the filling:
1 cup chopped onion
1 clove garlic, minced
2 TBSP butter
1/2 tsp dried savory
1/2 tsp dried oregano
1/4 tsp salt
dash pepper
4 cups cauliflower florets
1/2 cup sliced carrot
1/2 cups shredded cheddar, divided
2 eggs, slightly beaten
1/4 cup milk
1. Saute onion and garlic in butter until tender but not brown.
2. Add dried herbs, cauliflower, and carrot. Cover and cook over low heat 10-15 minutes until veggies are crisp-tender.
3. Sprinkle half the cheese (3/4 cup) over prepared crust. Spoon vegetable mixurte over that.
4. Combine eggs and milk, and pour over all.
5. Bake 15 minutes at 375 degrees for 15 minutes. Sprinkle remaining 3/4 cheese over, and continue baking 5 to 10 more minutes until set.
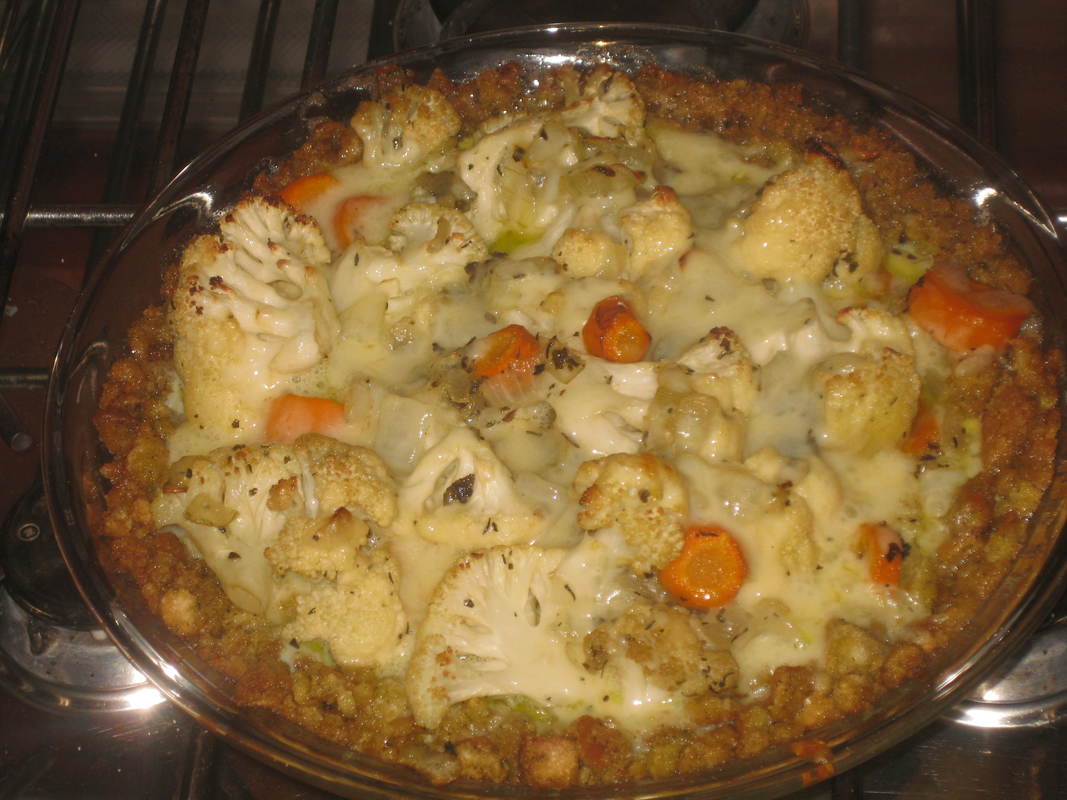
Jing Du Pork-----a popular dish in Chinese restaurants in the U.S.

I've seen this dish made with spare ribs, but pork tenderloin is more traditional. Using tenderloin makes this dish really tender and juicy.
Like many Chinese dishes, this one has a certain symbolism. Red is the good-luck colour in China, symbolizing longevity and prosperity. The fact that the sauce is also sticky symbolizes family cohesiveness.
You will need:
a wok
oil for deep-frying in the wok
a pork tenderloin (3/4 - 1lb.) cut into 1/2" slices
1 egg
1 TBSP cornstarch
1/2 tsp salt
1/2 tsp shao shing
Combine egg, cornstarch, salt, and wine. Toss in sliced pork, and let sit at room temperature for half an hour.
While pork is sitting, combine the following ingredients for sauce:
1 1/2 TSP ketchup
1/2 TBSP plum sauce (NOT "duck sauce")
1/2 TBSP chili sauce
1/4 tsp hoisin
1 TBSP worcestershire sauce
1 1/2 TBSP Chinese black vinegar (Do Not Substitute)
1 1/2 TBSP sugar
2 TBSP water
pinch of five-spice powder
Heat oil in wok and deep-fry pork until crispy, about 5 minutes. Remove and drain on paper towels. Put sauce in wok and heat to a simmer. Place pork in the sauce and heat through
Sprinkle with sesame seeds if desired
Another potato recipe (since it's the season for them in Maine): This time, Salt & Vinegar home fries.
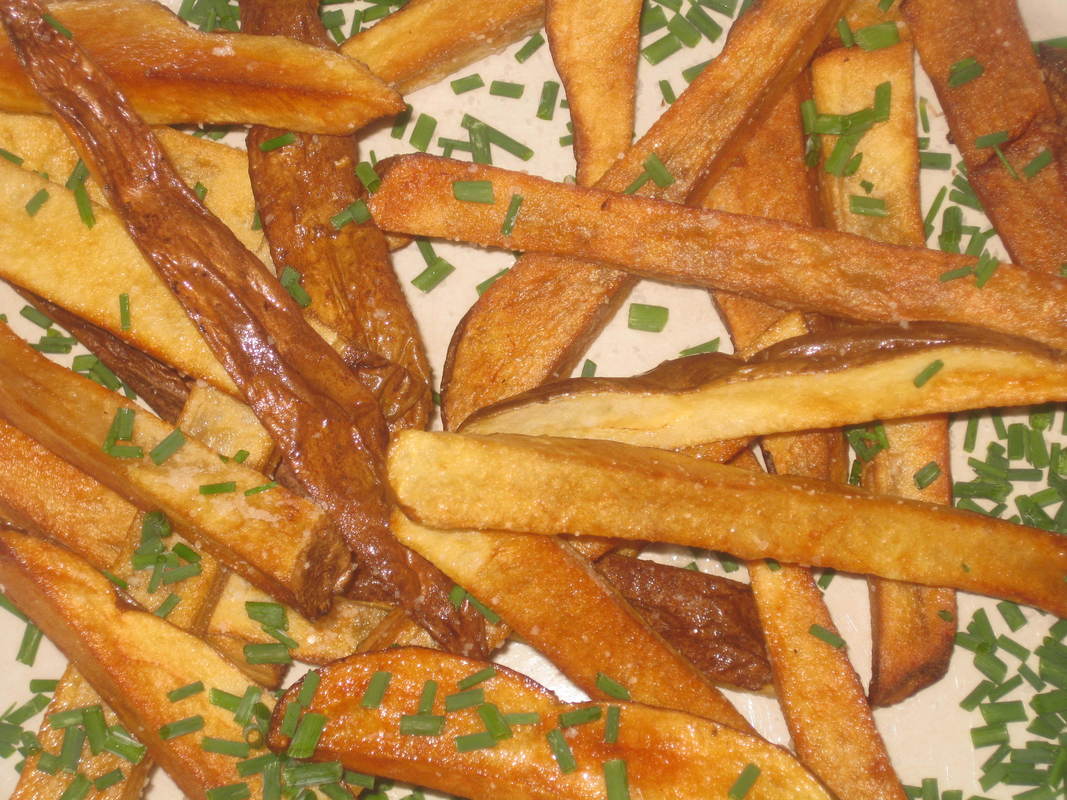
You don't need a deep-fryer for these. Shallow-frying in a cast iron skillet works great.
Combine 3 quarts water, 1 TBSP kosher salt, and 1 cup distilled white vinegar (don't substitute other vinegar). Bring to a boil and add 2 lbs russet potatoes, cut into wedges or sticks. Boil for about 20 minutes, until cooked through but not mush. Drain in colander, and let dry at room temperature for another 20 minutes or so. (if you like a squishier home fry, use the heel of your hand to break them apart slightly and squish them down. I didn't do that for the potatoes in the above photo, because we prefer them a bit more firm).
Heat 1 cup canola oil in a cast iron skillet to 350 degrees. Add potatoes to oil (in batches if necessary) and cook about 5 minutes per side until golden and crispy. Remove from oil and drain on paper towels. Drizzle with another 2 TBSP white vinegar, sprinkle with 1/4 cup chives, and generously sprinkle with 2 tsp kosher salt. Serve right away.
Cute as a button animal cupcakes!

When it comes to cupcakes, I very much like making animal-themed and flower-themed decorations. These little monkeys are a bit more advanced than most as they require a few things you might not have right there in your pantry, such as fondant and gel food colouring (I never use the liquid junk).
Fondant is not necessarily tricky to work with if you remember the key rule----it must be dry, dry dry. Your hands have to be very dry. The work surface has to be very dry. The cupcakes should not be covered too quickly, or the natural moisture in the cake part might melt the fondant.
And as always------NEVER USE A CAKE RECIPE OR REGULAR CAKE BATTER TO MAKE CUPCAKES!!!!!Cupcakes need slight adjustments in ratios in order to be moist and delicious----and to stay that way for a few days.
But otherwise they aren't hard to make, and are really fun. They'll be a big hit, I guarantee you!

Bourbon & Gorgonzola sauce on filet mignon? Yes, Please!!!!!!

You can adjust this sauce to your liking-------thinner (add extra cream), thicker (reduce it longer), or more boozy (add extra bourbon just before serving----the alcohol in the bourbon won't cook off that way).
This sauce is terrific on just about anything. It makes a particularly good dipping sauce for potato skins.
Simply melt 1 TBSP butter in a medium skillet. Add about 1/4 cup red onion, chopped fine, and cook over medium heat until onion is tender-----5 minutes or less. Add 1/2 cup bourbon and cook until reduced by half----about 2 minutes. Add 1 cup heavy cream, and 3/4 cup gorgonzola, crumbled. Add salt and pepper to taste. Cook until thickened to your taste. Add additional bourbon or cream to taste.
Very much "adult" mac and cheese-------made with stout and irish cheddar

This one-pot mac and cheese has adult ingredients, as well as a crunchy, garlicky topping which is so good juxtaposed against the creamy, gooey, melt-in-your-mouth pasta.
1/2 lb elbow macaroni
1 TBSP butter
1 TBSP flour
1/3 cup Extra Stout
3/4 cup milk
1/4 cup half-and-half
1/4 tsp salt
1/8 tsp ground pepper
1 1/2 tsp Dijon mustard
1 oz cream cheese
1 3/4 cups shredded aged cheddar (English or irish)
1. Boil pasta in salted water according to package directions until just barely al dente. Drain, saving some of the pasta water.
2. Melt butter in the saucepan. Add flour and cook until raw-flour taste is gone, about 1 minute. Add remaining ingredients except cheeses, and cook until sauce begins to thicken. Add cheeses, stirring until melted.
3. Add cooked pasta and heat through Pour into a serving bowl and top with the garlicky crumbs, prepared as below:
In small skillet melt 1 1/2 tsp butter. Add 1/4 cup panko and a small clove of garlic, minced. Cook until breadcrumbs are golden. Add salt and pepper to taste, and about 1 tsp fresh parsley, minced.
Coffee bread-------don't let the looks of this one deceive you! It's very sweet and good, in spite of being made from whole wheat flour!!

The secret is to sweeten the dough.
Combine 1 cup whole wheat flour with 1 package dry yeast. Gently warm 5/8 cup milk (10 TBSP), 1/4 cup sugar, 1/4 cup butter, and 1 tsp salt until just warm (115 degrees). Add to dry ingredients along with 2 TBSP beaten egg. Knead until smooth, and let rise until doubled. Punch down.
Roll dough into a rectangle of about 14 by 10 inches. Place rectangle on greased baking sheet. Spread 3/4 cup fruit preserves (any flavour----we like red currant) down center of rectangle. Bring the two sides of the dough up and over filling, overlapping edges. moisten edges and seal. Diagonally slash dough at 1 1/2 inch intervals. Let rise until doubled.
Bake at 350 degrees for 25 minutes. Let cool. Blend 1/2 cup confectioner's sugar with just enough milk to make a drizzling consistency, and spoon over loaf.
YUMMY!!!!!
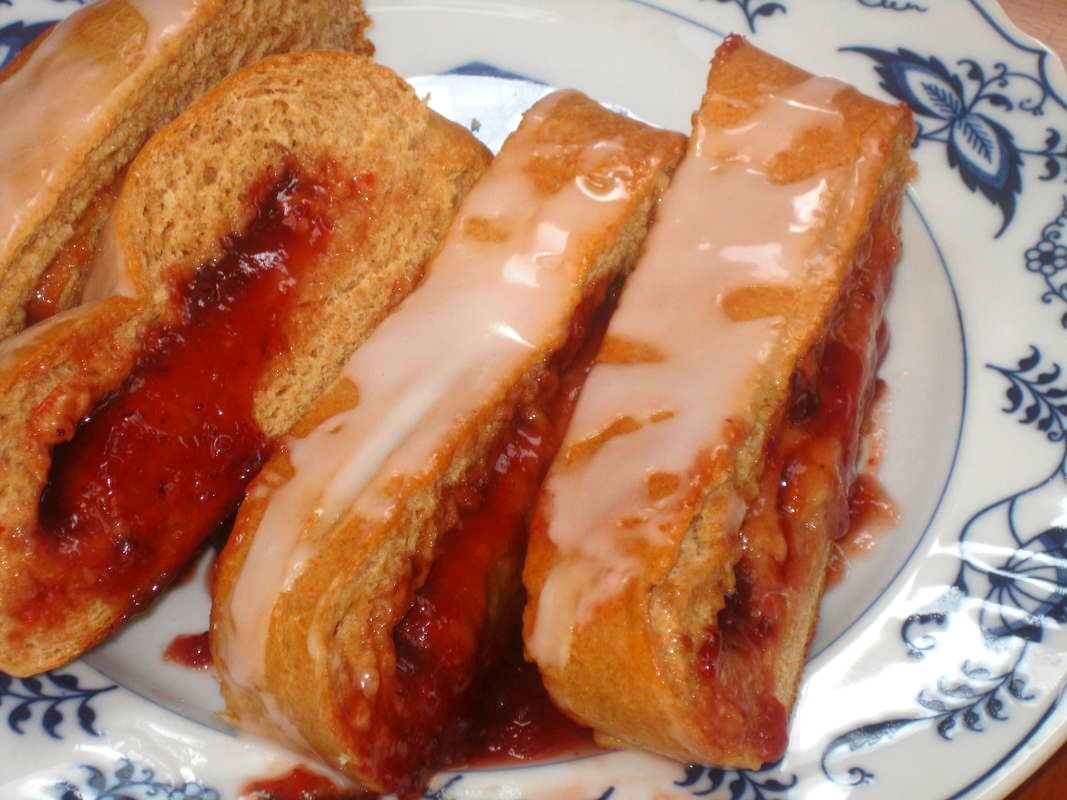
Brussels sprouts.........oh, they gross me out. I love every vegetable in the world-----even okra!!!----but brussels sprouts I cannot abide. I can't even stand the way they smell while cooking.
But then a Roger Bill friend of the McCuskers turned me on to this great recipe last week.

This is amazing, and from the least likely guy from my old college dorm that I would have imagined. So grateful to this former football player for his continual support this web site----and for contributing this recipe!
Use the Contact Form for this unique way of preparing what I used to consider an inedible veggie, and for the name of the Roger Bill chef who created it!
Use the Contact Form for this unique way of preparing what I used to consider an inedible veggie, and for the name of the Roger Bill chef who created it!
These super-quick little Asian chicken meatballs remind me of the yakitori we used to buy from the street vendors in Tokyo
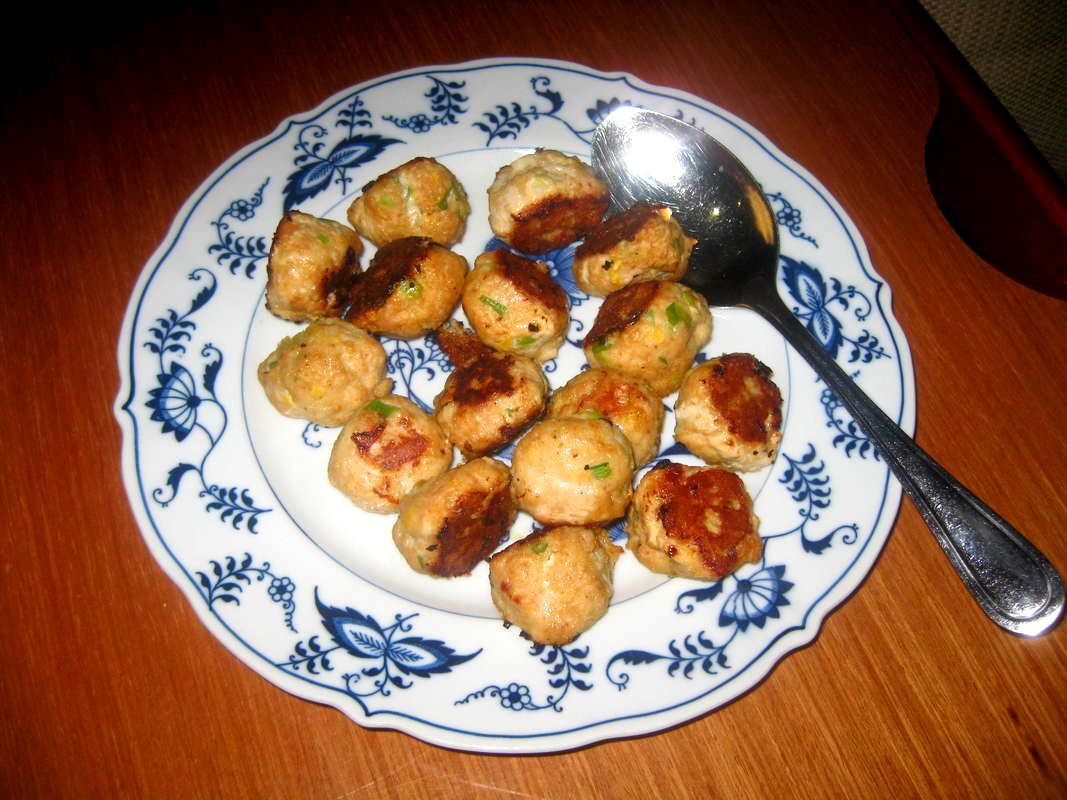
......But these are baked instead of grilled. Rather than being basted with sweet soy, they are served with store-bought Asian chili sauce for dipping. They are just delicious, and so very quick and easy.
1 lb ground chicken
1/2 cup dry bread crumbs
1 egg
1/3 cup minced scallions, plus extra to garnish finished dish
3 TBSP minced fresh ginger
2 garlic cloves, minced
2 tsp sesame oil
2 tsp soy sauce
1/4 tsp kosher salt
canola oil
Asian chili sauce
Paint a jelly-roll pan with canola oil. Preheat oven to 450 degrees. Combine first nine ingredients (chicken through salt) and form into balls. Place on prepared pan, and brush with more oil. Bake for 15 minutes, until cooked through. Serve with chili sauce on the side, for dipping.
This beer-batter-dough pizza would have been great had I not burned half the crust!

Using beer in home-made pizza dough is an inspired idea. But when I decided to put this pizza on the grill, I hadn't realized that the beer would make the crust burn easily.
But we ate around the burned part, and it was fabulous! Use the Contact Form for the easy recipe.
But we ate around the burned part, and it was fabulous! Use the Contact Form for the easy recipe.
Shu Mai are a type of dumpling/dim sum that looks like a little purse that's open at the top. They are always steamed.
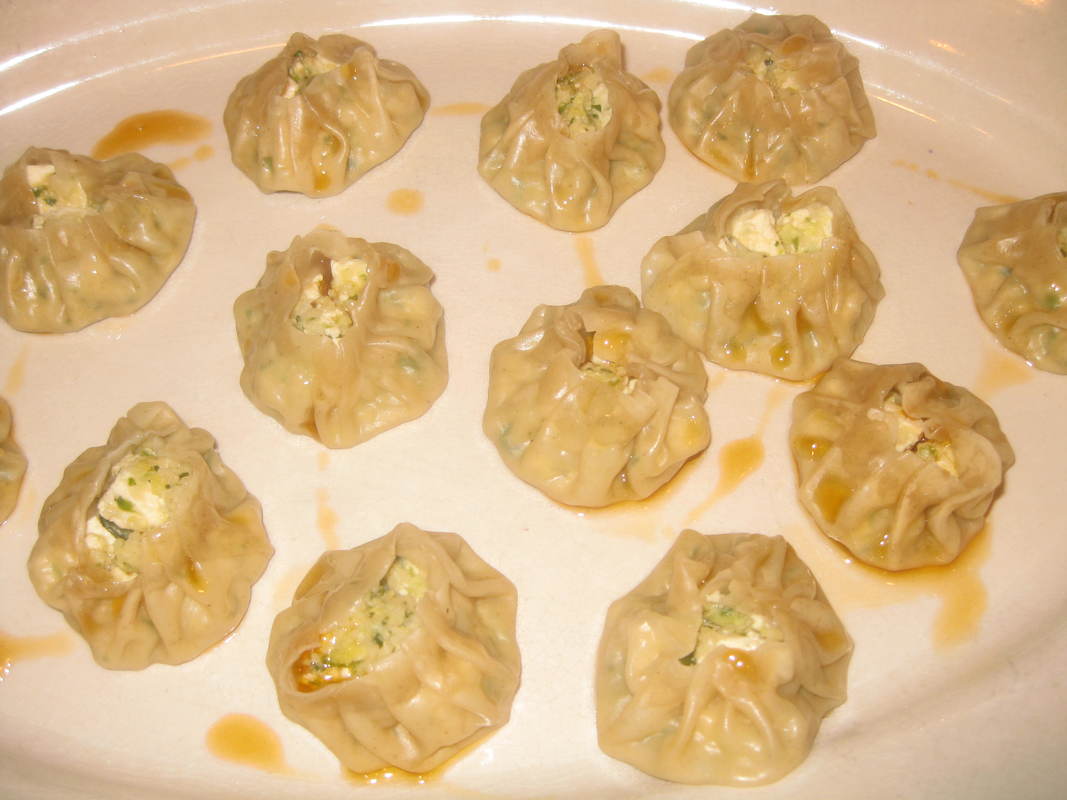
Shu mai can be stuffed with almost anything------shrimp is popular. But we like vegetarian dim sum, so I was intrigued by this recipe that stuffs them with tofu, napa cabbage, and even granny smith apple!
A simple sesame-chili oil is drizzled over them after steaming. Delicious!
Combine 2 TBSP chopped fresh cilantro, 2 scallions, 1 garlic clove, and 1/2 inch fresh peeled ginger in a food processor and process until finely chopped. Add 1 cup sliced napa, 1/2 cup granny smith apple, 1 TBSP soy sauce, 2 tsp mirin, 1/4 tsp kosher salt, 1/4 tsp siracha, and an egg white, and process until combined. Add 6 oz finely chopped extra-firm tofu.
Place about 1 TBSP filling into each of 20 or so gyoza skins. Leave the top slightly open-----this is what distinguishes shu mai! Place in a steamer lined with napa cabbage leaves, and steam for about 10 minutes or until firm.
Remove shu mai to serving platter. Combine 2 tsp sesame oil with 1/2 tsp chili oil and pour over dumplings. Enjoy!
Homemade Cheez-its! A thousand times better than out of the box!
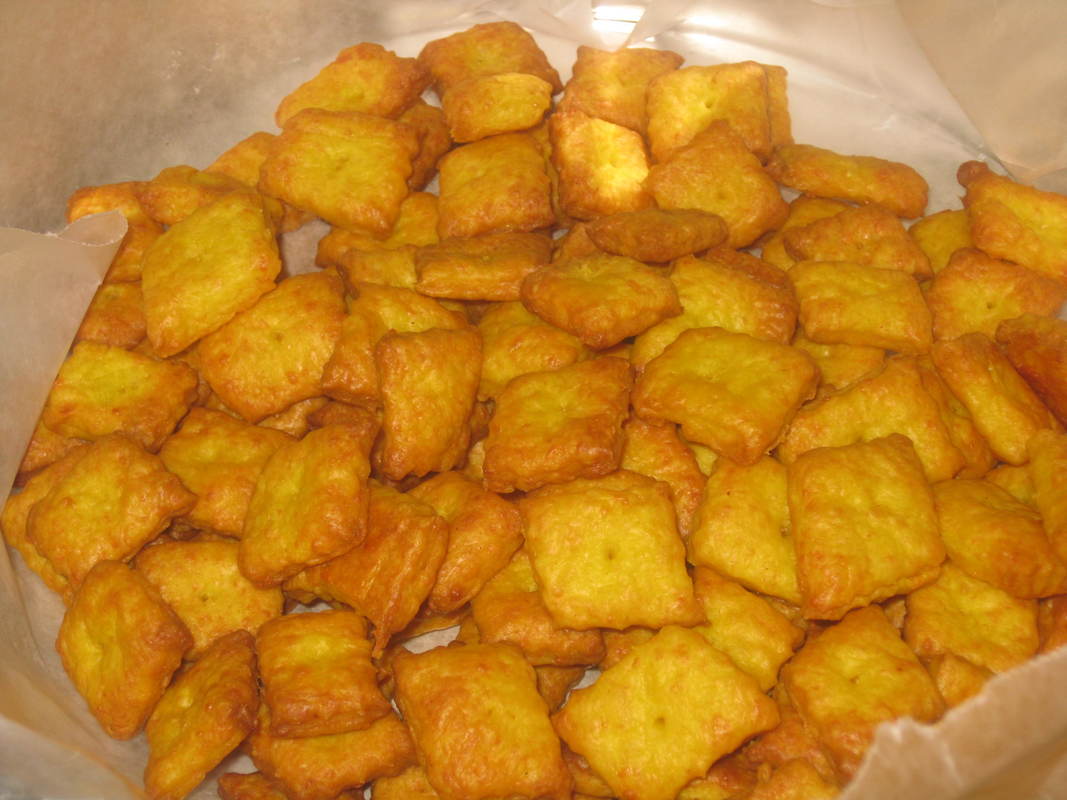
These were a great snack for watching football today. They taste exactly like Cheez-it crackers, but have a fresher texture and really great cheese flavour-----after all, they're made from much better cheddar than the boxed kind.
These come together easily in your food processor. The ingredients are simple: 1 1/2 cups flour, 5 1/2 TBSP unsalted butter, 1 cup shredded cheddar, 3/4 tsp salt, 1 tsp baking powder, 1/2 tsp turmeric, 1/8 tsp cayenne, and 1/2 cup water.
Make the dough by whirling everything except the water in your food processor. Add the water a bit at a time until the dough forms a ball. Chill it in the fridge for about 1 hour.
Roll it out between sheets of parchment paper to about 1/8 inch thick. Cut the dough into squares using a fluted pastry cutter, and prick holes in each cracker. Bake at 375 degrees for about 20 minutes.
Delicious!
Comfort Food for Fall: Swedish Meatballs
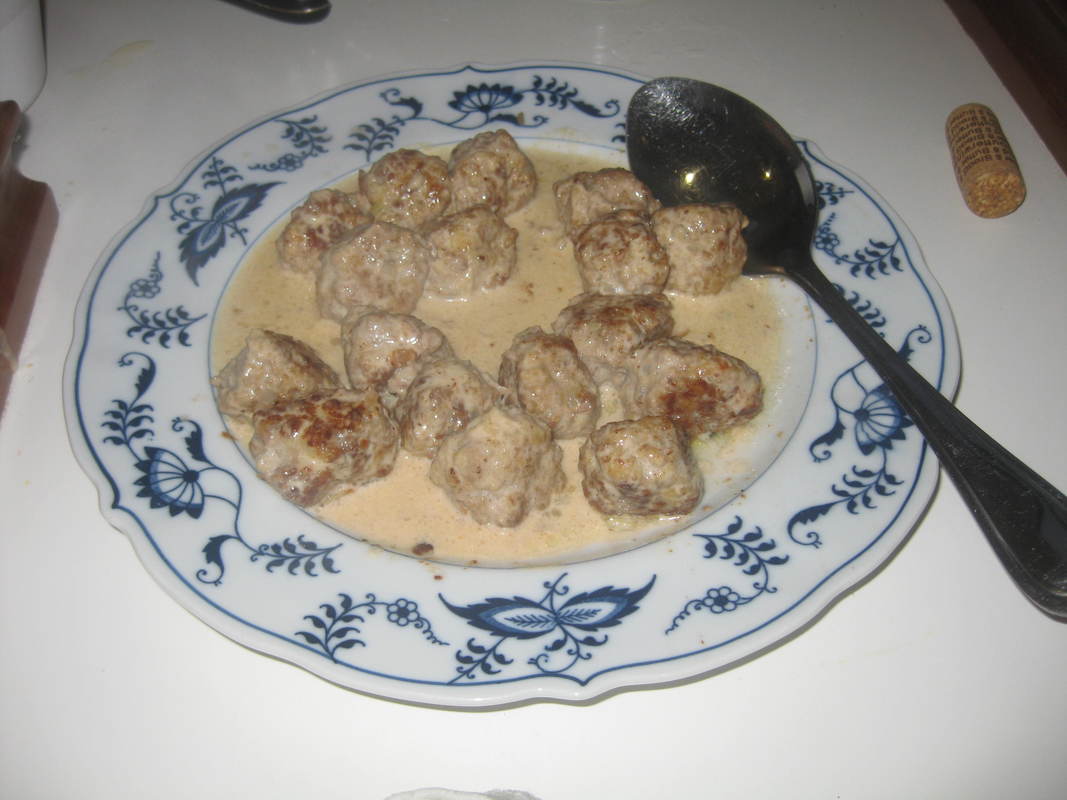
It's important to use unsalted butter in this recipe, otherwise it will be too salty.
1 1/2 tsp unsalted butter
1 1/2 tsp vegetable oil
1/2 of a medium onion, minced
1 slice white bread, crust removed
1/2 cup whole milk
3/8 tsp cumin
1/8 tsp cayenne
1/2 lb ground pork
1/2 lb ground beef
1 tsp celery salt
3/4 tsp kosher salt
1/2 of a beaten egg (give the other half to your pooch!)
another 1 1/2 tsp unsalted butter
another 1 TBSP vegetable oil
1/2 cup heavy cream
fresh ground pepper
1. In a small skillet, heat the first 1 1/2 tsp butter and the oil. Add onion and saute until translucent, ab out 2 minutes. Remove from heat and set aside.
2. In large bowl, soak the bread in the milk for 5 minutes. Add the next 7 ingredients (through egg). Mix thoroughly, then refrigerate until cold and firm, about 1 hour.
3. Remove from fridge and shape into 1" balls (this will make about 30).
4. Heat remaining butter and oil in a large skillet. Ad meatballs and cook, turning, until browned and cooked through, about 8 minutes.
5. Remove the meatballs from the pan and drain on paper towels. Drain fat from skillet.
6. Add the cream and deglaze the pan. Cook until slightly reduced, about 1-2 minutes.
7. Return meatballs to pan and simmer in the sauce until heated through, about 1 minute. Enjoy!!!!
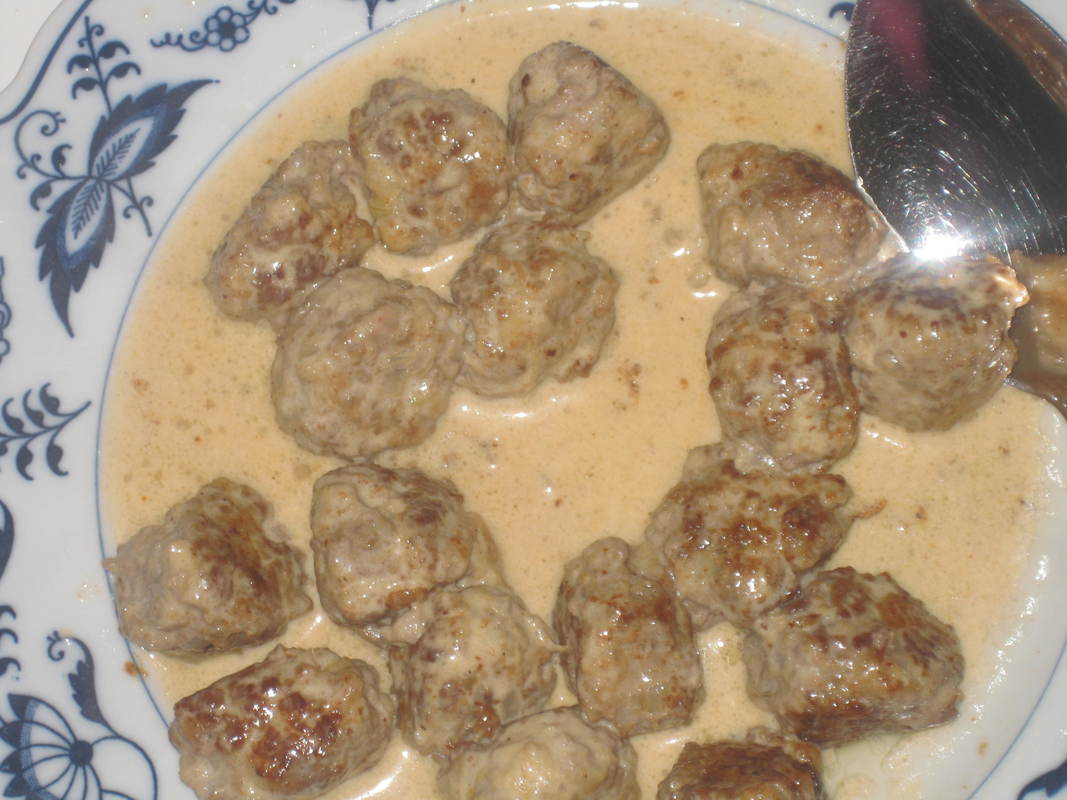
Piadine is a thin Italian flatbread, which I often find as street-food in the Romagna region of Italy. Think of it as an Italian quesadilla!
Because it's not a yeast bread, it's quick and easy to make, though the dough does need to stand for a few hours. This one is filled with good prosciutto, cheese, and arugula. Unbelievably good.
This easy and delicious recipe is courtesy of Food & Wine https://www.foodandwine.com/recipes/prosciutto-mozzarella-piadine
This easy and delicious recipe is courtesy of Food & Wine https://www.foodandwine.com/recipes/prosciutto-mozzarella-piadine
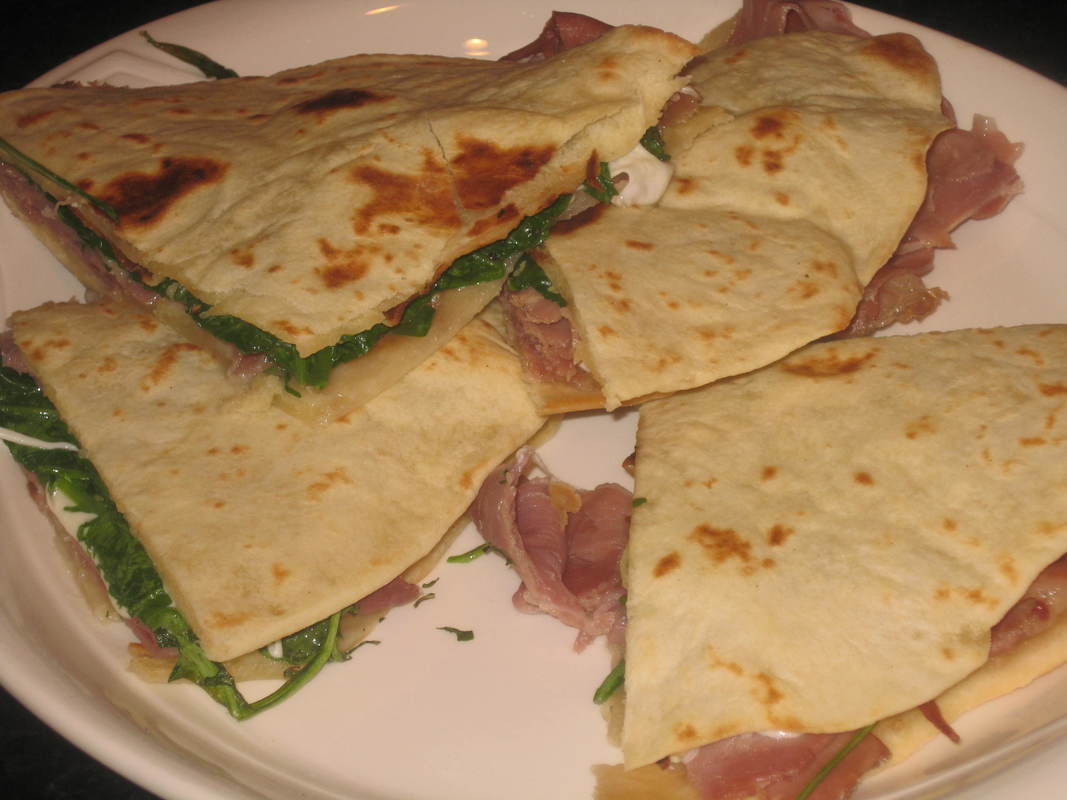
Summer nights in Maine can be cool, yet we always prefer to eat on the terrace overlooking the Atlantic if we possibly can. A good answer to to this is to serve soup, and one of my go-to soups is always French Onion.
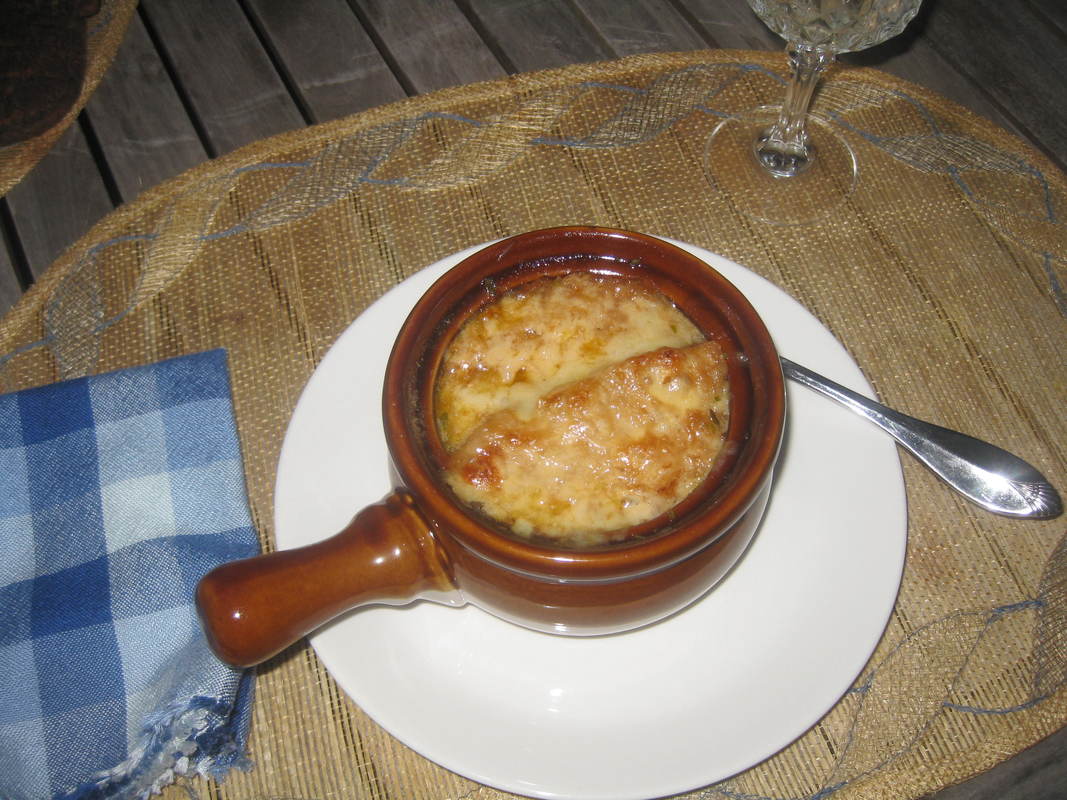
If you've tried to make this in the past and have been dissatisfied with the results, you are probably not cooking the onions properly. You should cook them slowly. Use about 2 TBSP unsalted butter for every 2 lbs of onions (halved and sliced lengthwise). Also add a pinch of fine sea salt. Using medium heat, cover the pot and cook, stirring once or twice, until the onions have softened, about 10 minutes.. At that point they will look like this:
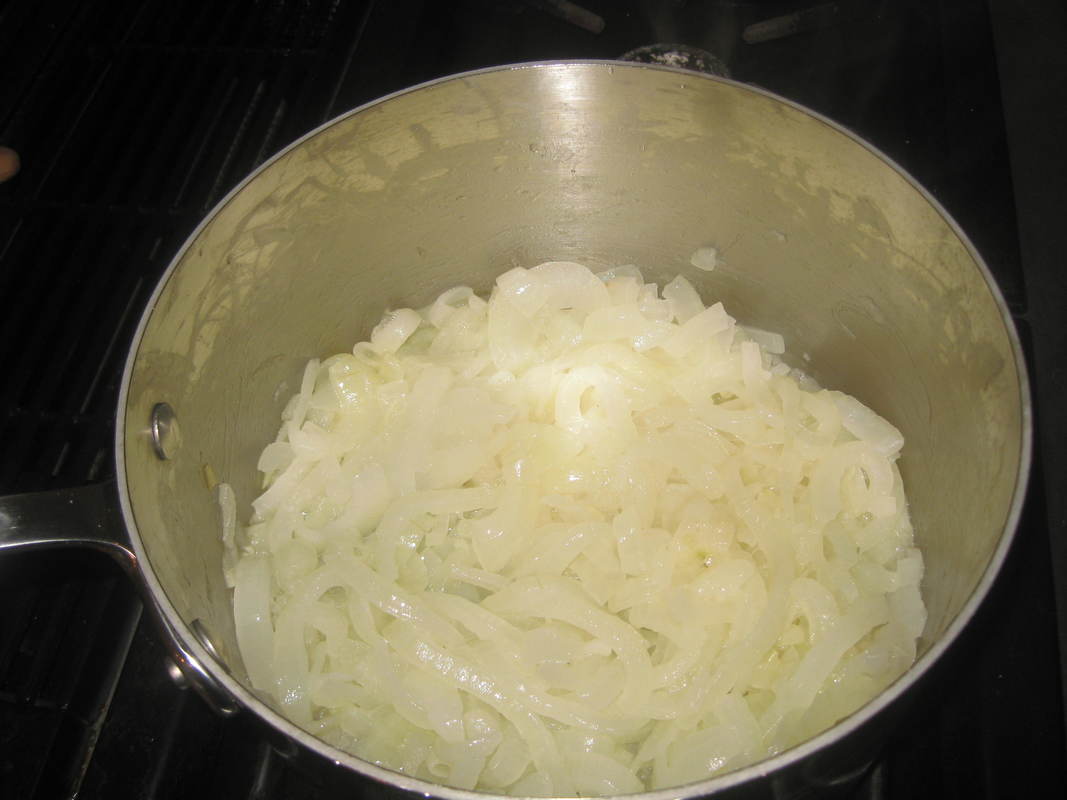
Remove the cover from the pot, and continue to cook, stirring very frequently, for 40 minutes. Yes, 40 MINUTES!!!!! You want them to be nicely, but lightly, tanned. They should look like this:
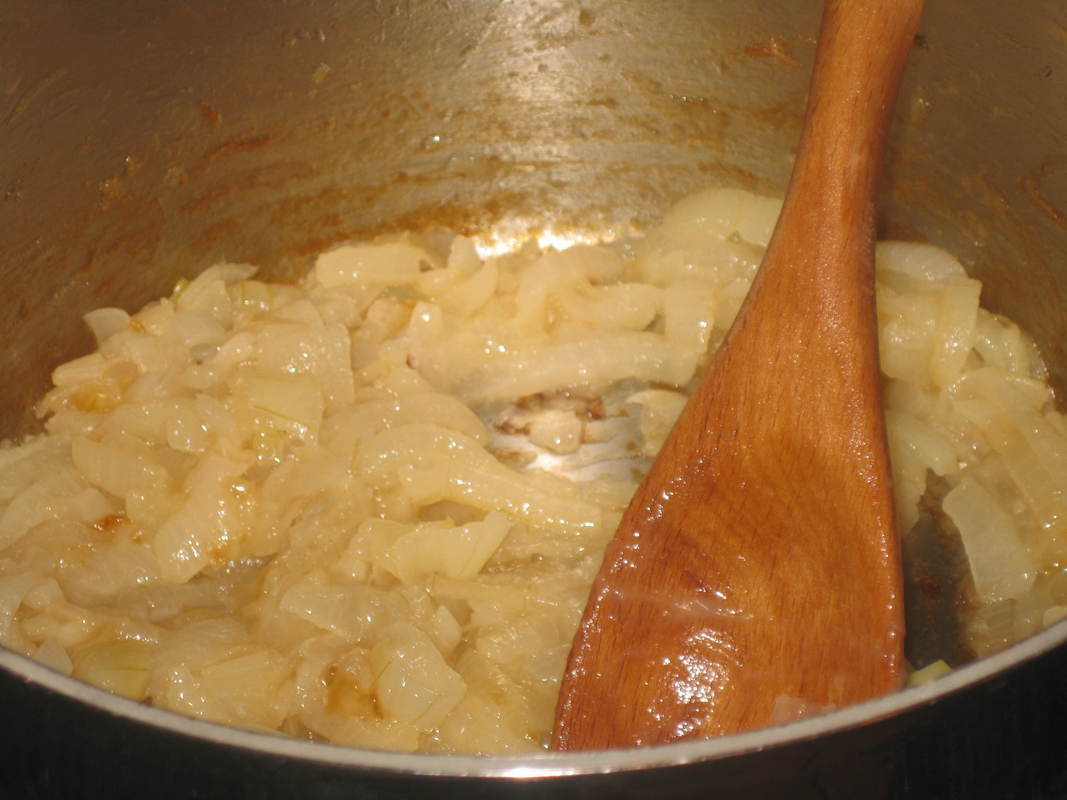
At this point add a quart of beef stock,as well as a bouquet garni made of a bay leaf, a thyme sprig, 2 sprigs of flat-leaf parsley, and 2 juniper berries. Add this to the pot, then cover and simmer for about 30 minutes. Add 1/4 cup very dry sherry.
Meanwhile, generously butter some slices of French bread. In a 350 degree oven, toast the bread, turning once, for 15 minutes. Remove the bread from the oven and increase the heat to 425 degrees.
Ladle the soup into ovenproof bowls. Top each with the toasted French bread, and then top the bread with at least 1/2 cup shredded Gruyere cheese on each bowl. Place bowls in oven and bake about 10 minutes, or until cheese is nicely melty.
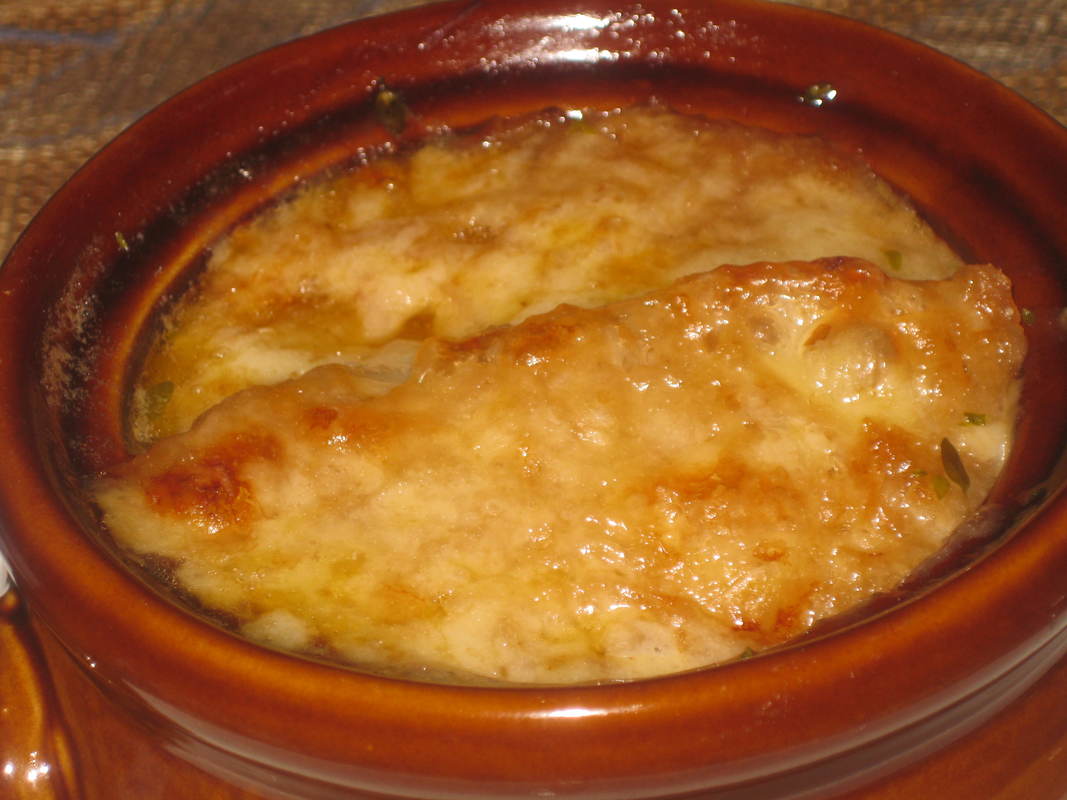
Pork and Spinach Pot Stickers----more easy, great dim sum to have a Chinese-food feast

1 tsp vegetable oil
1 cup spinach, trimmed
1/4 ground pork
1 medium clove garlic, minced
1 tsp fresh grated ginger
1/ tsp crushed red pepper
1/4 tsp cornstarch
kosher salt and black pepper
gyoza wrappers
additional oil (1 TBSP)
For sauce:
2 TBSP soy sauce
2 TBSP unseasoned rice vinegar
1 tsp sesame oil
Chopped scallions, for garnish
1. Saute spinach in oil until wilted. When cool enough to handle coarsely chop.
2. Combine spinach with all other ingredients except wrappers and additional oil. Fill wrappers with mixture.
3. Heat the 1 TBSP oil over moderately high heat. Add dumplings and sear on one side, about 1 minute.
4. Add about 1/2 cup water to pan, and cover. Steam until pan is dry, about 3 minutes.
5. Transfer pot-stickers to a serving platter, and garnish with scallions. Serve with dipping sauce on the side.
Better-Than-Take-Out: and you can shallow-fry these crunchy, authentic Chinese Egg Rolls, so no wok or deep-fryer needed

Egg rolls are very easy to make compared to other dim sum (such as dumplings). Give these a try----they are much better than take-out.
6 oz bulk pork sausage (sweet or hot----your choice)
1 cup cole slaw mix
4 oz sliced water chestnuts
2 TBSP sliced scallion
4 1/2 tsp soy sauce
1/2 tsp garlic powder
1/4 tsp ground ginger
dash salt
dash fresh ground pepper
7 egg roll wrappers
Duck sauce, plum sauce, or Thai sweet chili sauce, for serving
Hot Chinese mustard, for serving
1. Fry crumble sausage and fry until no longer pink. Add next 8 ingredients (through pepper) and fry for about 1 minute. Remove from heat.
2. Place about 1/4 mixture in each wrapper, and roll up-----well, "egg roll style". Place seam-side down on a plate.
3. Heat about 1/2 inch of oil in a large skillet. Fry about 1-2 minutes per side, until golden. Drain on paper towels, and serve with sauces on the side.
Tartuffo----a truffle-infused pecorino from Italy will take your burgers to Heaven. So "gourmet" you could almost serve these at a dinner party!
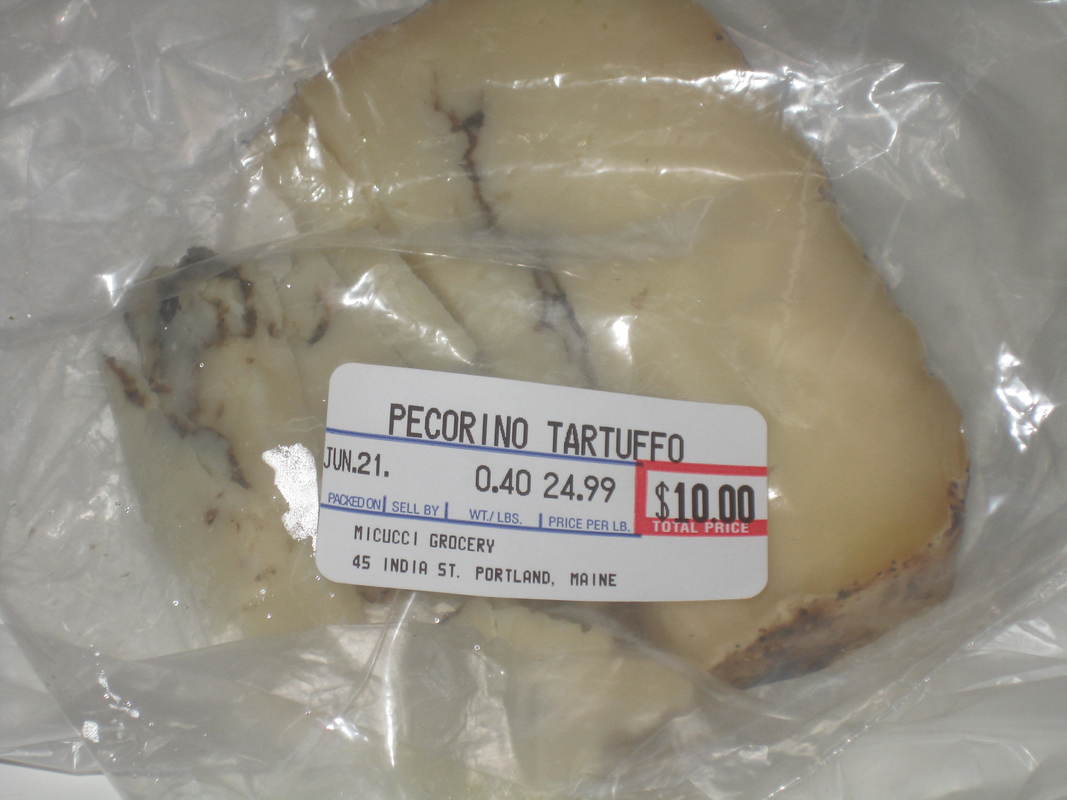
A Roger Bill person was recently reminding me that he'd heard about a time at my Falmouth house that Steve McCusker and his son Matt came over for drinks and snacks. Apparently I'd served this truffle cheese, and Steve loved it so much he talked about it later (Matt McCusker of course didn't know what it was and wouldn't eat it----his palate wasn't into complex things then----he told me he thought this was because his mother liked "everything plain" and "didn't teach me about food").
Anyhow, I bought some the other day and thought about how it might be used. I developed this recipe based on "Truffle Burgers" I've had in France.
I use ground sirloin in this recipe-----something I don't normally use because it doesn't contain enough fat and flavour. But these burgers get their fat from other things, so use the leanest ground sirloin you can find. And don't even THINK about how many calories there are in these. You'll need to be on an all-salad diet for a week afterwards, but they are SO WORTH IT!!!
For 2:
4 slices maple bacon
3 oz or more crimini mushrooms
3/4 lb ground sirloin
3 TBSP black truffle butter (available at Whole Foods or specialty markets)
salt to taste (1/2 tsp?)
2 slices pancetta
Several slices pecorino tartuffo
Brioche hamburger buns
1. Cook bacon, set aside. Drain most of the fat from skillet.
2. Cook crimini in same skillet until browned, set aside.
3. Combine ground sirloin, salt, and truffle butter until just mixed, being careful not to overwork the meat. Form into 2 patties.
3. Place a slice of pancetta over each pattie. Heat ovenproof skillet over moderately high heat. Cook pattties aout 4-5 minutes per side for medium.
4. Place cheese on top, then transfer the pan to a 400 degree oven until cheese has melted, about 2 minutes.
5. Place burgers on buns and top with bacon and mushrooms.
Incredible!!!!!!
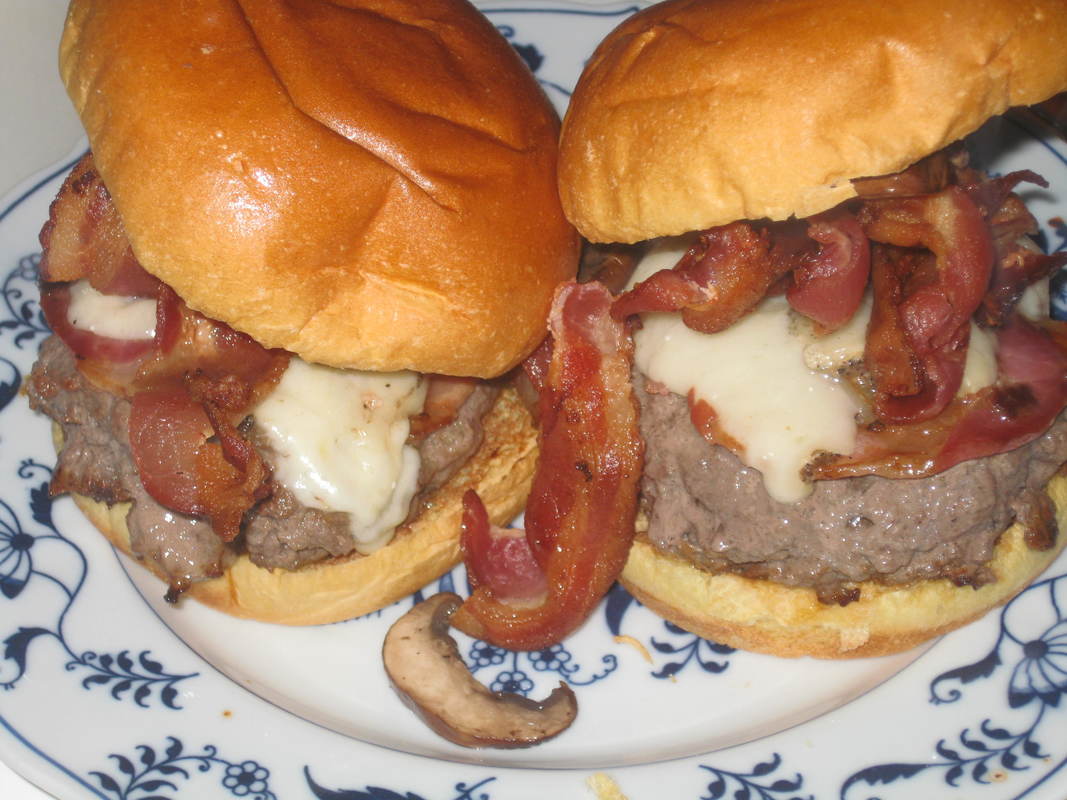
I learned to love persimmons while living in Japan. This fabulous salad uses the Fuyu variety (the orange kind) but can really be made with any good fruit.
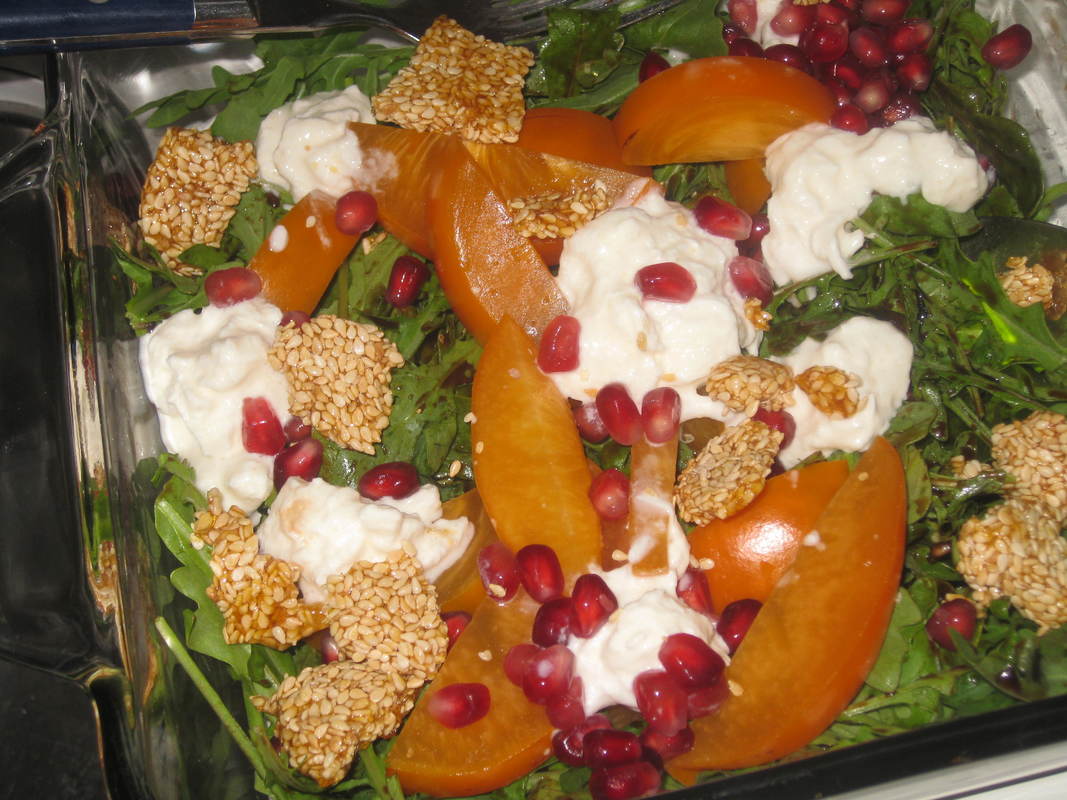
But I sure as heck couldn't get burrata cheese in Tokyo!
This salad is the most beautiful combination of flavours-----the sweetness of the sesame candy plays against the slight bitterness of the arugula. Pomegranate seeds add crunch against the orgasmic creaminess of the burrata, which itself plays so well with the sweetness of the fruit. A balsamic dressing sweetened with maple syrup ties it all together.
This recipe comes from Food & Wine Magazine. Here's the link to the recipe: https://www.foodandwine.com/recipes/persimmon-and-burrata-salad-with-sesame-candy
Yes, this is an expensive meal to make but so worth it.
Splurge on a beef tenderloin, then up the game with good port wine and gorgonzola. These ingredients have a natural affinity for one another.....
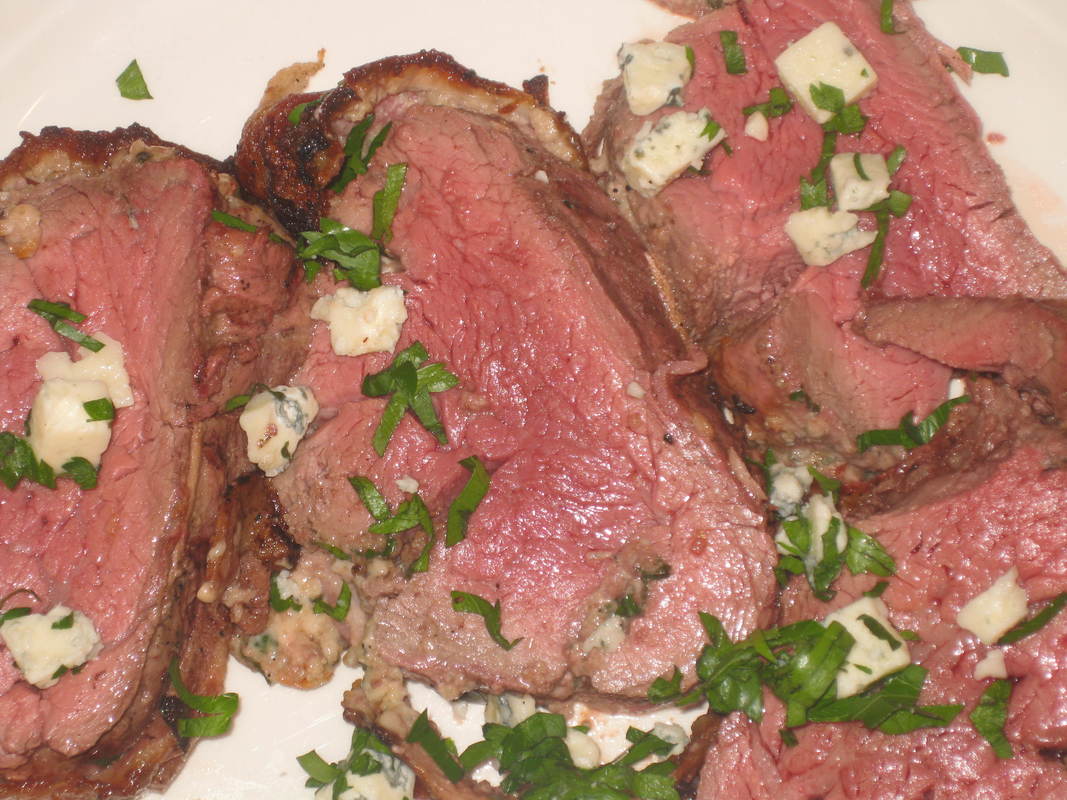
This can be done on your bbq grill, as long as you watch it carefully, so no cleaning of a roasting pan. Be sure to let the meat come to room temperature before stuffing and roasting. Also, the stuffing needs to be chilled before you put it in the roast, so make the stuffing and chill it while you are waiting for the roast to get to room temperature.
Use good port for this sauce-----NOT "tawny" or "ruby". A Resesrvo is a good choice.
For the stuffing and garnish:
1/2 cup PLAIN dry breadcrumbs
12 oz gorgonzola
4 TBSP chopped flat-leaf parsley
1 TBSP chopped fresh chives
1 tsp chopped fresh thyme
1. Combine 2 TBSP of cheese, and 1 TBSP parsley. Set aside to use for garnish later.
2. Toast breadcrumbs in a small frying pan, stirring, until deeply golden; about 4 minutes over medium heat.
3. Combine breadcrumbs with remaining cheese, parsley, and the chives and thyme. Chill.
For the meat:
beef tenderloin, 2-3 pounds (it's important to ask for center cut to not only ensure even roasting but also for stuffing)
1/2 tsp kosher salt
1/2 tsp pepper
3/4 lb bacon
butchers' twine
1. Cut a slit down the center of the roast, ending the slit about 1/2 inch from the ends of the roast, and 1 inch from bottom----in other words, don't cut it all the way through. Make another slit, equidistant from the center slit and one side of the roasts. Do the same on the other side of the roast, for a total of three slits equally apart from one another.
2. Push the stuffing mixture into the slits, stuffing them densely.
3. Salt and pepper the roast. Wrap the slices of bacon around it crosswise, overlapping if the bacon is long.
4. Tie the roast tightly at one-inch intervals, using the butchers' twine.
5. Preheat grill to medium (400 degrees). For a gas grill, leave one burner off to create a cooler zone. (For charcoal, pile hot briquets on one side of grill).
6. Grill beef, covered, over the hot side of the grill until browned on all sides, about 10 minutes. Keep an eye on it!
7. Move meat to the cooler side of the grill and cook, covered, about 25 minutes or until meat reaches 135 degrees.
8. Remove meat to platter, cover with foil, and let rest 20 minutes before cutting.
For the sauce:
1 bottle reserve port
1 medium shallot, chopped
2 TBSP butter
2 1/2 tsp flour
1 TBSP chopped flat-leaf parsley
1 1/2 tsp chopped fresh chives
1/2 tsp fresh thyme leaves
kosher salt and pepper, to taste
1. Bring port and shallot to a boil. Simmer until reduced to around 1 1/2 cups or less, about 25 minutes. Strain, and discard the shallots.
2. In a small saucepan, melt butter and add flour to make a roux. Be sure to cook the roux for at least a minute (without browning) in order to get rid of the raw-flour taste.
3. Whisk in the port and the herbs. Bring to a simmer to thicken. Add salt and pepper.
4. Cover a platter with a bit of the sauce. Slice meat and arrange on platter.
5. Garnish meat with reserved gorgonzola/parsley mixture, and serve remaining sauce on the side.
Super-easy Spaghetti with Sun-dried Tomato and Almond Pesto
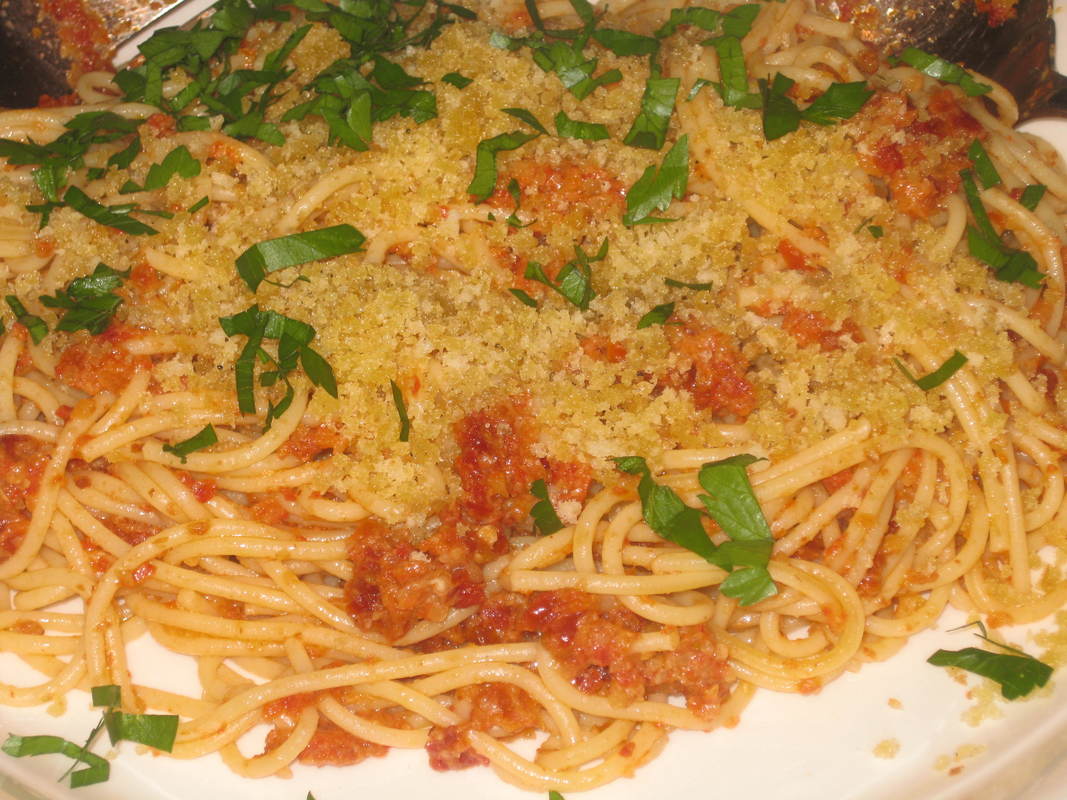
6 oz spaghetti pasta
1/4 cup oil-packed sun-dried tomatoes, drained
1 small garlic clove
1/4 cup EVOO, plus more for drizzling
3 TBSP salted roasted almonds
salt and fresh ground pepper
1/4 cup FRESH (not dried) bread crumbs
flat leaf parsley, for garnish
1. Fry bread crumbs in a TBSP of the oil until golden. Transfer to a plate, and season with salt and fresh pepper.
2. In a food processor, pulse tomatoes, almonds, and garlic. Add 2 TBSP EVOO and process until smooth. Season to taste with salt and pepper.
3. Cook spaghetti according to package directions. Drain, reserving 2 TBSP cooking water.
4. Add pasta to pesto and toss with the cooking water and 1 TBSP EVOO. Garnish with parsley, and serve right away, drizzling with more oil if necessary.
There are lots of ways to make Kung Pao Chicken....here's an easy one that I like:
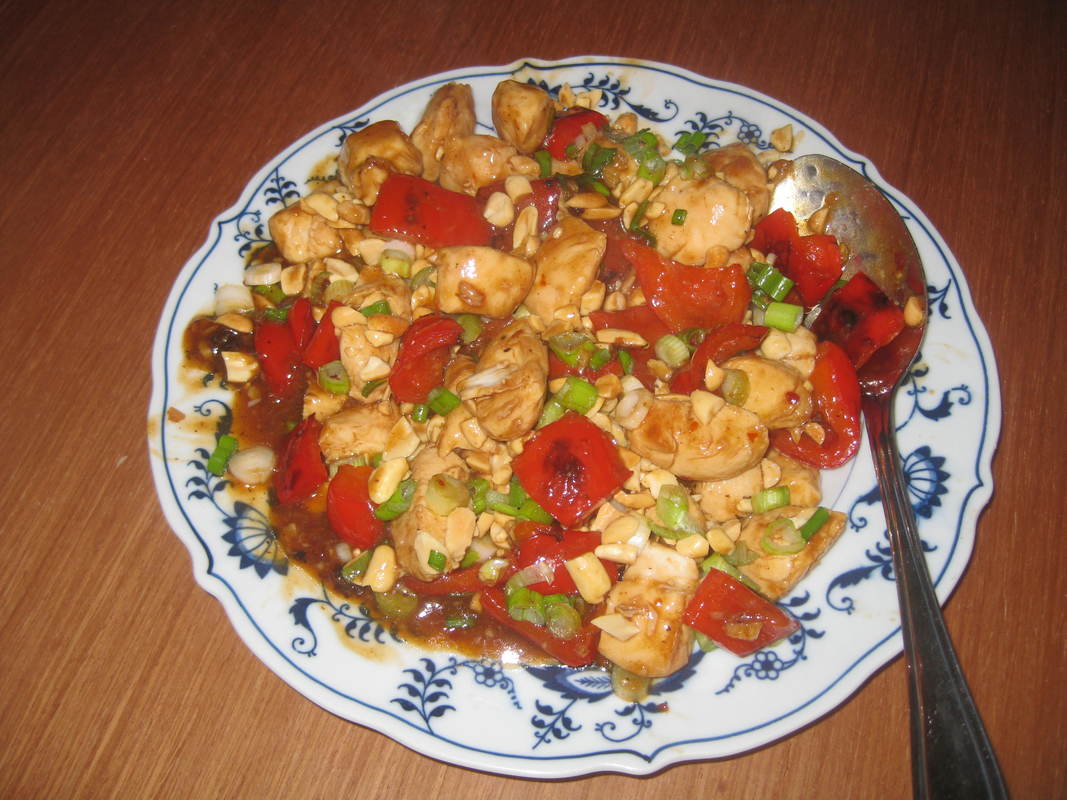
1 TBSP soy sauce
1 TBSP sake
1 tsp cornstarch
1 lb chicken, cut into bit-size pieces
Combine first 3 ingredients, then add chicken and toss to coat. Let sit at least 15 minutes.
3 TBSP soy sauce
2 tsp cornstarch
1/4 cup fat-free, low sodium chicken broth
2 TBSP cider vinegar
1 TBSP hoisin
2 tsp sesame oil
1 tsp garlic chili paste
Whisk these sauce ingredients together. Set aside.
1 TBSP peanut oil
2 cloves garlic, minced
1 sweet bell pepper, cut into bite-size pieces
3 sacallions, sliced
1/3 cup peanuts
In a wok, heat the oil. Add chicken and stir fry until cooked through, 5-10 minutes. Remove chicken from wok.
Add bell pepper to wok and stir-fry until crisp-tender, about 5 minutes. Add garlic and cook about 30 seconds more.
Return chicken to wok and pour in sauce. Bring sauce to a simmer and cook until thickened and chicken is coated, about 2 minutes.
Place on serving platter and toss with scallions and peanuts. Serve right away.
Another comfort classic: Spaghetti and Meatballs done right. Put down that jar of sauce.
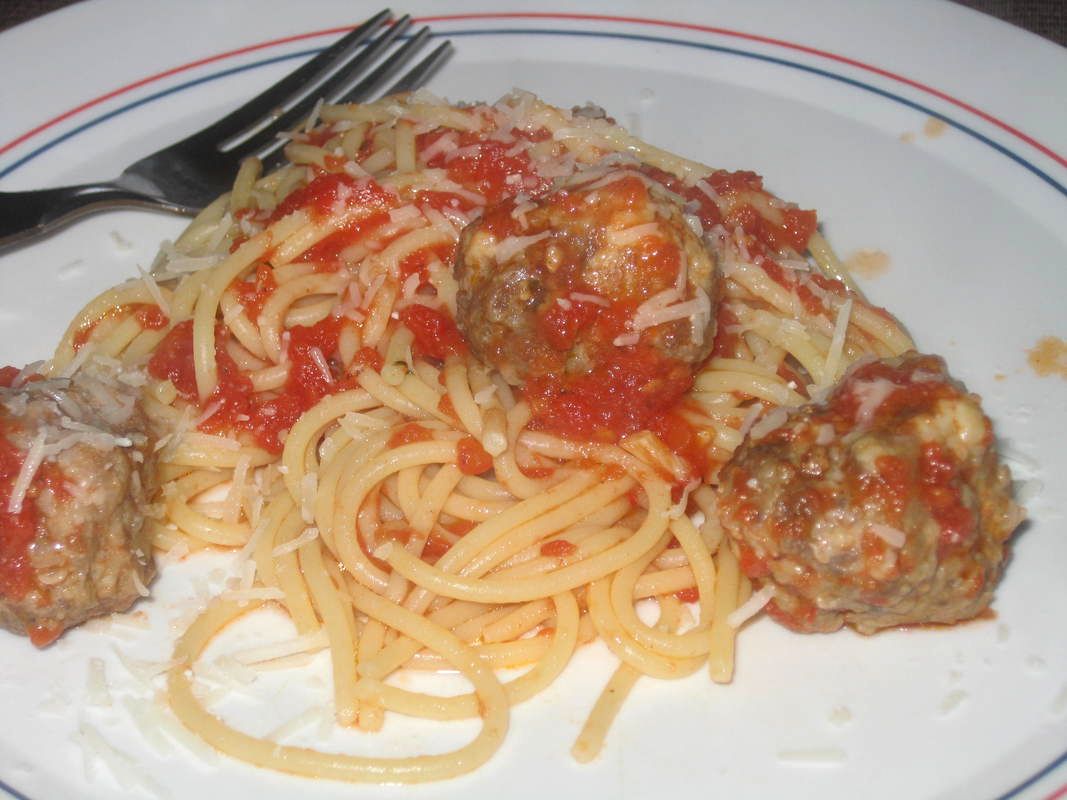
If all you've ever done is open a jar of sauce and a bag of frozen meatballs, you will be amazed at the transformative power of this dish done correctly. You can make the meatballs and sauce well in advance, making this an easy dinner on the night you need it.
Don't buy "meatball mix"; you need to get the meat proportions right. Actually, don't substitute ANY of the ingredients----this dish needs the richness imparted by the ingredients selected.
For the meatballs:
1 slice white sandwich bread, torn into small pieces
1/4 cup whole milk
1/2 lb. ground chuck
1/4 lb ground veal
1/4 lb. ground pork
1 TBSP parmesan reggiano, freshly grated
3/4 tsp fnely minced garlic
1 tsp kosher salt
1/8 tsp freshly ground black pepper
1 1/2 tsp finely chopped fresh basil
1/2 tsp oregano
Combine above ingredients. Form into golf ball-size meatballs. Refrigerate until well chilled. Heat about 1 TBSP olive oil in skillet. Cook meatballs (in batches if necessary). Set aside. Add about 2 TBSP water to skillet, deglazing pan. Save to add to tomato sauce.
For tomato sauce:
1 1/2 tsp minced garlic
1 28 oz can tomatoes
1 TBSP olive oil
pinch crushed red pepper
basil sprig
kosher salt and fresh ground pepper
Saved water from meatball pan (see above)
Heat oil, and then cook garlic until fragrant. Pulse tomatoes in food processor until chunky. Add tomatoes and rest of ingredients to sauce, and cook until slightly thickened, about 15 minutes.
Put it together:
12 oz spaghetti
fresh grated pramesan reggiano
a few TBSP chopped fresh basil
Cook spaghetti in boiling salted water. Drain and toss with sauce and meatballs, Sprinkle with parmesan and the fresh basil.
Note: If making ahead, gently reheat the sauce, adding the meatballs until heated through.
This is SOOOOOOOOO good!!!!!!!!!!!!!
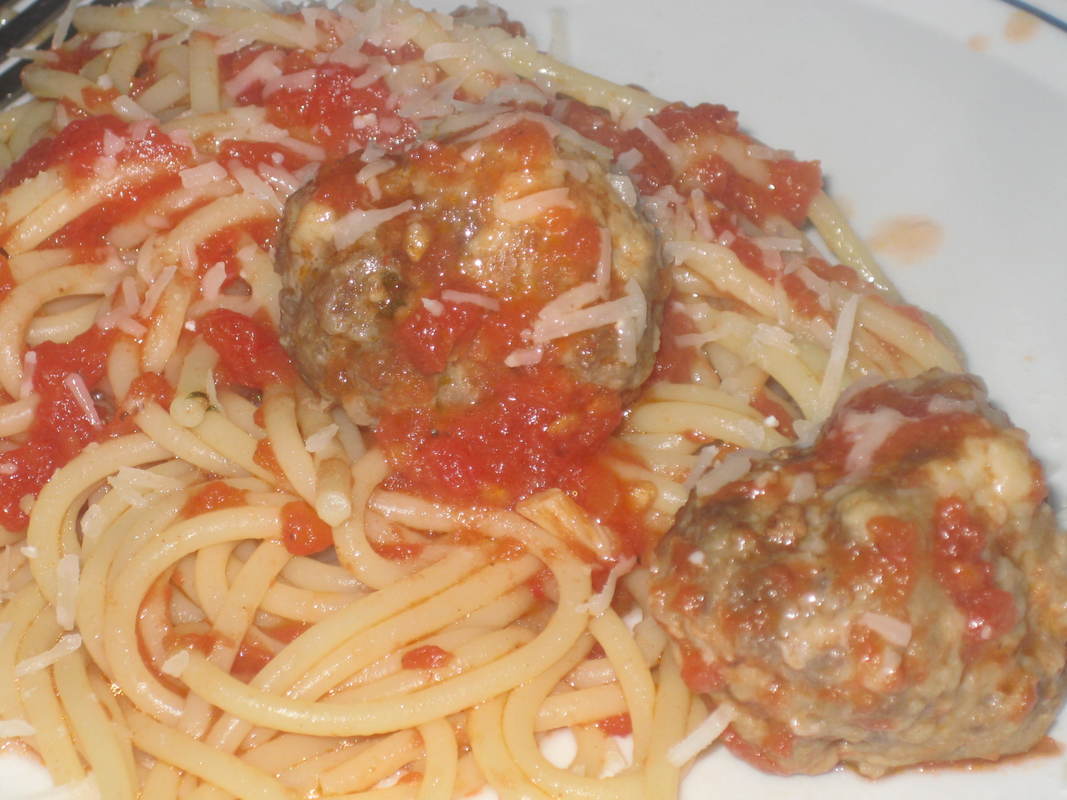
Sometimes only deep fried will do: Beer-batter onion rings
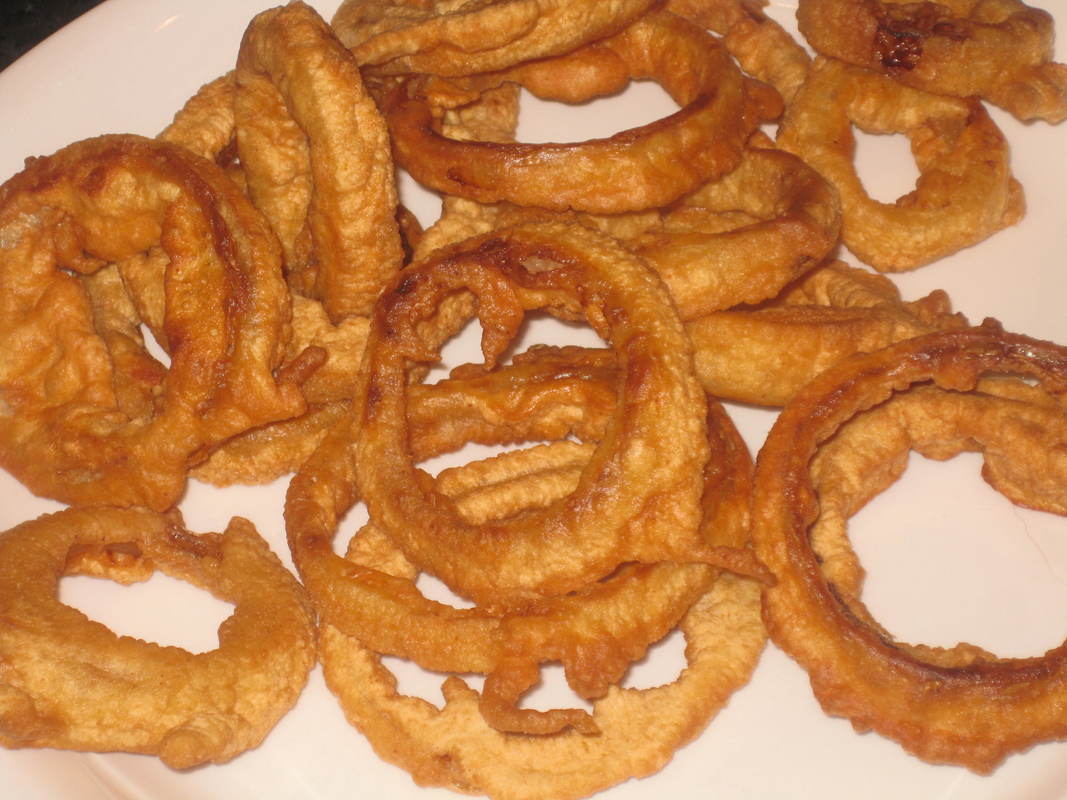
Slice up some yellow onions. For onion rings, it's always worthwhile to let the sliced onions sit in ice water for a while (a trick I learned at Cape Elizabeth's Lobster Shack). Meanwhile combine 1 beaten egg, 2 cups flour, 2 tsp cayenne, 1/2 tsp salt, 2 tsp garlic powder, and 1 cup lager beer until well-combined.
Heat oil in a deep fryer or dutch oven to around 360 degrees. Dip each individual slice of onion into the batter, then place in the oil. Cook until brown, turning once. Drain on paper towels and serve immediately with ketchup and/or ranch dressing.
Heat oil in a deep fryer or dutch oven to around 360 degrees. Dip each individual slice of onion into the batter, then place in the oil. Cook until brown, turning once. Drain on paper towels and serve immediately with ketchup and/or ranch dressing.
These Garlic Bread Hot Dogs were a huge hit with the Roger Bill sailors. We're on the first of 2 trips; we'll be meeting again in August!

Unfortunately one of them broke, but that didn't mean it wasn't delicious! The guys were swooning.
I wish I'd been able to get more of a French-style baguette (i.e., smaller in diameter and crustier) but I was in a small Maine coastal town and didn't have access to the type of bread that would have worked best.
For each 4 hot dogs:
Preheat oven to 350 degrees. Cut a French baguette into 4 slices, and hollow out slices. Place 1 hot dog into each of the 4 slices. Melt 1/2 stick butter with 2 TBSP grated fresh parmesan, 1 minced garlic clove, 2 tsp minced fresh parsley, adding kosher salt and fresh ground pepper to taste. Brush the butter onto the bread. Place on parchment-lined baking sheet and bake about 18 minutes, or until baguette is nicely golden.
Cupcakes for the Roger Bill crowd's early sailing rendezvous: Marzipan starfish on graham-cracker "sand"!
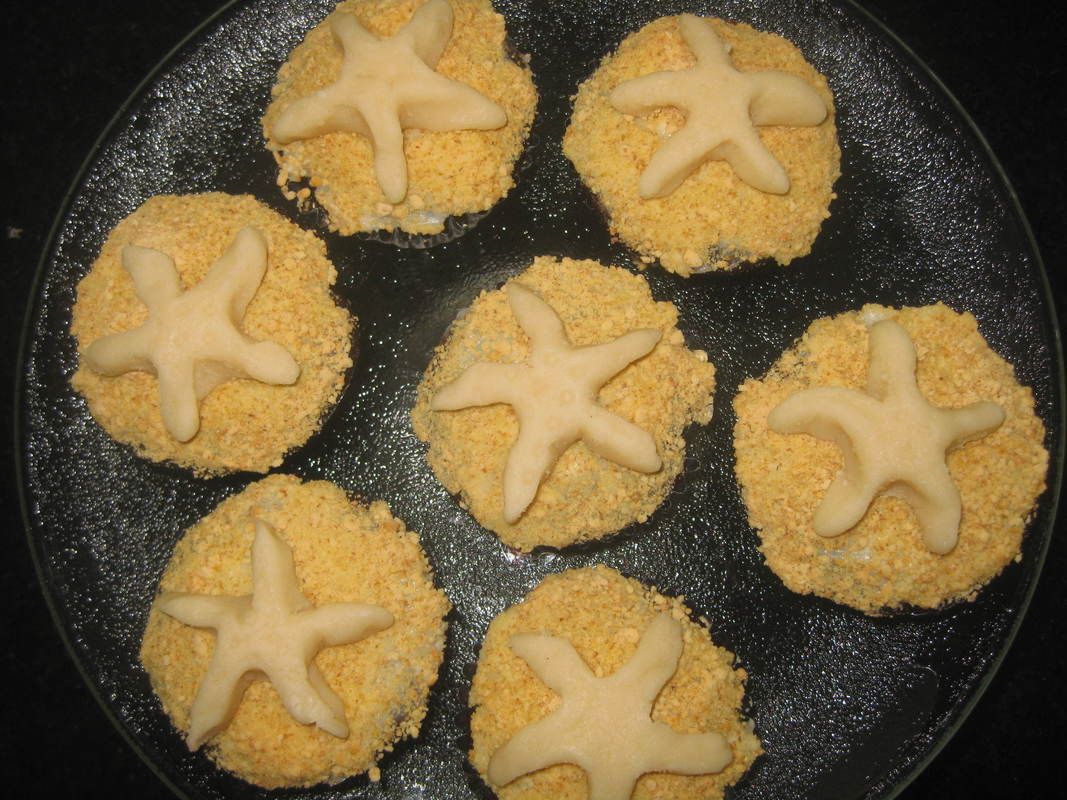
I just wanted to make a boat-dessert of chocolate cupcakes a little "nautical". These are my basic yummy chocolate cupcakes with buttercream icing. To make them a little fun for the Roger Bill rendezvous, I dusted the icing with graham cracker crumbs for "sand", and made starfish out of marzipan. It's hard to see in the photo, but I gave the starfish some texture by pressing a grater into them.
A very retro side dish from the 1950s----"Daffodil Lemon Sauce" over asparagus
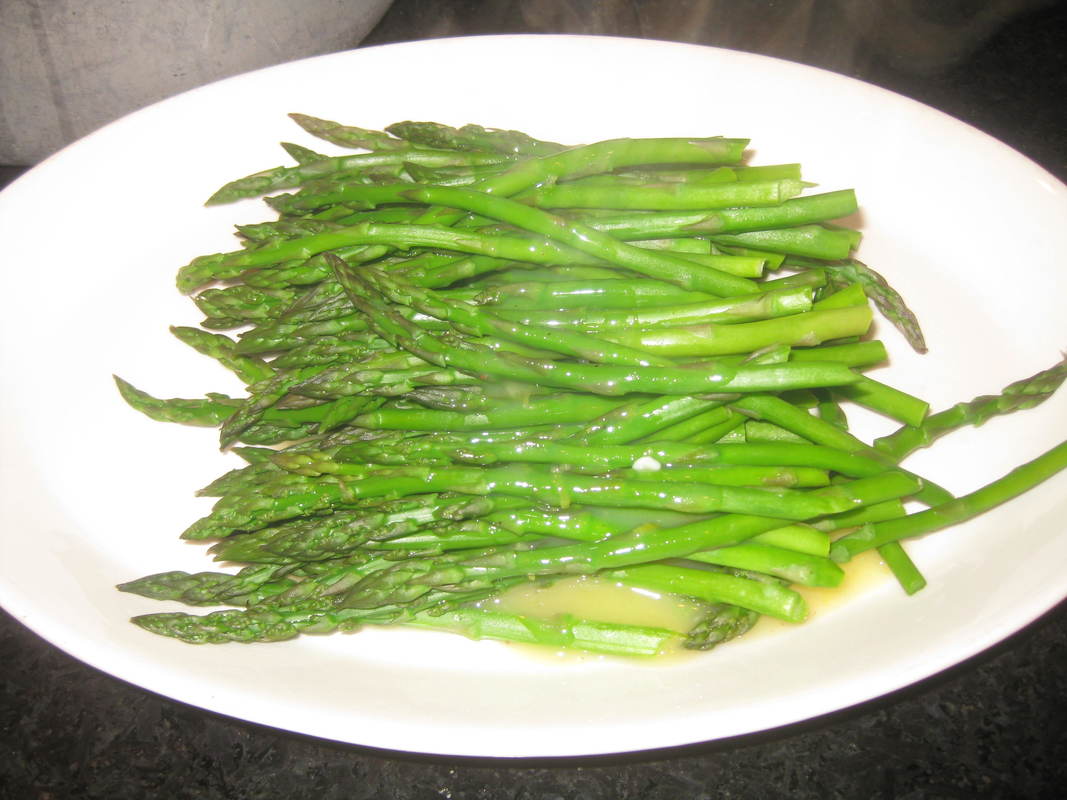
This easy sauce is great over anything that can use a bit of sweet and sour........
Combine 1/4 cup sugar, 2 tsp cornstarch, a pinch of salt, and a pinch of nutmeg. Stir in 1/2 cup water. Cook and stir until thick and bubbly. Stir a bit of the hot mixture into 1 beaten egg yolk, then return briefly to heat, about 30 seconds. Remove from heat and add 1 TBSP butter, 1/2 tsp grated lemon zest, and 1 TBSP lemon juice.
Combine 1/4 cup sugar, 2 tsp cornstarch, a pinch of salt, and a pinch of nutmeg. Stir in 1/2 cup water. Cook and stir until thick and bubbly. Stir a bit of the hot mixture into 1 beaten egg yolk, then return briefly to heat, about 30 seconds. Remove from heat and add 1 TBSP butter, 1/2 tsp grated lemon zest, and 1 TBSP lemon juice.
The perfect classic Pizza Margherita----chewy crust with great texture and complexity; San Marzano tomato sauce, and the slight tang of buffalo mozzarella

This recipe from chef Grace Parisi is perhaps the most classic pizza I've eaten outside of Italy. Her secret is to allow the dough to rest in the fridge at least overnight (and up to 3 days) where it continues to develop its great texture.
The simple sauce made from San Marzanos is as tasty as it gets, with pure tomato flavour you'll never find in a jar. And the slight tang of fresh buffalo mozzarella is brilliant.
You can find this great recipe on the Food & Wine web site----www.foodandwine.com/recipes/perfect-pizza-margherita
The simple sauce made from San Marzanos is as tasty as it gets, with pure tomato flavour you'll never find in a jar. And the slight tang of fresh buffalo mozzarella is brilliant.
You can find this great recipe on the Food & Wine web site----www.foodandwine.com/recipes/perfect-pizza-margherita
Per your requests, my loyal readers, here's another take on a Chinese-style chicken----This one is a Sticky-Orange Chicken
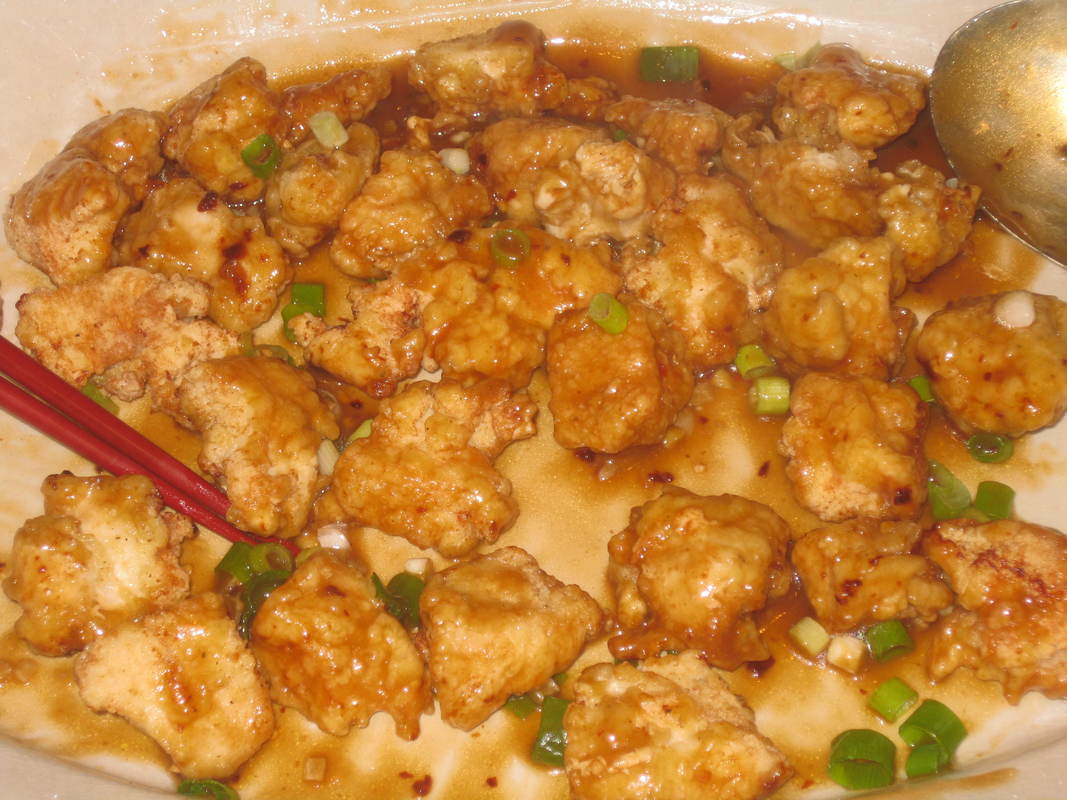
This recipe is a little stickier and sweeter than the recipe I've posted earlier, but a lot of Americans prefer it just because it is a bit sweeter than is preferred in Asia.
Here's how to do it:
1 beaten egg
1/4 cup cornstarch
2 TBSP flour
kosher salt
fresh ground black pepper
3/4-1 lb boneless chicken breasts, or equivalent chicken tenders, cut into bite-size cubes
Canola oil (about 1/4 inch in a skillet), plus 1 1/2 tsp
1 garlic clove, minced
1/4 tsp minced fresh ginger
1/4 tsp crushed red pepper
1/3 cup OJ
1 TBSP soy sauce
1 1/2 tsp cider vinegar
1 1/2 tsp light brown sugar
1 1/2 tsp bottled sweet chili sauce
1 1/2 tsp cornstarch
1 TBSP water
chopped scallions, for serving
1. Place beaten egg in one bowl, and mix next 4 ingredients (cornstarch through black pepper) in another.
2. Heat canola oil over medium-high heat.
3. Dredge chicken first in egg, then in cornstarch mixture. Fry until golden and crispy, 4-5 minutes. Remove from oil, drain on paper towels.
4. Heat the 1 1/2 tsp canola oil in a small saucepan. Fry garlic and ginger for about 30 seconds. Add the red pepper, OJ, soy sauce, vinegar, brown sugar, and chili sauce.
5. In small bowl, combine the 1 1/2 tsp cornstarch with the water until smooth. Add to the saucepan, and cook, stirring, until the sauce reaches a syrup-like consistency.
6. Place chicken in serving dish, and pour sauce over, stirring to combine.
7. Garnish with scallions, and serve immediately.
More yummy dim sum-----Beef and Scallion Dumplings
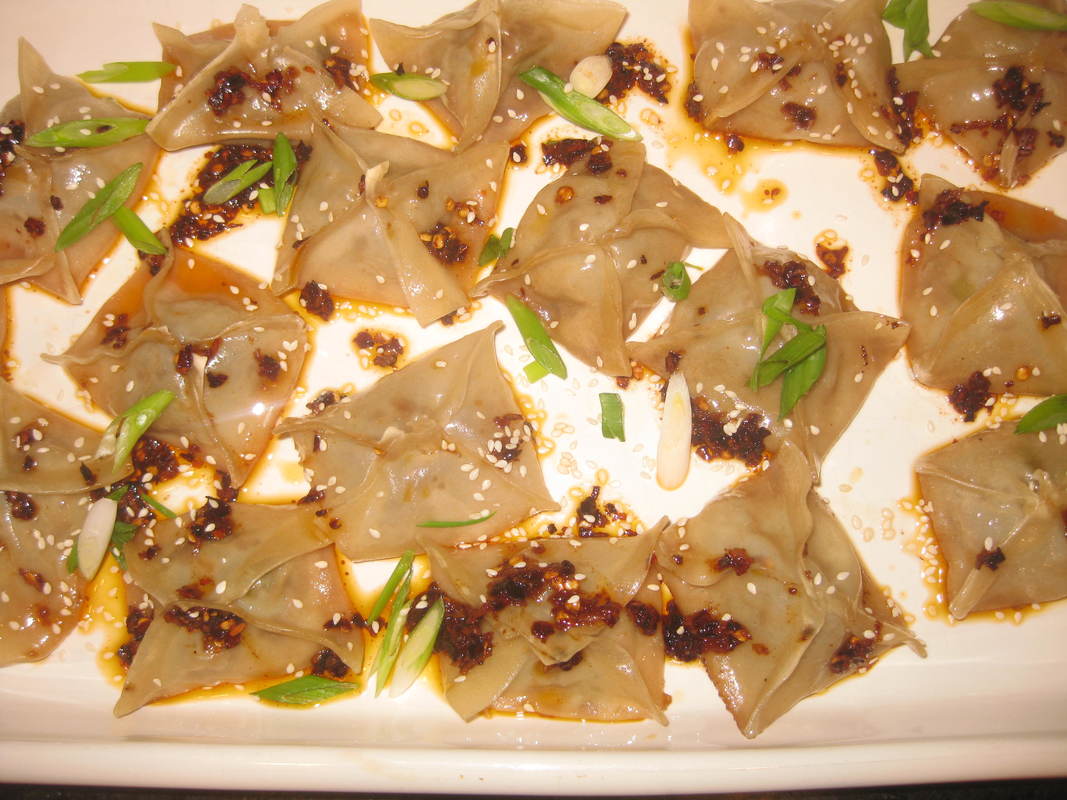
I made these in a less traditional shape than regular potstickers (which are usually made with gyoza skins, which are slightly thinner than the won ton wrappers I used here). But wrapping the potstickers this way allows for a lot of surface to get brown and crunchy on the bottom!
Here's what you need and how to do it:
2 TBSP soy sauce
2 tsp gochujang (a Korean condiment that includes capsicum, fermented soybeans, and other ingredients)
2 tsp rice vinegar
3/4 tsp fresh ginger, grated
3/4 tsp garlic, grated
3/4 tsp sugar
1 tsp sesame oil
Stir all the above ingredients together. Set aside about 1 TBSP of this mixture, and put the rest in a mixing bowl with:
9 oz ground sirloin (at least 90% lean or leaner)
3 TBSP chopped scallions
Place ground beef mixture, about 1 TBSP, in each of
16 wonton wrappers.
To form the potstickers, bring two opposite corners of the wrapper together, then pinch the other corners together corners as shown in the photo (so that there is a flat bottom surface)
Then bring about 3 TBSP canola oil to a shimmer, and place in it 2 tsp crushed red pepper. Let this combination steep for several minutes, then add to the reserved 1 TBSP of sauce.
Heat about 2 tsp of sesame oil in a skillet over medium high heat. Add wontons (in batches if necessary, adding more sesame oil as needed) and cook until well-browned on bottom, about 2 minutes. Add 1/2 cup water, cover and cook untel cooked through, about 4 minutes. Remover cover and cook longer if necessary to evaporate the water.
Place on platter, pour reserved sauce over, and garnish with sliced scallions and some sesame seeds. Enjoy!
Who doesn't love a strata? You make it in advance and just pop it in the oven. Often used for brunch (or as the classic dessert Bread Pudding), this one works great as a supper dish
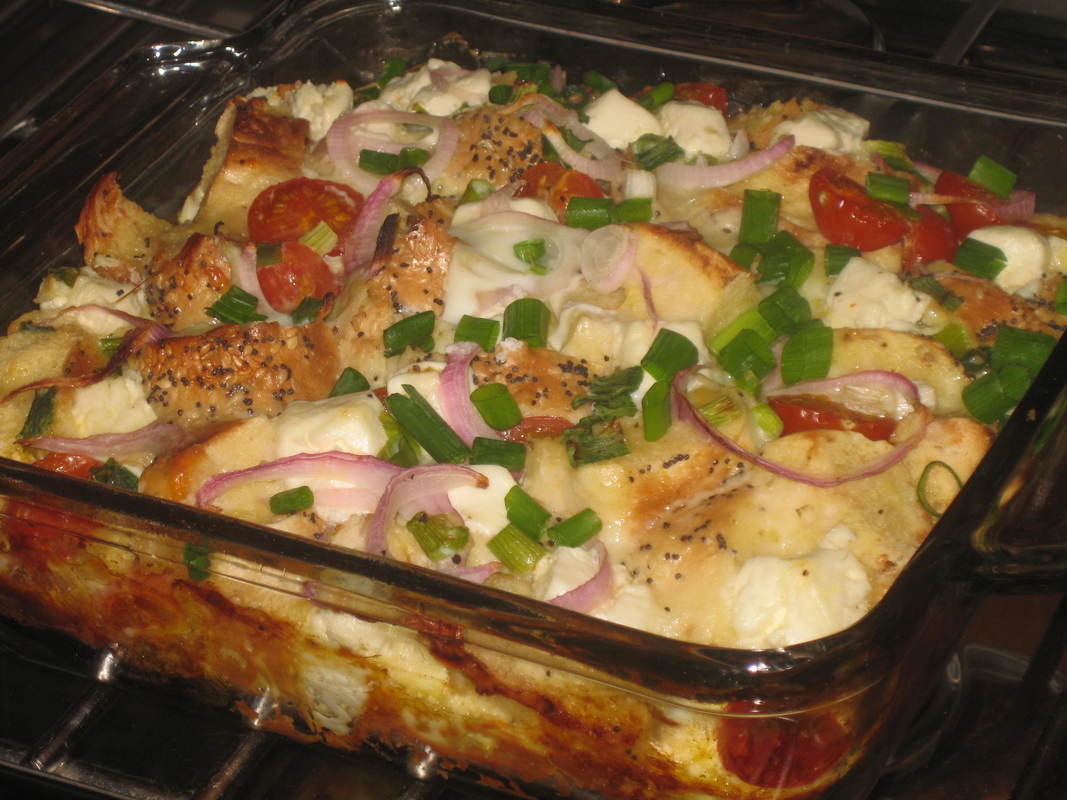
This recipe uses Everything Bagels from your local shop in lieu of regular bread! It's filled in with some classic bagel toppings, such as cream cheese and scallions. But it's ESSENTIAL to make this the day before!!!!!!!
This is what I used:
2 Everything bagels, torn
some sliced red onion
4 oz cream cheese
3/4 cups extra-sharp cheddar
1 scallion, plus more for garnish
3/4 cup cherry tomatoes, halved
1 1/4 cups milk (can use low fat)
4 eggs, beaten
Kosher salt, and fresh ground pepper to taste
pinch cayenne
All stratas are made the same way:
1. Grease a casserole dish
2. Add your bread and your veggies or meats, and toss together.
3. Beat milk and eggs, along with seasonings, and pour into dish.
4. LET SIT OVERNIGHT IN THE FRIDGE
5. Bake, covered, at 350 for 35-40 minutes, or until set.
6. Uncover and continue baking until top is lightly brown.
A Jewish bread----Challah
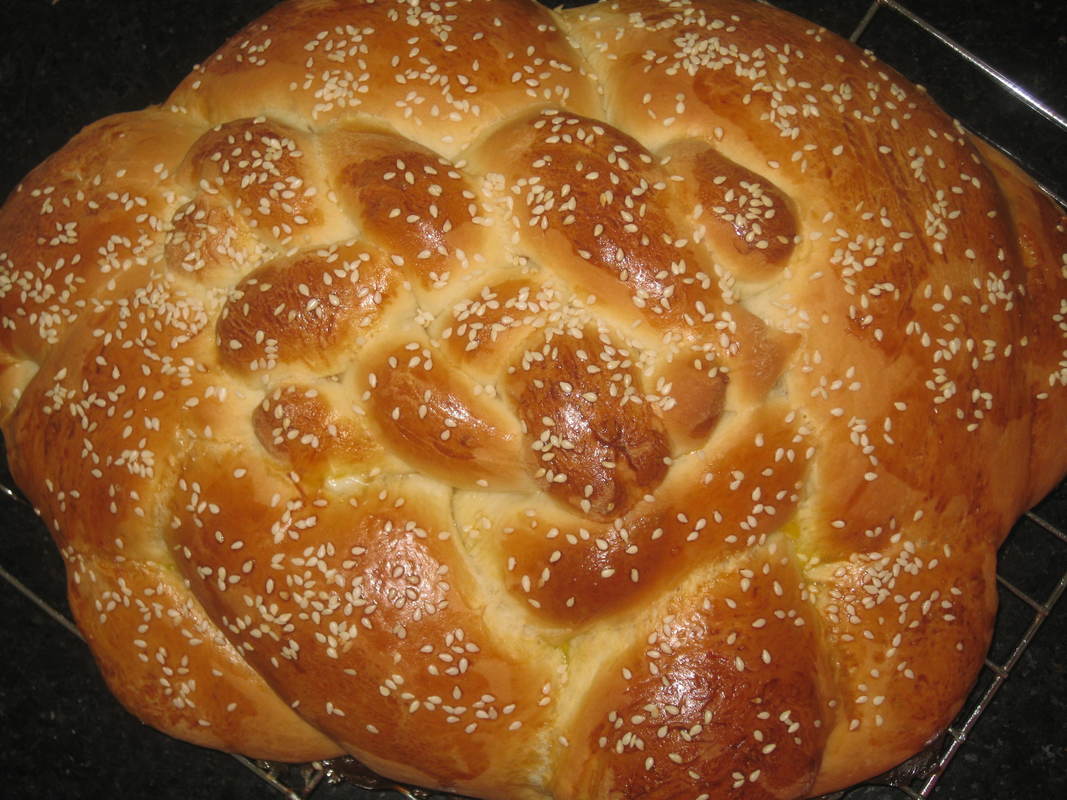
Challah is an egg-and-yeast bread, not unlike it's French cousin Brioche. Challah are traditionally braided, making for a lovely presentation on your brunch table.
Use the Contact Form for this recipe.
Use the Contact Form for this recipe.
These nacho burgers created by Bobby Flay are definitely over the top
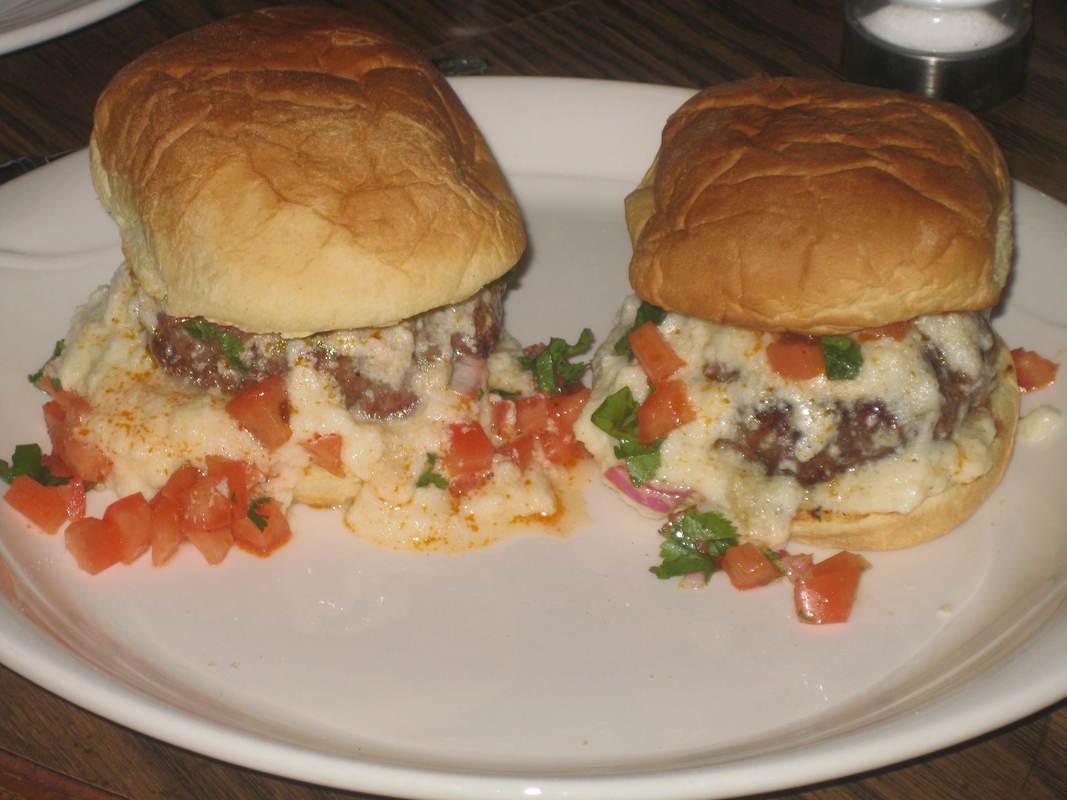
From the homemade salsa to the homemade nacho cheese sauce; from the goodness of ground chuck to the blue corn chips, these burgers are an amazing, messy mash-up of flavours.
The recipe is from famed chef Bobby Flay, and is available on line at Foodandwine.com.
The recipe is from famed chef Bobby Flay, and is available on line at Foodandwine.com.
Mmmmm......Mmmaple-Glazed Pork Chops with Toasted Pecans....right off your bbq grill!
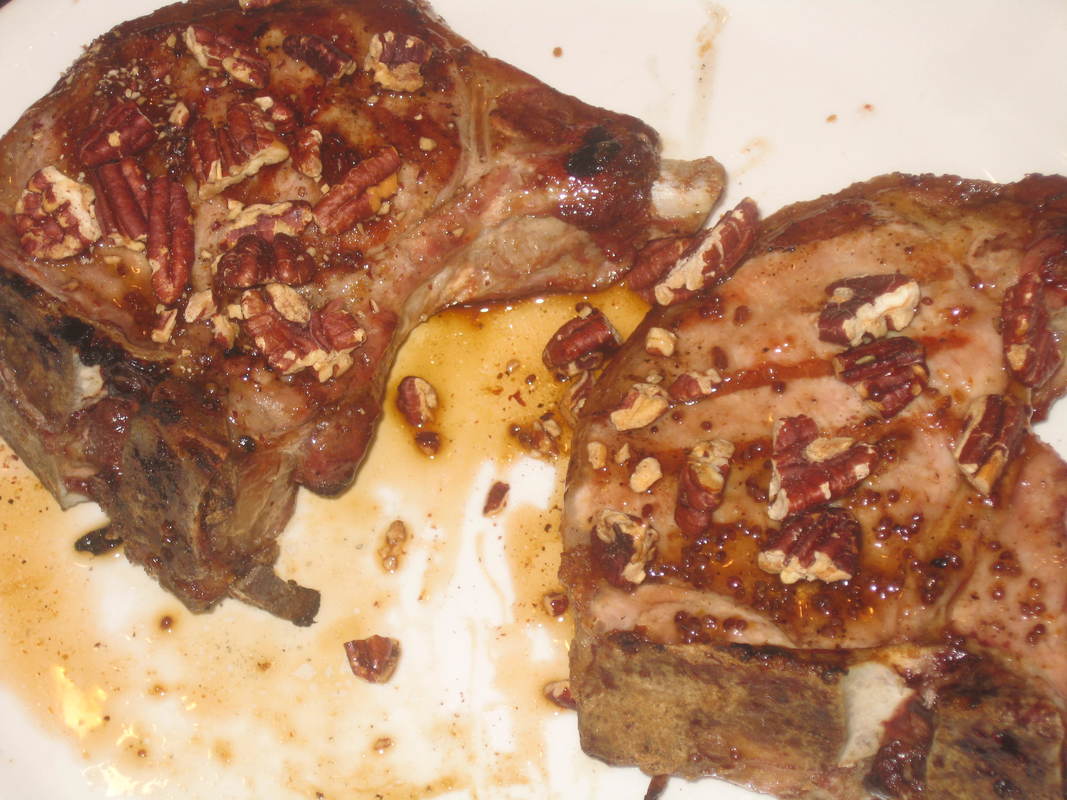
1/4 cup pecans
1/2 cup maple syrup (the real stuff, NOT "pancake syrup")
2 TBSP apple cider vinegar
1 TBSP whole grain mustard
sprig fresh rosemary
1/2 tsp sriracha
bone-in pork loin chops
vegetable oil
salt and fresh ground pepper
1. Toast pecans in a 350 degree oven until lightly brown, about 7 minutes. When cool enough to handle, coarsely chop.
2. Combine maple syrup, vinegar, mustard, rosemary, and sriracha. Bring to a boil; reduce heat, and simmer until reduced by almost half.
3. Fire up the grill. Season chops with salt and pepper, and brush with oil. Grill the chops over fairly high heat until almost done. When chops are about 3 minutes from being done, Brush each side with the maple glaze.
4. Continue to grill, turning a once or twice, until lightly caramelized-----about 2-3 minutes.
5. Remove to platter. Sprinkle with pecans.
Remember those slim, lacy disks of ground almonds bound with buttery caramel and gilded with bittersweet chocolate that you see in upscale pastry shops?
Those are Florentines.
Just look at these cookies----the "lace" and delicate texture seems impossible to achieve.
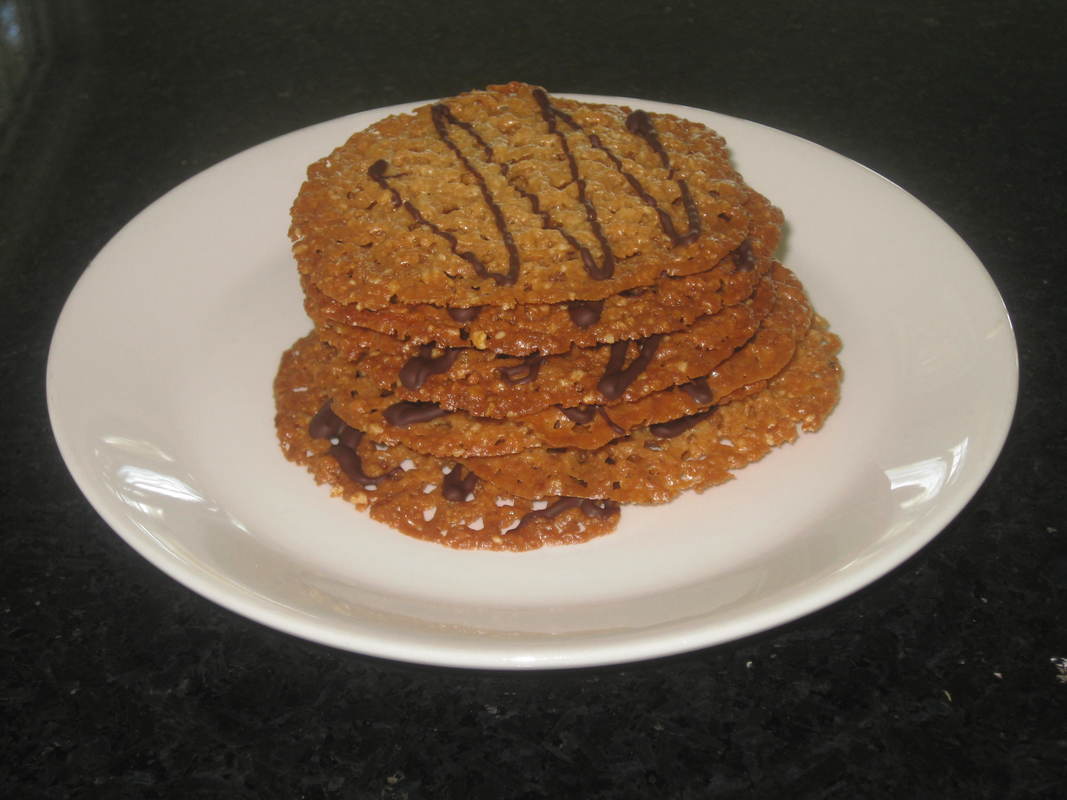
These cookies just melt in your mouth. There is no need to pay the high price they command at upscale pastry shops.
Technique, technique, technique! They are made from common ingredients, many (if not most) of which you likely have in your pantry.
Use the Contact Form for the recipe for these elegant, elegant cookies. Look at how lacy!
Technique, technique, technique! They are made from common ingredients, many (if not most) of which you likely have in your pantry.
Use the Contact Form for the recipe for these elegant, elegant cookies. Look at how lacy!
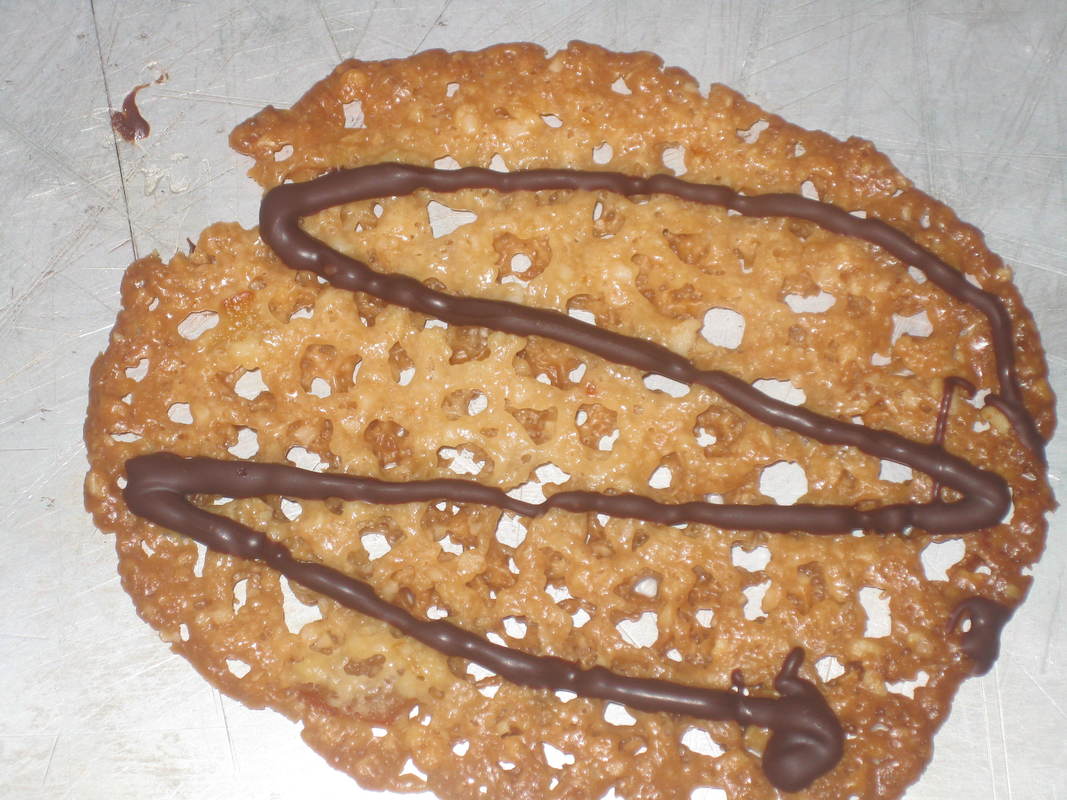
Apple-Onion Soup with Cheesy Puff-Pastry Croutons

This is a totally delicious soup (especially nice in the fall, but good any time of year). The Cheese-Puff Croutons are to die for-----make enough so you have leftovers!
For the cheese puffs:
6 oz puff pastry
egg
2 tsp milk
1/2 cup fresh parmasan, grated
2 TBSP grated cheddar
1/2 tsp chives
1/4 tsp kosher salt
1/8 tsp sweet Hungarian paprika
Whisk together egg and milk. Brush puff pastry with egg mixture, then sprinkle with cheeses and chives. Cover with plastic wrap, and use a rolling pint to press cheeses into the pastry. remove plastic wrap. Sprinkle with salt and paprika, and cut into rounds. Place on parchment-paper-lined baking sheet. Bake at 400 degrees for 10-15 minutes until golden.
For the soup:
1 1/2 TBSP butter
1 large vidalia onion, chopped
1 garlic clove
1 large Honeycrisp or Gala apple, sliced
1 bay leaf
1 qt chick broth
6 TBSP apple cider
1 small russet potato, peeled and sliced thin
6 TBSP heavy cream
2 tsp lemon juice
1 tsp kosher salt, or more to taste
1. Heat butter in a soup pot over low heat. Saute onion, garlic, and bay leaf until caramel-coloured, stirring often, about 20-25 minutes.
2. Add apple and cook until tender, about 3-4 minutes.
3. Add broth, cider, and potato. Cook until potato is tender, about 10-15 minutes. Remove bay leaf.
4. Process using a hand-held blender (or in the alternative, cool and blend later----do not put hot liquids in a regular stand-blender).
5. Add the rest of the ingredients, and heat until just under a boil. Serve with the cheese puff croutons.
My Tokyo memories: Baozi; or as they are called in the U.S., "Bao Buns"

There are wonderful little buns in Asia that have no American equivalent. These are yeast rolls that are steamed. It gives them the most wonderful soft yet chewy texture. There is just nothing like them in the U.S., though I've seen them in the Netherlands-----probably due to the Malaysian influence there. They are of course Chinese in origin, but many Asian nations have some version.
I was pleased to find the buns at my local Asian market, distributed by a company called Chimei. I do prefer the ones that in Chinese are called "lotus-shaped", as shown above. I also used plain pulled pork from my local supermarket-------it's hard to make a small amount of pulled pork, so buying it pre-made works well for these (since one doctors-up the pork with Asian influences).
Bao buns, such as Chimei
1 lb prepared pulled pork
1/4 cup gochujang
3 TBSP Japanese mayo such as Kewpie brand (important: don't use American mayo)
1 1/2 TBSP ponzu sauce
1 1/2 TBSP (plain) rice vinegar
European cuke, sliced
carrots, cut into matchsticks
1/4 cup plain fried shallots (not salted----available at Asian markets)
1/4 cup cilantro
lime wedges
1. Pre-heat oven to 475 degrees. Grease a foil-lined jelly roll pan, and spread pork on it in an even layer. Bake for 10 minutes, then heat broiler and broil until crisp, about 2-3 minutes.
2. Place buns in bamboo steamer. Steam over boiling water for about 8 minutes until heated through and soft.
3. Mix gochujang, mayo, ponzu, and vinegar. Toss with the crispy pork.
4. Put the buns together by filling with the pork, then topping with the veggies and fried shallots. Serve with lime wedges.

A better-for-you Steak Frites
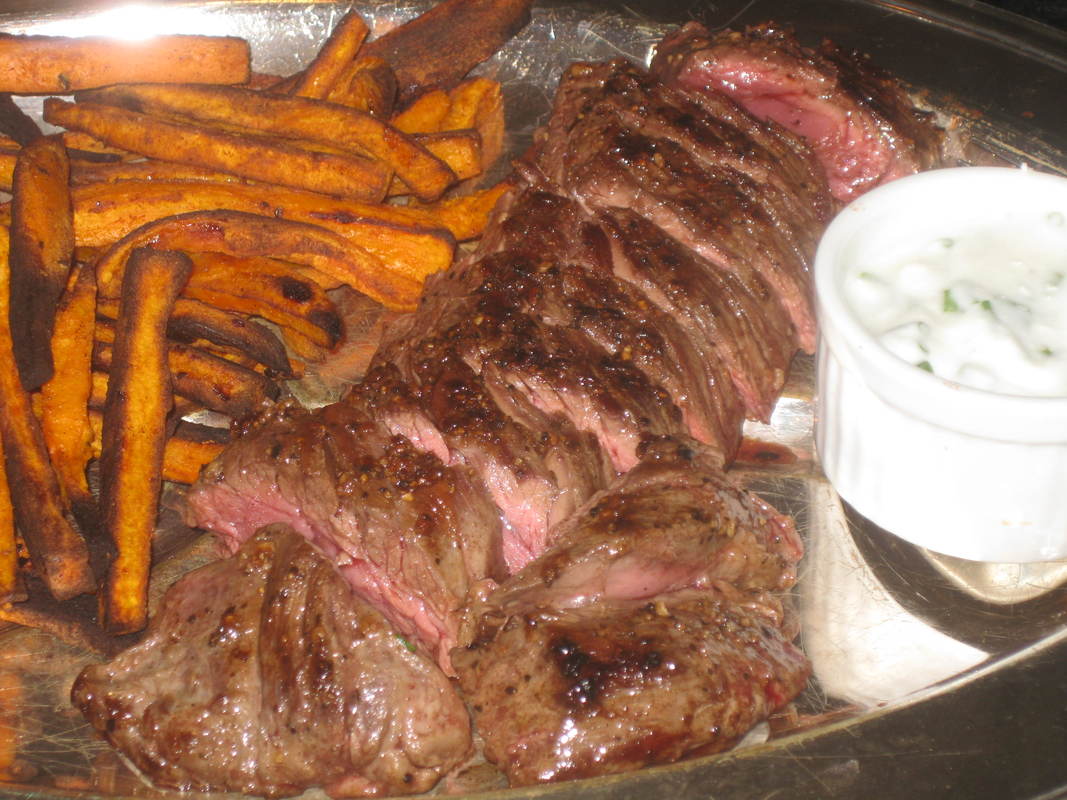
Paris is one of my homes, and every brasserie in Paris (Brussels too for that matter) has some version of Steak Frites on its menu. Both France and Belgium claim to have invented it!
My version uses hanger steak, which my mother used to call "the butcher's cut" because she said "the butcher always keeps it for himself". My own butcher does call it "the butcher's tenderloin" and it's an extraordinarily good cut. Very tender like tenderloin, but with more flavour. There is only one per steer, which is why they aren't usually seen in your local supermarket.
My recipe also includes sweet potato "fries" which I bake in a small amount of olive oil seasoned with smoked paprika and cumin.
Though steak frites is often served with bernaise, I lighten things up with a sauce made of yogurt and blue cheese. This is a yummy combination!
2 lbs sweet potatoes, peeled and cut into french-fry shapes
2 TBSP extra virgin olive oil
1 tsp smoked paprika
1 tsp cumin
1/2 tsp salt
1/4 tsp pepper
cooking spray
1 more TBSP olive oil
hanger steak
steak seasoning of your choice (I use Montreal seasoning for this dish)
1/4 cup plain yogurt
1 TBSP crumbled blue cheese
1. Toss together first 6 ingredients. Coat jelly roll pan (or pans-----you will likely need more than one) with cooking spray. Bake at 450 degrees for 25 minutes.
2. Mix together yogurt, cheese, and chives. Set aside.
3. When fries are almost done, season the steak and cook it by the method of your choice. The authentic French method is to fry it in your cast-iron skillet with 1 TBSP of olive oil. This yields the best flavour.
4. Serve the steak with the yogurt sauce and fries on the side.
You can make a wonderful, creamy, deluxe mac and cheese very quickly in the microwave

Here's how to do it:
1/4 cup very finely chopped onion
1/4 cup finely chopped green pepper
2 TBSP H2O
In a 2-qt casserole, combine above ingredients and microwave for 2 minutes.
2 cups elbow macaroni-----cooked
8 oz shredded cheddar
1 can condensed (i.e. Campbell's) cream of mushroom soup
6 oz can sliced mushrooms (canned are better than fresh for this retro dish!)
24 Ritz crackers, crushed
3/4 cup milk
1/4 cup choppped pimentos
Add all above ingredients to casserole, stir well. Cook at 70% power for for 10 minutes, stirring once. Remove from microwave.
1 TBSP butter
12 crushed Ritz crackers
Melt together in microwave. Sprinkle atop casserole.
These floral cupcakes are the prettiest little cupcakes ever. You can make these! They are just gorgeous with decorations of flowers and shells (all made of frosting!!!!!)


These babies are rich chocolate, with a wonderful buttercream frosting.
It's all about technique!!!!! Use the Contact Form to learn how to make these beautiful cupcakes----perfect for a wedding or a shower.
It's all about technique!!!!! Use the Contact Form to learn how to make these beautiful cupcakes----perfect for a wedding or a shower.
These little bites are a perfect hors d'oeuvre!
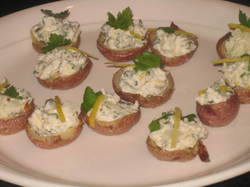
15 petite red potatoes
1 TBSP olive oil
1 tsp kosher salt
1/2 cup sour cream
2 TBSP capers
2 tsp finely chopped flat-leaf parsley, plus whole leaves for garnish
2 tsp chopped fresh dill
1 tsp grated lemon zest, plus more for garnish
2 tsp whole grain mustard
1/2 tsp salt
garnishes: whole parsley leaves and lemon zest
1. Toss potatoes with olive oil and the 1 tsp salt. Bake at 350 degrees until they can be pierced through with a small knife; 30-40 minutes. Remove from oven and cool until they are cool enough to handle.
2. Cut each potato in half. Scoop out pulp, leaving shells intact.
3. Place potatoes, cut side up, back in oven and bake until dry, about 10 minutes. Let cool completely.
4. Meanwhile combine rest of ingredients (other than garnishes). When potato shells have cooled, mound each with the potato mixture. Garnish with parsley leaves and lemon zest.
Delightful Greek: Avegolemono Soup
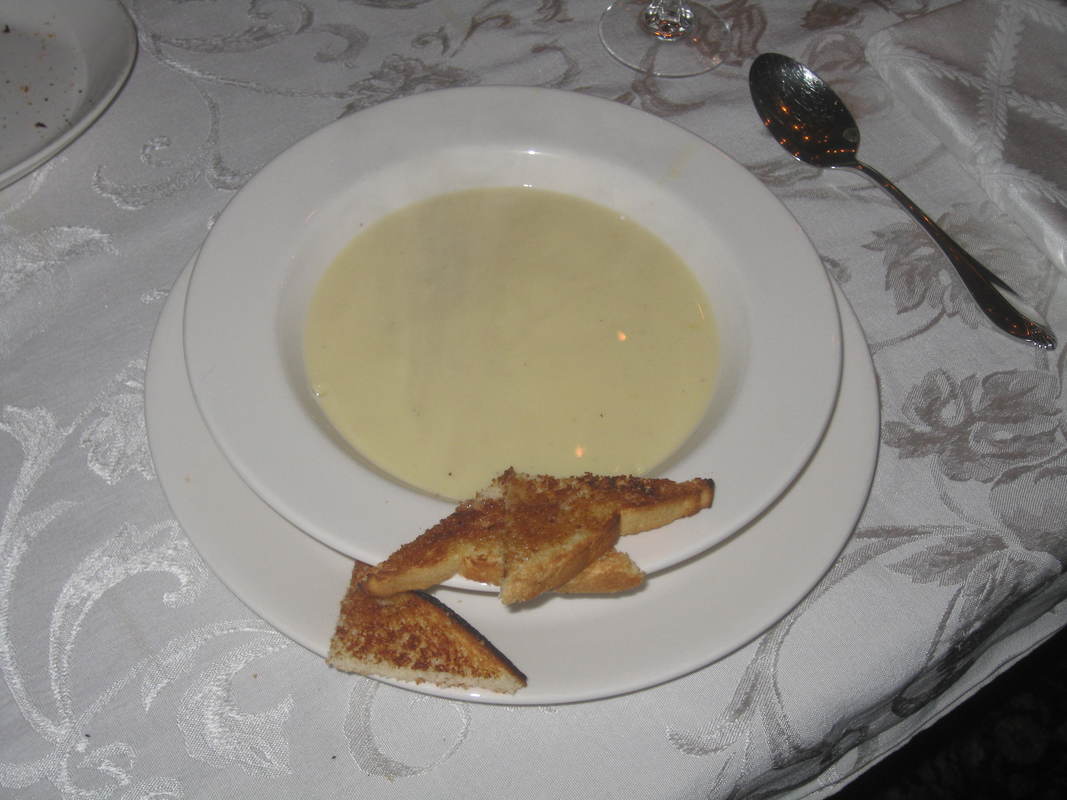
"Avegolemono" refers to a family of lemon-and-egg-based sauces and soups that are common in Greece, Turkey, and among Sephardic Jews; also to a certain extent in the Balkans. The soups are thickened by eggs, which are carefully tempered to thicken without turning into scrambled eggs.
These soups are thus creamy, and rich from the eggs but with a delightful tang from the lemons. You may add shredded chicken if your family likes it. I prefer a bit of small pasta in it------orzo works well.
1 quart low-sodium chick broth
1/4 cup orzo
1 whole egg
2 egg yolks
zest and juice from 1 lemon
kosher salt
fresh ground pepper
1. Boil broth and orzo until orzo is cooked; about 6 minutes.
2. Meanwhile, whisk eggs, egg yolks, lemon juice, and lemon zest together.
3. Temper the egg mixture by slowly drizzling about 3/4 cup broth into it, whisking constantly.
4. Once egg mixture is tempered, slowly drizzle it into the broth-pot, whisking constantly.
5. Simmer gently, stirring constantly, until mixture coats the back of a spoon----about 8 minutes.
6. Season with salt and pepper and serve immediately.
Arugula Salad with Filet Mignon
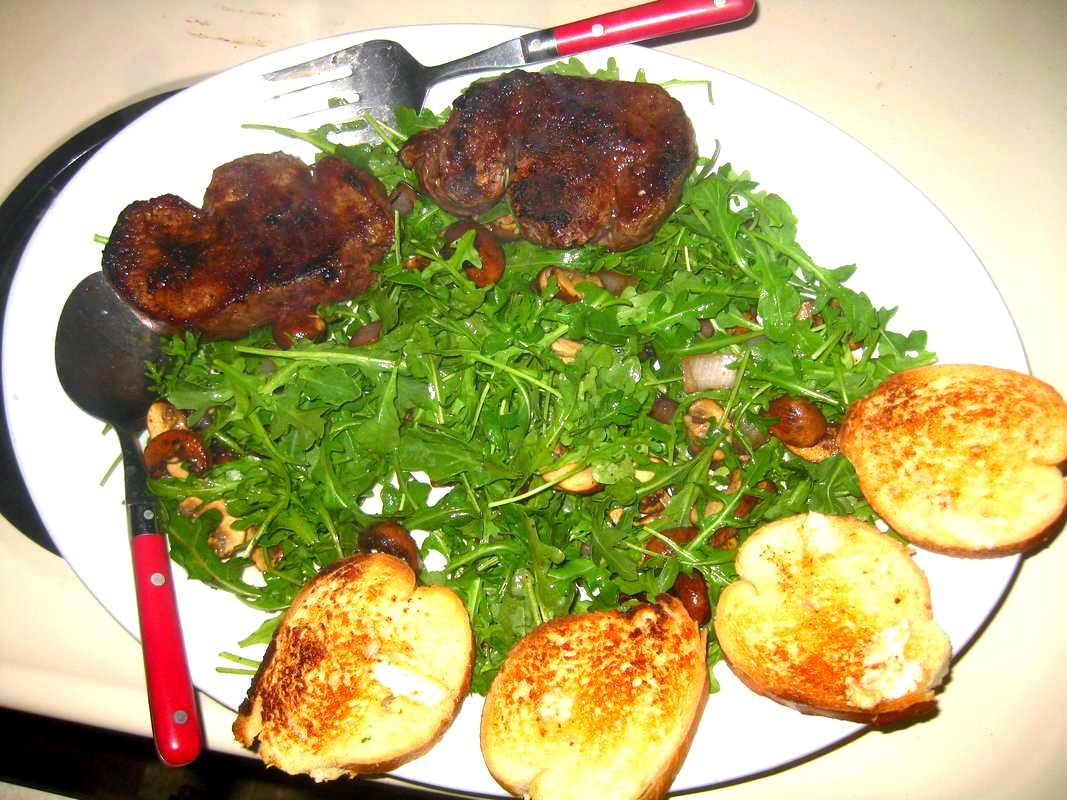
We like good cuts of beef served over salad------usually Caesar salad. But this salad with peppery greens, mushrooms, and red onions is also a great foil for a nice cut of beef.
Always cook these kind of cuts as the French do-----in cast iron, on the cook-top. Don't use the grill!
2 1/2 oz baby arugula
1 TBSP lemon juice
4 oz. baby belle mushrooms
1/4 cup red onion, chopped
1 TBSP butter
salt and pepper
2 filet of beef
baguette and extra butter (optional)
1. If using, toast slices of baguette in a cast-iron pan in a small amount of butter. Set aside.
2. Toss arugula and lemon juice, set aside.
3. Melt the 1 TBSP butter in cast iron pan. Add onions and mushrooms, salt and pepper to taste, and saute over moderately high heat until mushrooms release liquid. Pour contents of pan over arugula mixture and toss.
4. Salt and pepper the beef. Cook beef filets over moderately high heat---about 4 minutes per side for medium-rare.
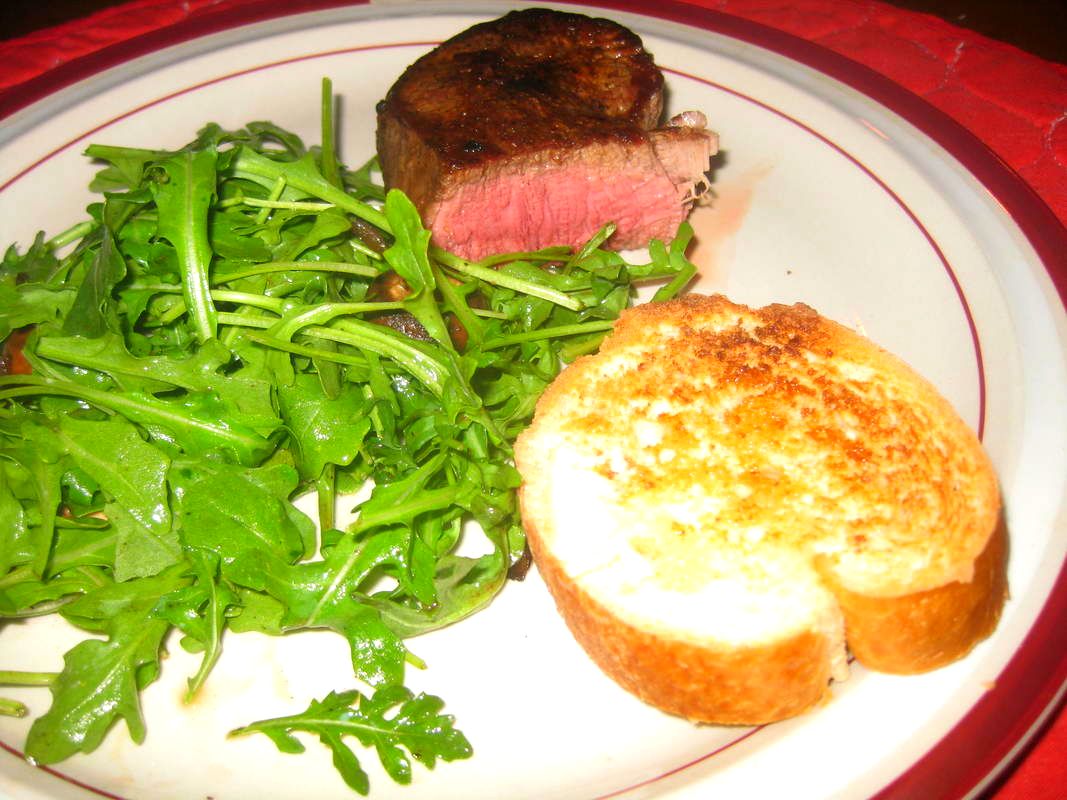
There are a lot of "copycat of [name your chain-restaurant]" on the internet. My recipe for Orange Chicken is instead the way I learned to make it from a woman in China.
It has the heat of hot pepper, but is sweet at the same time. It's one of my "go-to" recipes, and when I serve it to people who have lived in Asia, it's always a huge hit.
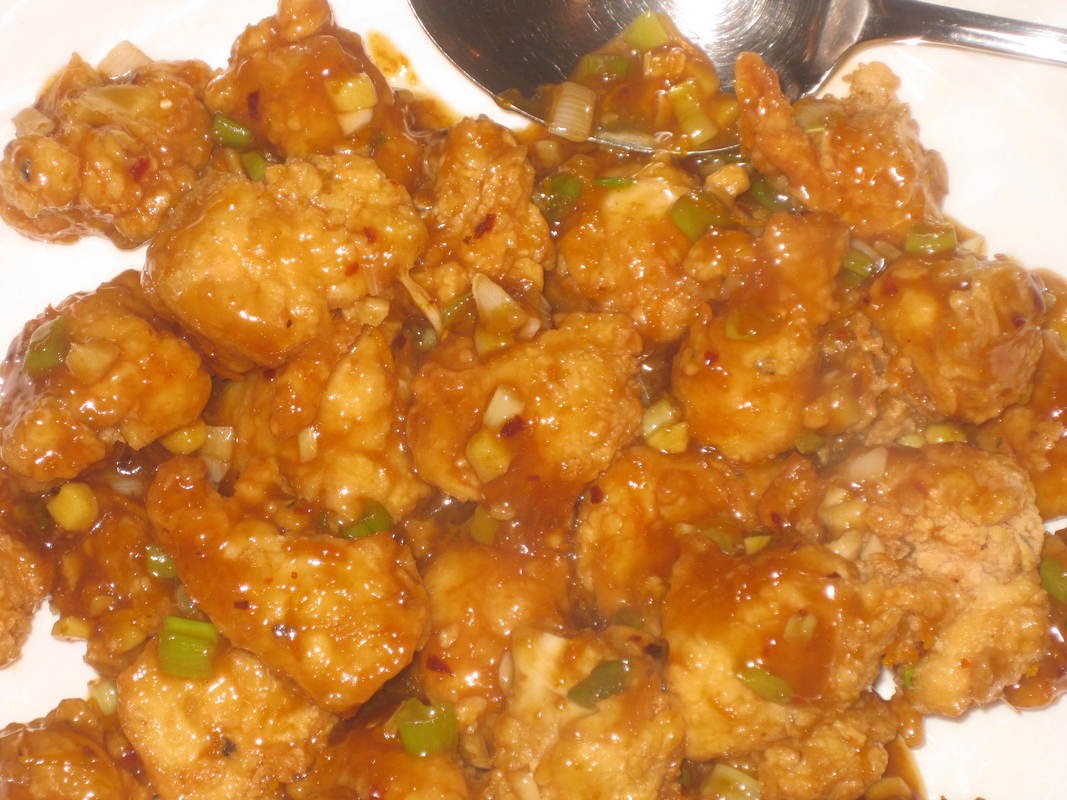
This is NOT a low-calorie recipe (though it's not totally horrifying)
Nor is it a recipe for beginner cooks.
But I do this dish a few times a year because of what it is......which is authentic and perfect.
FOR THE CHICKEN:
3/4 to 1 pound chicken tenders; or equivalent amount of boneless breasts, cut into 1" pieces
1 egg
1 TBSP peanut oil
salt
pepper
1/4 cup flour
1/2 cup cornstarch
deep-fry oil
FOR THE SAUCE:
1/4 cup water
4 1/2 tsp soy sauce
5 TBSP white vinegar
1/4 cup (or a bit more) brown sugar
1 TBSP sake
2 TBSP orange zest
1 TBsp cornstarch
1/2 tsp sesame oil
a bit more water?
FOR PUTTING IT TOGETHER:
1/4 cup sliced scallions
1 TBSP minced ginger
2 large cloves garlic, minced
1/2 tsp hot red pepper flakes
OK, now put it together.
1. Get out your wok and bring oil to high heat for deep frying.....375 degrees.
2. Beat together the egg, salt, pepper, and peanut oil.
3. Whisk together flour and cornstarch.
4. Dredge chicken pieces first in egg mixture, then flour mixture. Toss into wok and deep fry until done, about 2-3 minutes. Remove and drain on paper towels.
5. Drain oil from wok. There will be a small amount of oil left. Toss in scallions, ginger, garlic, and pepper flakes. Cook until fragrant, about 30 seconds.
6. Add sauce ingredients to wok. Add chicken back to wok. Cook quickly, tossing to coat chicken pieces. When sauce thickens, you're done!
This delicious dish is great served with sticky rice (Thai sweet rice or sushi rice).
One of my favourite Dim Sum----Pork and Chive Dumplings in Chili Oil. These dumplings are steamed, not fried, so are lower in fat than most.
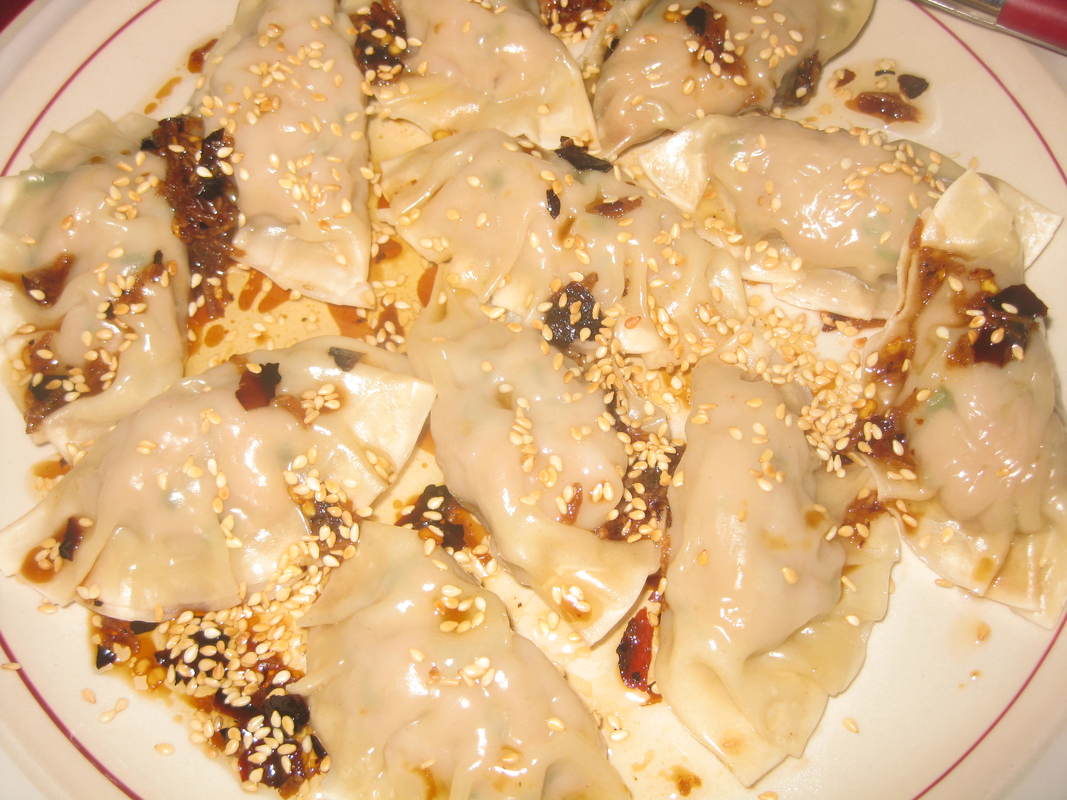
You can certainly use lean ground pork for this recipe in lieu of the pork tenderloin. Just be sure to use LEAN ground pork, otherwise your dumplings will be greasy.
FOR THE CHILI OIL:
3 bird chilis
1 1/2 TBSP peanut oil
1 tsp sugar
1 tsp sesame oil
2 tsp soy sauce
2 tsp unseasoned rice vinegar
1 garlic clove, grated
1. Heat a small skillet, such as an omelet pan, over medium heat. When hot, add whole chilis and cook until fragrant and beginning to brown.
2. When cool enough to handle, remove stems, then process in a mini food processor until broken in small pieces.
3. Warm the oil until it shimmers. Remove from heat and add the rest of the oil ingredients. Set aside.
FOR THE DUMPLINGS:
8 oz pork tenderloin or ground pork
1 tsp sugar
1/4 cup chopped chives
1 tsp soy sauce
1 garlic clove, grated
1 tsp grated ginger
1/4 tsp white pepper
1 egg
gyoza wrappers (about 20)
lettuce leaves
toasted sesame seeds
1. If using pork tenderloin, process in food processor until ground but still chunky. Add next 7 ingredients (through egg) and pulse until combined.
2. If using ground pork, mix all ingredients together until well combined.
3. Using about 1 TBSP of pork filling for each, fill the gyoza wrappers. Moisten edge of each wrapper to pleat and seal.
4. As you create each dumpling, place it in lettuce-leaf-lined steamer basket.
5. Steam dumplings about 8 minutes or until cooked through.
6. Spread chili oil on a platter, and place dumplings on top. Sprinkle with sesame seeds and serve.
Last month's burger-of-the-month that I forgot to post: the Tex-Mex burger
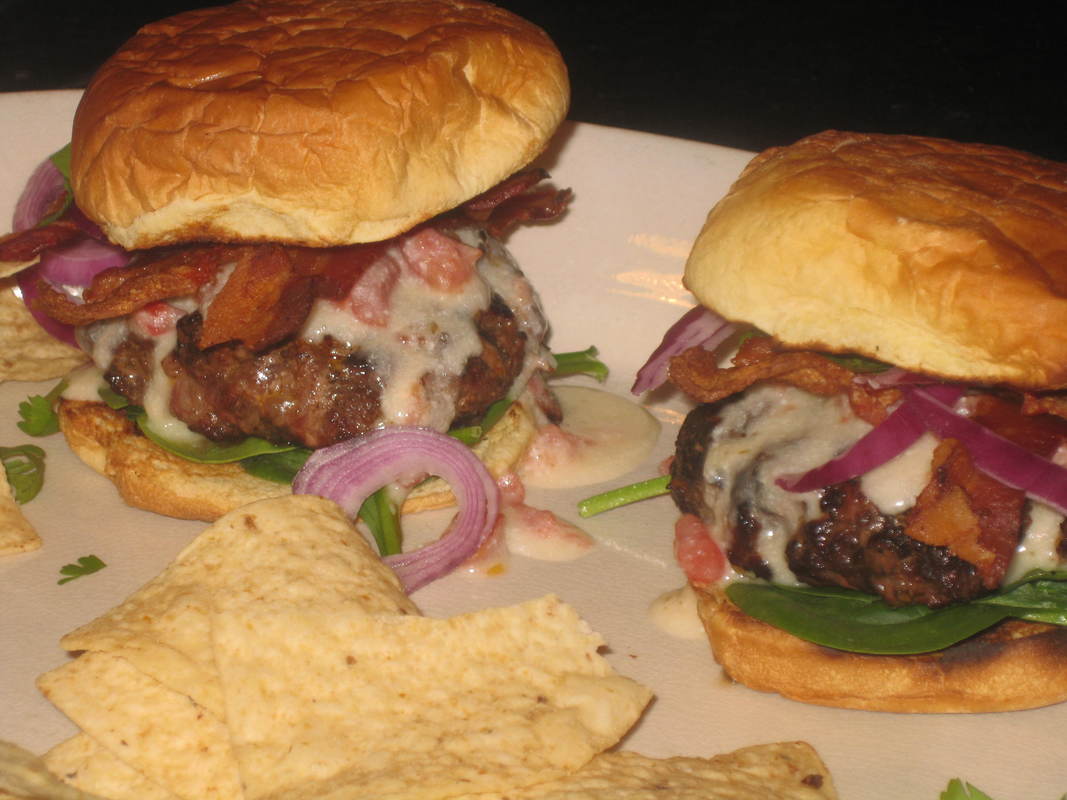
What you need and how to make them:
For TWO burgers:
6 slices smoked bacon, divided----4 slices cooked, and 2 slices uncooked and chopped
10 ounces 80% lean ground beef
2 TBSP grated onion
1 garlic clove, minced
1 TBSP of the sauce from chipotle chilis in adobo
1 TBSP worcestershire
salt and pepper
olive oil
1 1/2 TBSP butter
1TBSP flour
1/2 cup milk
3/4 cup cheddar
7 ounce can diced tomatoes with green chilis (such as Rotel)
Hamburger rolls
corn chips
sliced red onion
pickled jalapeno
cilantro
chopped tomato
Boston lettuce leaves
1. Combine beef, uncooked chopped bacon, grated onion, garlic, adobo sauce, and worcestershire. Season with salt and pepper. Brush with olive oil, and grill about 5 minutes per side.
2. While grilling, make the queso sauce: Melt butter over medium heat. Whisk in flour, and cook a minute or so to get rid of the raw-flour taste. Add milk and cook, stirring until thickened. Add cheese, stirring, until it melts. Add tinned tomatoes and cook until tomatoes have warmed.
3. To assemble: Place a leaf of lettuce on the bottom of each roll. Top with burgers, then queso sauce, then bacon, onion slices, chopped tomato, and cilantro.
I used Food & Wine's recipe this month for our once-a-month burger indulgence, and am glad I did
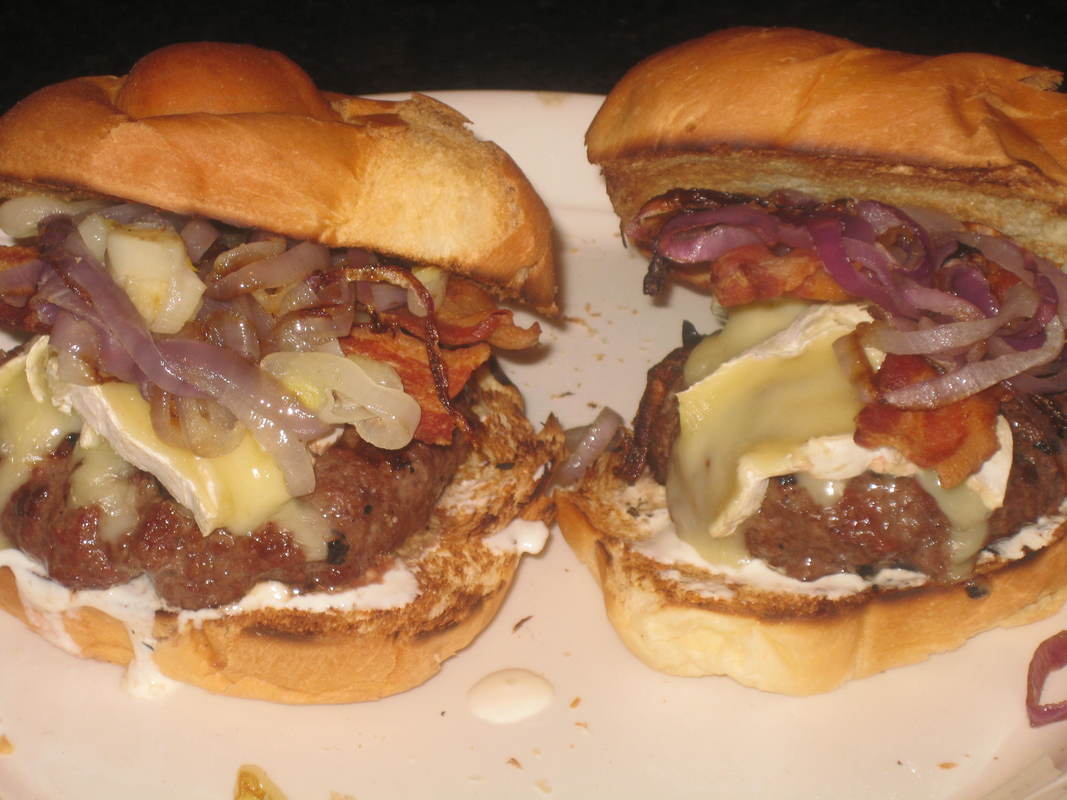
This super-easy and yummy recipe uses a lemon mayo, roasted onions, and brie cheese. Highly recommended!
Use the Food & Wine website for this recipe, https://www.foodandwine.com/recipes/bacon-burgers-brioche-buns
Use the Food & Wine website for this recipe, https://www.foodandwine.com/recipes/bacon-burgers-brioche-buns
My husband asked, "What's for dinner" and I replied, "Things that are bad for you, rolled up in pizza dough".
Welcome to stromboli!

This is a true Italian dish that we often have been given as a nosh in the afternoon at bars in Italy. It's almost impossible to make a small one, so must go with the normal-size one and plan to have leftovers. It keeps well.
You will need:
About 1 lb pizza dough
1/4 lb Black Forest Ham (DO NOT SUBSTITUTE!)
1/4 lb provolone
1/4 lb soppressata
1/4 lb mozzarella
a big handful of fresh basil leaves
1/4 lb roasted red peppers in olive oil
1 or 2 pepperoncini, minced
1 egg yolk, lightly beaten with 1 TBSP H2O
some sesame seeds
Roll out the dough to about 10 x 14 inches. If it resists, let it rest 10 minutes or so until it stretches without resistance.
Place the ingredients in the order listed above on the dough. Roll up and seal the edges.
Brush with the egg wash, then bake at 375 degrees for 40 minutes. Let it rest around 20 minutes before cutting.
Is it a quesadilla? Is it a burger? Do I really have to choose?
And 1/8 pound of ground beef per person can be enough!!!!
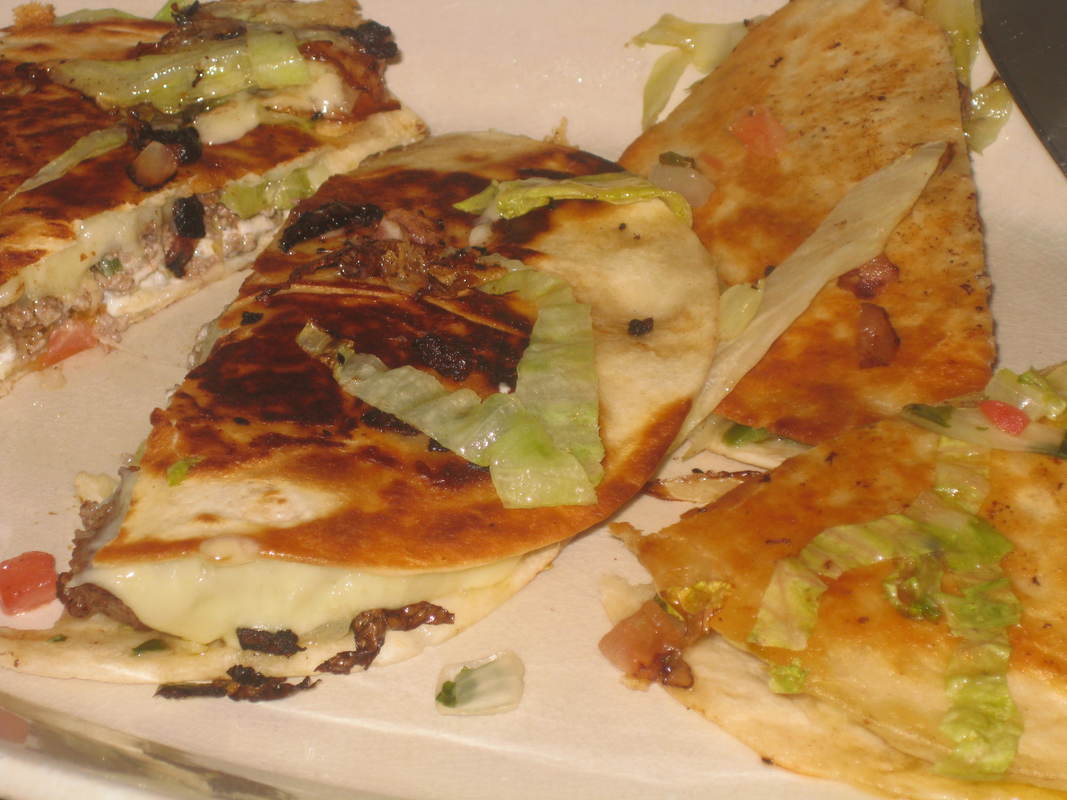
This will serve 4 people:
For the burgers:
1/2 lb. ground chuck
1 small garlic clove, minced
a small jalapeno (about 1 tsp minced)
1/2 tsp chili powder
For the quesadillas:
3/4 cup shredded jack cheese
3/4 cup shredded very sharp cheddar
3/4 cup shredded iceberg lettuce
1/2 cup pico de gallo
a couple TBSP sour cream
4 small (taco size) flour tortillas
veg oil, if needed
1. Mix burger ingredients together. Smash them down in a hot skillet until they are thin and wide, and fry on each side until done. They will be crispy on the outside, tender on the inside. Remove to a plate.
2. Wipe out skillet. Add oil if needed. Place 1 tortilla in skillet. Top with half the cheeses, the lettuce, one of the burgers, half the pico de gallo, and a blop of sour cream. Top with another tortilla. Fry until the tortilla is brown and crispy, about 1 1/2 minutes. Carefully flip over and fry the other side until crispy, another 1 1/2 minutes.
3 Remove to plate and fry the second quesadilla in the same fashion.
I served these with my own homemade cole slaw. Totally delicious!
Cutest. Cupcakes. Ever!
These little mice will delight children and make adults laugh.

You can do this on any flavour of cupcakes-----in this house we like chocolate. You'll need both Chocolate frosting (for the noses) and good Swiss buttercream (for the faces).
They don't take a lot of talent to put together. Licorice rounds and "shoestrings" are necessary, along with chocolate-covered sunflowers. I used Necco wafers for the ears-----but the New England Candy Company who makes those little wafers may be out of business in 3 days. I'd read about that possibility in The Wall Street Journal so bought a bunch of them in advance.
They don't take a lot of talent to put together. Licorice rounds and "shoestrings" are necessary, along with chocolate-covered sunflowers. I used Necco wafers for the ears-----but the New England Candy Company who makes those little wafers may be out of business in 3 days. I'd read about that possibility in The Wall Street Journal so bought a bunch of them in advance.

More burgers!!!! Because, folks, it's grilling season!
These beauties have the usual cheddar, lettuce, and tomato (along with the unusual addition of scallions) but it's the sauce that makes them special.
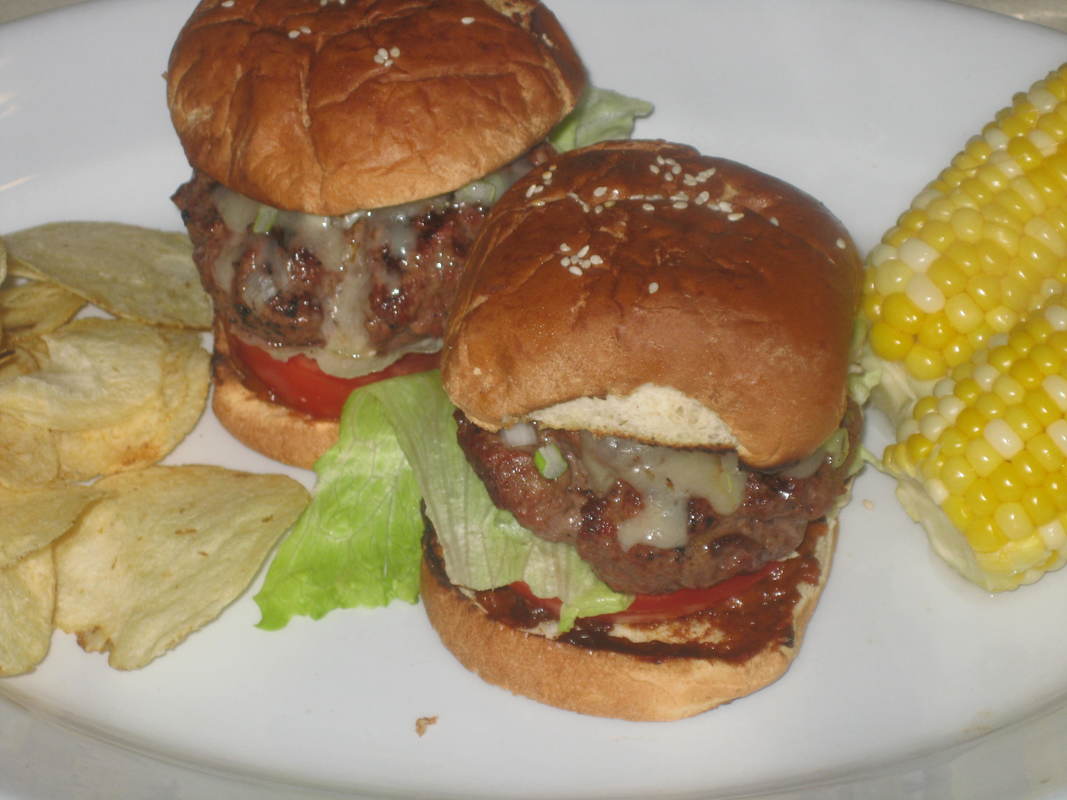
This sauce will take your burgers to another level. Use it to BRUSH on the burgers as you grill them, and also a bit on your toasted buns.
Here's what you need to make this amazing sauce:
3/4 tsp oil
1/4 of a small onion, finely chopped
2 tsp minced fresh ginger
1 small clove garlic, minced
1/4 c tomato puree
1 1/2 tsp ketchup
3/4 tsp red wine vinegar
3/4 tsp worcestershire
1 1/8 tsp Dijon
1 1/2 tsp honey
1 1/2 tsp molassses
4 1/2 tsp ancho chili powder
small amount of minced chipotle in adobo
2 TBSP water
1 1/2 tsp peanut butter
Saute the first 3 ingredients until soft. Add other ingredients and boil until desired consistency.
Pour into blender, and puree until smooth.
Composed Salads are a favourite at my house

No need for a recipe here----it's pretty obvious. But if you are curious as to how to make this one at home, know that I used:
Red leaf lettuce (Can't use romaine these days!!!)
Cherry tomatoes
Deli ham
Deli turkey
Cheddar
Swiss
Hard-boiled eggs
English cuke
4 strips of bacon
A bit of shaved fresh parmesan
a scallion for garnish
Homemade Italian dressing
Composed salads are lovely....and let everyone arrange their personal plate to suit themselves.
If you don't know how to make a lovely-looking hard-boiled egg (with no icky black stuff discolouring the yolk----looking at YOU, Liz!)-----use the contact form for the method to make perfect eggs every time.
Pull-apart Pecan Sticky Buns-----another great coffee bread
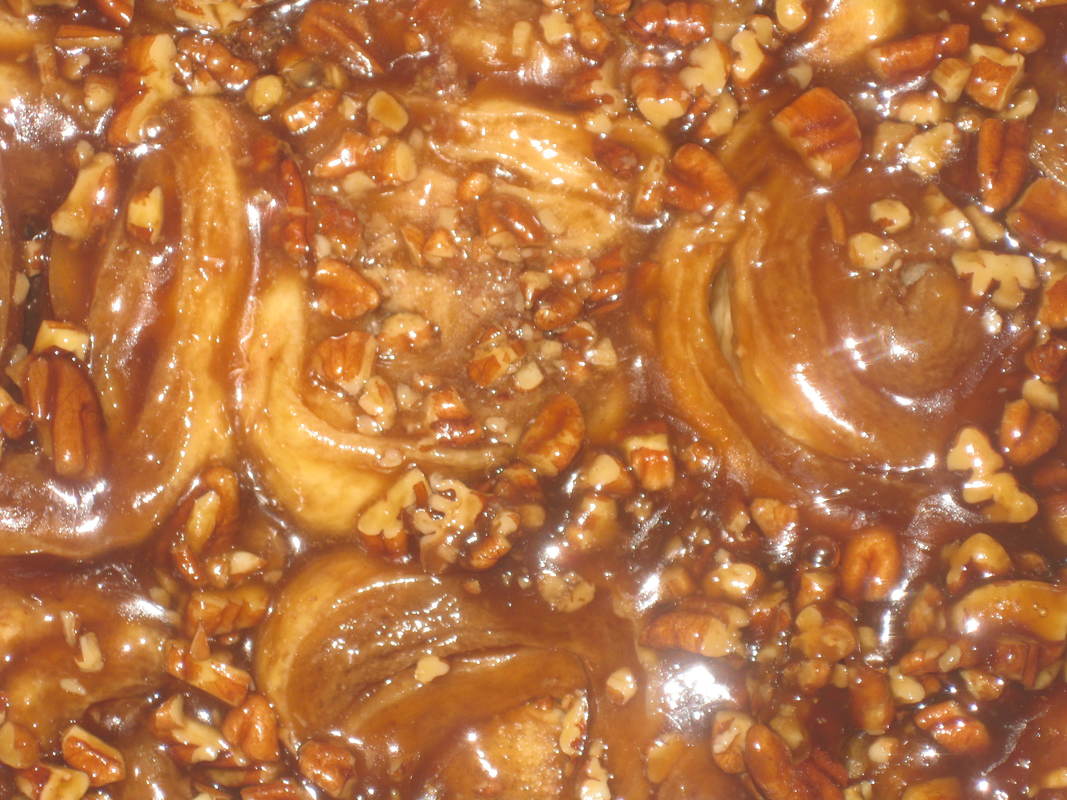
These are easier than they look. As usual, I recommend kneading with your stand-mixer, and giving the dough it's first rise the day before. You will need:
FOR BUNS:
about 2 cups flour
2 TBSP sugar
1/2 tsp salt
1/4 cup 2% milk
2 TBSP water
1 1/8 tsp dry yeast
about 2 TBSP butter
1/4 cup Egg Beaters or similar
FOR FILLING:
2 tbsp melted butter
1/4 cup dark brown sugar
FOR PAN:
1/4 cup butter
1/2 cup dark brown sugar
1/4 cup light brown sugar
1/4 cup chopped pecans
1. Mix 1/2 cup flour, sugar, salt, and yeast.
2. Combine milk, water, and 2 TBSP butter. Heat over very low heat until warm (about 115-120 degrees). Gradually add to dry ingredients, and beat 1 minute at medium speed.
3. Add Egg Beaters and a bit of flour. Beat at high speed for 2 minutes.
4. Stir in the rest of the flour, and either knead by had or with your stand-mixer for 8-10 minutes.
5. Place in greased bowl and turn to grease top. Let rise until doubled.
6. While dough is rising, prepare pans: Melt 1/4 cup butter then stir in the 1/2 cup dark brown sugar and the corn syrup. Heat until sugar is dissolved, then pour into an 8-inch-square baking pan. Sprinkle the pan with the pecans.
7. Punch down dough. This is the time to refrigerate it if you aren't using it until the next day.
8. Roll dough into a 14 x 9 inch rectangle. Brush with the melted 2 TBSP butter, andsprinkle with the 1/4 cup brown sugar.
9. Roll dough up from a 9" side, then cut into 9 1-inch slices. Place slices in prepared pan.
10. Let rise until doubled in size. Bake at 375 degrees for 20-25 minutes. Cool in pan 10 minutes, then invert pan onto a serving dish.
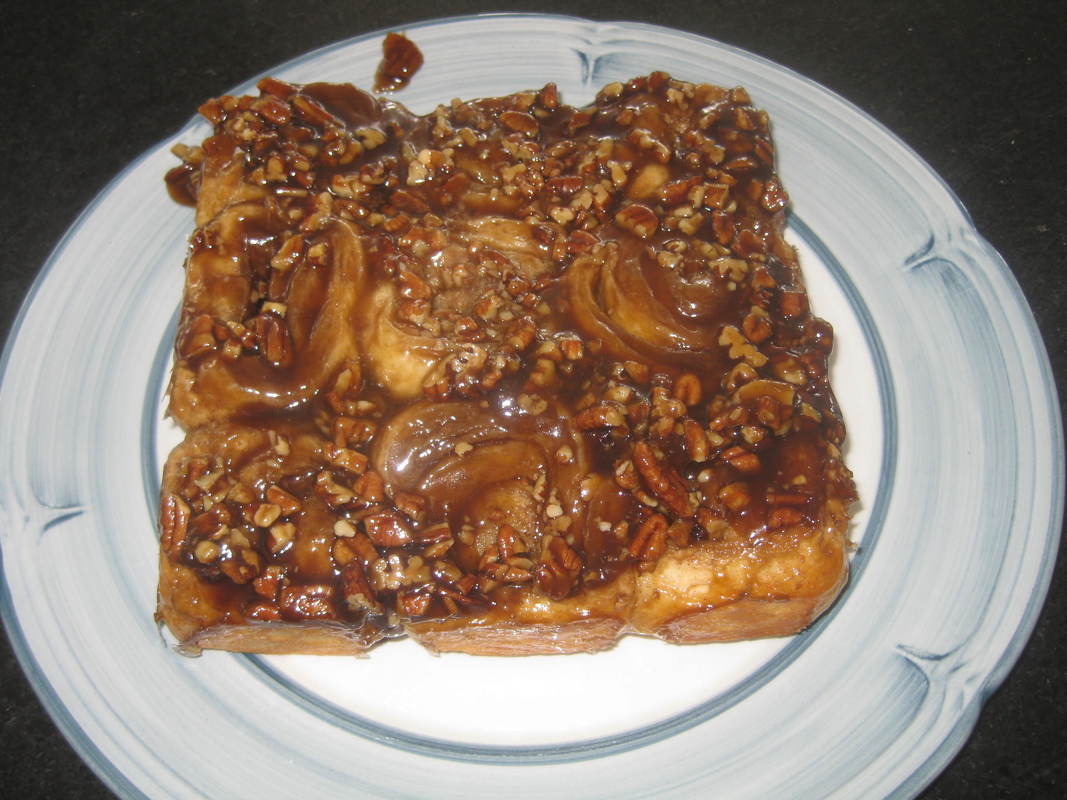
Quick and easy, if you can just plan to marinate it the night before: Ginger Beef and Pineapple Kabobs
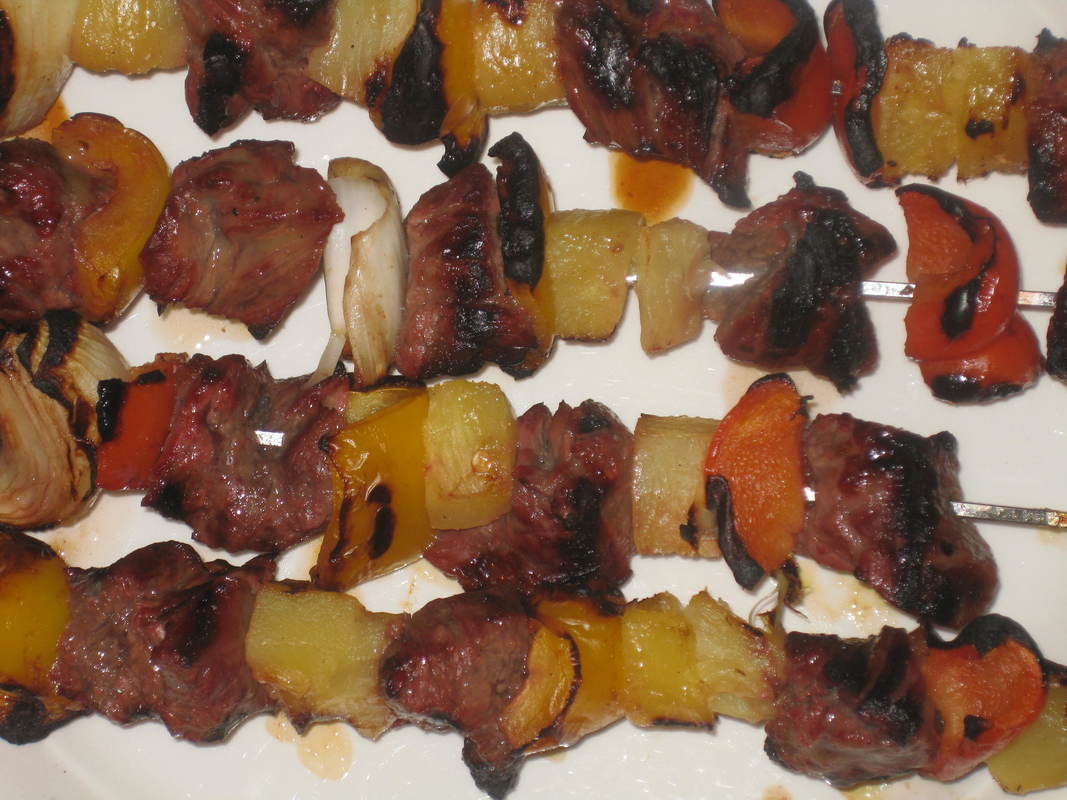
It's fine to use tinned pineapple for this recipe; in fact it's a good idea because you'll need to use some of the juice. Mix a little of the juice with some bottled marinade-----a Thai flavour that contains ginger and lime juice is great. Marinate some sirloin steak and the veggies (I used onion and red bell pepper) overnight in a zip-lock plastic bag.
The next day, thread onto skewers along with the pineapple. Grill for 10 to 15 minutes until desired doneness, turning once and basting often with marinade. Do not baste during last 5 minutes of cooking (for food safety).
Voila! An easy, near-instant dinner for a busy weeknight.
The next day, thread onto skewers along with the pineapple. Grill for 10 to 15 minutes until desired doneness, turning once and basting often with marinade. Do not baste during last 5 minutes of cooking (for food safety).
Voila! An easy, near-instant dinner for a busy weeknight.
Brie & Cheddar & Apples & Beer makes the best soup you've ever tasted. Add some granola-like oat-pecan-cinnamon garnish and you have dinner perfection for apres-ski!!!!! (of course who knew we'd still need apres-ski recipes in April.......)
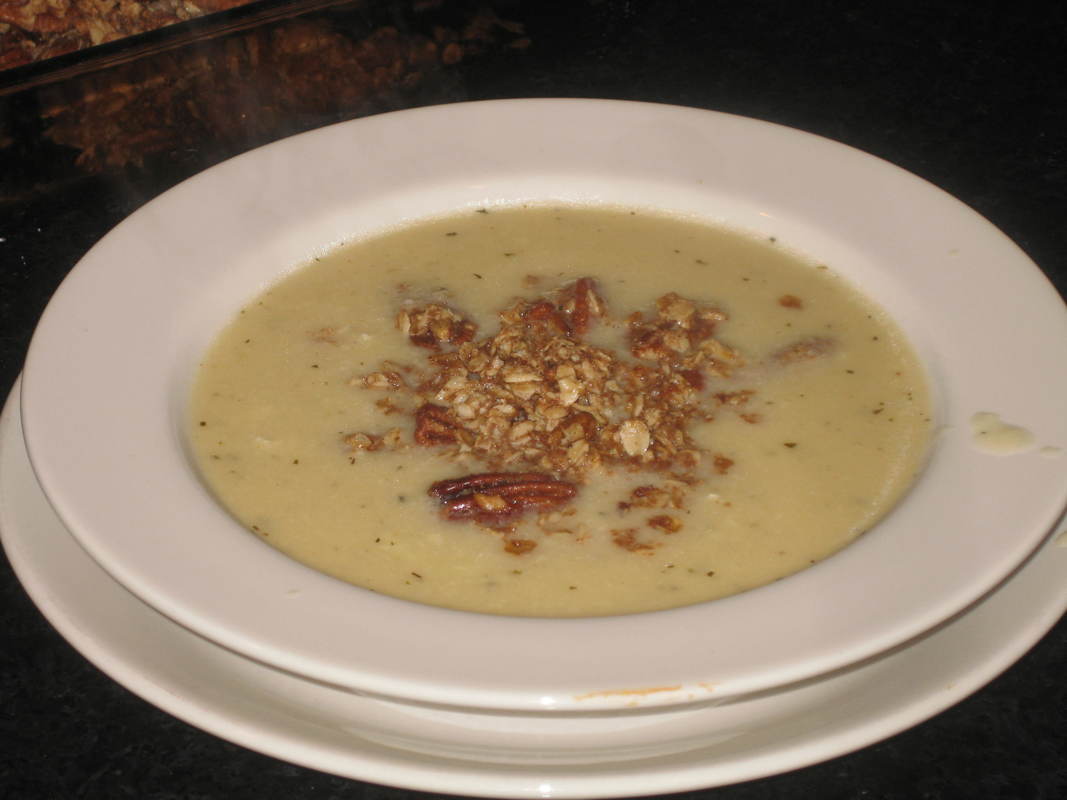
FOR THE SOUP:
2 TBSP olive oil
1 small vidalia onion, chopped
pinch brown sugar
salt and pepper to taste
2/3 cup apple cider
2 Honeycrisp apples, peeled and chopped fine
1/2 tsp dried thyme
1 bottle of beer
2 cups low-sodium chicken broth
1/4 flour
1/4 tsp cayenne
1 cup whole milk
1 cup grated cheddar
1/2 pound brie, without rind, softened
FOR THE GARNISH:
1 cup oats (NOT instant/one-minute)
1 1/2 cups raw pecans
2 TBSP flour
2 TBSP brown sugar
1/4 tsp salt
1 tsp cinnamon
3/4 stick unsalted butter, very soft
FIRST, PREPARE THE GARNISH:
1. Preheat oven to 350 degrees.
2. Stir together first 6 garnish ingredients.
3. Add in softened butter, using hands if necessary to thoroughly incorporate.
4. Place on parchment-line baking sheet. Bake for 10 minutes.
5. Stir, and bake for another 10 minutes, or until golden.
THEN, PREPARE THE SOUP:
1. Heat olive oil, then add onions and brown sugar. Saute until onions are soft but not brown.
2. Add next 6 ingredients (through broth).
3. Bring to a simmer and cook until apples are tender.
4. Using an immersion blender, puree until smooth. [Note: At this point, soup may be refrigerated for up to 48 hours. Soup can be blended in a regular stand blender once cooled].
5. Stir together milk and flour. When soup is at a simmer, add this mild mixture. Simmer until soup has thickened.
6. Add cayenne and cheeses, and stir continually until cheeses are melted. Serve immediately with garnish.
SOOOOOO YUMMY ON A COLD NIGHT!
I generally prefer coffee breads to coffee cakes, but I make an exception for this one

1 16-ounce can sliced peaches
1 1/4 cup flour
1/2 cup sugar
1/2 cup unsalted buttter
2 eggs
1 tsp baking powder
1 tsp rated lemon peel
Preheat oven to 350. Pat peaches dry with paper towels, set aside. Combine the rest of the ingredients, and beat at low speed for 1-2 minutes, forming a stiff batter. Spread into a 9-inch-square, greased baking pan. Arrange peaches over cake.
Then combine:
1/2 cup sugar
2 TBSP unsalted butter
2 TBSP flour
1 tsp grated lemon peel
Cover the peaches with this topping, and bake for 35-40 minutes.
After removing from oven, make a glaze with
1/2 cup powdered sugar
1-2 TBSP milk
Drizzle glaze over warm cake.
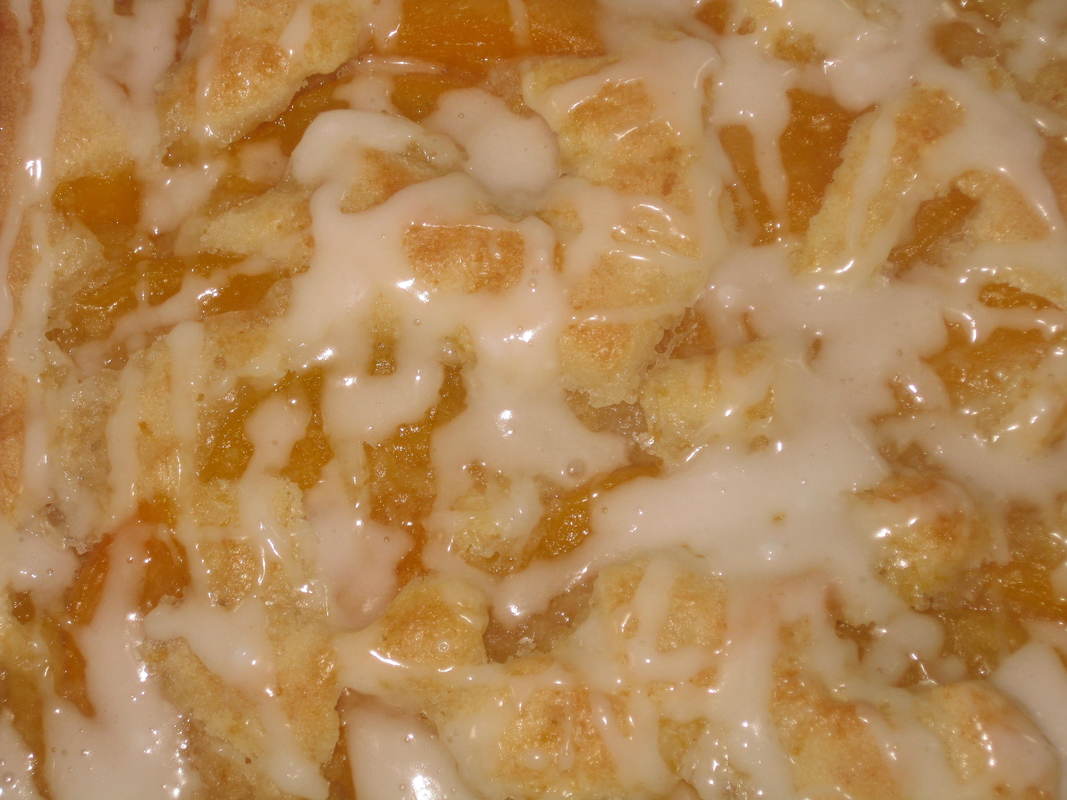
Say "Basil-Cream Sauce" to me and I'm RIGHT there. Meatballs in basil cream?
Prepare to have your husband or other significant other swoon.
McCusker said, "Liz wouldn't have a clue how to cook something this good. She can maybe do a pot roast".

Use the Contact Form if you'd like the recipe for this "Non-Pot-Roast" recipe!!!!!
A protein-packed composed salad for dinner tonight
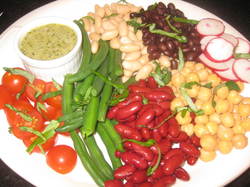
This super-easy salad is low in calories and so good for you! I used cannellini beans, dark red kidney beans, and garbanzos along with some lightly steamed green beans, radishes, and cherry tomatoes.....garnished with a bit of fresh basil.
I like to keep the dressing on the side so that each person can dress his or her salad to their liking. A basil vinaigrette goes very well with this. It takes just moments to make.
Simply whirl in a blender 1/2 cup minced fresh basil, a very small minced shallot, 1/4 cup olive oil, 3 tbsp red wine vinegar, 2 tsp agave syrup, 2 tsp dijon mustard, and salt to taste.
Let's call 'em "Docos". They are OMG good!!!!!

They are easy-peasy to make. Here's what to do:
First, make the cheese sauce:
1 TBSP butter
1 TBSP flour
1/2 cup milk
3/4 cup shredded extra-sharp cheddar
1/4 cup Jack cheese
1. Melt the butter and make a roux with the butter and flour. Be sure to cook this for a minute or two, in order to not have a raw-flour flavour.
2. Add the milk, stirring until the sauce almost comes to a boil and is thickened.
3. Whisk in the cheeses until the sauce is smooth. Season to taste with salt and pepper.
Then cook the hot dogs:
1 1/2 tsp olive oil
about 1/4 cup, plus or minus, chopped onion
1/4 tsp chili powder
kosher salt
fresh ground pepper
4 hot dogs, slashed several times on the diagonal
1. Heat the oil in a skillet over medium-low heat. Add all the rest of the ingredients and saute until the onions are tender; about 4 minutes.
2. Add the hot dogs to the skillet, and raise the heat to medium-high. Cook the dogs, turning as necessary, until the hot dogs are nicely charred.
Then put together the Docos:
4 taco shells
Guacamole
Sour cream
Pickled jalapenos
Warm the taco shells according to the package directions. Put some guacamole in each, and then a hot dog with a bit of the onion. Top with some cheese sauce, along with some sour cream and jalapenos.
Steak with butter sauces sound odd to some people. But they are very classic in France. Think about Bearnaise, for example.
However I was looking for something that was creamy, yet had a bit of a kick. Once again it was togarashi to the rescue!
There is nothing.....nothing.....quite so delicious as watching a compound butter slowly melt onto a fine piece of steak. When you serve it, it will initially look like this, but soon the butter melts into a delicious pool.......
There is nothing.....nothing.....quite so delicious as watching a compound butter slowly melt onto a fine piece of steak. When you serve it, it will initially look like this, but soon the butter melts into a delicious pool.......
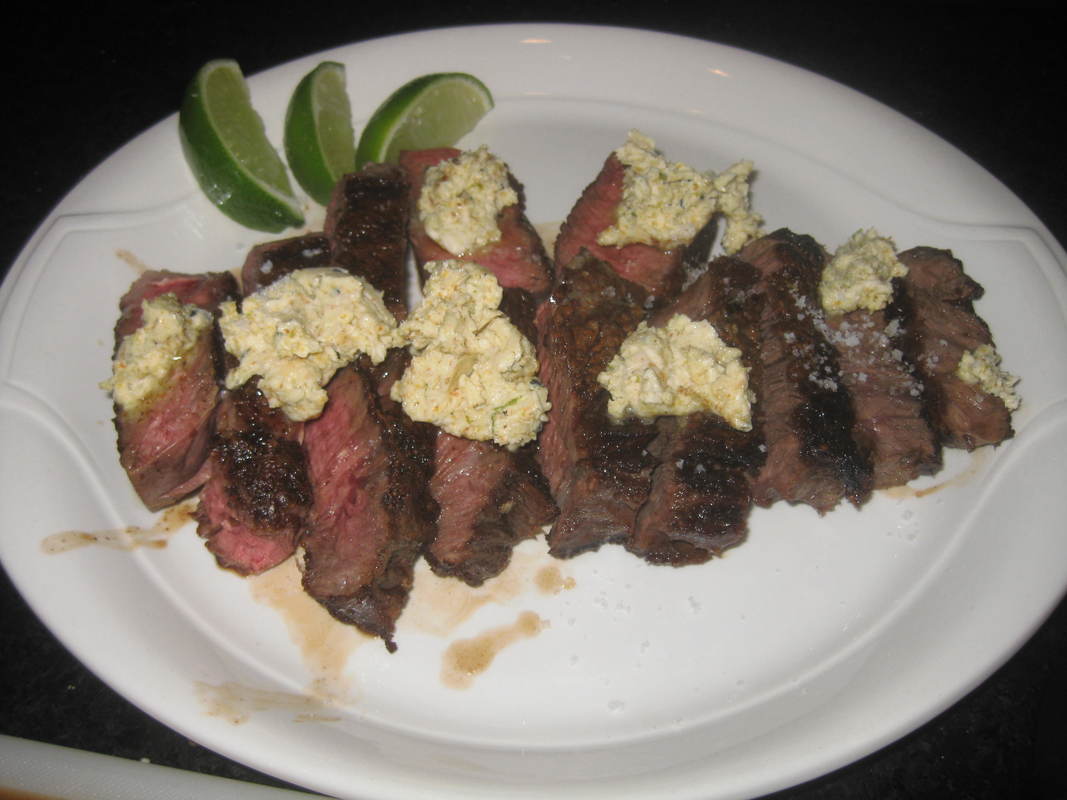
In this case for two of us (plus leftovers), I used a thick-cut rib eye that was BONE-IN, about 1 1/2 pounds total. I always recommend you buy your steaks bone-in------the presence of the bone imparts an enormous amount of flavour. I can't buy bone-in rib eyes at my local supermarket; it's worth going to a good butcher for these. I do fry better pieces of steak in the French manner (in unsalted butter, in a cast-iron pan)....this puts a nice caramelized crust on the outside. And of course a steak must sit for 5 or 10 minutes after cooking, otherwise when you cut it you will lose the juiciness.
For the compound butter, just blend half a stick of (unsalted) butter with 2 1/4 tsp togarashi and 1 1/2 tsp lime juice (if you are squeezing a fresh lime, also grate the lime zest and add that too).
This is a fabulous dish, and of course very, very easy!
Mmmmmm.......how about some fresh baked garlic rolls with dinner tonight?

This is a very basic bread recipe with just a couple of easy twists to make it feel like a special occasion.
For you cooks out there who are familiar with bread baking, this is a basic roll recipe that uses bread flour and whole milk, along with a TBSP of butter in the batter-------I also put in 1 1/2 tsp caraway seeds. The 8 rolls are rolled in garlic-parsley butter, monkey-bread style, before their second rising in the pan. Additional garlic-parsley butter, along with some good coarse sea salt, is poured over the rolls right after baking, immediately upon their removal from the oven.
If you aren't yet comfortable with bread baking, please use the Contact Form for detailed instructions!
In a nod to Antigua----and missing my maid/cook Marilyn like crazy----I made "Bananas Foster Crepes" for brunch. Yum, yum, YUMMMMMM!!! Talk about a taste of the Caribbean!
I've written about Bananas Foster elsewhere in this section of my web site. It's usually a dessert, and is attributed to New Orleans, but I am quite sure that isn't true since I've been eating it in Antigua since my grandmother's time.
We came home to a blustery Maine, and felt we'd left the island about a week too soon. What to do? Well, an island-style brunch of course!
You, my faithful readers know that crepes are one of my go-to meals. So I made some crepes, and then filled them with traditional Bananas Foster.
Here's how you do it:
First make my basic crepes, the recipe for which is elsewhere on this page. of the web site.
Then you will need:
3 TBSP unsalted butter
1/2 cup dark brown sugar
2 bananas, sliced about 1/4" thick
pinch kosher salt
pinch fresh grated nutmeg
1 tsp vanilla
1/8 tsp cinnamon
Melt the butter and sugar together until sugar melts. Then add the rest of the ingredients, and saute for a minute or two. Then add:
1/4 cup dark rum (e.g. Myers)
Carefully ignite this (which you can do on a gas stove simply by tipping the pan away from you until the alcohol fumes ignite. If you only have an electric stove, carefully ignite the pan with a long match) and cook until the flame goes out, about 1 minute.
Divide the bananas among the crepes, and fold the crepes twice. Pour the sauce over the crepes. Garnish with some creme fraiche.
You will think you died and went to Heaven....or at least to Antigua!

Here's a good New York style pizza to calm your cravings. I'm still off meat, but this is very indulgent!
And easy. I wasn't trying to make an artisanal pizza here.....just an alternative to take-out.
My pizza crust is incredibly easy to make if you have a good stand mixer.
1 tsp yeast
2/3 cup warm water
2 cups flour
2 TBSP olive oil
1 tsp kosher salt
Proof the yeast, then mix everything together and knead for 10 minutes (or do what I do-----let your stand mixer do the kneading while you go do something else). Cover the kneaded dough, and let it stand for 1 hour before spreading it in your pizza pan. (If it shrinks back when you try to stretch it, re-cover it and let it sit for 10 more minutes).
I then used an 8 oz tin of commercial tomato sauce (NOT "pizza sauce"). I used plenty of mozzarella (about 2 cups), 1/2 cup of grated romano, about a cup of sliced mushrooms, a cup of olives (I used black, as you can see, because I didn't know I was out of kalamata), 1/ 2 cup of cherry tomatoes, 1 TBSP dried oregano, 1 tsp hot red pepper flakes, and a bunch of torn fresh basil.
Brush the exposed edge of the crust with a bit more olive oil, and bake at the highest temperature your oven can attain (500 degreees at least).
Again not an artisanal pizza, just basic goodness with ingredients that you might have on hand anyway.
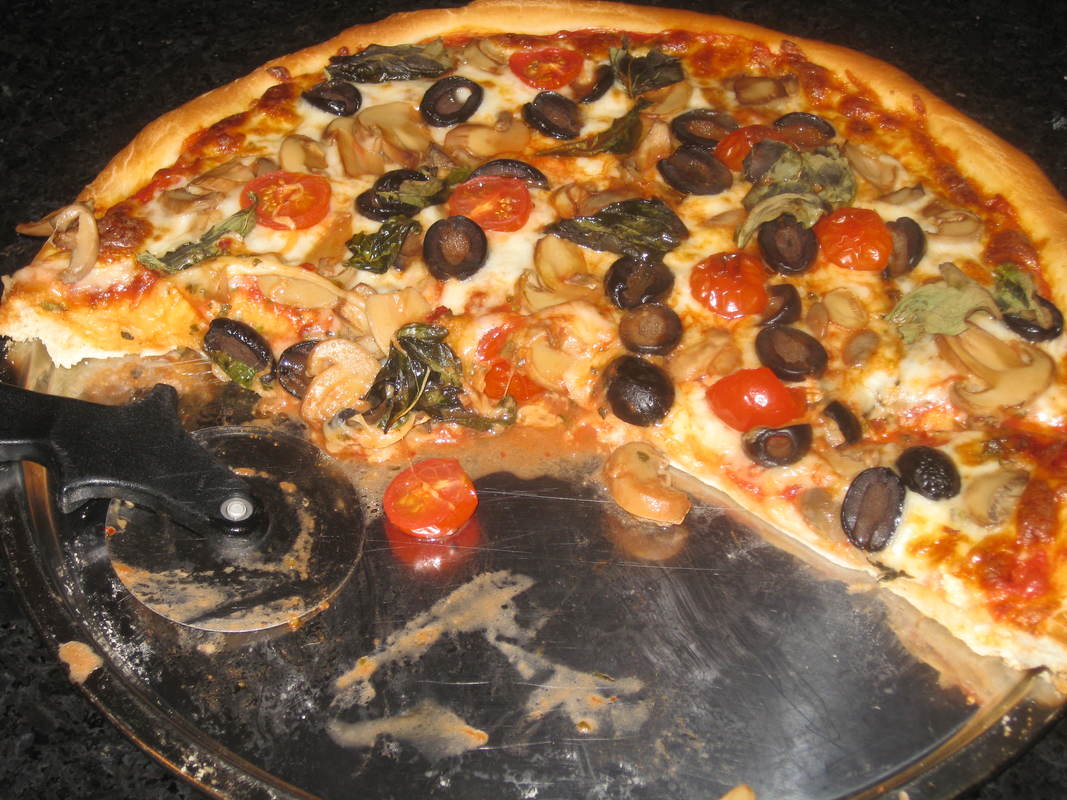
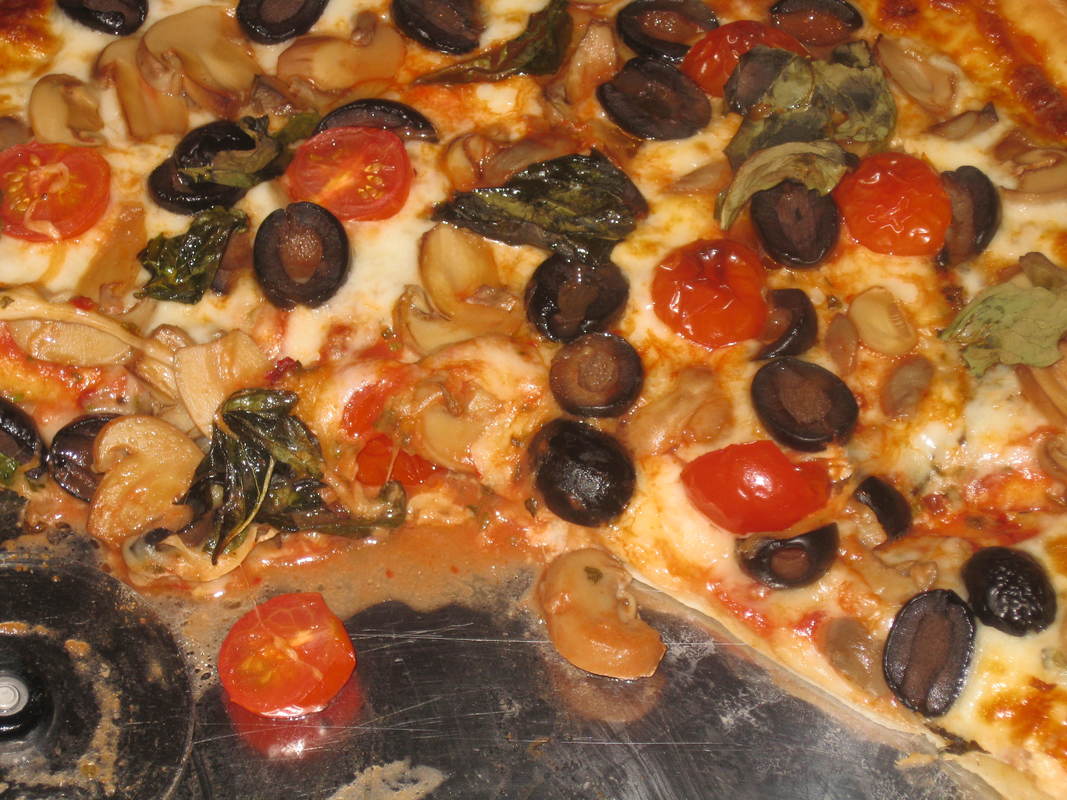
You asked for more homemade hamburger and hot dog rolls-----this batch, with both black and white sesame seeds was made a couple of months ago and frozen. Oh and the burgers? Marinated in beer!!!!!
These rolls are easy to make....and with the two kinds of sesame seeds, much more flavourful. Use the Contact Form for the easy recipe!
The burgers are American classics. For 2, use 1/2 lb ground beef, 1 or 2 minced garlic cloves, 1/2 tsp salt, and 1/8 tsp pepper. Pour in 2 TBSP beer. Let all this sit until the beer is absorbed, then form into patties (they will be loose, so handle carefully).
Grill or fry them, topping each with a slice of good ol' American cheese. Serve with mayo, tomato, lettuce, the bacon, and sliced red onion.
An absolute classic!
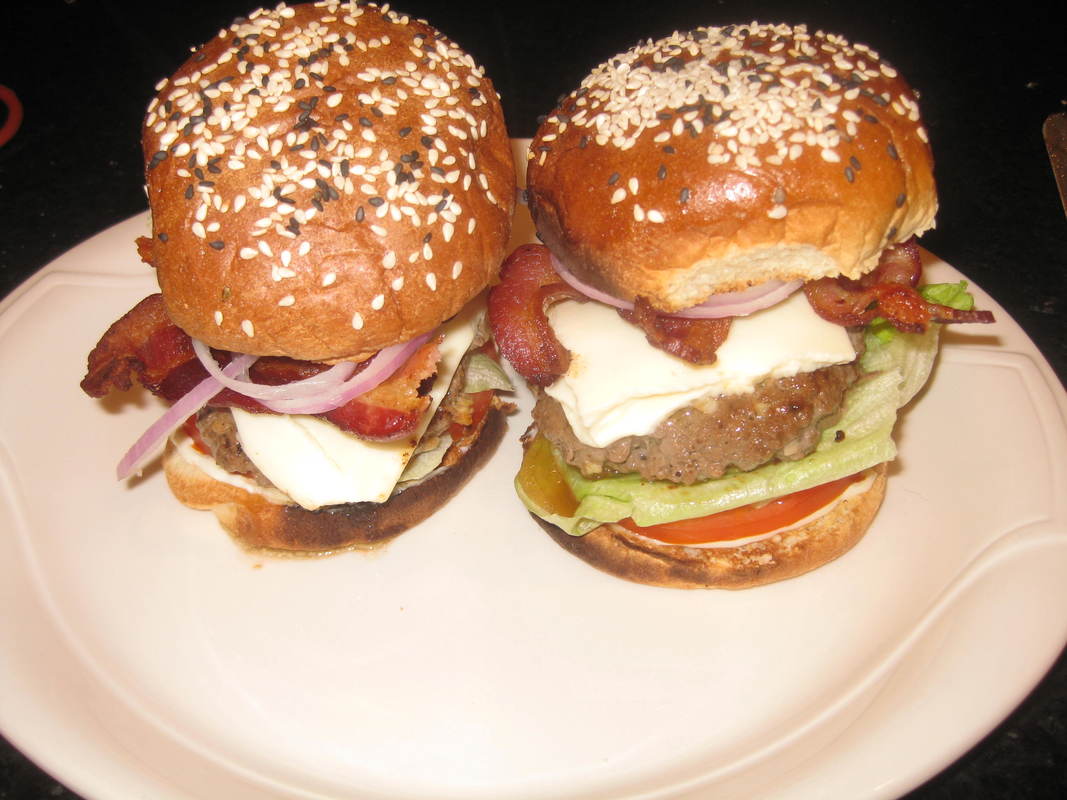
Fabulous for brunch------Lemon Crepes with fromage blanc and honey
I get more requests for my crepe and risotto recipes than almost any other kind of recipe on this web site. That's because crepes especially are so easy to make!
These crepes are perfect for an elegant brunch. To round things out, I also fried some local sausage. Then, pass the prosecco!!
Basic crepes:
1/3 cup plus 1/4 cup King Arthur flour
2/3 cup WHOLE milk
1 egg
scant 1/4 tsp kosher salt
5 tsp melted unsalted butter (plus more for the pan)
Sift dry ingredients. Beat egg and mix with milk and butter.
Chill overnight (this is important----the gluten in the flour needs to relax. It will also eliminate air bubbles. If you do not let it rest, your crepes will be tough, not tender).
Once you have fried your crepes (about 1 minutes on the first side, and 45 seconds on the reverse), spread them with:
Fromage blanc (creme fraiche will also work)
a pinch of lemon zest
a twirl of honey
Serve them with fresh lemon and a pot of honey, so that your guests can balance the sweet and tart flavours to their liking.
Delicious!
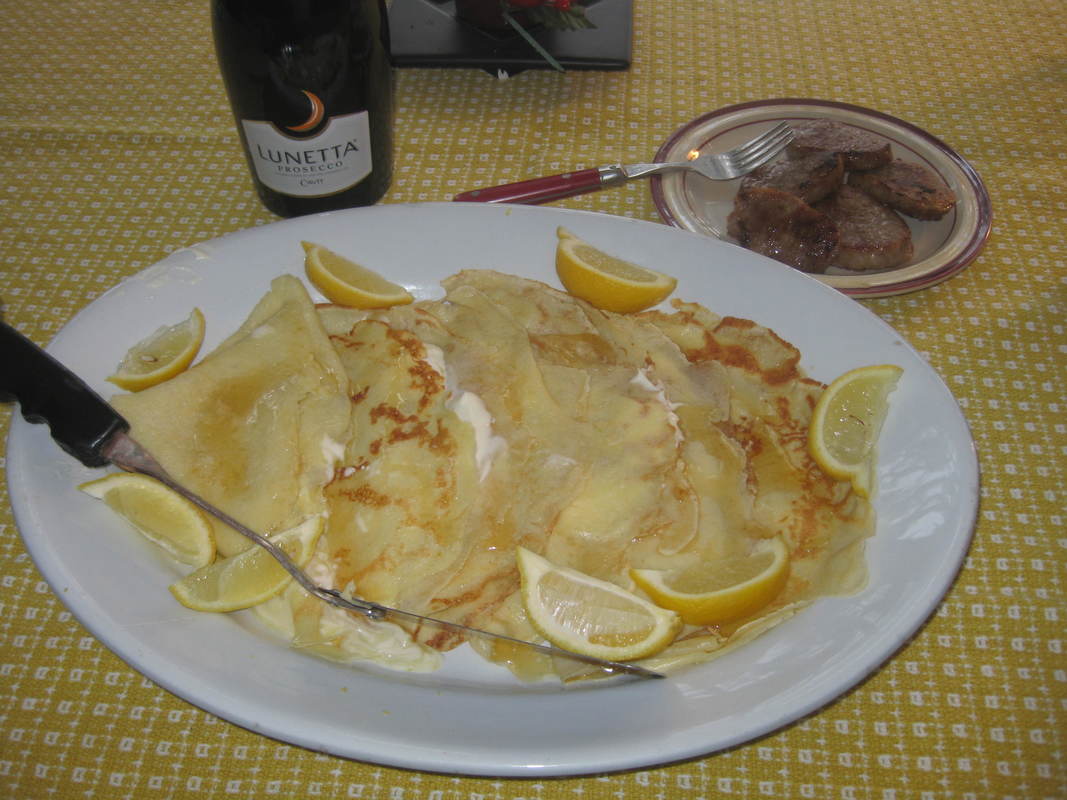
Crab Cakes with Spicy Remoulade-----a restaurant quality light meal
These crab cakes are enhanced by fresh herbs including tarragon. They have minimal filler, and the remoulade is made with canola mayo.
Because they have minimal filler (half an egg and 2 TBSP panko for 1/2 pound of crab) they do require a deft hand. And even here in Maine crab is expensive-------$30 per pound. But 1/2 pound is more than enough for 2 people. And look at it this way----in a restaurant this meal would cost twice as much!
Served over a salad of baby greens, zucchini, and thin-sliced radishes, it's the perfect light meal.
For the crab cakes:
1/2 lb lump crab meat
1 TBSP very finely diced green pepper
1 finely chopped scallion
2 1/4 tsp canola mayo
2 TBSP panko
1/8 tsp fresh ground pepper
1/2 of a beaten egg (as always, give the other half to your pooch as a treat!)
Mix all this together,and carefully form 4 cakes. Put some more panko on a plate, and coat the outsides of the cakes. Fry in a tiny bit of canola oil until hot and brown, about 3 minutes per side at medium-high.
For the remoulade:
2 TBSP canola mayo
1 tsp minced shallot
3/8 tsp capers
1/2 tsp minced fresh tarragon
1/2 tsp minced fresh parsley
1/8 tsp cayenne
3/4 tsp Dijon
(this recipe for the remoulade may be doubled) Mix all together.
For the salad:
Baby greens
about 1 cup shaved zucchini
about 1/2 cup very thinly sliced radish
Italian vinaigrette (NOT Italian dressing)
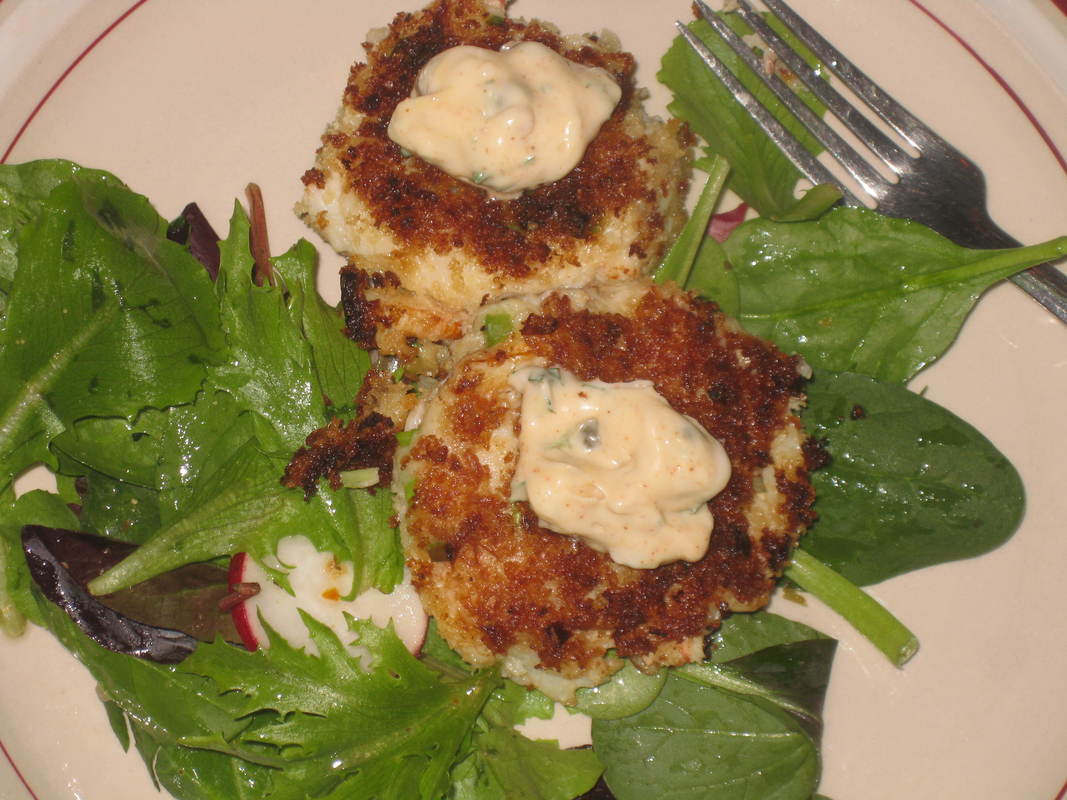
I do not eat at fast-food places, but apparently "Double-layer tacos" are a thing at fast food restaurants like Taco Bell
A friend of my kid was describing these to me------this friend lives outside of the U.S. and seemed somewhat in awe of these tacos. I thought to myself, "I can do better than that".
My version was very well received by the kids (and my husband for that matter). I made it quite a bit leaner and with less sodium than the fast-food version by using fat-free re-fried beans, 90% lean ground beef, and cooking the beef with a healthy fresh mix of onion, jalapeno, garlic, cumin, coriander, and canned tomato sauce. A dollop of low-fat sour cream was great on top of the lettuce and tomato. There is no avoiding some cheese, and low-fat cheese isn't worth eating. So these came in at around 350 calories each-----but very filling, so just one was enough for the ladies; my husband ate two.
Use the Contact Form if you want to pare down calories and fat on your taco night!
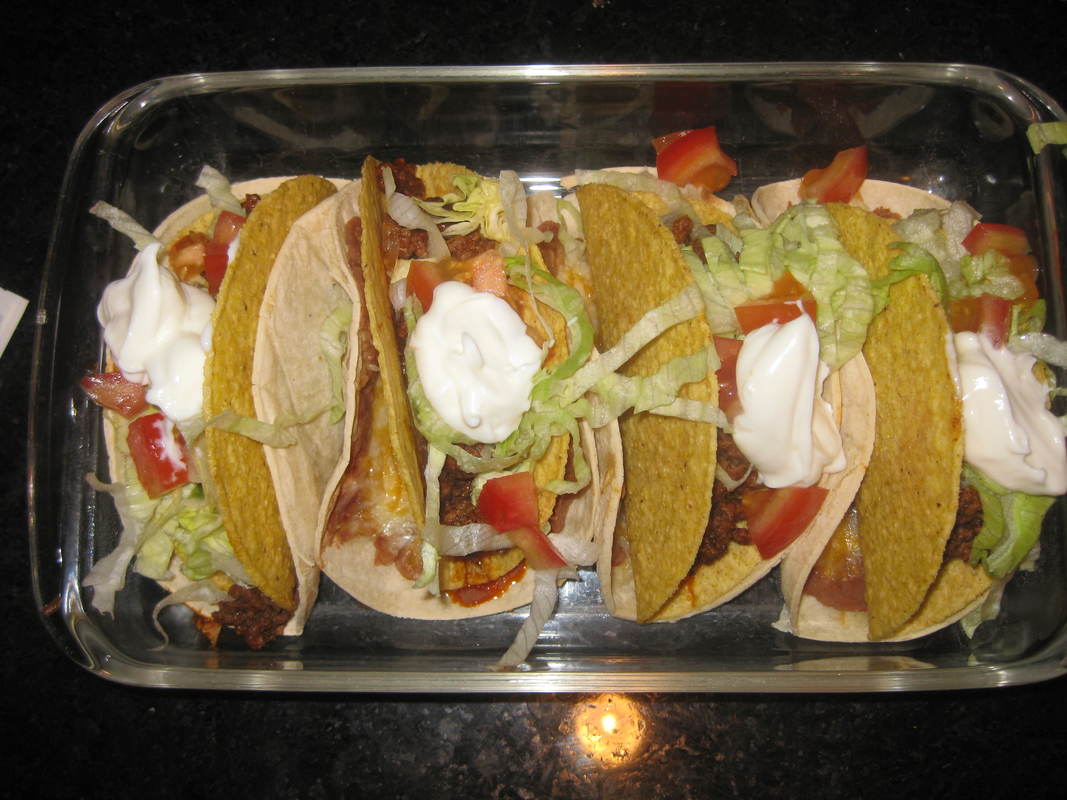
Bacon jam? Pimento cheese? A burger?
Oh, wait....you had me at "bacon".....
We like burgers in this house. But we also worry about our health, so we don't eat burgers more than once a month (usually less often than that).
That means that when we're going to eat them, they'd better be damn good. I recently came across a recipe from Food & Wine Magazine for"Pimento Cheeseburgers with Bacon Jam".
I followed the recipe exactly, and these were quite possibly the best burgers we'd ever eaten IN OUR LIVES Seriously....they were that good. "Bacon jam"? Yes....oh, oh yes.
Get this recipe, and make them. The cholesterol in them may kill you, but you'll die happy........
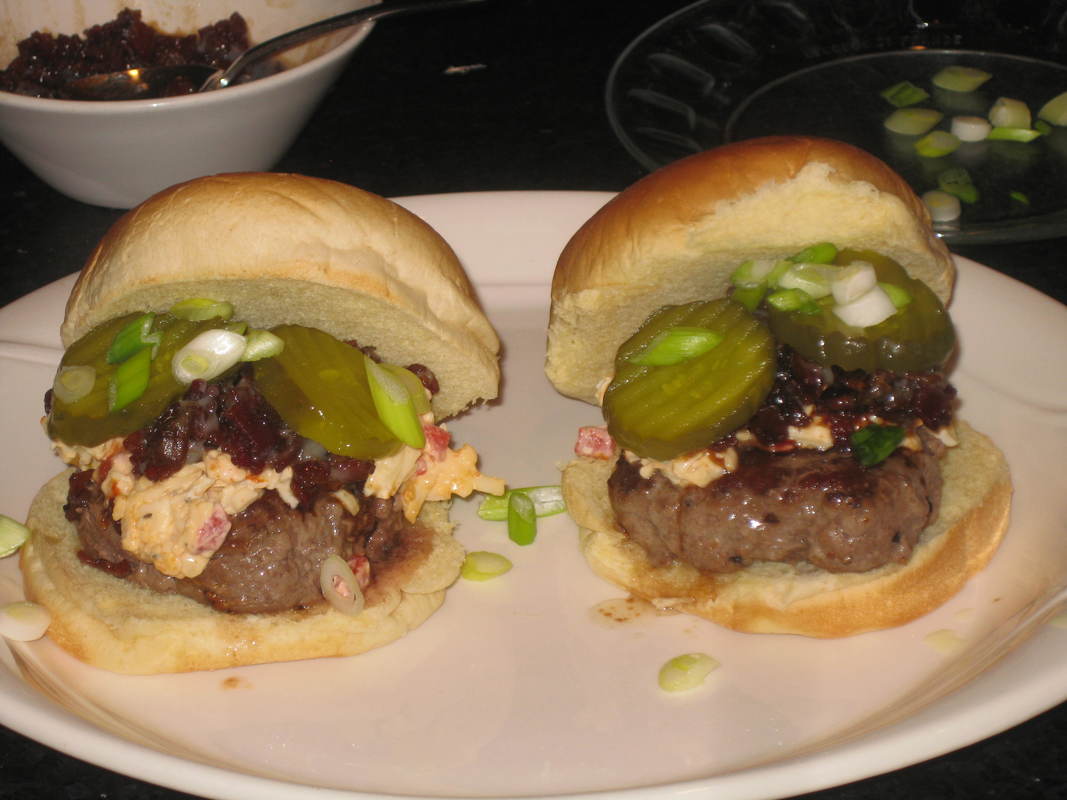
Ever been to Chicago? Some of the street-food is better than New York City's-----especially those Chicago-Style Hot Dogs. Here's how to make them at home:
Unlike so many regional dishes, there is no controversy over what goes into and onto a Chicago style dog.
First and foremost, they HAVE to be served on poppyseed hot dog rolls. Those aren't sold in Maine, so I easily made my own.
Otherwise, Chicago-style dogs MUST have:
mustard
sweet relish
sport peppers (also not available in New England------I got them from Amazon)
good dill pickles
Roma tomato spears
chopped onion
These are soooooooooo good. A real indulgence-------not something to eat every day, but certainly the best dog you'll ever eat.
Contact me if you need the recipe for these beautiful home-made poppyseed rolls.

I think this is an Eastern European "recipe". It's a bit like a loaded-baked-potato-soup, but with the addition of dill.
By which I mean, LOTS of dill-----in the form of pickles and even pickle juice.
I followed the recipe that is available on Delish.com. It was quite good.
But would I make it again? Probably not. I'm not a big fan of Eastern European cooking......and would probably prefer just a plainer soup. But the potatoes, bacon, fresh dill, and cheddar are a powerful combination.
I followed the recipe that is available on Delish.com. It was quite good.
But would I make it again? Probably not. I'm not a big fan of Eastern European cooking......and would probably prefer just a plainer soup. But the potatoes, bacon, fresh dill, and cheddar are a powerful combination.

Cupcakes again......and Cook's Illustrated again. These "Ultimate Chocolate Cupcakes" are from their All-Time Best Cookbook. And "ultimate" and "all-time best" are understatements for how good these are.
As the Cook's Illustrated article states--------cupcakes aren't just little cakes, and so you can't bake them that way. Sure, you'll have dessert, but do you really want to feed that kind of crap to your family?
These cupcakes are the real thing. As C.I.'s recipes go, they aren't hard to make, though the icing can be touchy. They have an incredible crumb, along with a touch of molten ganache. The frosting is to die for.
All I can say is, MAKE THESE!!!!!!!
These cupcakes are the real thing. As C.I.'s recipes go, they aren't hard to make, though the icing can be touchy. They have an incredible crumb, along with a touch of molten ganache. The frosting is to die for.
All I can say is, MAKE THESE!!!!!!!


A lighter taco salad
This is a delicious but lighter taco salad. It's VERY filling (too much for me, really) and has all the flavours you'd expect out of a taco salad.
The real differences are substituting whole wheat tortillas for the deep-fried kind. You can make the whole wheat ones fairly crispy by draping them over ramekins, spraying them lightly with PAM, and putting them under the broiler for a few minutes. They get a bit of crispiness----but the lack of deep-fried-crispiness is offset by how great the whole wheat tastes with this salad.
After you've broiled the tortilla "bowls" here's how to do the rest:
1. Put a couple handfuls of shredded lettuce in each "bowl".
2. Take 3/4 lb 91% lean ground beef and fry over medium heat until no longer pink. Add one 15-oz-can black beans that have been rinsed and drained. Add 3/4 cup refrigerated salsa. Heat for about 5 minutes, then divide among bowls
3. Sprinkle about 1 rounded TBSP shredded Mexican 4-Cheese Blend on each bowl
4. Mix 1 medium tomato, chopped; 1 small avocado, chopped, 1/4 cup cilantro, 1 tsp olive oil, and 2 tsp lime juice. Place a few spoonfuls of this on each bowl.
5. Mix 1/4 cup low-fat sour cream with 2 tsp liquid from a can of chilis in adobo. Place a TBSP of this atop each salad.
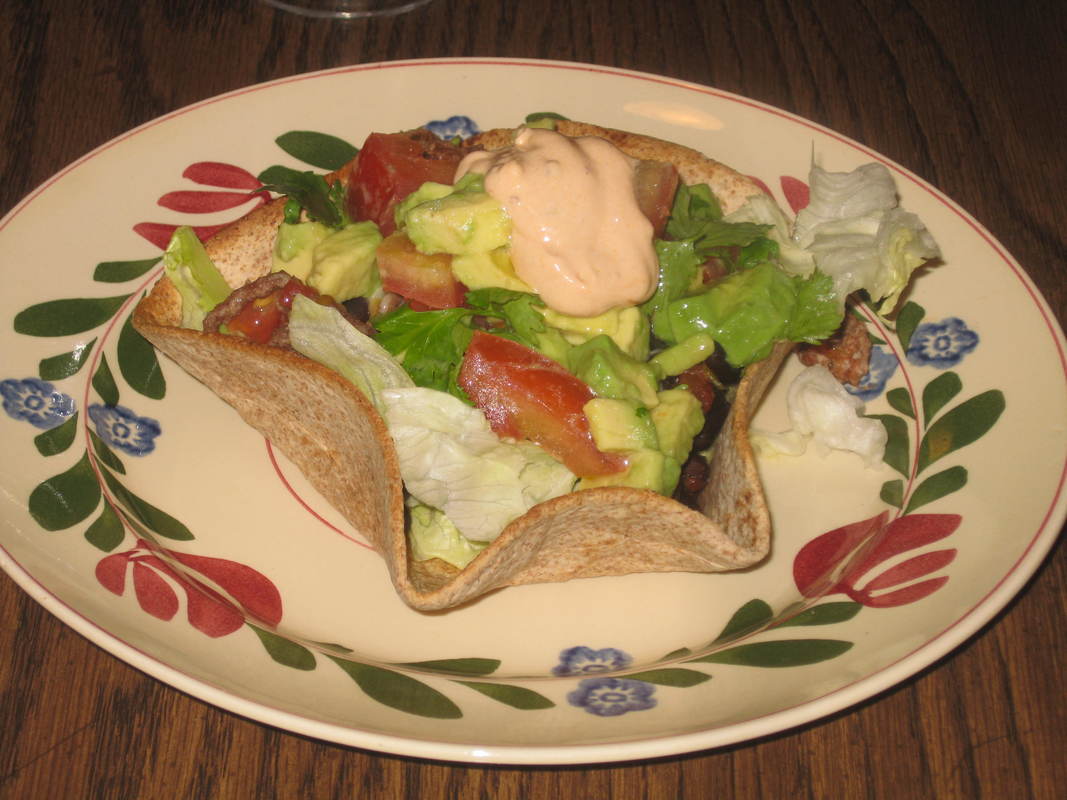
We do like Indian food, once in a while......and the easiest Indian food is tandoori chicken. Served with fresh green beans (with a bit of paneer cheese) this is an amazing meal. So hey, got two days to think about two different marinades? That's what I thought.......
It's really not hard to make. But sometimes it's hard to think about doing stuff two days in advance.
Otherwise this is totally easy to make----it just requires some planning.
Use the Contact Form for this easy ethnic recipe!
Otherwise this is totally easy to make----it just requires some planning.
Use the Contact Form for this easy ethnic recipe!
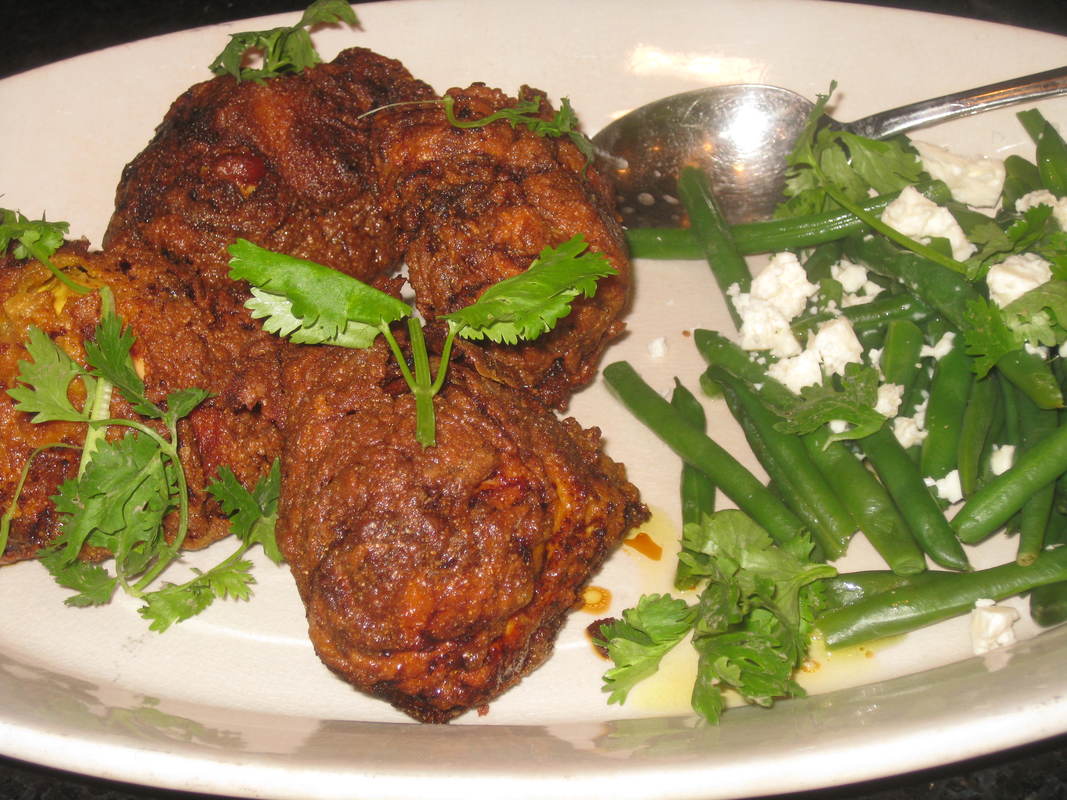
Where I live in the U.S., people don't know what "country ham" is
For some reason, people in the northeastern United States buy "hams" that are a rather strange light colour and have water added.
In the southern U.S., I'm not even sure these things would be recognized as hams!
So when in the U.S., I buy country hams (or country ham slices for ease of use). If you live in the northeast and have never had country ham, then you really haven't had ham.
In early October I used a few of these slices to make a nice dinner salad. The juxtaposition of the salty country ham, the sweetness of the summer melons (honeydew and cantaloupe), the sharp heat of the aleppo pepper, and the luxurious creaminess of the burrata cheese make this dish heaven in your mouth.
For dressing I made a plain oil and white balsamic vinaigrette, with just a touch of honey.
This is a really, really good salad. And just 1/4 pound of ham is plenty for 2 people. Once again, it's a dish that uses very little meat for big results.
I served it with some fresh-baked date-nut pumpernickel. It was a great meal, light but filling.
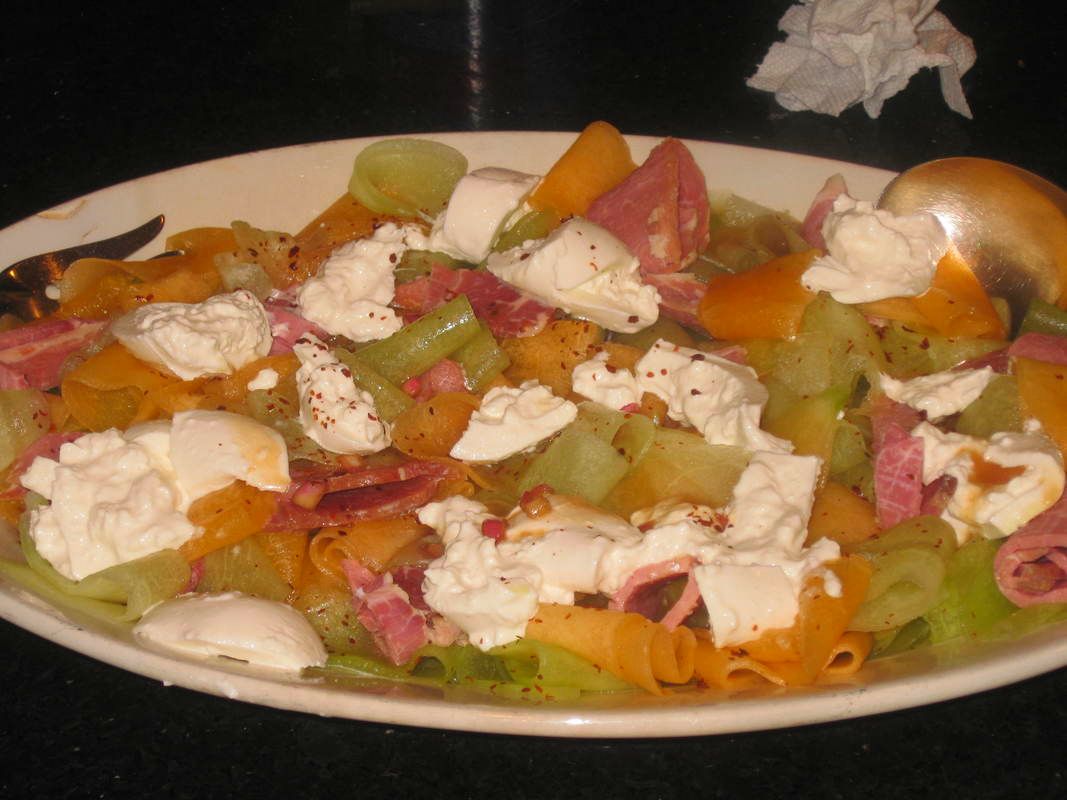
Gluten-free? Yuck. But somehow this recipe was calling me......
You, my faithful readers know that I am a big fan of Cook's Illustrated. I was looking through an old issue, and it had a recipe for gluten-free cupcakes.
As stated earlier, "Yuck".
But my kid has a lot of friends who are supposedly gluten-intolerant (I'm a skeptic) so I decided it would be interesting to try Cook's Illustrated's gluten-free cupcakes. Holy Toledo, they would stand up to ANY cupcakes. UNBELIEVABLY good!!!!!!!!
However, like so many Cook's Illustrated recipes, the recipe is very complex (but again, WORTH IT). It begins with their flour-substitute, which contains:
White rice flour
Brown rice flour
Potato starch
Tapioca starch
Xantham gum
So the recipe is clearly not for the faint of heart. But is it worth it? My husband thought it was the best cupcakes he'd ever eaten. I'm not a big sweets-eater, but these things are just delish.
My advice? Definitely use the VERY best white chocolate you can find. And follow the directions exactly. As Cook's Illustrated suggests, I weighed each ingredient rather than measuring. Let's face it, baking is chemistry so this makes sense.

Arancini seem to be trendy right now. I made them again....a little differently this time....but I think I'm done for a while. And I'm in Sicily anyway, so am well and truly wondering why I am making these at home.....
I just saw a box of arancini among the boxes of frozen hors d'oeurvres at my local market. When what used to be a very special dish ends up among the frozen burritos, perhaps it's become a bit too mass-market.
Instead of the aged provolone and prosciutto; this time I sauteed pancetta, a bit of onion, fresh parsley (the very last from the garden), milk, and of course thickened it with a tiny bit of flour. For cheese, I used a lot of pecorino.
Fresh mint on top made for a great foil to the cheesy goodness.
These were really great! We loved them, but I do think there are so many bad ones around that no one will be willing to take the time to make what are wonderful.
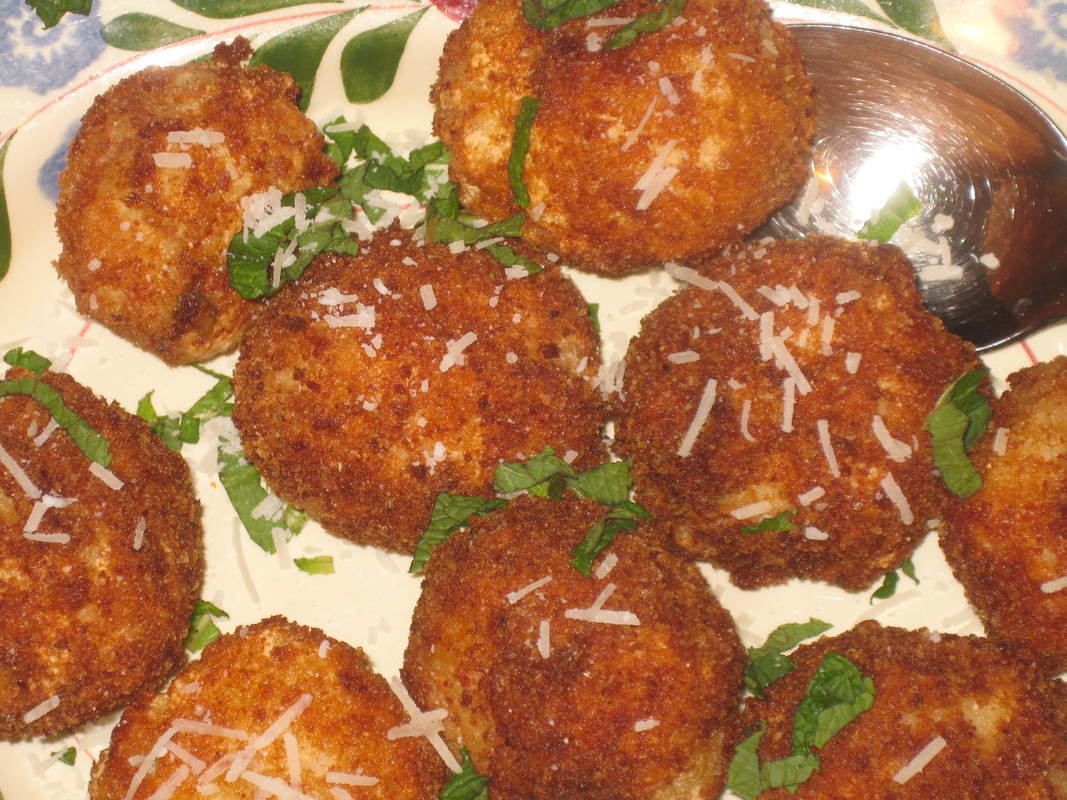
5 minutes work-time, with oven-roasted tomatoes that make the kitchen smell fabulous--------an easy meal that's not turkey
As you can see from the photo, I used both capanelle and penne----in other words, just odds and ends of leftover pasta I had in the pantry.
Here in Sicily, I was able to get some good fresh plum tomatoes (just cut them in half). I roasted these with a couple of cloves of minced garlic, mixed with dried spices ("Italian Seasoning"), Mediterranean (of course!) sea salt, a bit of regular pepper, and a good dollop of crushed red pepper....along with a good 1/4 cup or more of fine olive oil.
Roast the tomatoes in a single layer, cut sides up...This will take about an hour.
Mash half of them, and toss with the cooked pasta. Add the other half of the toasted tomatoes, and toss.
This is a great meal that we eat often when we are here on the Med; particularly this week when it's still been summer-mild.
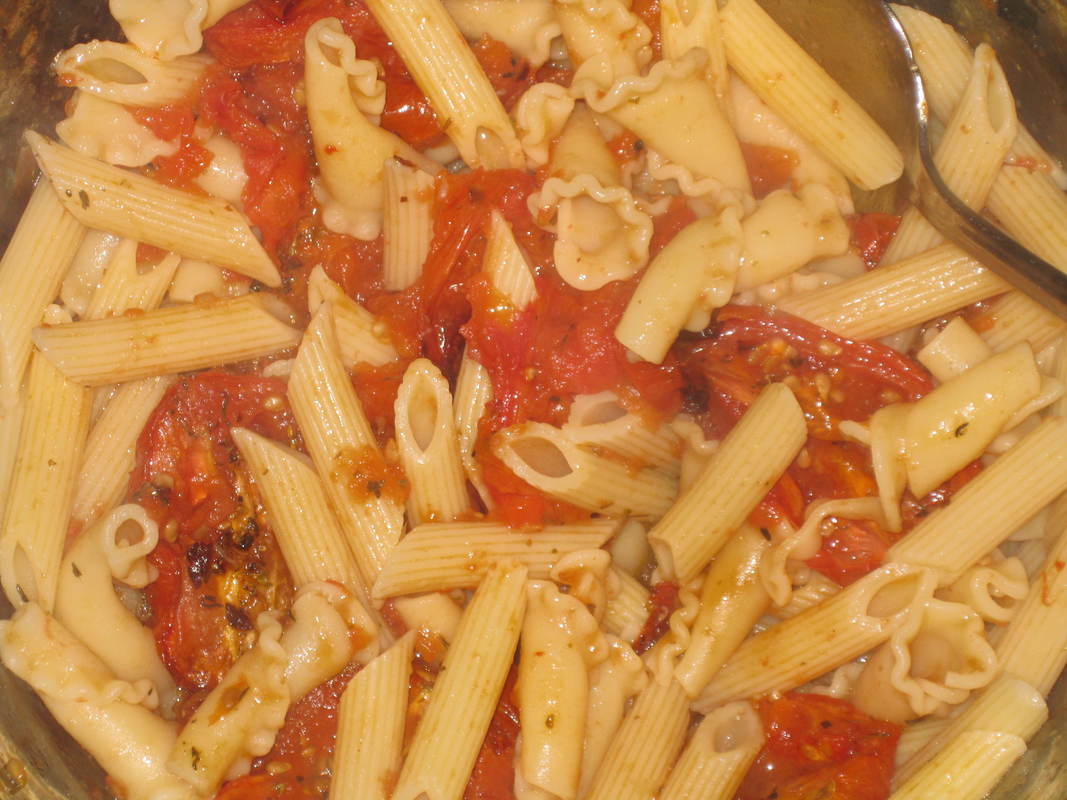
Pumpkin in a slightly different way this week......in an orzo pasta salad with arugula, cheddar, and some spice
This is a nice little warm or room-temp salad that's easy to make. It uses some of that pumpkin puree that you might have hanging around this American Thanksgiving week----as well as pepitas, cheddar, and a bit of Asian spice.
It's a delicious difference from the groaning-board meals most Americans will be eating this week, while still using good seasonal flavours. Use the Contact Form for this easy recipe!
It's a delicious difference from the groaning-board meals most Americans will be eating this week, while still using good seasonal flavours. Use the Contact Form for this easy recipe!
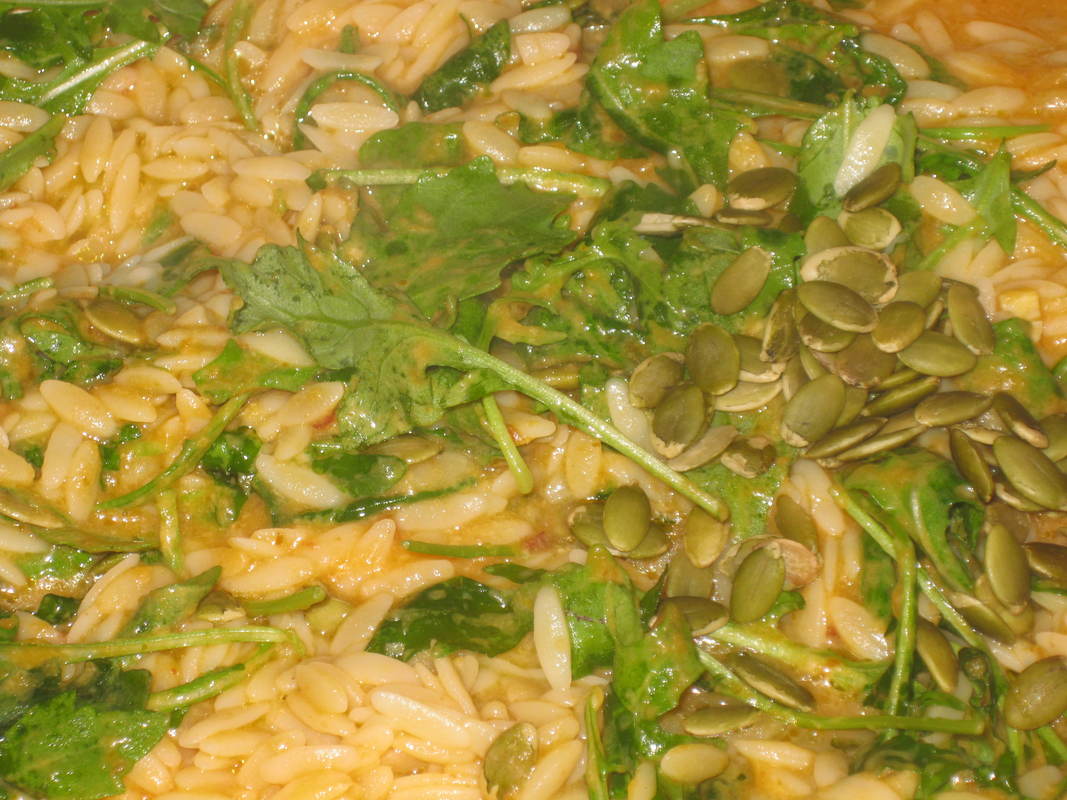
Steve McCusker told me this was one of the best meals anyone had ever made him.....A delicious flat-bread pizza cooked in less than 5 minutes on the bbq grill
Notwithstanding the fact that I'm not a big Steve McCusker fan, he was right about this one----everybody I've ever made it for just loves it. This is a unique and ADDICTIVE flatbread pizza!
When making homemade pizza dough for the bbq grill, it's important to add a bit more olive oil, and a bit more kosher salt than you would when making pizza dough to bake in the oven.
Our toppings tonight:
Fresh red sauce (san marzano tomatoes, oregano, salt, fresh ground pepper) whirled in the blender)
Fresh parsley
Fresh mozzarella
Pancetta (about 1 1/2 ounce)
Gorgonzola dolce (about 1 1/2 ounce)
One tomato, very thinly sliced
1 cup arugula, tossed with 1/2 tsp olive oil and 1/2 tsp 25-year-old balsamic
figs

What to do with that leftover risotto?
What to make when you don't know what to make for dinner.......and there is nothing in the fridge? My go-to dinners in those scenarios are always crepes or risotto. You can make either one with just about any stuff you have hanging around; and can make either of them rather mindlessly.
So....uhhh......around here we eat a lot of crepes and risotto!
Inevitably there is some leftover risotto hanging around. So when I'm feeling a bit more ambitious, I use that leftover to make......TAH DAH........arancini!
If you've never had these little balls of heaven, it's about time you tried them. They can be made with regular white rice, but are better with leftover risotto--------they are a bit fussy to make, so risotto's starchiness eases that a bit. Though not much-----just get into it.
I added just 2 slices of extremely thin-sliced prosciutto (minced), and wrapped it all around good aged provolone-------scamorza would also work well.
Use the Contact Form for this AMAZING recipe!!!!!!
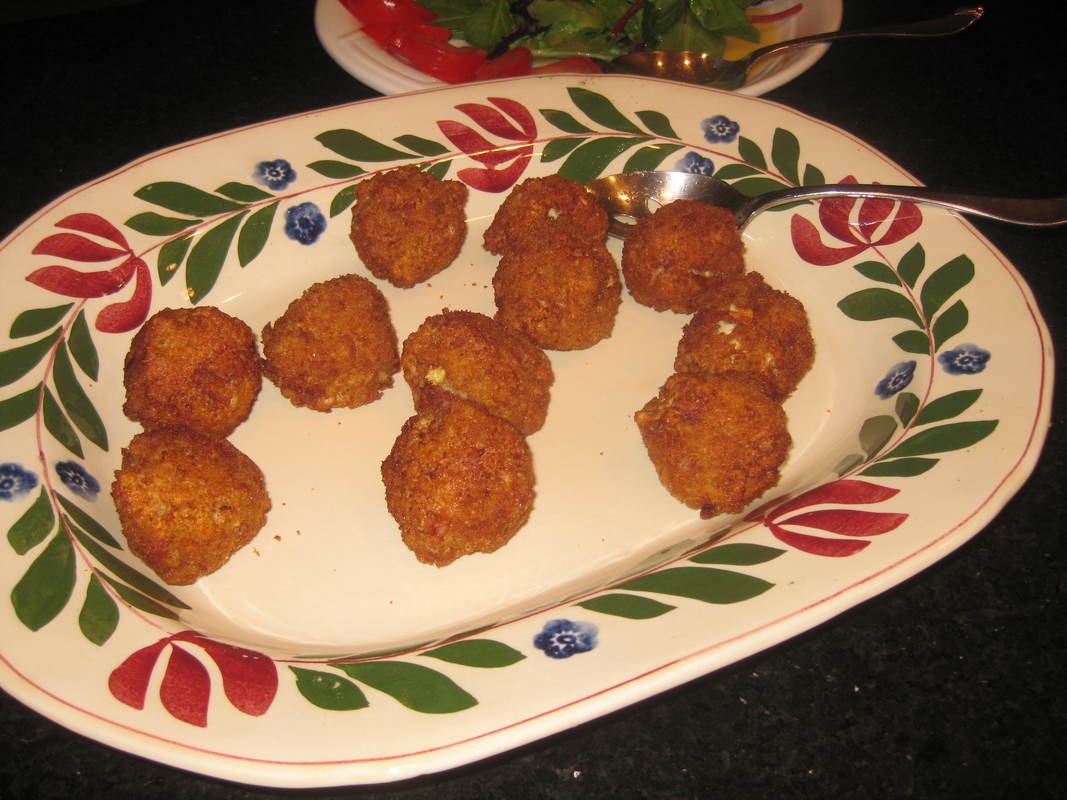
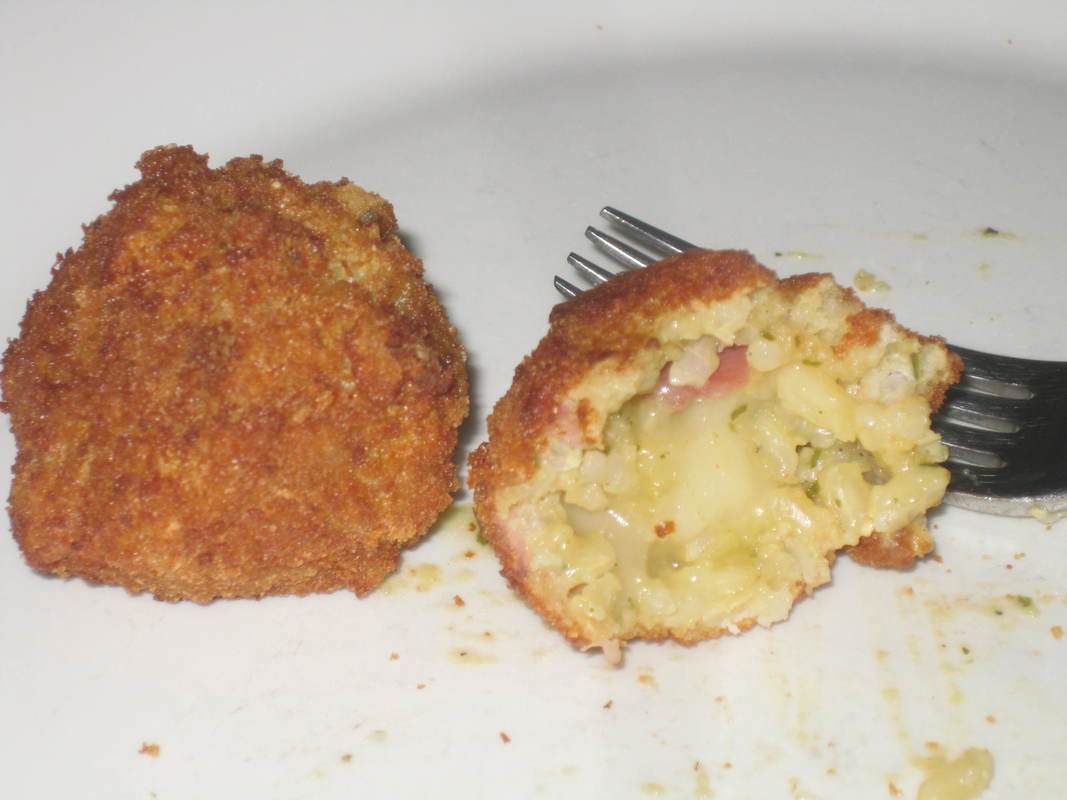
Give us this day, our daily bread
I'm pretty dang busy, but I do manage to make our bread once a week. OK, usually I manage to make our bread once a week......I'm not perfect. But as I always advocate here, you don't have to sit at home for 5 hours waiting for your dough to rise twice then bake. Break the process down into 2 or 3 parts, and baking bread every week becomes an easy thing to do for an hour or so while you're at home doing other stuff.
Because we are at home in Paris right now, and good bread is made by the baker literally across the Rue St. Louis en L'Ile, it seems a bit stupid to bake my own bread. But my husband was saying that he was tiring of the local bread (I was like, "What?????" ), and was craving some good whole wheat bread. So this morning as part of our brunch I made some whole wheat breadsticks.
These are easy to make with my go-to whole wheat dough (same dough I use to make pretzels)------I keep some in the freezer. The breadsticks go wonderfully with salty meats (we had corned beef hash) and eggs.
Use the Contact Form for my basic whole wheat dough recipe!!

The challenge: Making an Apple-Cranberry Pie that is actually worth eating
Apple-Cranberry pie is trendy right now. That apple-pie balance between sweet and tart, tender and crispy, is seriously compromised by the addition of cranberries, which overwhelm the apple flavour and worse, turn the bottom crust into mush within a day.
Trying to overcome these significant hurdles, I turned again to Cook's Illustrated. Their recipe overcomes all these issues.......and like me (as I've published previously on this web site), they have found that pre-cooking the apples actually leads to them being firmer within the finished pie.
I am also a big fan of their "Foolproof Pie Dough". The result of their technique (like so many of my own recipes, it's all about technique), this pie dough has two distinct parts----long sheets of gluten separated by a flour-fat paste. Also, the dough is hydrated with some vodka.
Since gluten will not form in ethanol, and too much gluten is what makes pie crusts tough, using part vodka and part water makes for the most easy to roll dough you've ever made. The vodka imparts no flavour whatsoever, and vapourizes in the oven.
The recipe for this delicious pie is available from Cook's Illustrated. Don't waste your time and calorie-intake on any other apple-cranberry recipe......you'll love this one, even if you've had apple-cranberry pie before and think you don't like it!
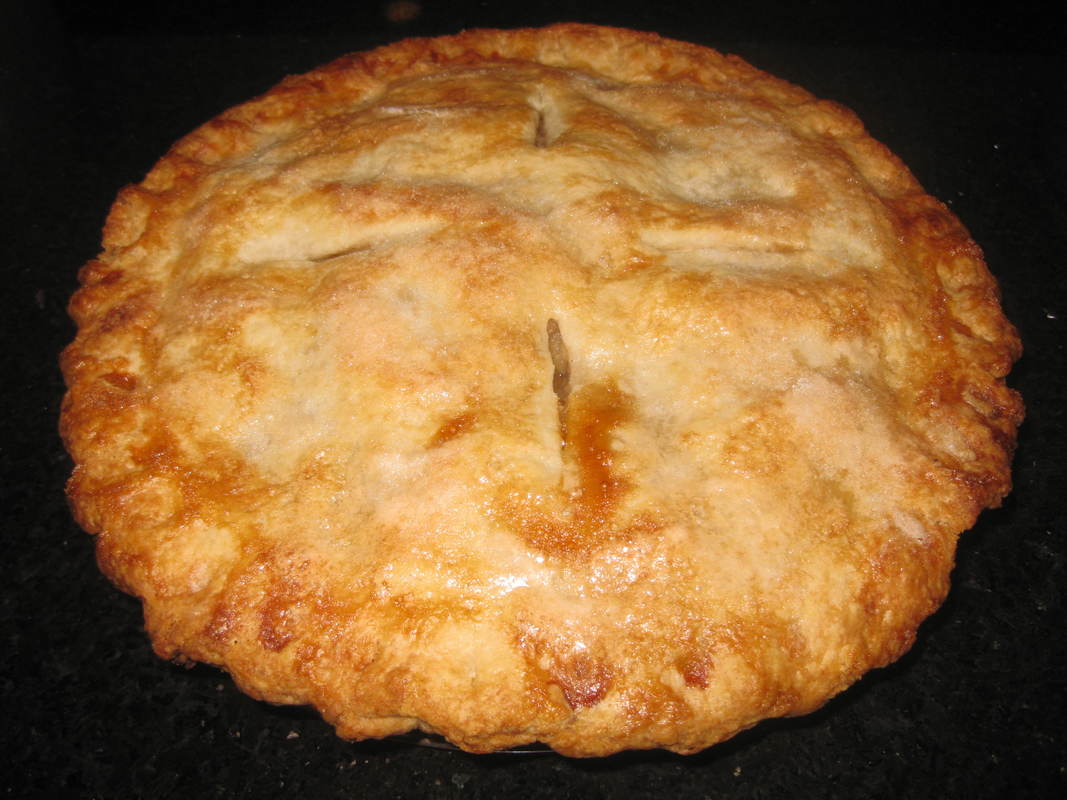
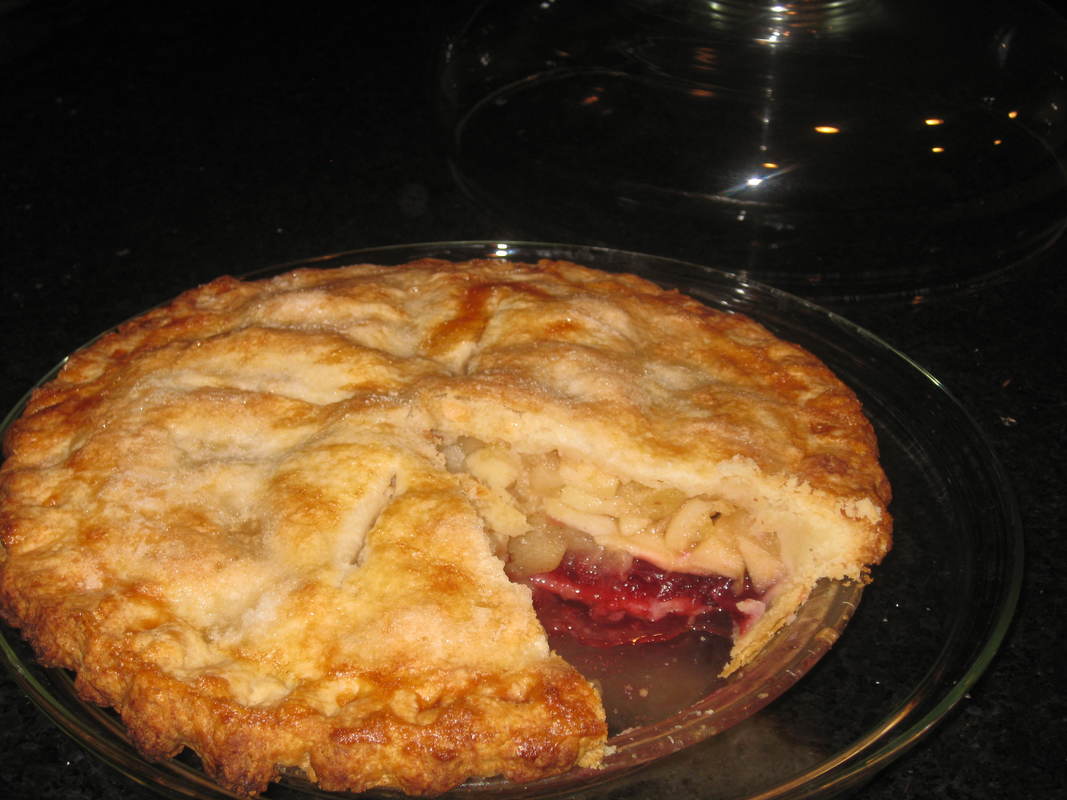
Although I've been lucky enough to celebrate Christmas in many parts of the world and discover the traditions and foods of many cultures, I think the most Christmasy-Christmases I have ever encountered are those here in Provence. In this beautiful part of the world, centuries-old traditions seem to have survived unchanged.
When Christmas comes around there will be big family meals, especially here in the countryside. One of the most important takes place on Christmas Eve, before midnight Mass.
This is called the Gros Souper ("Great Supper"). This consists of a very large meal with seven courses (symbolizing the seven sorrows of the Virgin Mary). There are other traditions involved, such as knotting the corners of the tablecloth (to prevent the Devil from climbing up), and the use of three tablecloths, three candles, and three plates with the wheat of St. Barbara; all representing the Holy Trinity.
This groaner of a meal is followed by the 13 Desserts (Les Treize Desserts de Noel), representing Christ and the 12 apostles.
One of these desserts is always Pompe a l'Huile, a delicious fried pastry. And we're here now, and won't be at Christmas, so what's wrong with making them right now? They really are delicious anytime of year-------particularly as a morning pastry.
A batch of these (a dozen) took me only about half an hour this morning. It might have gone even more quickly if I had a stand mixer in this house (missing my Maine house on that one).
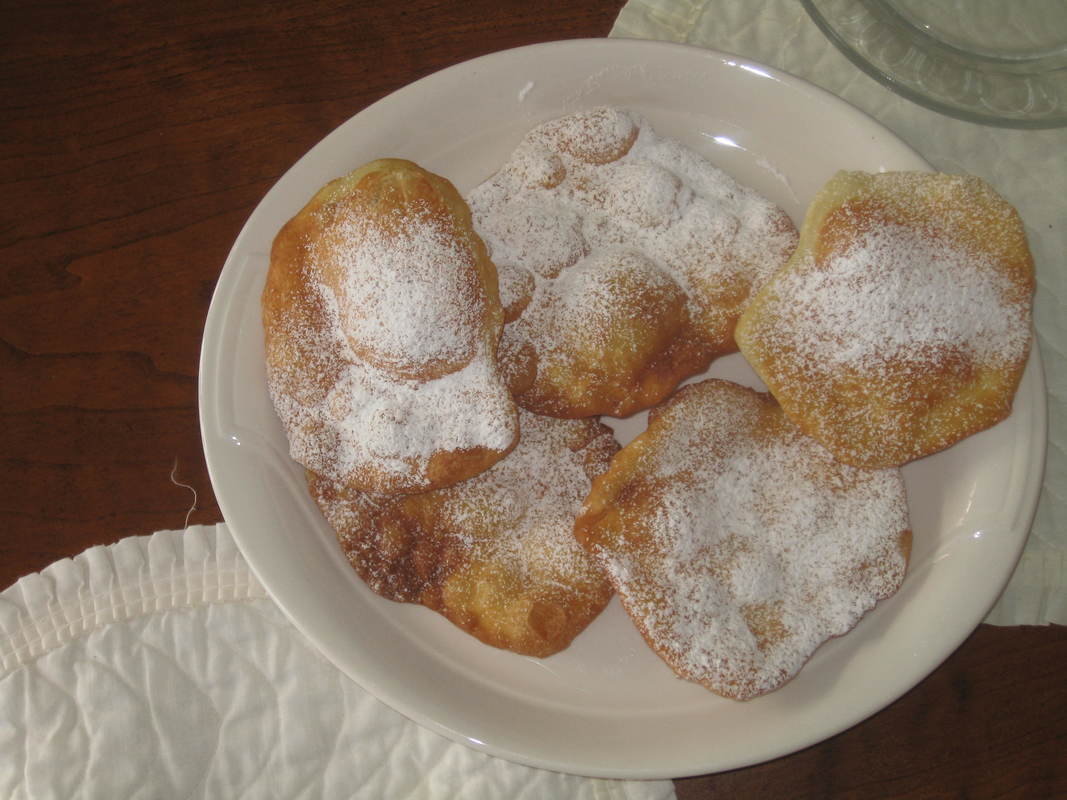
"Dinner will be in 15 minutes".....OK, maybe 20. This salad is super easy, and super good.
This salad has spring mix, broccoli, grapes, honey-roasted cashews, and "oven-fried" chicken. It goes together in a snap----and the thin chicken breasts take only 15 minutes to bake.
Dip your chicken cutlets (i.e., thin-sliced breasts) into a beaten egg and then some seasoned bread crumbs. Bake at 425 degrees for 15 minutes. (Line the pan with foil for easy clean-up!)
While the chicken is baking, shake in a jar:
1/4 cup olive oil
1/4 cup cider vinegar
1 1/2 tsp Dijon
1 TBSP honey
1/4 tsp kosher salt
1/8 tsp fresh ground pepper
Construct the salad on a platter. When the chicken is done, cut it into slices and arrange it on the salad.
As a friend of mine in Antigua used to say,
"Voila! Instant dinner!!"
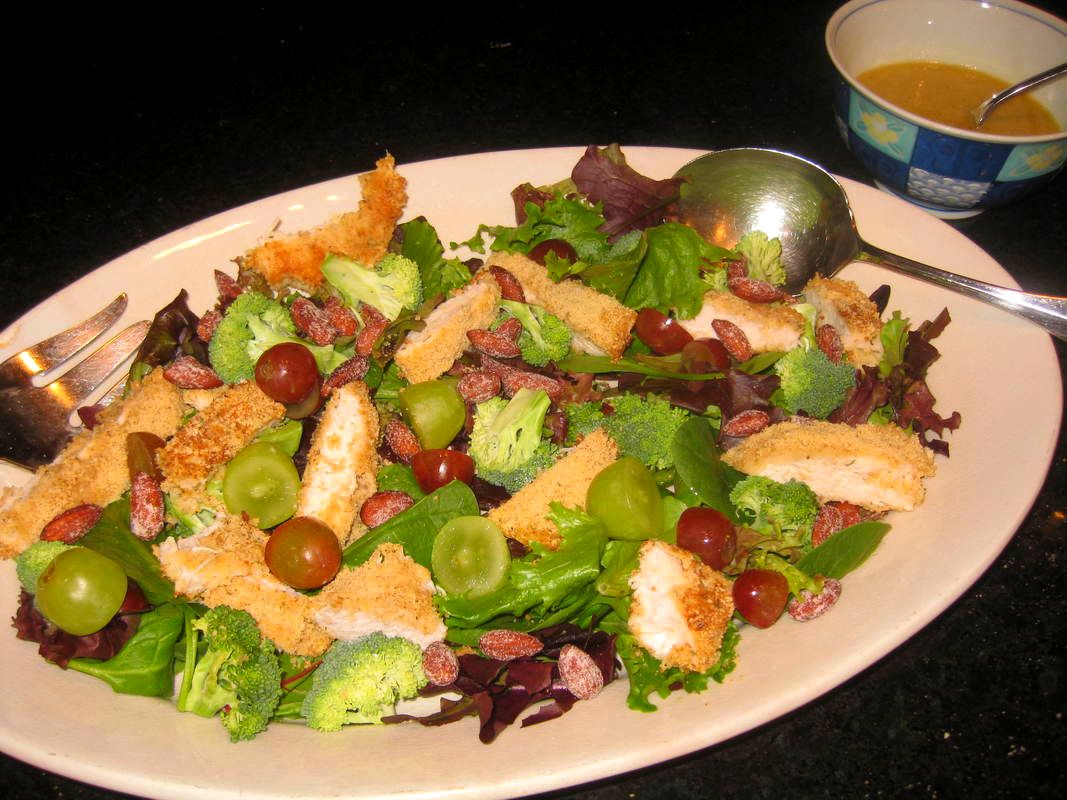
Oops, I burned the outsides a bit. I got distracted by the sound of the built-in generator........
At my home in Antigua there is a saying about hurricanes: "You can hide from the wind, but the water will find you".
The southern coast of Maine recently got hit hard by near-hurricane force winds. And unlike Antigua, the real problem in Maine really is the wind.....because it brings down trees, which brings down power-lines.
So here at our house, we've spent the last 48 hours on the generator--------which we are so happy to have. No lighting candles after dark! Hot water for showers! The garage doors go up and down! I run the dishwasher, use the oven, and pretty much do everything as I always would at home.
But once in my car it's a different story. There are detours everywhere because of downed trees, and many power lines in the road. I was exhausted by the time I got back home from my errands.
So tonight I was just tired, and did kind of a lunch-for-dinner thing of grilled sandwiches and cole slaw. These are a delicious riff on regular grilled cheese---delicious.
It's really important to use really good quality bread and cheese.
4 slices homemade sourdough bread
good quality extra-sharp cheddar
6 slices cooked bacon
sliced baby kosher dills
mayo
1. Heat a griddle or cast-iron fry-pan to medium.
2. Slather mayo on each slice of sourdough. Note that this will be the GRILLED side of the sandwiches.
3. Place two slices mayo-side-down on griddle. Quickly cover with cheese, bacon, and pickles. Top with other two slices of bread.
4. Cover, and grill until browned on one side--(Don't do what I did----walk away and burn them!)
5. Flip sandwiches, and grill until............well, do as I say and not what I did..........golden brown.
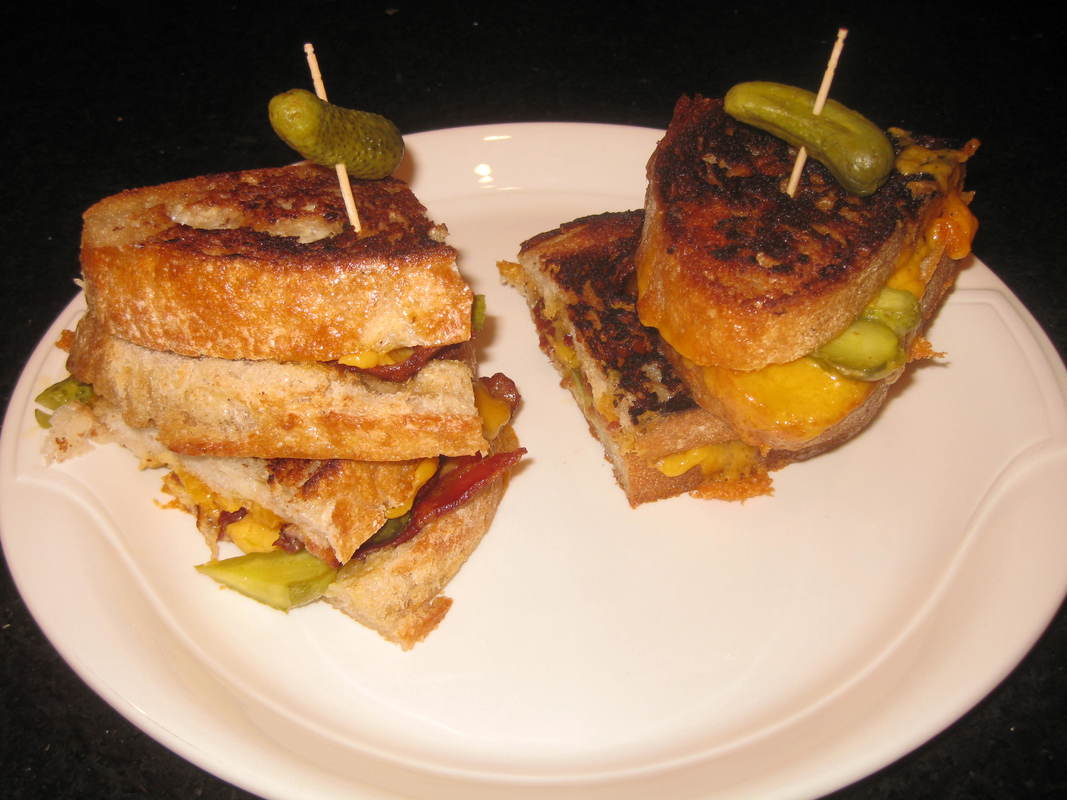
A nice Mushroom Pilaf: Low fat and zero sodium
This is a great light meal....and perhaps even better microwaved for lunch the next day. I did serve it for dinner with a spinach, blue cheese, and bacon salad on the side, which wouldn't be good for anyone making this as a low-fat, low-sodium meal, but works for people who can follow a normal vegetarian diet.
If you are trying for low-fat, low-sodium; the dish stands on its own.
2 TBSP unsalted butter
2 cups sliced mushrooms
1/2 cup chopped onion
2 cloves garlic, crushed
2 TBSP chopped fresh parsley
1 tsp dried basil
1/8 tsp pepper
2/3 cup converted rice, e.g. Uncle Ben's
1 1/3 cups water
1/3 cup chopped blanched almonds, toasted
1. Saute first 7 ingredients for about 5 minutes, or until mushrooms are very lightly brown and giving off liquid.
2. Add rice and water. Bring to a boil.
3. Reduce heat to low, and cover pot. Cook for 15-25 minutes, or until water is absorbed.
4. Stir in almonds and serve hot.
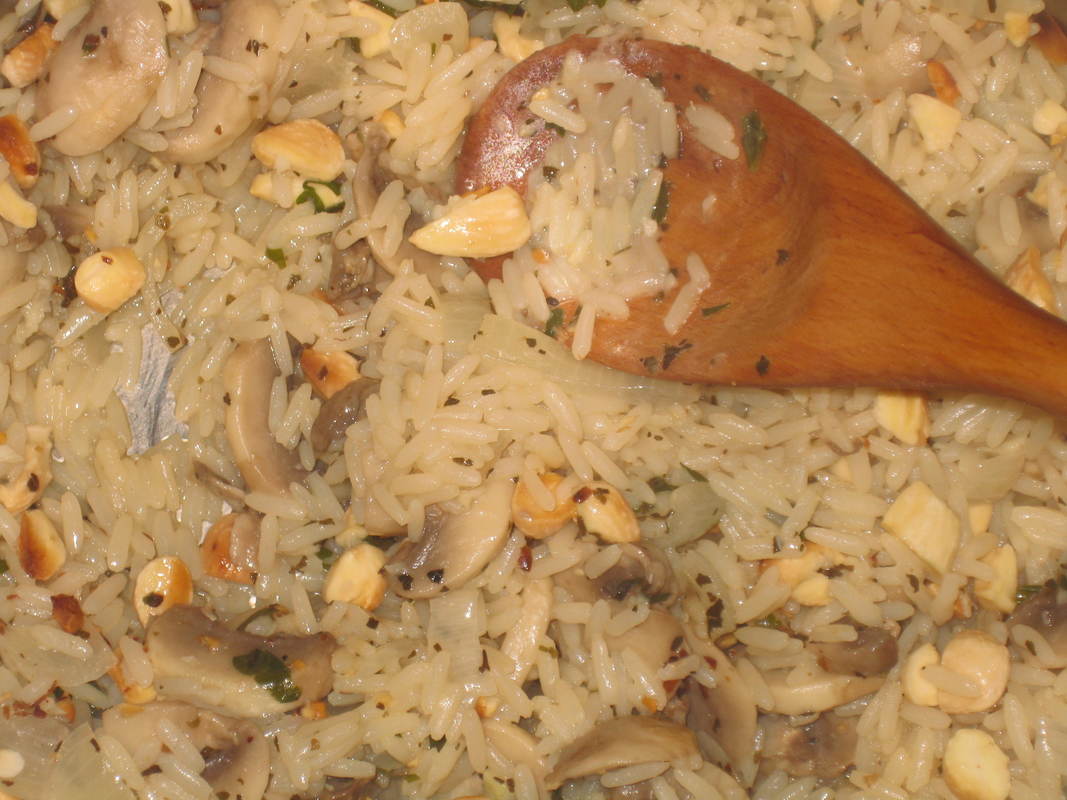
Spare ribs in your wok-------the way it's done in China.
I have a drawer-full of take-out menus from local places. Every single one of them advertises "spare ribs"; and in every single case if you order those ribs, you'll get tough little ribs that are a red-colour not found in nature.
That is NOT what you'd eat if you ordered ribs in China! The ribs there are often used as an "appetizer", and are done in a wok in about half an hour. They are not difficult to make at all! And to my mind, it's much easier to clean up the wok than the bbq grill. So here's the way they are made in Hong Kong:
You will need:
about 3 TBSP Black Bean Garlic Sauce
a hunk of fresh ginger, minced
1 clove garlic, minced
Heat 1 TBSP oil in your wok. Add all of the above, and briefly stir-fry until fragrant.
Add:
A bunch of pork spare ribs, cut into individual ribs.
Stir fry this for a minute or two.
Add:
1 TBSP sugar
3/4 cup water
Simmer the ribs in all this for about 25 minutes. You may or may not need to cover. The idea is to cook the ribs through, plus reduce the liquid to almost nothing.
When the ribs are cooked through and liquid is almost gone, baste them with a mix of 2 tsp cornstarch mixed with 1 TBSP water to glaze them.
It's lovely to serve them with a bit of chopped scallion and cilantro.
These are the real thing! You'll be amazed how good they are.
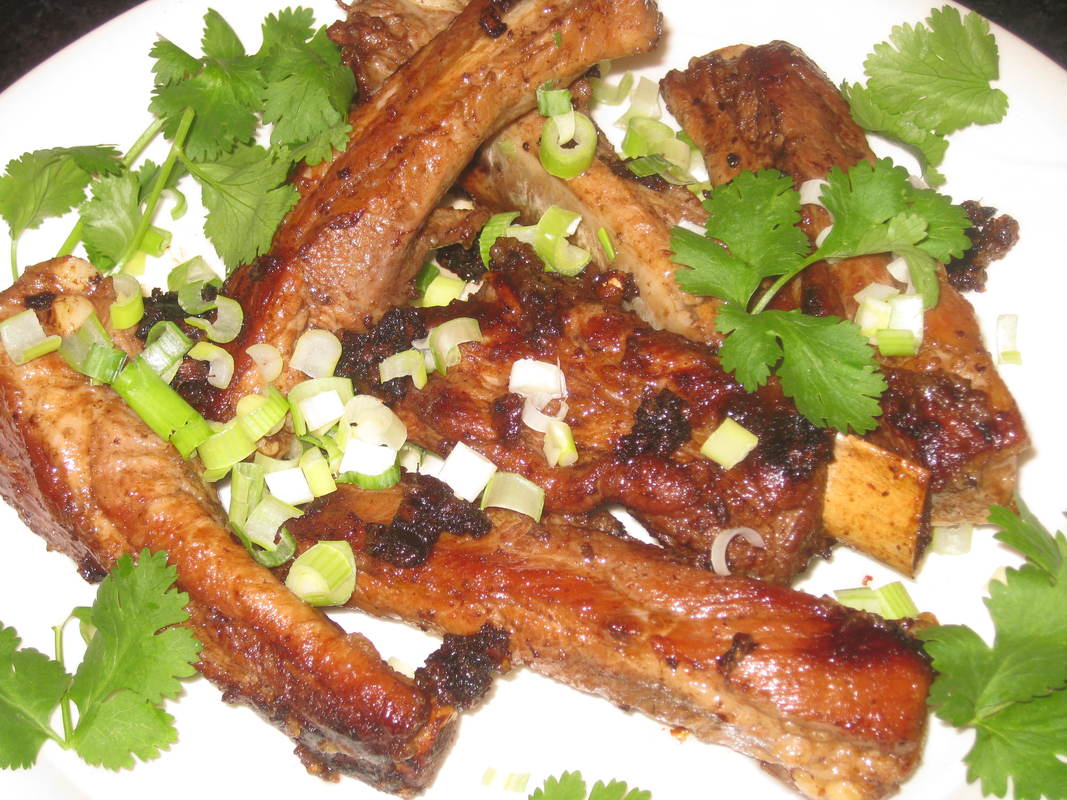
"Bowls" are very trendy right now------that is, this whole "meal-in-a-bowl" concept.
I guess it makes the cook think that he/she is not making as much food as he/she actually is......I mean if everything is just served in one bowl, it can't be that complicated, right? [uhhhhh....wrong.]
What many "bowl" recipes do is allow everyone at the table to adjust their portions to their liking.
Tonight I made the individual ingredients for Burrito Bowls. This allowed all of us to decide how much of everything we wanted. But in a lot of ways, this wasn't unlike putting out the ingredients for tacos.
For tonight's bowls I put out:
White rice, mixed with fresh cilantro
Ground beef; browned with chili powder and mixed with jack cheese
Shredded cheddar
Guacamole
Tortilla chips
Sour cream
Pico de Gallo
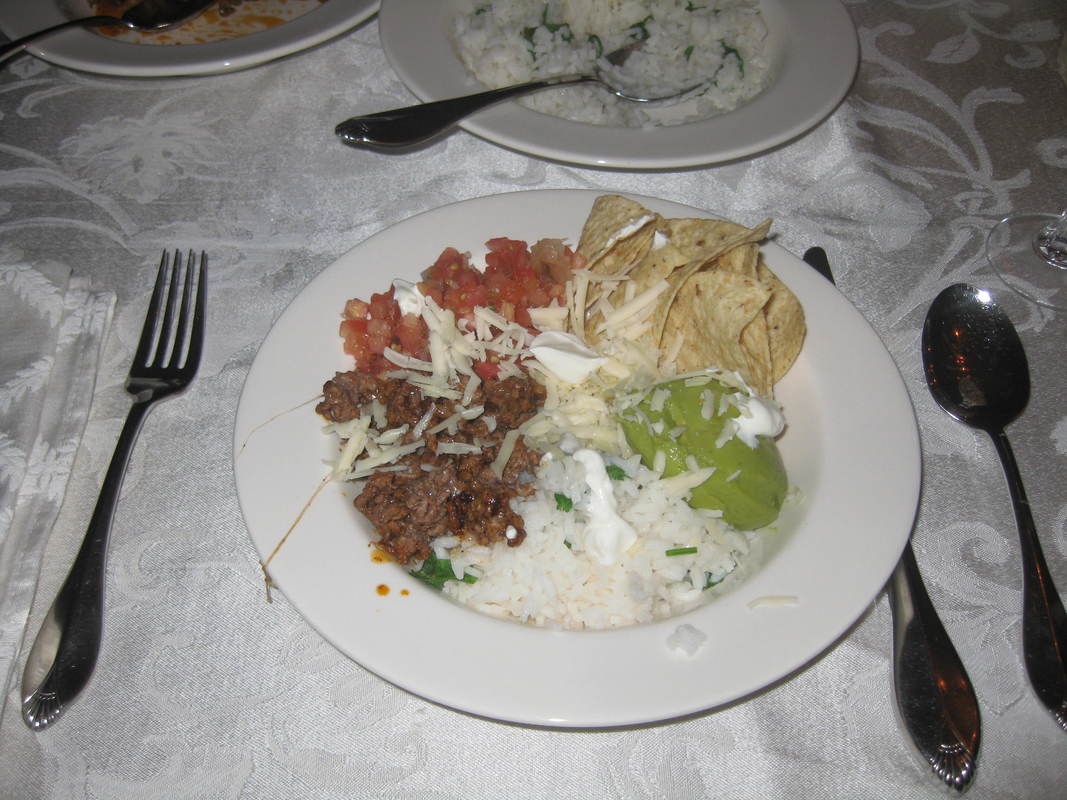
If you're from New England, you probably don't know the difference between a yam and a sweet potato.
What you find at the grocery stores here in New England are sweet potatoes. They are generally orange-ish in colour, with orange-ish flesh on the inside. Some varieties at the farmers' market have a purple-coloured skin, but are still orange-ish on the inside.
Sweet potatoes are.....well, a bit sweet compared to a regular potato. They are also starchier.
Yams are, in general, not available in New England other than at Latino markets and occasionally at Whole Foods (where they are labeled "Japanese Sweet Potato"-----and are indeed what I used to buy in Japan). Yams have a deep maroon skin, and an almost white interior. They are incredibly starchy.
In Japan, there were food-trucks that sold roasted yams. They seasoned them in various ways, and were delicious (well, to be honest, once I got accustomed to Japanese street food!)
The other night I cut up a couple of yams that I bought------I cut them into french-fry portions. I then tossed them with a small amount of oil, along with some Liquid Smoke (to mimic the Japanese food-truck yams) and a bit of tamari. I then tossed them in some polenta, and baked them at high heat for about 15 minutes until they were crispy on the outside and tender on the inside. YUM!!!!!!
I then made a spinach salad, and made a miso-based dressing-------a bit of mayo, a bit of white miso, a bit of lime juice, and a very small amount of tamari.
I did a quick-pickle of some julienned carrots----just white vinegar and sugar.
I then tossed all this together----added some peanuts (since it's an Asian dish) and cilantro for the same reason. I put one sliced jalapeno on the side, but we found the dish spicy enough without it. A really delicious fusion-style dish.
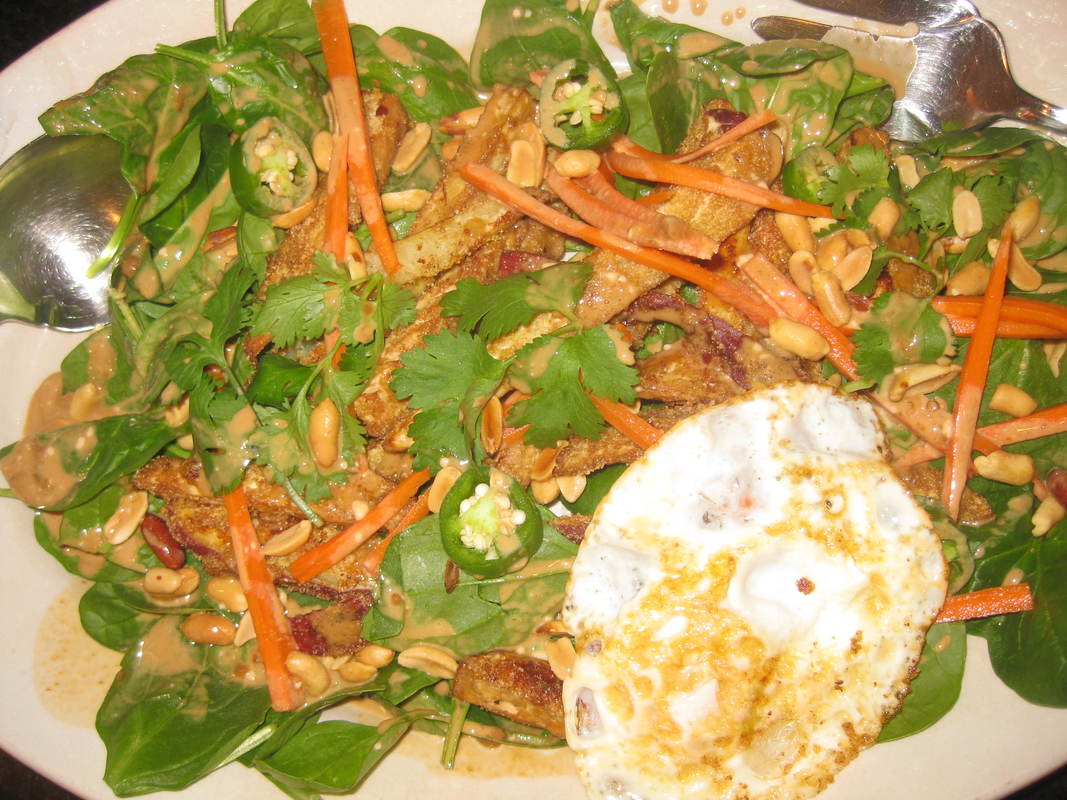
These Pork & Mushroom Potstickers are a classic with shitake mushrooms....but I'm highly allergic to shitake......
.....so it was wonderful to find they are just as good with any OTHER mushroom of your choice. I used crimini.
This is another classic type of dim sum. Using gyoza skins instead of wonton wrappers makes these quite a bit more delicate, with a terrific mouth-feel. And notice how lovely they are, with the classic "pleats". This can take a while to master, but once you do you can make these easily and quickly-------I usually just mindlessly put them together while watching teevee for half an hour.
These are among the most classic of any of my dim sum recipes. They taste just like the ones we eat in Hong Kong.
Use the contact form for the recipe!
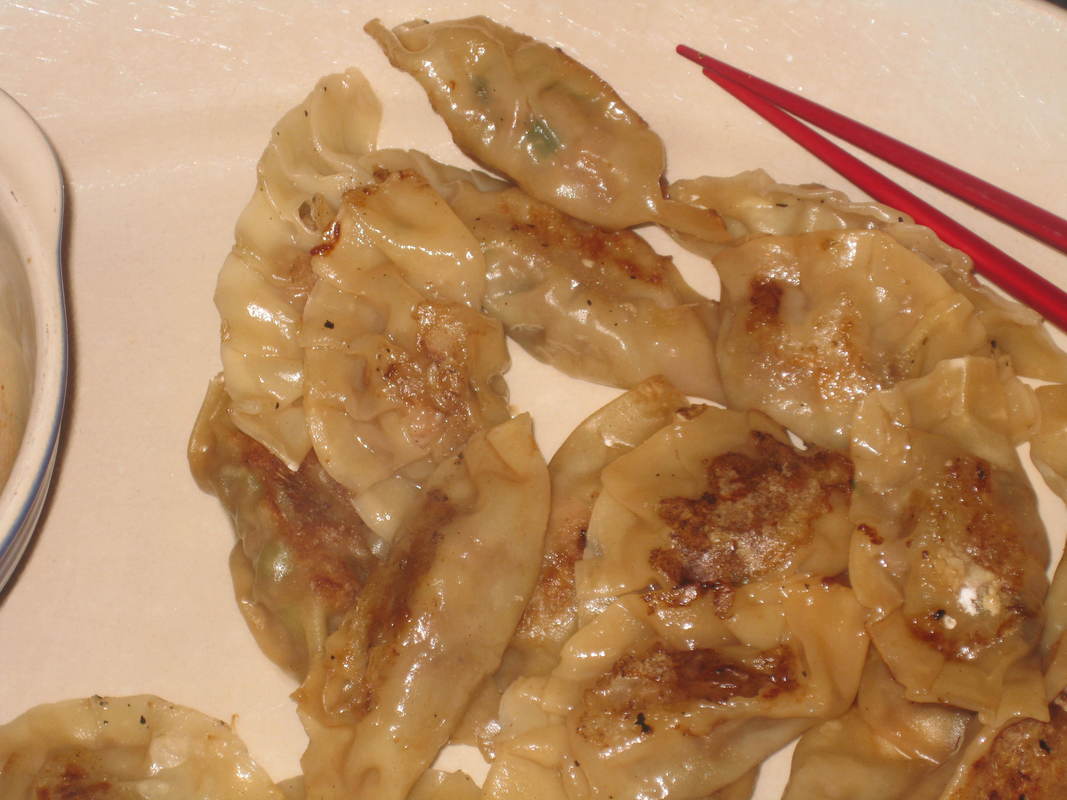
Half of this flatbread came from a popular local (Portland Maine) restaurant called "Flatbread". The other half I made here at home in Scarborough.
If you can't tell which is which, I've proved my point-------it's easy to make great food at home for less than half the price you are paying for take-out.
I made the delicious crust using my stand-mixer, so didn't even have to knead it. I let it rise by just letting it sit on the kitchen counter on a not-warm Saturday afternoon by the sea.
The topping is the same as what I often order at Flatbread-----caramelized onions with pancetta. I used fontina cheese instead of mozzarella-------fontina has loads more flavour. I also used some of the fresh thyme from the garden.
Stop wasting money, and start cooking! This is so easy to do!!!!!
The topping is the same as what I often order at Flatbread-----caramelized onions with pancetta. I used fontina cheese instead of mozzarella-------fontina has loads more flavour. I also used some of the fresh thyme from the garden.
Stop wasting money, and start cooking! This is so easy to do!!!!!
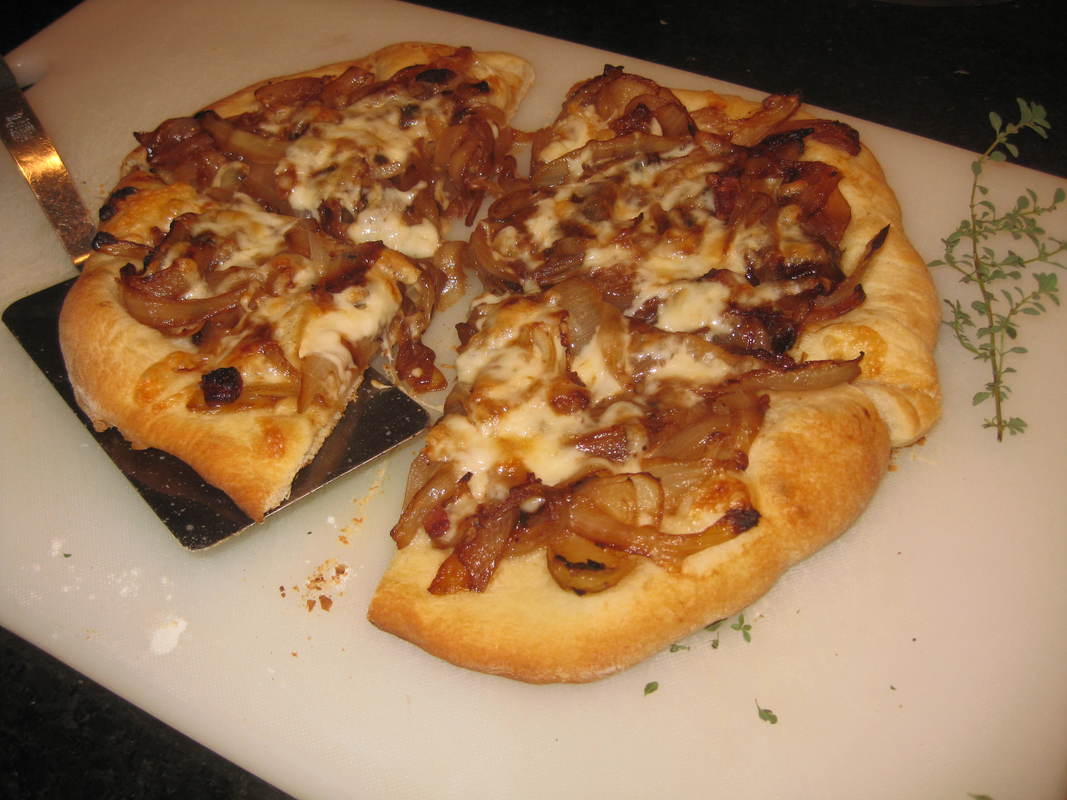
An easy lunch sandwich that's delish and a little different.
Do you like bagels but aren't a fan of the traditional nova or lox? This is for you!
This is a nice way to make the kind of sandwich you can get on the street in New York. Use an "Everything" bagel, which at my local grocer can be had for 89 cents. Split and toast your bagel, then slather some cream cheese on each half. Put on a few slices of good prosciutto, some leaf-lettuce, and----importantly------a big handful of french fried onions. Incredibly good!

An autumn dinner that doesn't involve "pumpkin spice". And it's vegan. And it doesn't dirty even one pan in the kitchen.
This is so easy, and so good.
First, peel and slice one sweet potato. Toss it with 2 TBSP olive oil, 3/4 tsp allspice, 1/4 tsp salt, and 1/4 tsp pepper.
Fire up the grill, and get it hot. While you're doing so, shake together in a jar (or whisk in a bowl) 3 TBSP olive oil, 1 TBSP red wine vinegar, 1 tsp allspice, 1/4 tsp salt, and 1/4 tsp pepper.
Put the sweet potato slices on the grill, and grill them for about 5 minutes per side----until they are tender. Remove them to a plate.
Slice one or more pears, and some scallions. Toss this all together with the grilled sweet potato slices, and the dressing.
Perfect light dinner, with the flavours of Fall!
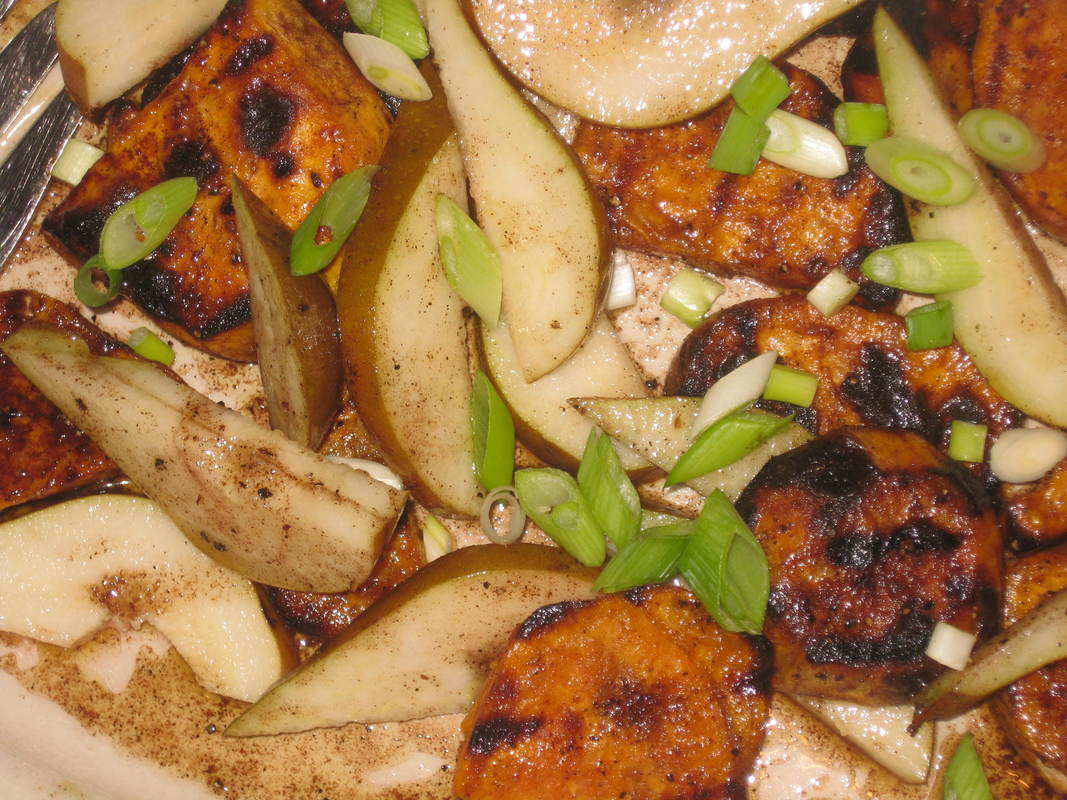
A very Maine main course salad: Lobster and Blueberries
I'm trying to use a lot of the herb-garden's bounty before the first frost. I truly hate spending 3 bucks for a tiny bit of fresh herbs during the winter.
This is just such a low-calorie, easy way to make dinner. About half a pound of Maine lobster, and some late-season blueberries. Red-leaf lettuce, a bit of sliced red onion, and some toasted sliced almonds. And most perfectly, a bunch of chopped tarragon from the garden. For the dressing I made an orange-juiced based vinaigrette (with a bit of shallot and white wine vinegar)
Perfection!
This feeds three people beautifully.
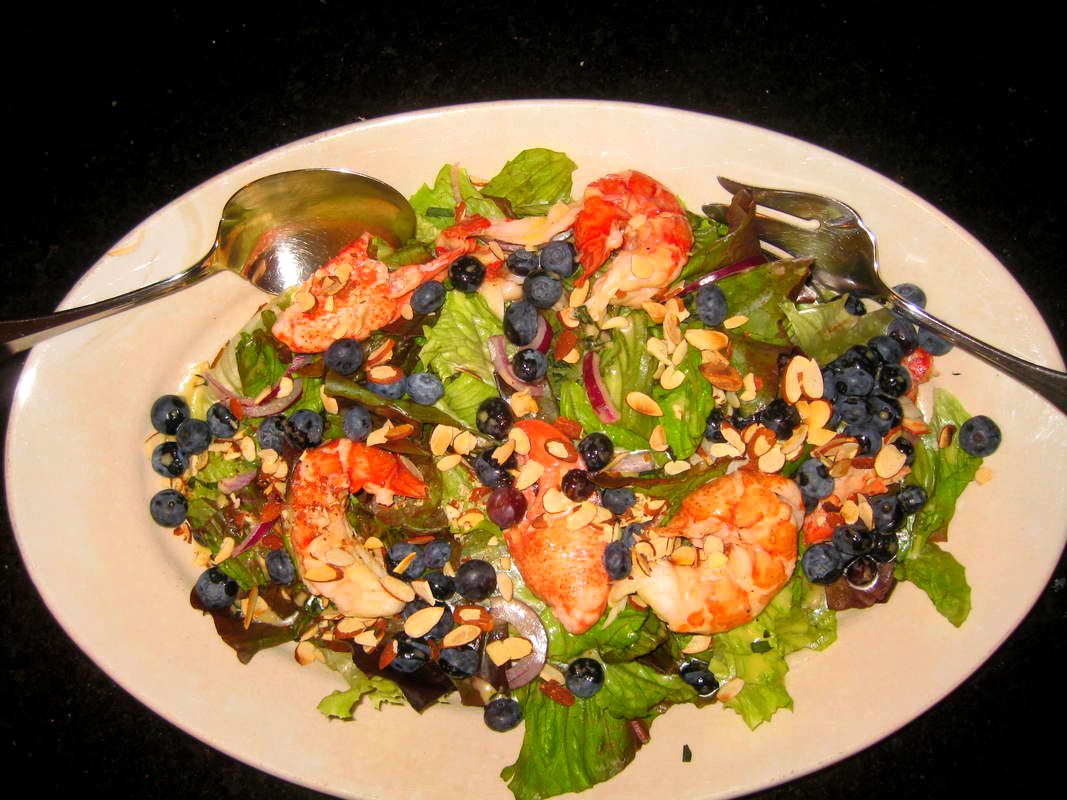
Savory pork and ginger potstickers are easy to make and freeze for later
This is yet another riff on classic potstickers. It's a classic recipe using pork, fresh ginger, and scallions. They can easily be made in advance and then frozen. The dipping sauce keeps in the fridge for a scary-long time!
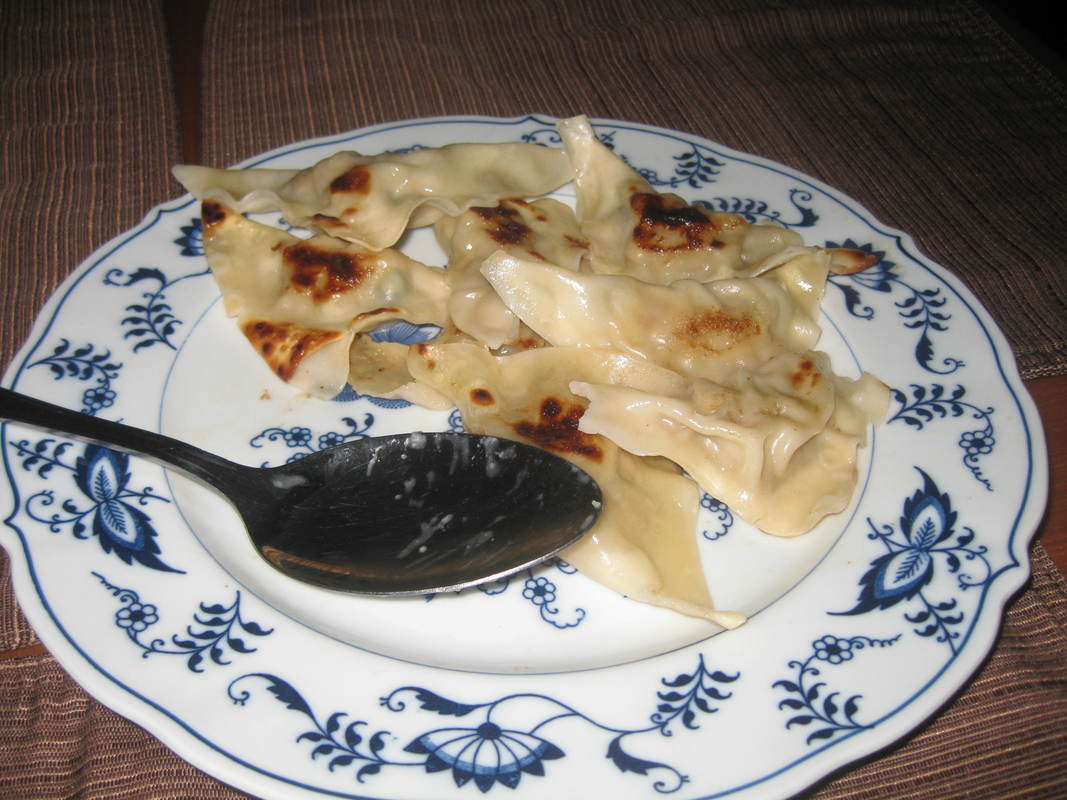
Are you a sophisticated enough cook to handle a LOT of stuff coming together at one time? Do you love southern cooking? Then this Chicken-Fried-Steak bowl is for you.
My husband is definitely NOT a southerner, and when I said, "Chicken Fried Steak", his response was....."chicken...or fried....what?" Up here in New England, it's not something one sees a lot. But it uses so much stuff that's now available in the farmers' market------corn, second-planting of green beans, new potatoes.
It IS indeed delicious, and if you make all the fixin's-------it will for sure dirty half the pans in your kitchen. But will that sacrifice be worth it? Oh, oh, yes!
This recipe is for more expert cooks, who are able to multi-task. It's difficult but------ask my husband, incredibly worth it.
Use the Contact Form for this incredible dinner!!!!!
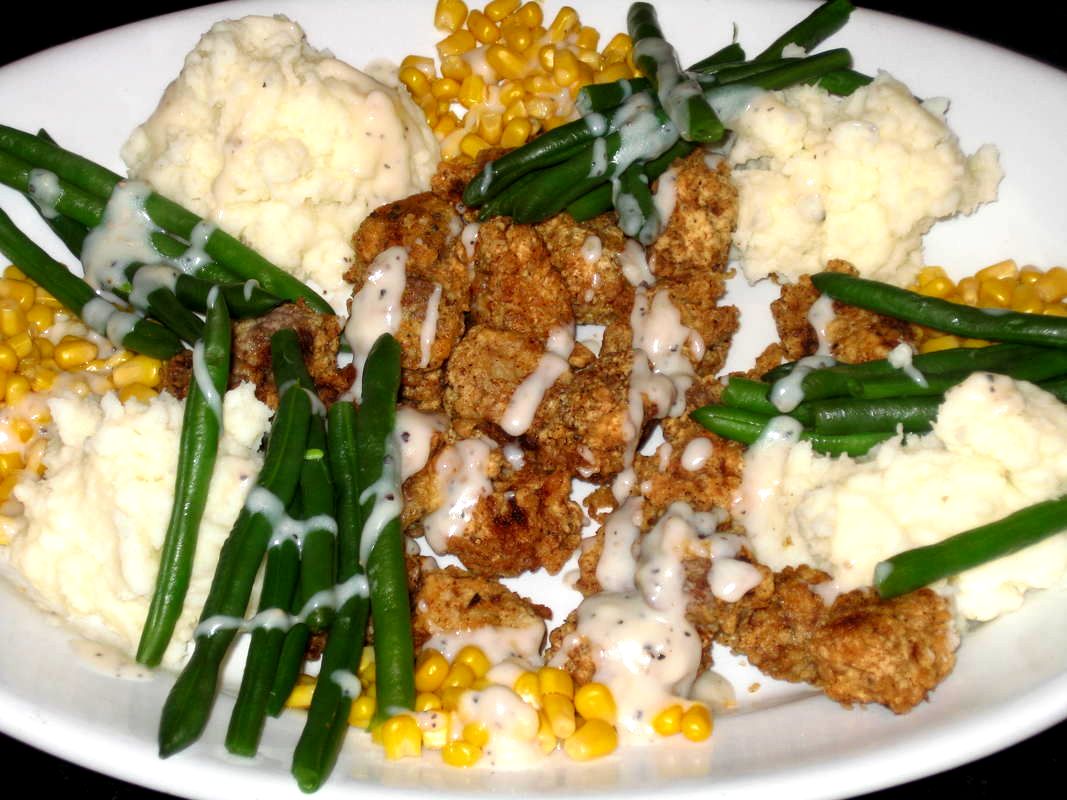
A young woman named Lily was feeling blue today....so we made teddy bear bread!
Baking together is a great way to take a kid's mind off whatever is bothering her. Bread is so easy to make, and gives you a chance to talk about what's troubling. And using one's hands to produce an edible result is always calming and satisfying.
Today I put a spin on regular bread by suggesting she make a loaf of bread in a shape. She chose a teddy bear, and I think she did a great job! [You gotta love that belly-button---her idea!]
Today I put a spin on regular bread by suggesting she make a loaf of bread in a shape. She chose a teddy bear, and I think she did a great job! [You gotta love that belly-button---her idea!]

This lovely Eastern European breakfast treat is my adaptation of the coffee bread called "makowiec"
For my version, I use much less of the poppy seed filling than might be traditional. You could adjust the amount of filling to suit your family's taste. Use the contact form for the easy recipe!

Most Turtle Brownie recipes call for boxed brownie mix and jarred caramel. Carefully now.....with your hands up.....step slowly away from the box
In order to understand the science behind making these right, I once again turned to Cook's Illustrated. Their recipe does indeed yield brownies that are reminiscent of a candy turtle-------rich, chewy, and chocolaty; with a bittersweet, tooth-sinking caramel and an abundance of pecans.
DO NOT CUT CORNERS ON THIS RECIPE! Baking is chemistry, and you need to follow the directions exactly.
Use the contact form, or google "Cook's Illustrated All-Time Best Recipes 2014"
DO NOT CUT CORNERS ON THIS RECIPE! Baking is chemistry, and you need to follow the directions exactly.
Use the contact form, or google "Cook's Illustrated All-Time Best Recipes 2014"
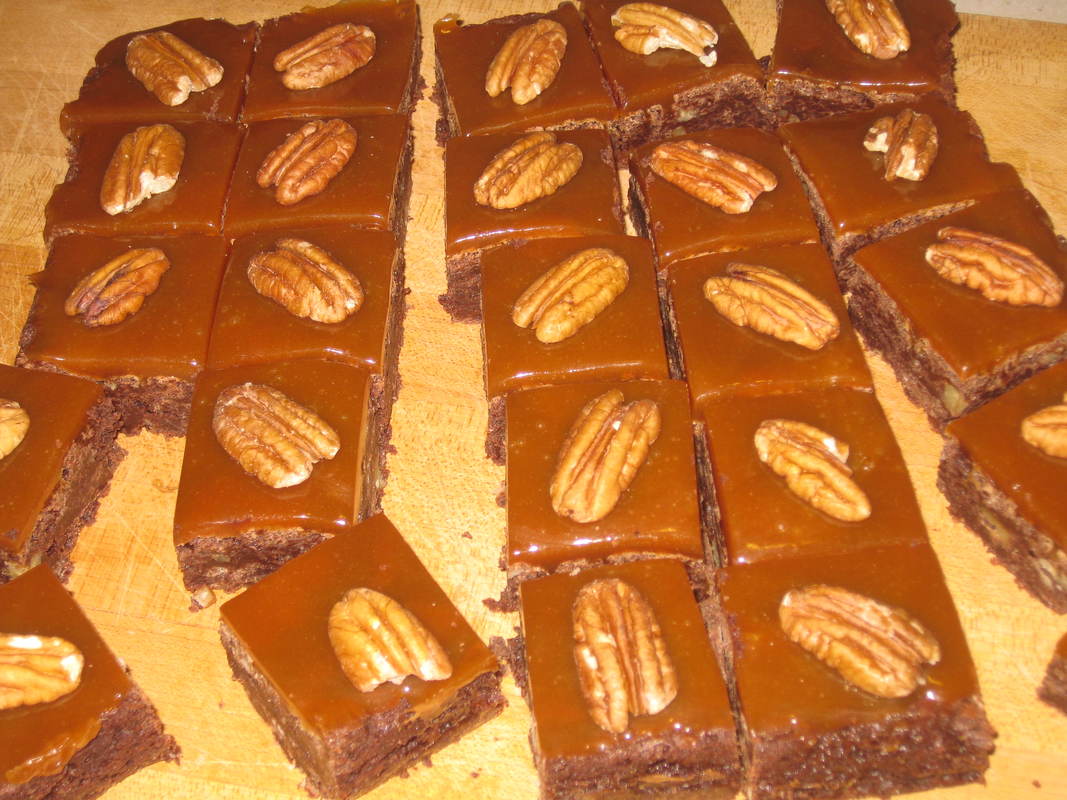
Last week we went down to San Sebastian Spain from Paris, and of course while there ate tapas......
.....because I always eat tapas in Spain, just as I always eat dim sum in Hong Kong. I just LOVE eating and sharing small plates of various dishes. And there is no better place to eat tapas shrimp than San Sebastian.
I got this recipe right from the chef who made it for us. It's easy to make!
12 garlic cloves
1/4 cup EVOO
3/4 tsp salt
3/4 tsp crushed red pepper
1/4 tsp paprika
1 bay leaf
1 lb large shrimp
1 1/2 tsp dry sherry
2 TBSP chopped fresh parsley
lemon wedges for (serving)
1. Make garlic oil: Smash 5 garlic cloves, and gently saute. Allow the garlic to only get golden; do not let it brown. This will take about 6 minutes. Remove the garlic from the oil.
2. Make shrimp: Thinly slice 6 garlic cloves and place them in the oil along with the salt, pepper, paprika, and bay leaf. Cook over very low heat until the garlic is very light. Add shrimp in a single layer and cook about 3 minutes, then turn and cook on the other sides for another 3 minutes. Add the sherry and parsley, along with the last of the garlic cloves (minced).
3. I like this dish hot out of the pan. However it's delicious at room temp. Serve it with lemon wedges-------let each person adjust the heat with a squeeze of lemon.
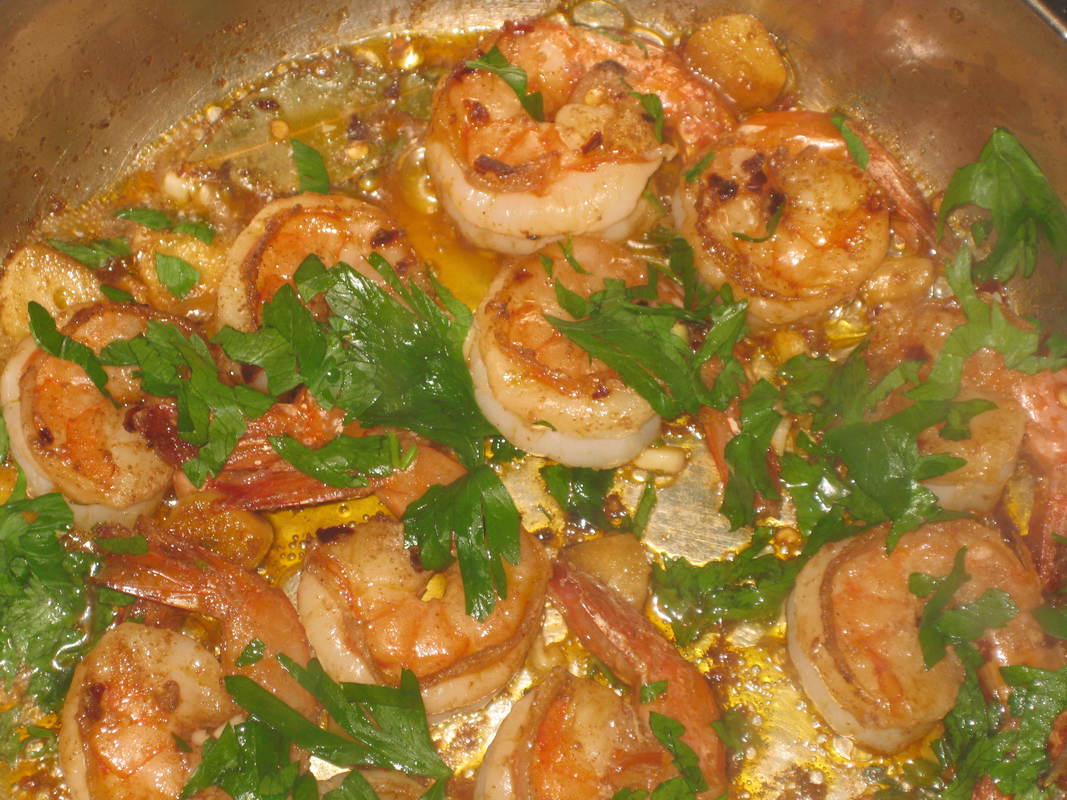
Using Nanami Togarashi: Essential for Tomago-toji Katsudon
Here's another classic Japanese dish. It's a classic katsudon, which includes the eggs.
Katsudon is traditionally eaten by students before a big exam, because "katsu" is a homophone for "to excel". Maybe it will be a lucky food for your young scholar! Use the contact form for this somewhat complicated recipe--------it's not just lucky, it's delicious!
Katsudon is traditionally eaten by students before a big exam, because "katsu" is a homophone for "to excel". Maybe it will be a lucky food for your young scholar! Use the contact form for this somewhat complicated recipe--------it's not just lucky, it's delicious!
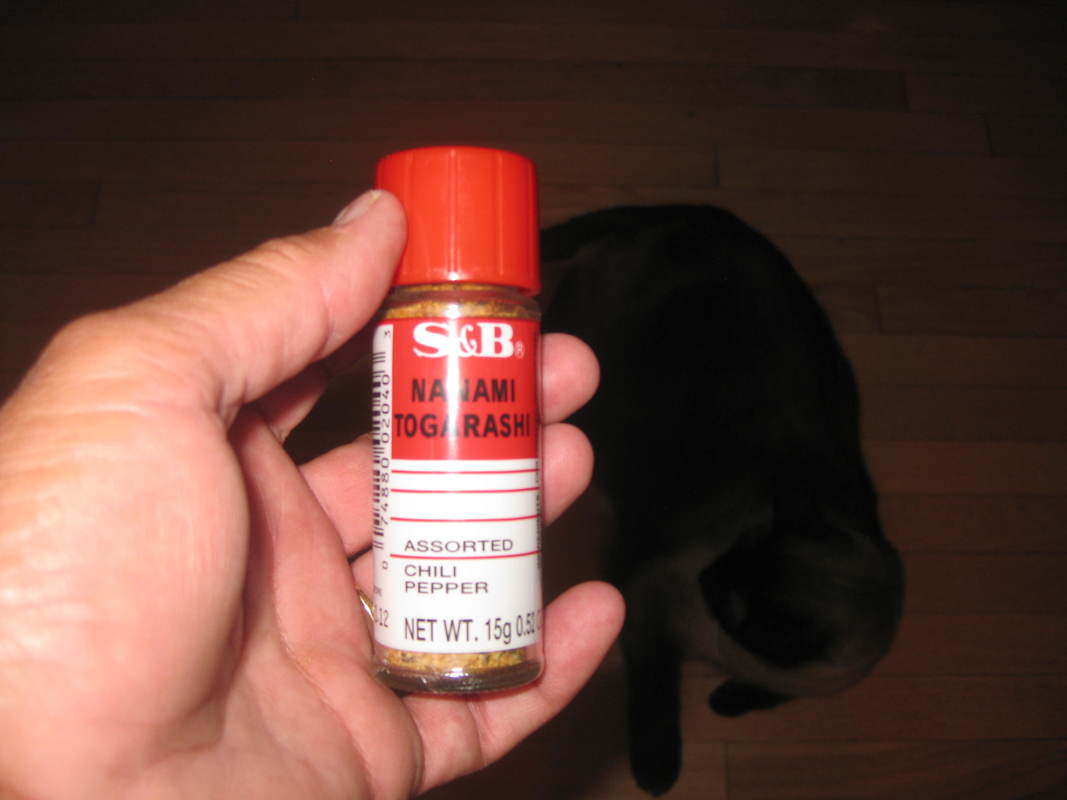

Mmmmm....Muffaletta
Muffaletta is a New Orleans thing, and so I certainly don't claim that my version is authentic. But for those who like Italian food....the kind of thing one gets in a street cafe in Umbria or even Rome.....my version really satisfies that urge.
The key to muffaletta is of course the olive salad. I've noticed that there is such a thing available in jars, but I vastly prefer to make my own------it's easy! I use whatever olives I have on hand-------generally a mix of Castelventano and Kalamata. A bit of red wine vinegar and good olive oil makes a super combination.
For the meats, I think Porcetta is essential. along with good imported prosciutto------this is not the time to skimp and buy American Prosciutto. Slather on some coarse-ground dijon mustard. Use good Italian provolone, a bit of very thinly sliced red onion, and a handful of arugula.
Put all this on a big ciabatta bread, and slice into serving sizes. Magnifico!!!!!!!!
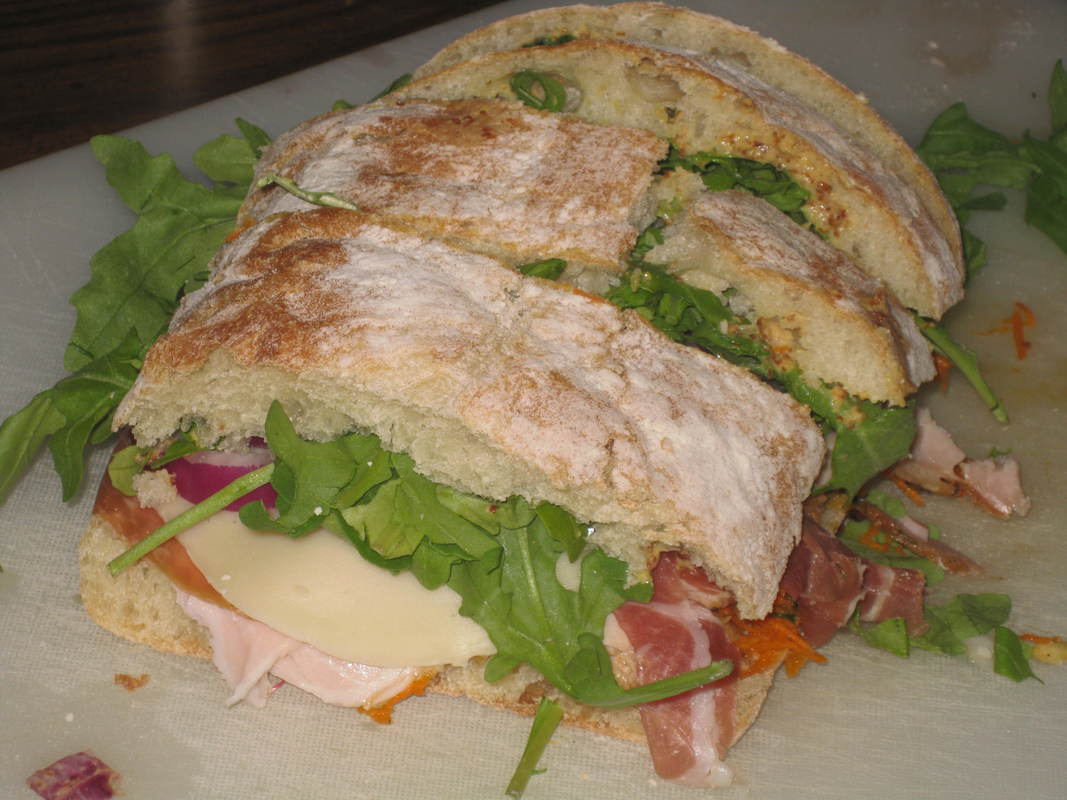
More Caprese....easy stuffed shells
This extremely rich dish pairs 1 cup ricotta with 1/2 cup mozzarella and about 3 TBSP sun-dried tomatoes (oil pack). Stir in some of that fresh basil that you've got in your garden.
This will yield enough filling for about 8 cooked pasta shells. This is a rich dish, so 8 shells is plenty for two people!
Make a sauce with 3/8 cup low-sodium chick broth and 3/8 cup heavy cream, seasoned with kosher salt and freshly ground pepper Pour the sauce into a roasting dish, and top with the stuffed shells.
Bake at 350 degrees until the cheese is bubbly-----30 minutes.
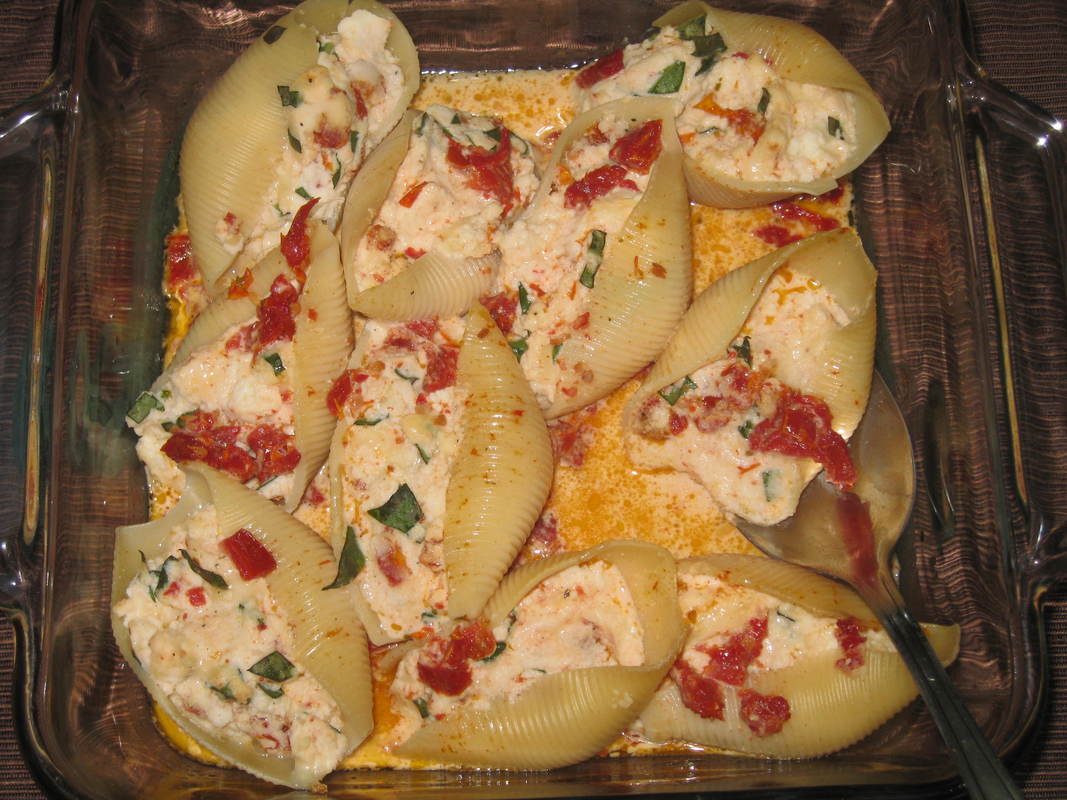
Japanese pub food: Okonomiyaki
Pubs in Japan are called izakaya. They are great places to get together with colleagues after work. Many dishes are ordered to go along with the beer or sake, and dishes are shared.
I've always really liked okonomiyaki, which are like little pancakes filled with veggies and loosely held together with rice flour. They are topped with----or more often simply served with-----both a sweet sauce and a set-your-mouth-afire wasabi-laced yogurt, and usually some pickled ginger.
Rather than make a bunch of little ones as one would get at an izakaya, I found that my omelet pan is the perfect size to make a larger one for the two of us to share for dinner. This one is full of shredded cabbage, carrot, and scallions. It's unbelievably good, and low in fat besides!
Use the contact form for the reasonably simple recipe.
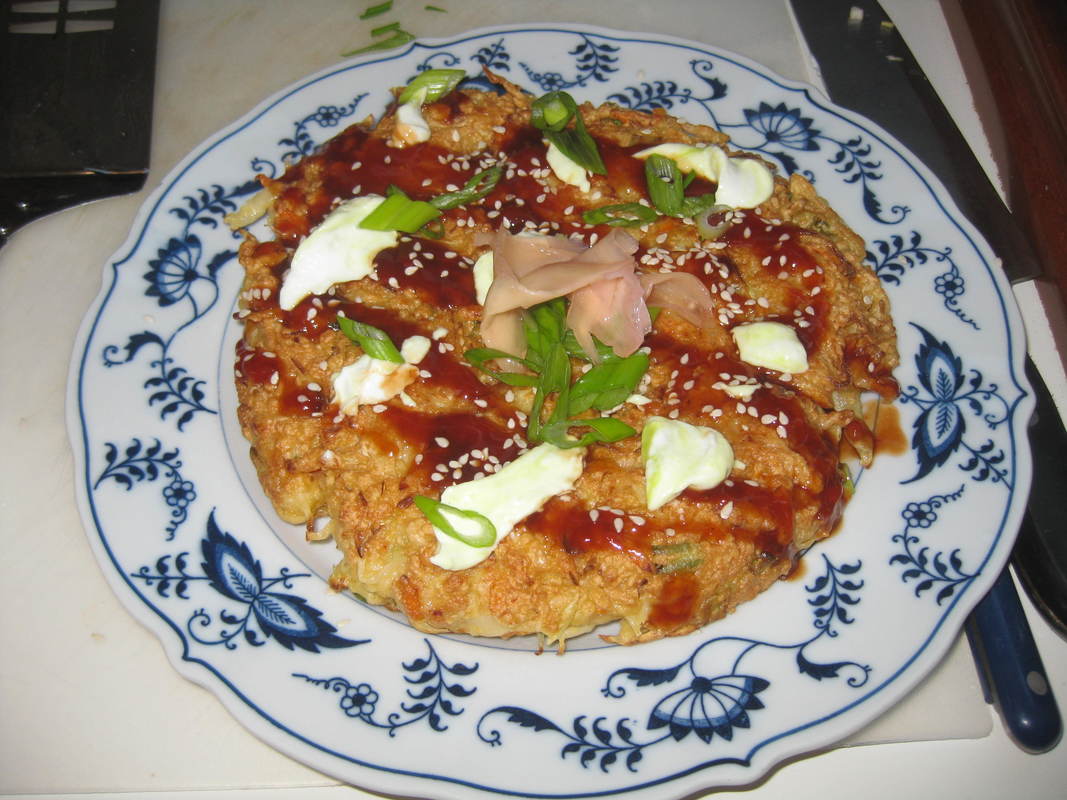
Mmmmm.........a Texas Food-Truck's Korean-Mexican-Texas fusion recipe
I make Asian food a lot. There are many reasons you should too, but the 2 best are:
1. It tends to be low in fat and calories; and
2. It's a great way to stretch a small amount of meat into a meal for a few people.
Beef Bulgogi is a classic Korean dish, and I make it with some regularity. But I love fusion food.
So I was interested to see this Korean/Mexican/Texas take on the whole thing, courtesy of the Austin food truck Chi'Lantro. The owner Jai Kim tops french fries with caramelized kimchi, bulgogi beef, and a sriracha mayo......along with some Mex-toppings.
OK, so much for Asian food being light! But this is UNBELIEVABLY good!!!!!! I won't reprint the recipe here, because it's available on the Food & Wine website as "French Fries with Bulgogi and Caramelized Kimchi".
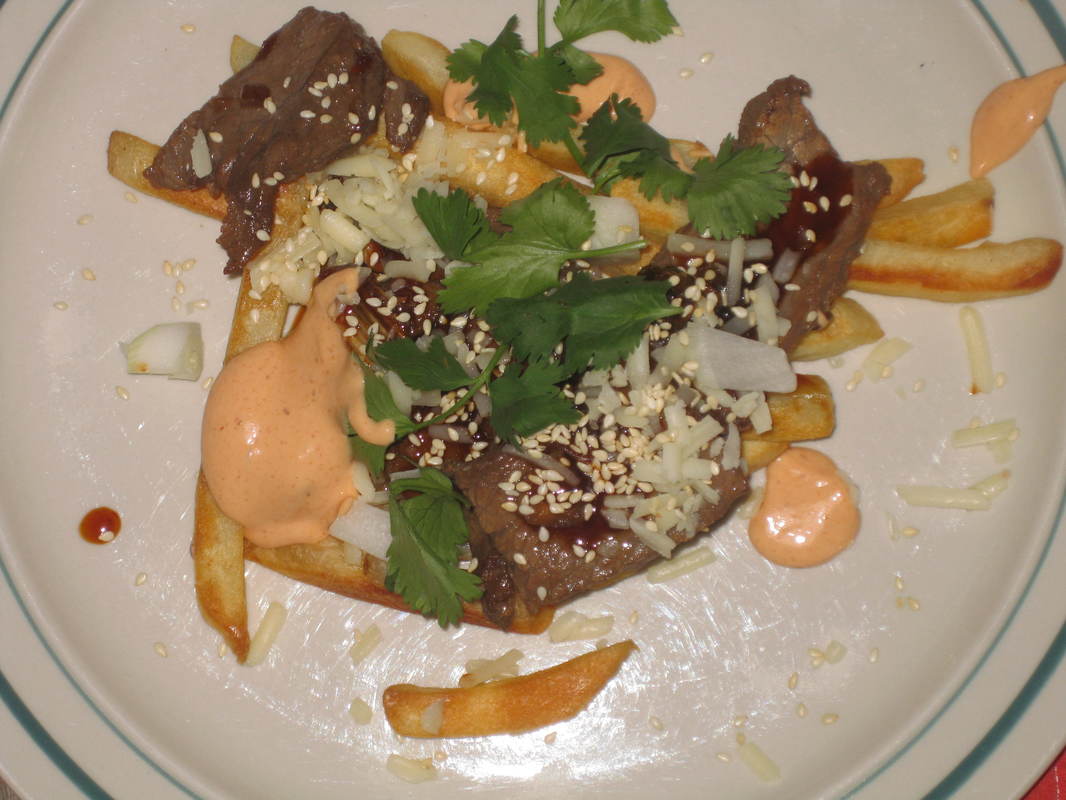
Lemon Meringue Pie---always in season when here in Maine we don't quite have fresh berries yet.
It's hard to make well---it takes understanding of chemistry!
Many people try to make Lemon Meringue Pie. My advice: Don't. Well, unless conditions are correct (humidity-wise) and you truly understand cooking.
We've all seen them-----somebody's Meringue Pie that has little bits of humidity on the meringue, which itself has burned bits that are so brown they are practically chewy. And the meringue itself is pulling away from the crust. Ugh.
A properly done Lemon Meringue is a thing of beauty.
Understand the chemistry of it. When so, use the correct technique.

Crispy Cheese Straws are always a hit with wine....though difficult to make if you aren't good with a knife.
BEWARE!!!! These are highly addictive. They are a perfect little munch with a nice bottle of burgundy. Use the contact form for the recipe!
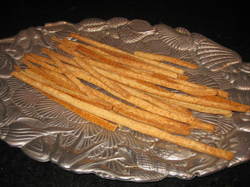
Homemade gnocchi----Little pillows of cheesy pleasure!
Gnocchi are very easy to make, especially in a stand-mixer. I made these little pillows at home, and then finished the dish on my boat.
Gnocchi have simple ingredients........Reggiano parm, eggs, flour. It's nice to put in a bit of lemon zest. About 15 minutes before dinnertime, I fried up about 2 ounces of pancetta, and a few leaves of sage from the garden. I added unsalted butter, and then the gnocchi.
It's an absolutely divine dish, very rich. Served with an iceberg lettuce wedge, it's a simple Italian meal reminiscent of trattoria in Tuscany.
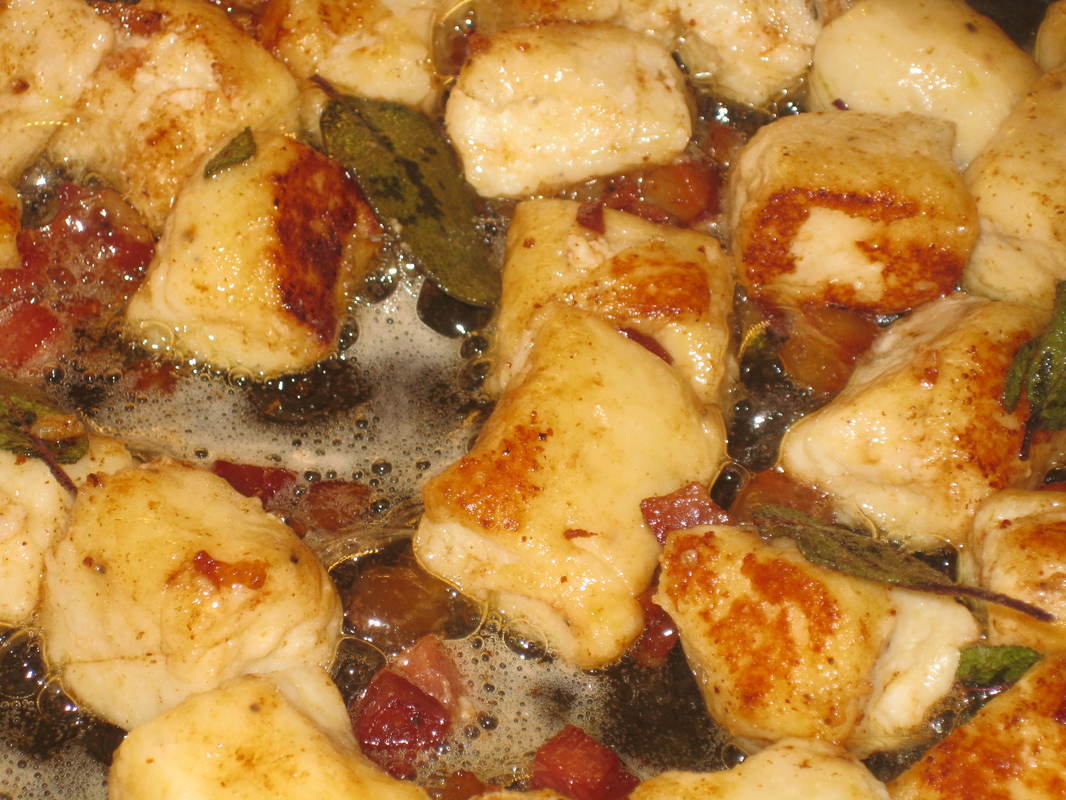
This is one of our absolute favourite main course salads
This is a very good salad to use as a main course. It's not a "light" salad by any means.......sure, it's got lots of stuff that's good for you, but it also has much that isn't.
Let's begin by frying about 5 slices of bacon. Drain the bacon, then add 1 1/2 TBSP butter (if using unsalted butter, also add a bit of salt) and saute a sliced apple-------Fuji or Honeycrisp works best.
When the bacon and apple cools, toss them together with about 2 cups mesclun, 1/3 cup toasted chopped filberts, 3 oz roquefort (use the good stuff), 4 or 5 fresh figs (quartered), and some halved dark grapes. Make a dressing with olive oil, apple cider vinegar, and (this is important) whole grain mustard (such as Inglehoffer). Add sea salt and pepper to taste.
We just LOVE this!!!
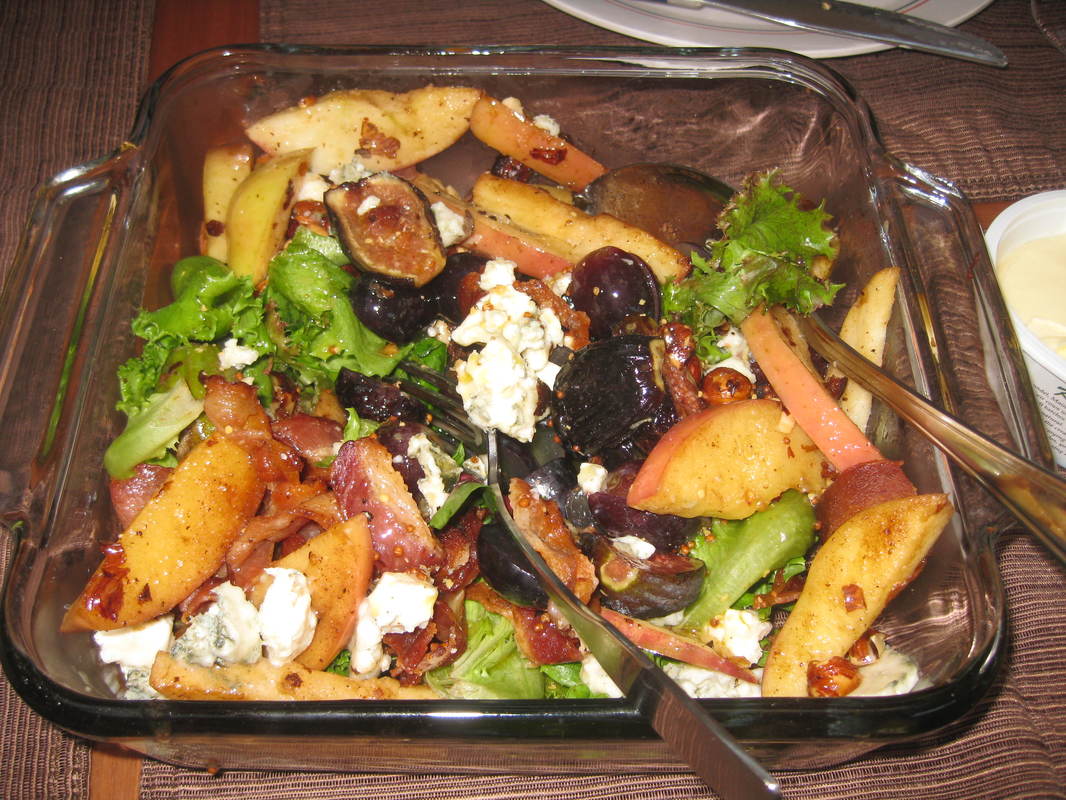
One more French Toast-----this time, let's use brioche
Because these are actually French toast sandwiches, it's important to use a softer bread. An egg bread like brioche keeps the French flavour and grills more nicely in these sandwiches. Challah would work as well.
Be sure to add 1/4 cup or so of sugar to the overnight milk/egg mixture. Although we generally prefer crunchy peanut butter, there is something nicer about creamy at breakfast time. Use a good mixed-berry preserve------I usually make my own but Bonne Maman brand is a super alternative. Bon apetit!
Be sure to add 1/4 cup or so of sugar to the overnight milk/egg mixture. Although we generally prefer crunchy peanut butter, there is something nicer about creamy at breakfast time. Use a good mixed-berry preserve------I usually make my own but Bonne Maman brand is a super alternative. Bon apetit!

Yum Yum, Dim Sum
I think I've mentioned that we've eaten dim sum all over the world. In Hong Kong certainly, but also in places as diverse as Sydney, Australia; Uturoa, Raiatea French Polynesia; and San Francisco. We just love it, and seek it out. We were over the moon that a couple of restaurants in Portland, Maine were starting to serve it, though their versions aren't terribly authentic....particularly in the way it is served.
So I make it at home. It would never, ever be served in Hong Kong for dinner (it's a mid-day thing).....but that's what we like, so I do it. I usually just make one type of dim sum, and serve it with "sticky" rice-----which for us is usually the Sweet Thai variety, but any short-grain will do.
Of course we love dim sum that are "potstickers". But if you're feeling like you'd rather eat something which is not fried----and that's often the case for us-----there's nothing like the steamed variety. I actually think that although they are low-fat, they are more filling.
The filling in tonight's little packages was lemongrass-and-ginger pork. The dipping sauce was a basic rice vinegar, soy, scallion, and pickled ginger.
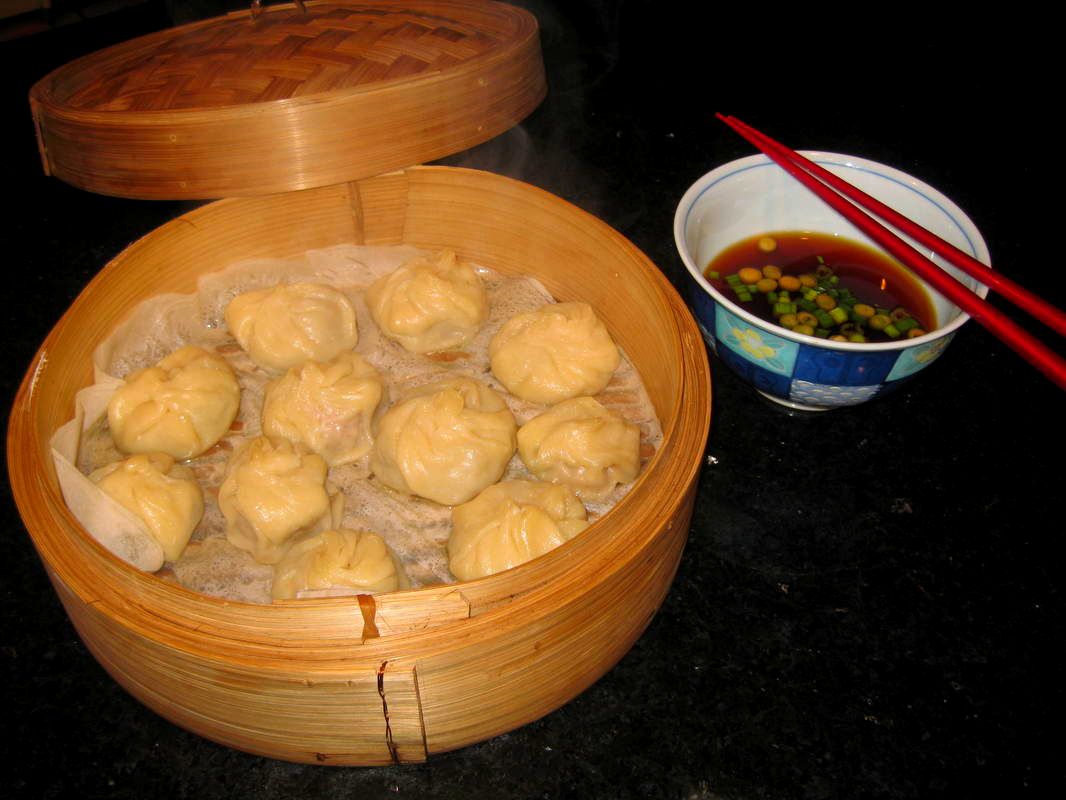
If you're paying for good strip sirloin, let's take it to the next level. And then serve it over buttery polenta? France meets Italy, so YUM!!!!!
I hate to admit it, but.......frying a very good cut of steak, over extremely high heat, in a cast iron pan.....well that's the way I was taught in France.
I save the bbq grill for the lesser cuts of steak, and of course for burgers. But a really good strip steak? Let's take a lesson from our friends in France.
This way of cooking steaks is so good you'll never do it any other way again. But the real key here is the technique regarding the use of the herb, in this case the fresh rosemary. Top it with about $2 worth of good prosciutto, and you'll think you are in Heaven.
Technique, technique, technique! You NEED this recipe----at least you need it if you don't want to just fry a steak, plop prosciutto on top, and think you've done it.
Use the Contact Form to learn how to take a steak from great to AMAZING.
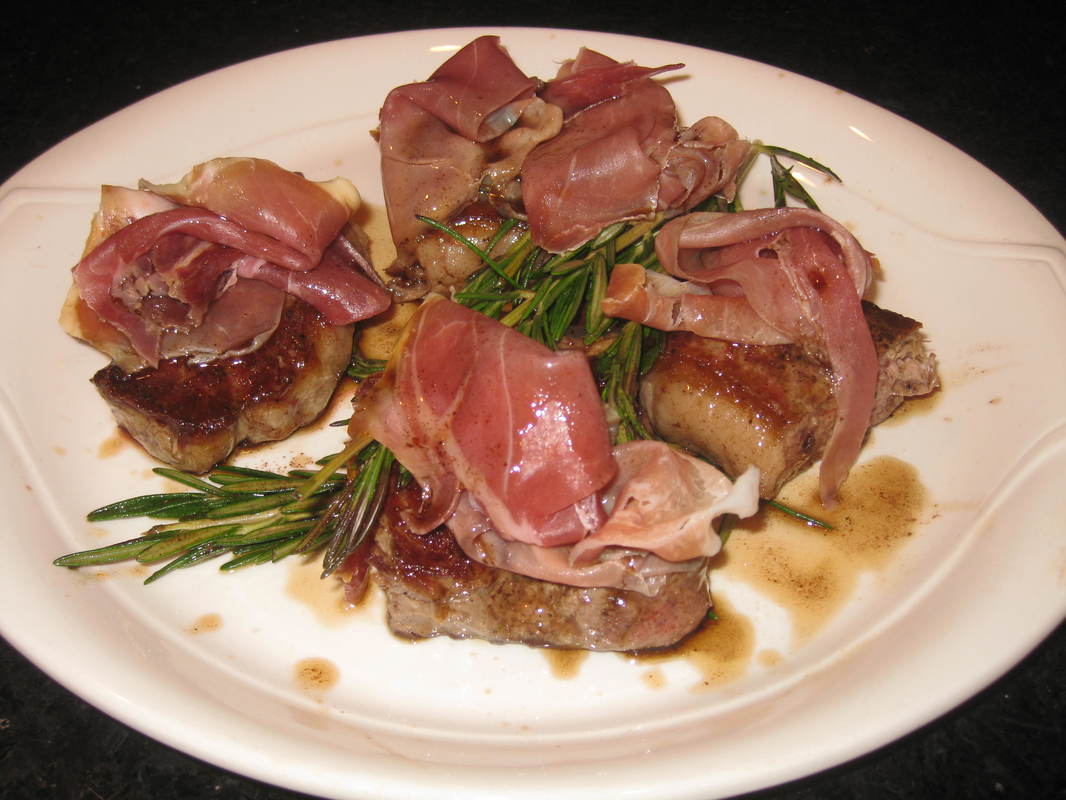
Oh Spring......how I love you!
I have not yet had the gardener plant my kitchen herb garden, but may do so as soon as this week. Maine is a problematic place to have a garden----it's possible we could still have a frost!
But in the meanwhile I am very excited to be starting to get some great fruit crops from southern New England and the mid-Atlantic states. Raspberries are starting to appear, and oh.......figs! The Black Mission figs coming out of New Jersey and Maryland are amazing!!!!!!
This is an easy main-dish salad that incorporates these newly fresh fruits. I had to buy some thyme (cool pun, n'est-ce pas?) since I don't have it yet in my garden-----but definitely use fresh thyme for the classic dijon herb dressing.
For the dressing:
1/4 cup Extra-Virgin olive oil
2 TBSP fresh lemon juice
1 1/2 TBSP fresh thyme leaves
2 tsp Dijon
1/2 tsp salt
1/2 tsp pepper
Put that all in a jar to completely combine.
For the salad:
Bibb or Boston lettuce
6 ounces raspberries
4 fresh figs, quartered
3 ounces gorgonzola
1/4 cup toasted, chopped pecans

French Toast stuffed with Mascarpone and topped with a warm cinnamon-infused peach sauce? Yes, please!!!
Many people make French toast by dipping a slab of sandwich bread in eggs and milk. So what they end up with is a piece of bread with some fried eggy-stuff on the outside.
The secret to truly great French toast is to make the custard mixture and let the bread sit in it overnight. Then when you finally grill it, you'll have toast with a creamy, yummy center----almost like custard. And hey, people it's FRENCH toast----use French bread!!!!!
I recently made this easy brunch, first mixing Mascarpone with a few TBSPs powdered sugar,. I then made slits in the slices of French bread, and let them soak in the eggs, milk, vanilla mixture.
The peach sauce is easy-peasy, using 1 1/2 pounds of peaches, 1/4 cup sugar, 3/8 tsp cinnamon, and 1/4 tsp nutmeg.
It's a delightful, easy brunch dish that cooks in about 6 minutes in the morning.
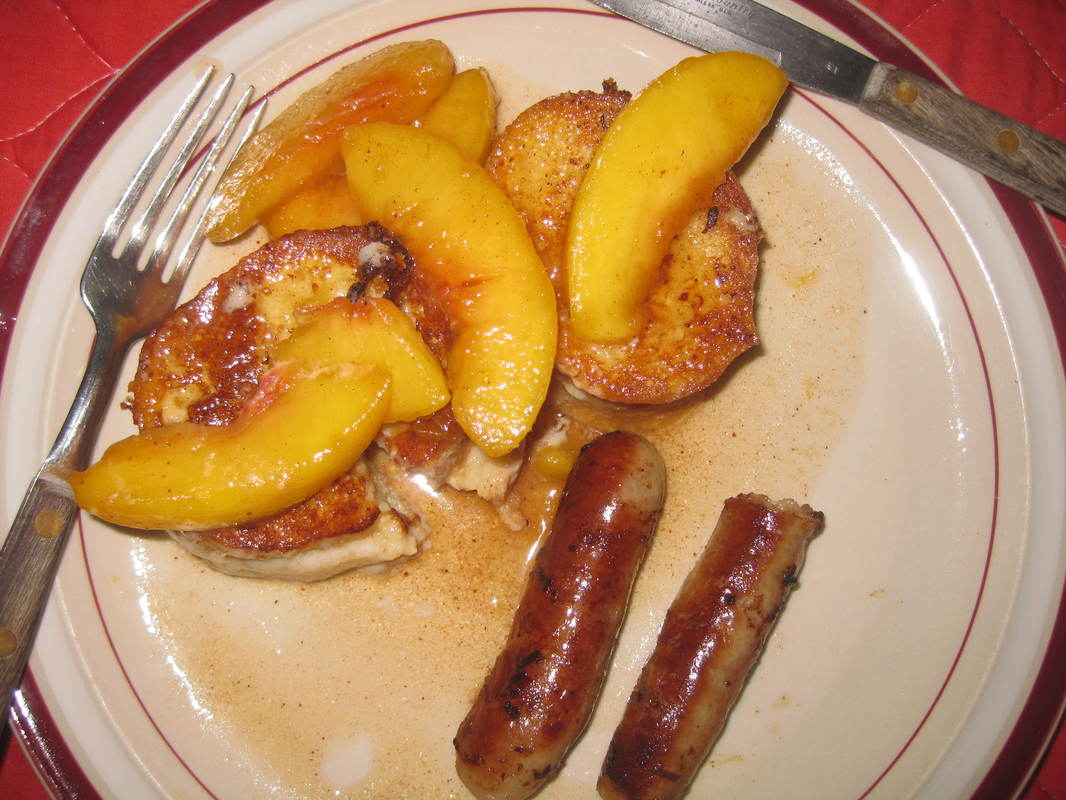
You can make an easy variation on this recipe-------call it Raspberry Cheesecake French Toast---- by stuffing the bread with a mix of raspberry jam and cream cheese. If you add sugar and cinnamon to the soaking liquid, you won't even need any syrup!!!!! This variation is sweet and good on its own or with berries.

These cute little Boursin-stuffed mushrooms make an easy hors d'oeuvre
When you remove the stems from the mushroom caps, finely chop the stems (of course discarding the woody part). Sautee the chopped stems in butter with some finely chopped onion, and some garlic. Add this to a round of Boursin, adding in about half a cup of breadcrumbs and some chopped parsley.
Stuff the mushrooms, top with a sprinkle of breadcrumbs and a drizzle of olive oil, then bake for 20 minutes at 350 degrees.
Stuff the mushrooms, top with a sprinkle of breadcrumbs and a drizzle of olive oil, then bake for 20 minutes at 350 degrees.
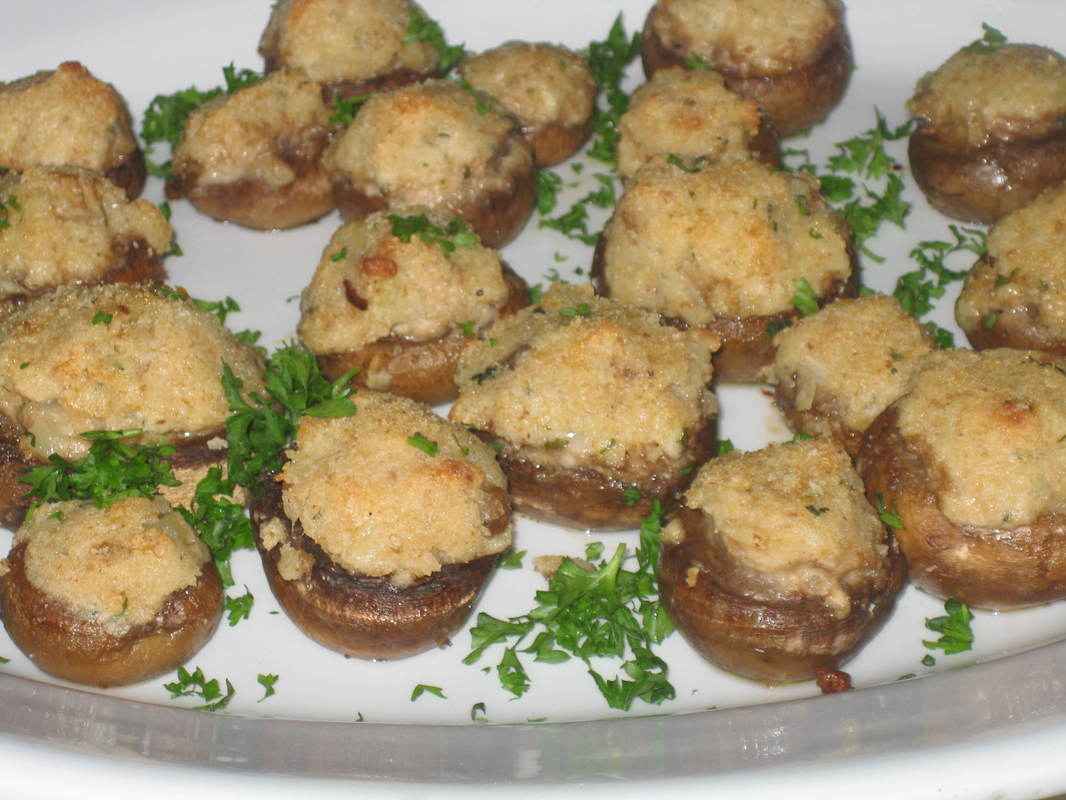
Ugh, chicken again......but it's skewers!
I lived in Tokyo for quite a few years in the 1990's, and beef or pork was hard to come by.
I'd go out to do the weekly grocery shopping. I'd ride over on my bicycle-----if one got to the store before noon, the store would later deliver. But first I'd ride to Bank of America where I had an account, and use the ATM to take out U.S.$1000 cash (though in Yen, obviously), because in the 90's only cash was accepted at the grocery stores in Tokyo. No cheques allowed, and certainly no credit cards.
The prices were unbelievable (I averaged about U.S.$750 per week for just two of us----and that's 1995 prices!!!!)). I was always terrified of the embarrassment of being at the check-out at the grocery store and not having enough cash to pay for my groceries.
It was a tough time to live in Tokyo. Our rent, for which was indeed a gorgeous house (featured in an architectural magazine) was $20,000 per month. And that was 25 years ago!
Buying groceries was a nightmare. One carrot was the Yen equivalent of $4. Melons could be as much as U.S. $60---yes $60, that's not a typo....for one canteloupe.
Beef was around U.S.$80/ per pound.....for hamburger. On top of the price, I didn't like it very well because it was largely Australian (which is range-raised) and I prefer the taste of U.S. corn-fed beef------no free-range, grass-eating cattle for me.
As a result, we ate a lot of chicken, which was relatively cheap. On some level, this has put me off chicken for life. But now, in my non-Tokyo-life, I occasionally make chicken for dinner...but it had better be damn good.
To this end, I marinated some chicken overnight in soy sauce, white wine, lemon juice, oil, freshly grated ginger, garlic, and fines herbes.
I then skewered it, and cooked it over....yes, COALS. I adore my huge Weber gas grills; but if you truly want to add flavour, use charcoal. There is no substitute.
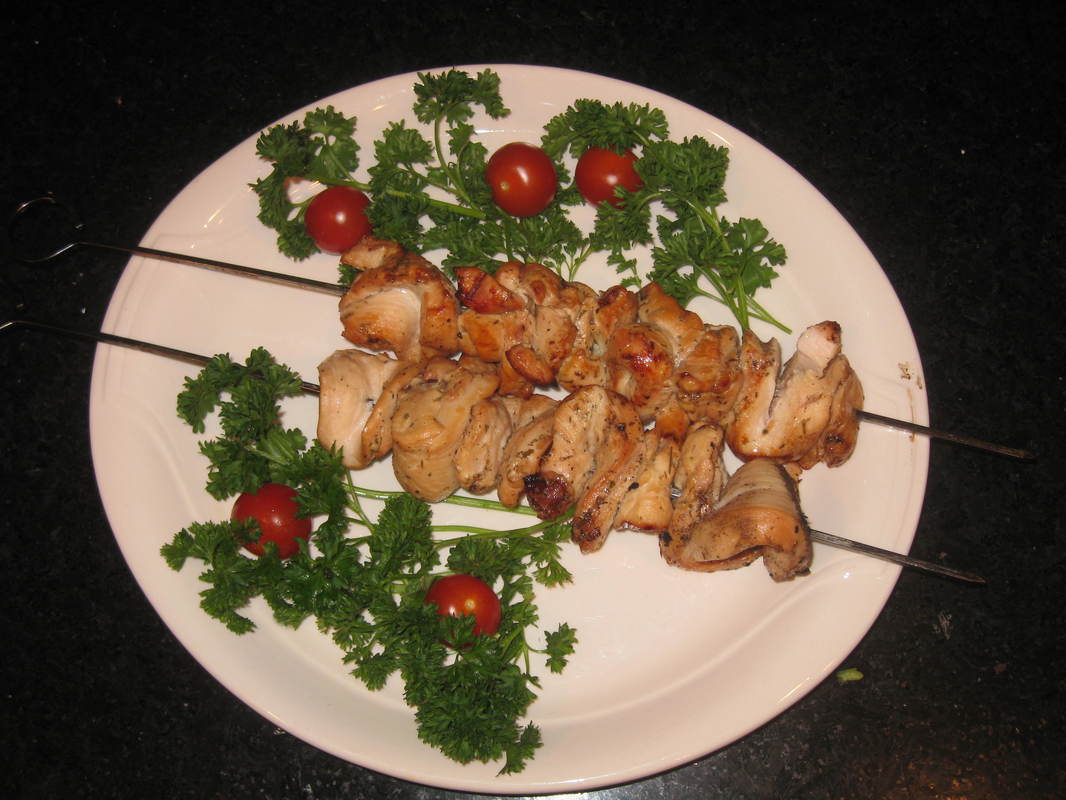
I have to laugh whenever some American recipe is labeled "Polynesian"
About 40 or 45 years ago, Steve McCusker and I had a "date" at a "Chinese/Polynesian" restaurant. That restaurant would be considered Politically Incorrect now. It's only older people reading this who would remember these types of restaurants.
But I'll guiltily admit, I really liked some of the food.
Polynesian? Well I LIVE in Polynesia now (part time) and I can assure you, I've never seen bell peppers grown there. Nor broccoli nor.....well, you get the picture.
But that doesn't mean that the fake stuff doesn't make a nice side-dish! Sometimes it's fun to be retro and non-authentic. Use the Contact Form for this fun, old fashioned recipe for "Polynesian Vegetables".
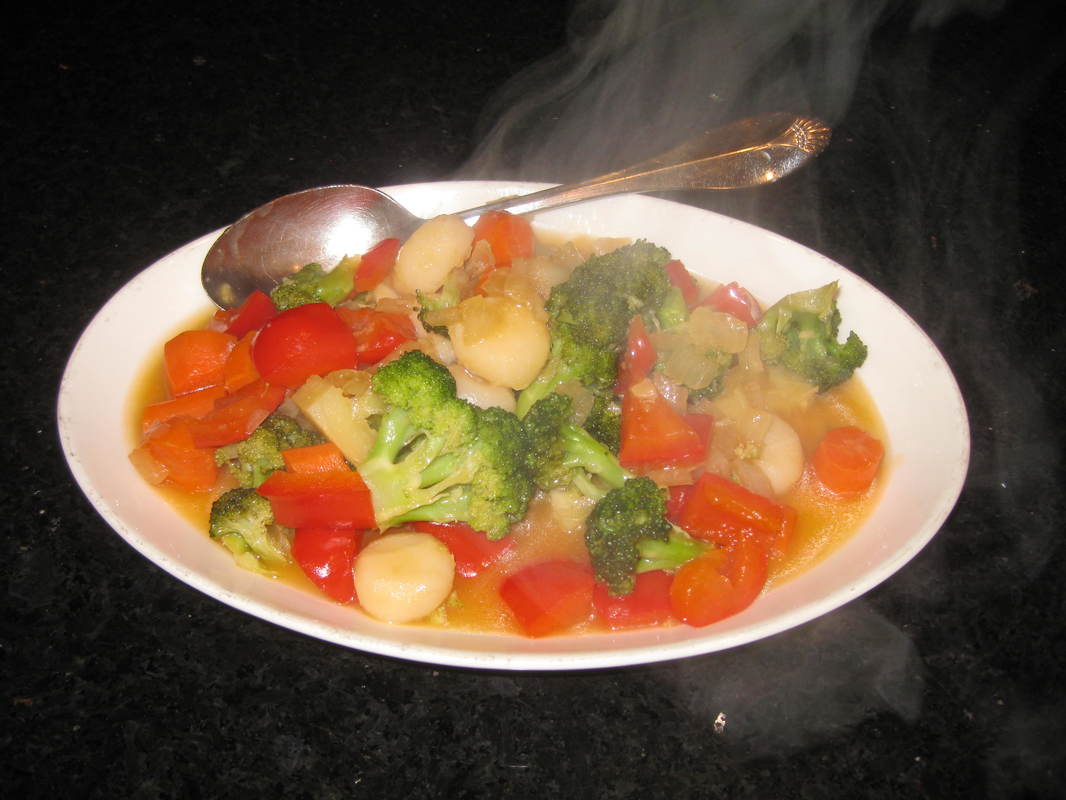
This yummy steak salad tastes a little like a bloody mary.....and is made with hanger steak, one of the very best cuts.
My mother used to call hanger steak "the butcher's cut" because she said the butcher always kept it for himself. Unlike other cuts of beef, there is only ONE hanger steak per steer. My butcher at Pat's Meat Market said they call it "the butcher's tenderloin".
Like tenderloin, hanger steak is melt-in-your-mouth tender. But its flavour is much more like a good strip steak.
I grilled a 3/4 pound hanger steak, and let it rest while I tossed the rest of the salad together. I used red grape tomatoes, red onion, Calabrian olives, some celery, flat-leaf parsley, and some good Maytag Blue cheese. I made a basic balsamic vinegar dressing, but added some lemon,Tabasco, a tiny bit of worcestershire, and a couple of TBSP horseradish. For added flavour, I left the completed salad in the fridge overnight.
It's amazing----and if you like a good bloody mary, you'll love this salad!
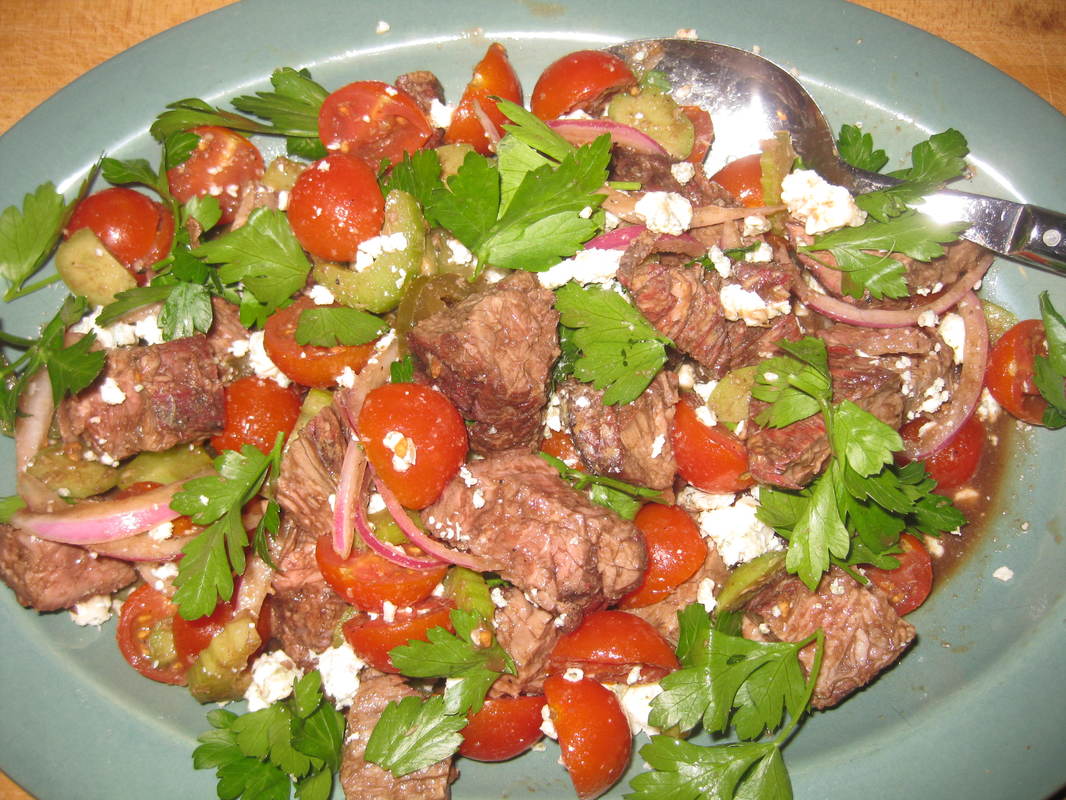
Cubano Burgers, YUMMMMMMM!!!
For anyone who loves a Cubano sandwich, this is your burger.
It's very easy to infuse the meat with cumin, garlic, and other spices. But the real kick here is the "mojo sauce", redolent of citrus. The ham slices, the provolone, the red onion.....oh my, oh my oh my!
Use the Contact form for the easy recipe!
It's very easy to infuse the meat with cumin, garlic, and other spices. But the real kick here is the "mojo sauce", redolent of citrus. The ham slices, the provolone, the red onion.....oh my, oh my oh my!
Use the Contact form for the easy recipe!
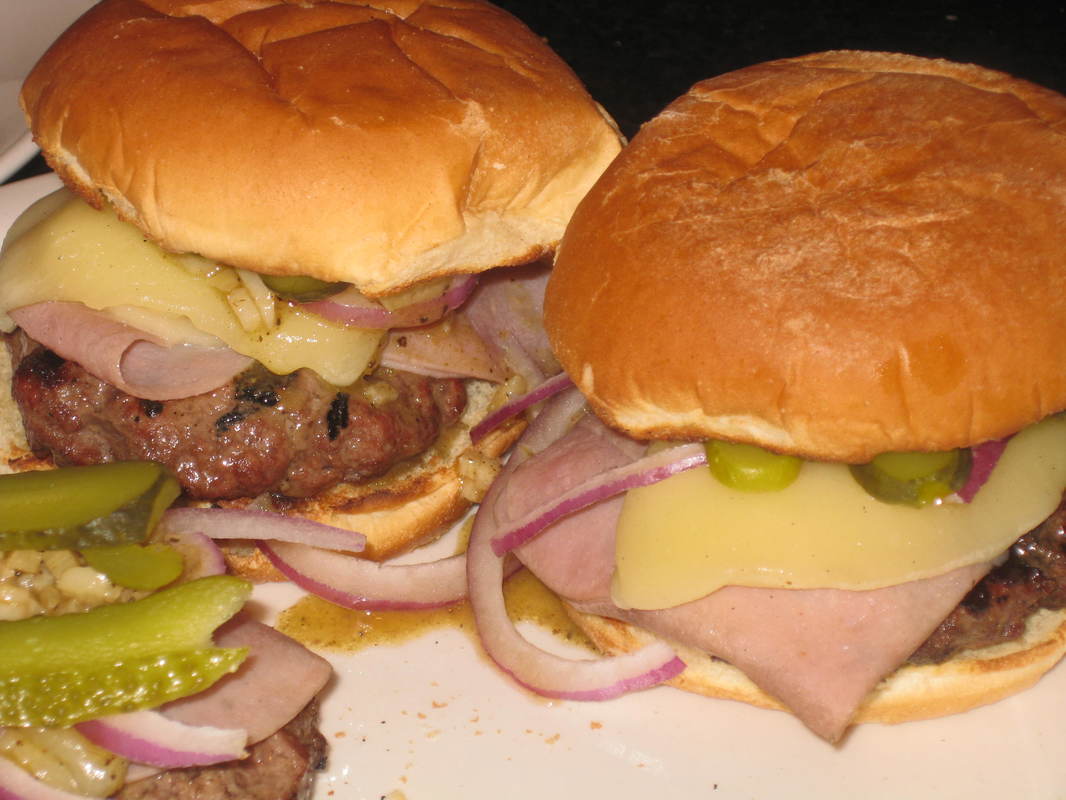
Total yumsters-----a quick "potage" for when you need to get dinner on the table in 15 minutes
You can use 2 cups of ANY veggie to make this comforting soup. It's a "use up what's in the fridge" kind of thing------I used half broccoli and half iceberg lettuce.
Use equal amounts of chicken broth and milk. But what makes this soup great is the addition of half again that amount of low-fat plain yogurt. It gives the soup a real edge----putting it so far beyond a regular cream soup.
Some fines herbs and a couple of egg yolks put this soup way over the top. So so good!

The Wall Street Journal called this "The Absolute Best Vegetarian Lasagna" They weren't kidding.
Let's get this straight right now-------this is NOT that American version of lasagna, full of mozzarella cheese and icky-pasty tomato sauce. This is what you get in Rome------bolognese sauce and bechamel between layers of pasta. Loads of reggiano parmesan. In other words, The Real Thing------and probably what your mother made, when she had the time.
This lasagna is NOT about the fact it's vegetarian. It's the texture that's amazing. My husband thought it was veal.
This is a GREAT dish for a crowd that includes vegetarians and meat lovers. The meat people won't even notice it's veggie. And it's even better the next day!
Use the Contact Form for this great recipe (or go to The Wall Street Journal).
I never in a million years would have thought of this unique method for giving veggie lasagna the taste and texture of meat!!!!
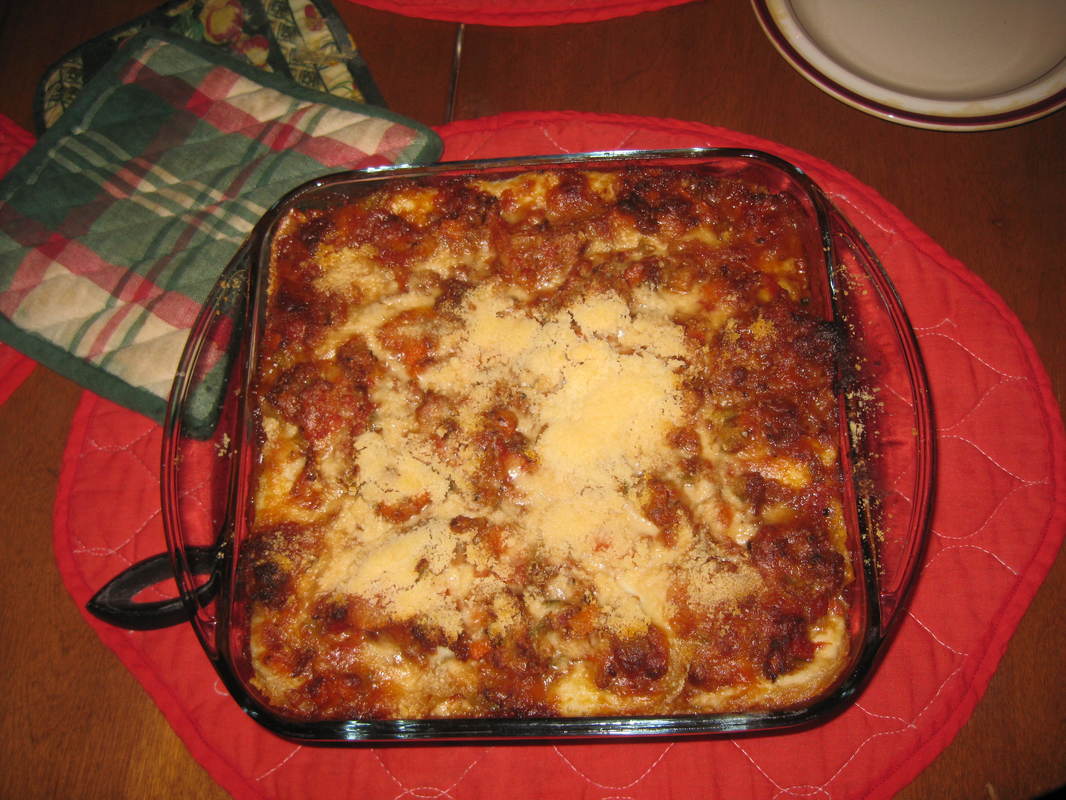
Indonesian tonight----Mee Goreng
Mee Goreng is a one-pan meal that my husband calls "complicated" but I disagree. This classic Indonesian dish-----which is often street food in Djarkarta-----can be made with meats or shrimp, but we prefer to keep it vegetarian.
It comes together in just a few minutes. While it can be made with any fresh Asian noodles (or for that matter, dry linguine or some such), we really like the fresh noodles sold as Hokkkien brand "Stir Fry Noodles". They are shelf-stable and sold in the Asian section of the supermarket.
Mee Goreng's appeal is its sweet-but-hot flavour. I use tofu for the protein, and bok choy, scallions, shallots, and garlic as the veggies. It's a super dish---easy to make, and good for you!
Use the Contact Form for this wonderful, one-pan meal!!!!

At Bates College in the 70's, the only way to bake a batch of cookies was to "blue slip" a kitchen (usually at Women's Union). Many of us liked to bake and would go over there and bake bunches of cookies to bring back to Roger Bill for when The Munchies set in.
[Laughing here]: How it was that my hippie girlfriends and I, Roger Bill residents all (Liz McCusker did NOT attend Bates so certainly didn't experience Roger Bill----thus I'm talking about a lot of other women, not just myself), called these "Health Cookies" is beyond my comprehension all these years later. (Important Note: Liz McCusker was NOT a part of this group. She not only did not experience Roger Bill, she did not experience college in the way we all did. She has not even graduated from college. However there was a group of women at Roger Bill who liked her now-husband----we ALL liked each other; it was a "friends" group).
Anyhow, I guess we thought that cookies were healthy if they didn't contain any sugar, and these don't. They are all about whole wheat flour, wheat germ, raisins, dried apricots, walnuts and sunflower seeds.....and the only sweetener is a bit of honey.
So maybe they ARE healthy! And they sure are yummy.
If you'd like have your own Roger Bill guy go back in time, use the Contact Form for the easy recipe!
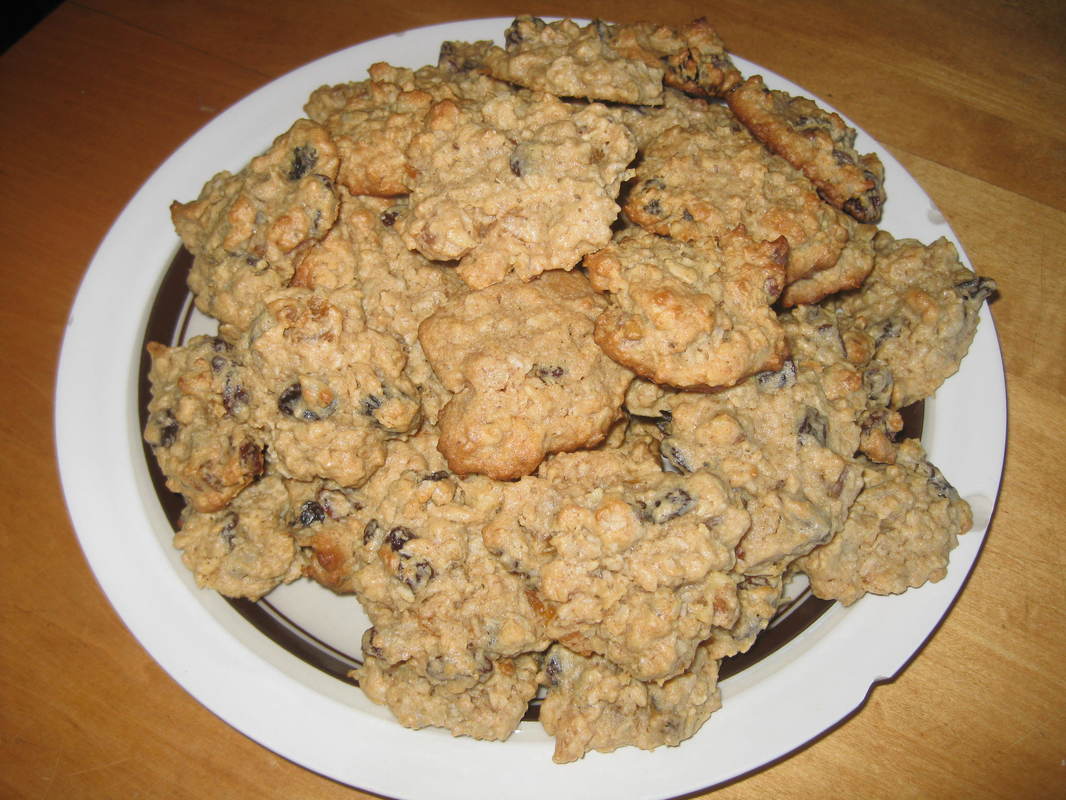
N'duja----my new go-to Italian meat!
I've never really spent time in Italy south of Rome---other than Sicily of course. So I only recently became aware of this Calabrian delight.
N'duja is basically proscuitto made spreadable.....with a few nice herbs added. It's delish!
I needed a fast dinner recently, and so used it for Spaghetti Carbonara in lieu of bacon. Wow was it great! I otherwise made the Carbonara the usual way-----egg yolks , a full egg, pecorino romano, and oregano. Just, just wonderful.

OMG, OMG, OMG-----this "French Toast" is to die for!!!!
As you faithful readers know, I did go to Cordon Bleu and thus can generally make-up a recipe....I pretty much do that every evening for dinner. But I never in a million years would have thought up this amazing, amazing riff on French Toast that appeared in the Portland Press Herald recently.
The PPH called it "Nancy Cerny's Overnight French Toast". The "overnight" aspect is extremely important----one needs to let that bread sit and soak, almost like one does for a strata.
Ms. Cerny's recipe, which then calls for deep-frying the bread, sounded really over-the-top-------which is exactly why I felt I needed to make it.
It's indescribable. "Orgasmic" might apply. The outside is nicely crusty/toasty and the inside is like the nicest----creamiest, richest----custard you've ever eaten. Sighs were heard around the table. You've just GOT to make this!!!!
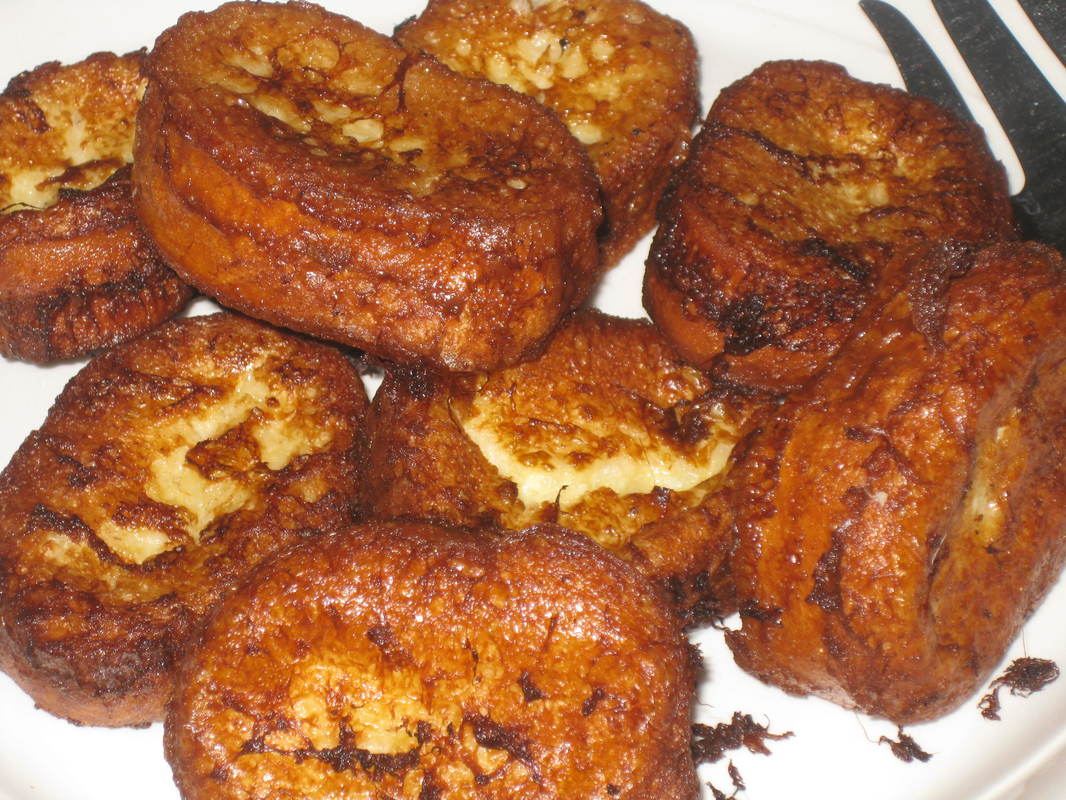
A bit of Spain on a snowy night on the coast of Maine: Abondigas en Salsa de Limon (Hope I spelled that right!)
OMG these Spanish meatballs are good. They could certainly be served as a tapa, but I made them with a side of rice and a side of broccoli for a beautiful meal in front of the fireplace in the dining room.
These meatballs are made of veal, pork, and proscuitto as well as the other usual meatball ingredients. But they are cooked in an unexpected way, and that Lemon Sauce....oh golly, it's so damn good!
The lemon sauce is made in an unexpected way, as it is thickened by egg yolks. It's a beautiful, rich sauce that not only works with the abondigas but enhances everything it touches.
This is a complicated recipe that even requires saffron----that most expensive of all spices (I paid $U.S.11.99 for 3/4 gram). But is this dish worth it? Yes, yes, YES!!!!
Because it is a long recipe, I won't print it here-----use the Contact Form to get this GREAT recipe!

These cute veggie-salads have the dressing on the bottom. Paired with the nutty-goodness of wild rice and barley, my husband declared it the Perfect Vegetarian Dinner!
The salad dressing is on the bottom! Some people like to eat them by picking out the veggies by hand (since the dressing is on the bottom of the red-pepper "baskets", each veggie is coated in dressing). I've served these at cocktail parties, and people love to walk around with what amounts to a portable crudites with dip.
I prefer to eat these little salads with a knife and fork, at dinner-time.
Here's the easy deal:
1. Cut the tops off your red bell peppers, scoop out the ribs/seeds, and microwave about 2 minutes.
2. Par-boil your veggies-----I used asparagus, green beans, brocolli, and snow peas.
3. Make dressing: one part each of mayo, sour cream, and your fave salsa.
Put about 1/4 cup dressing in each pepper. Arrange veggies.
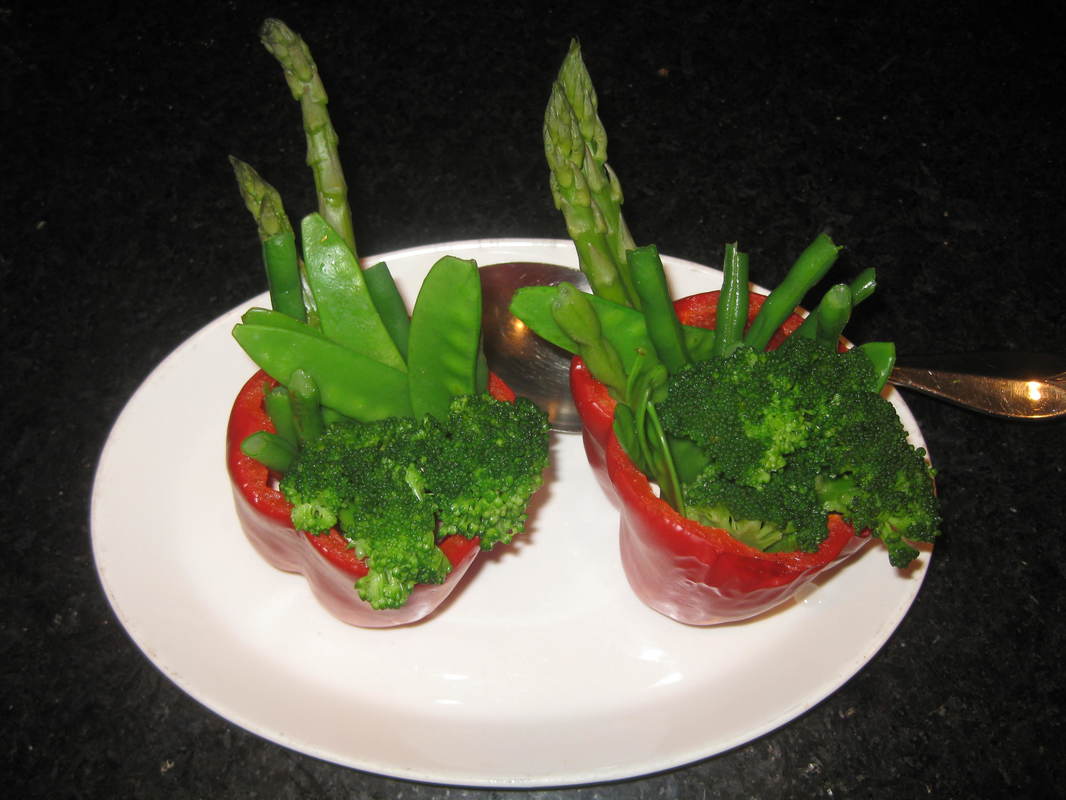
In Maine, it's scallop season. But still, $21.99 a pound?
Any true Mainer only cooks "dry" or "diver" scallops. They are big and meaty.
And they are in season right now. Oddly though, "dry" scallops freeze well, and within a month no store in Maine (not even my fave Harbor Fish!) will have scallops that hadn't been previously frozen. In all the years I've lived in Maine and been to family homes here (61 years!) I didn't know this scallop-info until 2 years ago when I had a conversation at Sawyer's Market in Southwest Harbour (Acadia) with both the market's owner and two scallop fishermen. It was enlightening....I'd always thought that fish-monger scallops were fresh.
The biggest take-away from the conversation is that excellent scallops ("dry" scallops or "diver" scallops) do freeze well.....and that's how you're going to buy them 10 months of the year; previously frozen. Things that are sold as "wet" scallops, or "bay" scallops-------they aren't from Maine (maybe from as far away as Thailand) and don't freeze well. They tend to taste a bit fishy, which is awful in a scallop.
Those $21.99/lb fresh scallops last night? Absolutely delicious. But at the same time my local Hannaford Supermarket was selling the same product previously frozen for $16.99/lb.
My husband has a very discriminating palate when it comes to seafood, and he said last night's fresh scallops tasted the same to him as the ones we get all year.
This gorgeous dish is easy-----Asparagus is lightly steamed. Proscuitto is fried to a crisp (in 1 TBSP unsalted butter). The scallops are fried (in 2 TBSP unsalted butter)---no more than 2 minutes per side, as you want them to be a bit charred on the outside but a bit raw in the middle.
Remove the scallops from the pan, and add the zest of one lemon as well as the juice of the lemon, 1/4 cup chicken broth, and a tsp or so of butter. Reduce this until it is a syrup.
Add the scallops and just let them be tossed in the syrup untl they are mahogany.
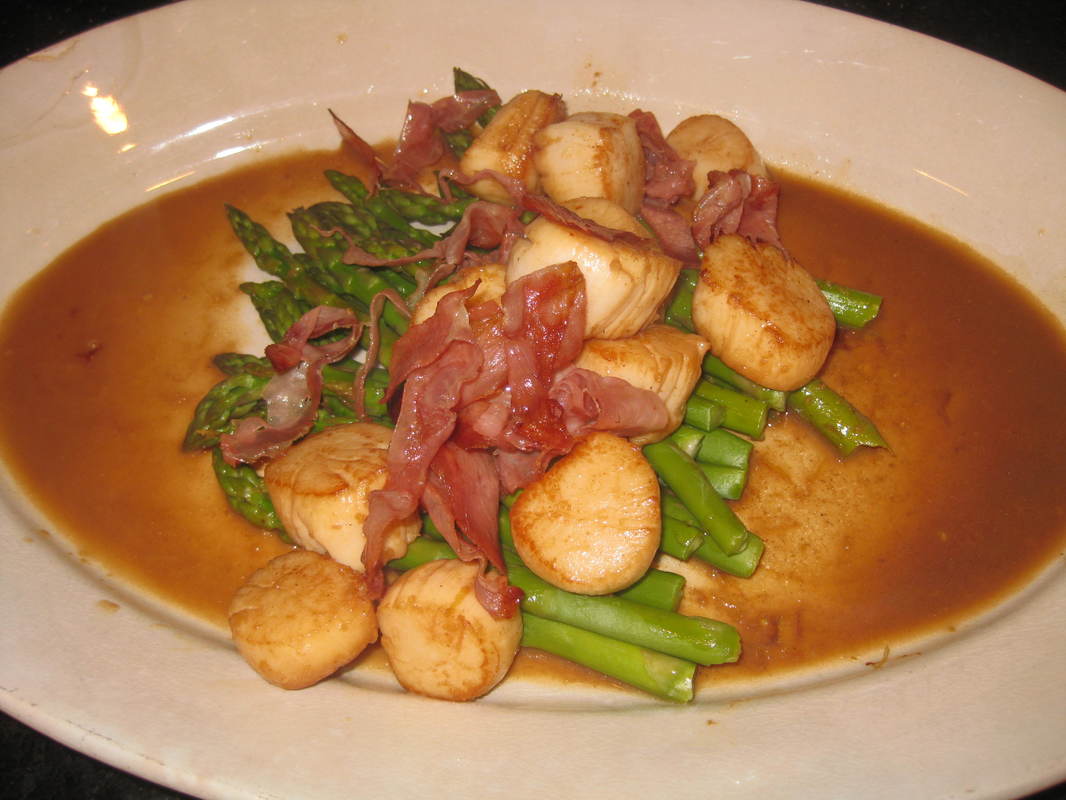
I am fairly certain there is nothing "Hungarian" about "Hungarian Goulash". On the other hand, I've never actually BEEN to Hungary....
I think the "Hungarian" thing in the name of this dish is solely because it's got paprika. I mean seriously, do Hungarians generally eat elbow macaroni?
I've been told that "goulash" is a really American thing. I'd never made it before. It turned out it was a nice warming dinner on a cold night----and served with just an iceburg-wedge, it was a very easy meal. The gorgonzola really bats this recipe right out of the park.
Quite cheap to make, also! We got 4-plus servings from just 3/4 pound ground sirloin!
I sauteed 3/4 lb ground sirloin in 1 TBSP olive oil. Once the meat is browned, I added 1/2 of a red bell pepper, a very small onion (chopped), and 2 cloves of garlic, minced. I added to that 4 1/2 tsp of smoked paprika, along with some salt and pepper.
Once the onions are tender, add 1/2 can of diced tomatoes and 1/2 cup chicken stock. Simmer this until it hs a slightly thickened consistency (to your liking).
Add to this 6 ounces COOKED elbow macaroni. Add about 1/4-1/3 cup sour cream.
Then add 1/2 cup gorgonzola cheese. Some fresh herbs on top make a nice contrast.
Wouldn't this be good apres-ski?
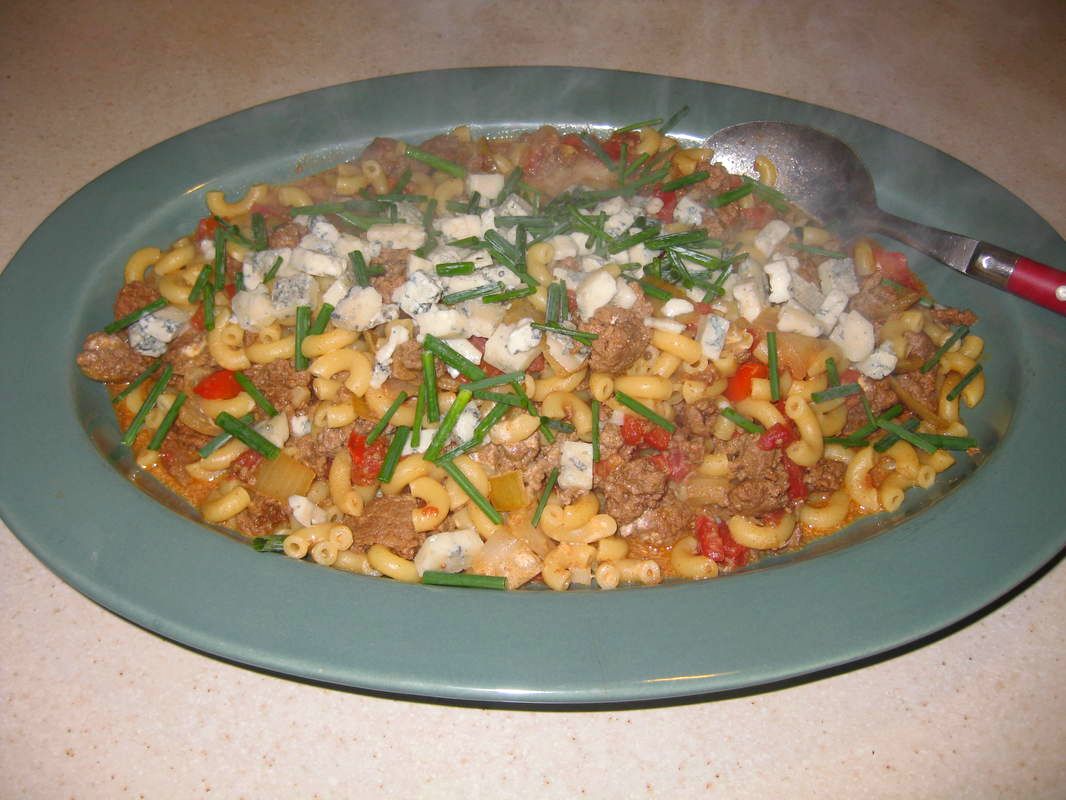
Not a corn chowder-----an amazing miso-infused corn soup with an Asian flair. And you'll need to put this on your table......(the tiny pitcher, that is....because OF COURSE you don't put commercial containers on your table)

This soup is simply amazing. I found the recipe on Bon Appetit. I certainly didn't think of this combination of ingredients. But WOW!!!!
It's gluten-free and dairy-free. Cooking corn cobs in water to make the broth is something i've often done, and it makes such a great soup-base!
The beauty of this combination to me is the chili oil----although my husband just adored the sweetness of the corn soup itself with that addition of miso. Whichever way you like it, DO make this Bon Appetit fabulous soup! It's phenomenal.

Up here in New England, we make a thing called "Chili". It's delicious. But if you tell a Texan that it contains beans, tomatoes, and ground beef, he'll probably be pretty mad that you're calling it "chili"!!!!!!
Real chili, made the southwestern-U.S way (and I think this is actually true of most places in the U.S.) is a very meat-forward dish that contains......geez, what a surprise.....chilis!
And by meat, I mean real pieces of good beef, not ground meat. No beans and no tomatoes. And DEFINITELY nothing called "chili powder"!!!!!
My basic recipe for this bowl of wonderfulness comes from Bon Appetit's "Best of Bon Appetit" series. I have workmen in the house, still working on the finish-carpentry for the elevator, and they were all coming into the kitchen talking about how great it smelled.
But be forewarned! Don't even THINK about doing it Bon Appetit's way unless you've got a great butcher....and a nearby bodega.
We don't have a huge Latino population here, and so the proper chilis can be hard to find. Whole Foods sometimes has them but fortunately we do have a good little bodega in Portland whose size belies its great variety of products. This recipe requires THREE different kinds of chilis----guajillo, pasilla, and ancho. Don't even THINK about making it without all three. Chilis are the essence of.....well, that southwestern dish called Chili.
As to the great butcher, well I've got one, fortunately. But is it REALLY necessary to use THREE different kinds of beef??? I do know from my stepson in Texas that Texas chili requires at least two (for flavour and texture). But I think I would have gone with just the brisket and the short ribs, and omitted the chuck. My butcher was going a little nuts at my requests....."One-half-pound of boneless ribs please"-----which is like one rib or less. What was Bon Appetit thinking?
So this is a labour-intensive meal-----not the least because of the shopping involved------but if you are from New England and have only tasted that ground beef dish that we call "chili" I can guarantee you that one bite of this will make you want to put on your Stetson and start lassoing cows.
As usual I put the add-ins on the table so that everyone could fine-tune their bowl to their liking. I put out shredded sharp cheddar, sour cream, red onion, cilantro and fritos. Delish!
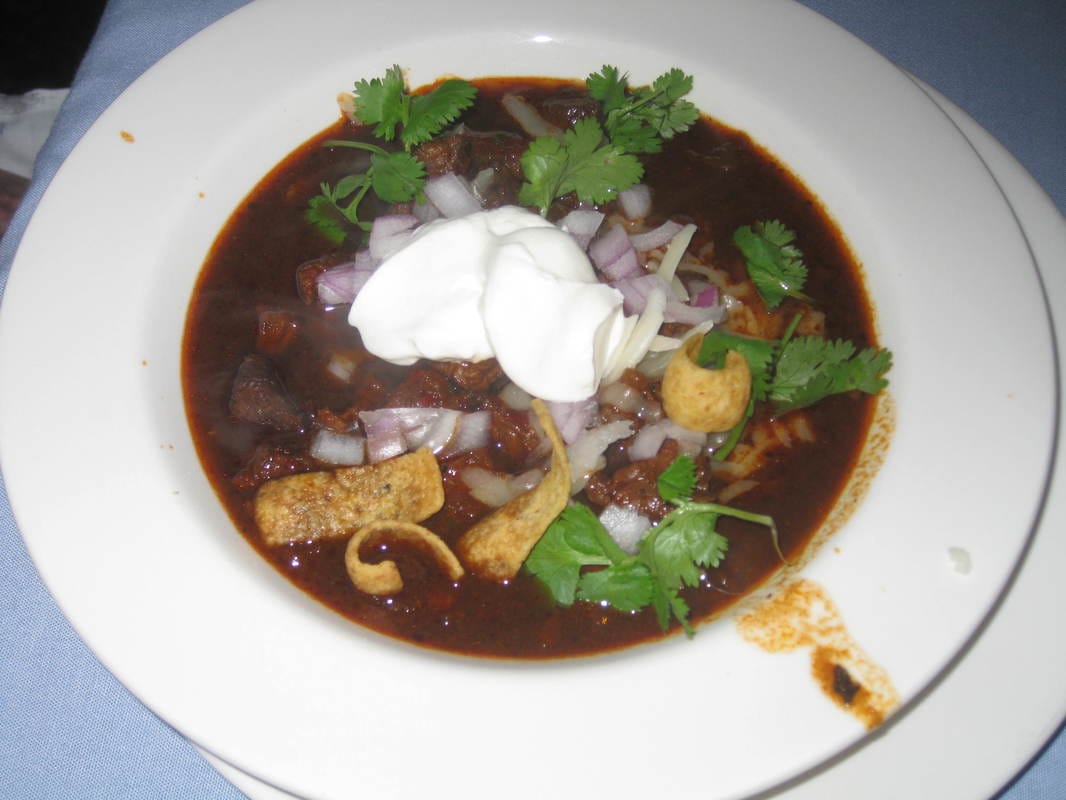

I'll bet the Japanese potter who made this daruma-style pitcher never expected it would end up on a gaijin's table at brunch, full of maple syrup! (And yes, it comes out his nose)
"What's for breakfast?"----I keep getting asked that by you readers, because I only post dinner recipes!
So here's the answer.
In the tropics----French Polynesia or Antigua---it's almost always fruit off our trees. Mango, papaya, grapefruit, banana----occasionally I'll pop open a container of fat-free yogurt if I'm really starving. Probably once a week we have the maid (or in F.P. the cook) make an omelet along with some bacon and toast.
Additionally, in F.P. the cook sometimes makes baguettes very early in the morning....it's a French thing, and is as much for the staff as it is for my husband and me. If so, I might have that instead of fruit.
In Paris it's always, and I do mean ALWAYS----a croissant and espresso from the amazing boulangerie across the street on Ile St. Louis......I'm as much addicted to the company of neighbors who gather there every morning as I am to the espresso. There is both laughter and serious conversation about events, which in Paris has been pretty serious lately (of course one needs to be able to speak French).
In Maine breakfast is usually a boring bowl of cereal, but I eat it looking at the ever-changing sea.......
But brunch.....well that's another matter entirely. My husband and I make a date to do brunch at least once a week, and most often twice. It's like a "date night", only in the morning until early afternoon.
My husband is an expert coffee-maker; he mills the beans and makes a superb pot. Later he's just aces at Bloody Marys. We spend hours just catching up on the week's newspapers, then catching up with each other....it's very romantic.
Later I make brunch. What do I make? Well that's pretty much the boring part......I have about 7 basic brunches that I do, and I rarely vary. These are:
Belgian waffles (or very occasionally, pancakes) with locally-made sausage on the side
Bacon & eggs, served with bagels and cream cheese (I send my husband out for freshly made bagels at a local bakery)
Eggs Benedict (often with lobster), followed by something sweet-----fresh pastries or doughnuts (I send him to the bakery for those, too!)
Corned beef hash, eggs, and biscuits
Ham, Marjorie's Marvelous Eggs, and English muffins with homemade jam
Various omelets----Veggies and cheese; ham and cheese; or my fave, bacon and brie. Always with toast
Steaks, eggs, and homefries
For whatever reason (inertia? The fact we both adore our relaxing habit???) it's odd for me to step outside the box; but today I did. I had made corned beef hash, and decided instead of biscuits I'd make a quick-bread.
I almost NEVER make quick-breads. Generally I think they are boring and just not that great. But you know something? There's a lot to be said for a good Zucchini-Nut Bread, which is what I made. I stirred it up during coffee, and baked it during the hour that we were sipping on our Bloody Marys. So it was beautifully warm as I served it.
I was taught to put lemon zest in zucchini bread, along with a bit of cinnamon and a teeny bit of ginger. These three ingredients took it over-the-top as a delicious foil to the corned beef hash and eggs. Use the Contact Form for the easy recipe for this beautifully golden Zucchini-Nut Bread!!!!!
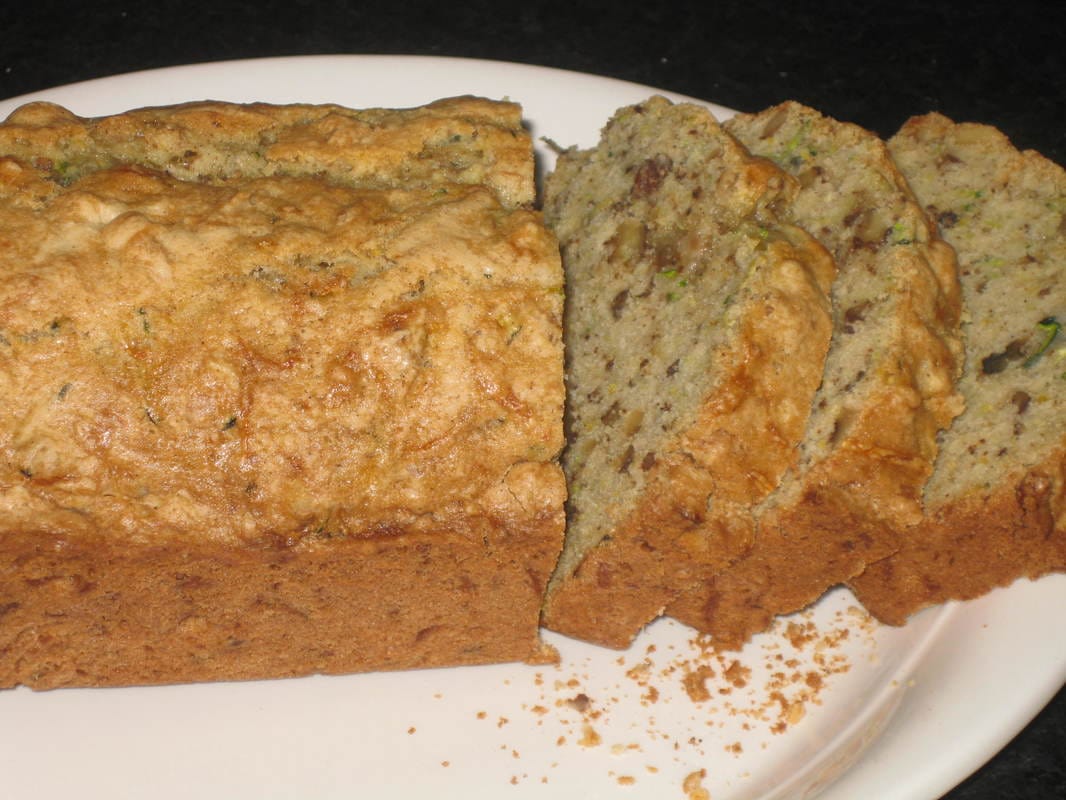
Discontent with the last results, I tried my hand at Pierogi again. Result? Mixed.
Reason I liked this version better than the last: Because I re-worked the dough-recipe----with fewer eggs I was able to roll it thinner. These were nicely light....well, as light as pierogi can be, I'm thinking.
But I still don't think I've got this recipe right.
I changed-up the stuffing, and mixed my tiny bit of mashed 'tater with dry-curd cottage cheese, a bit of sauteed onion, and some dill. This was unbelievably good.
Please notice that I simply boiled these, and added some butter to keep them from sticking together. I did NOT then fry them this time (last time I fried them after boiling, as one would a Chinese pot-sticker). We liked them this way----but it's really difficult to compare them with the last ones I made, since those last ones were so heavy. These were pretty light, but I still think I can improve the recipe!
As usual, use the Contact Form, if you too are dying to explore how to make this elusive food!!!! I'd love to discuss a better way to make these, 'cause they're delish.
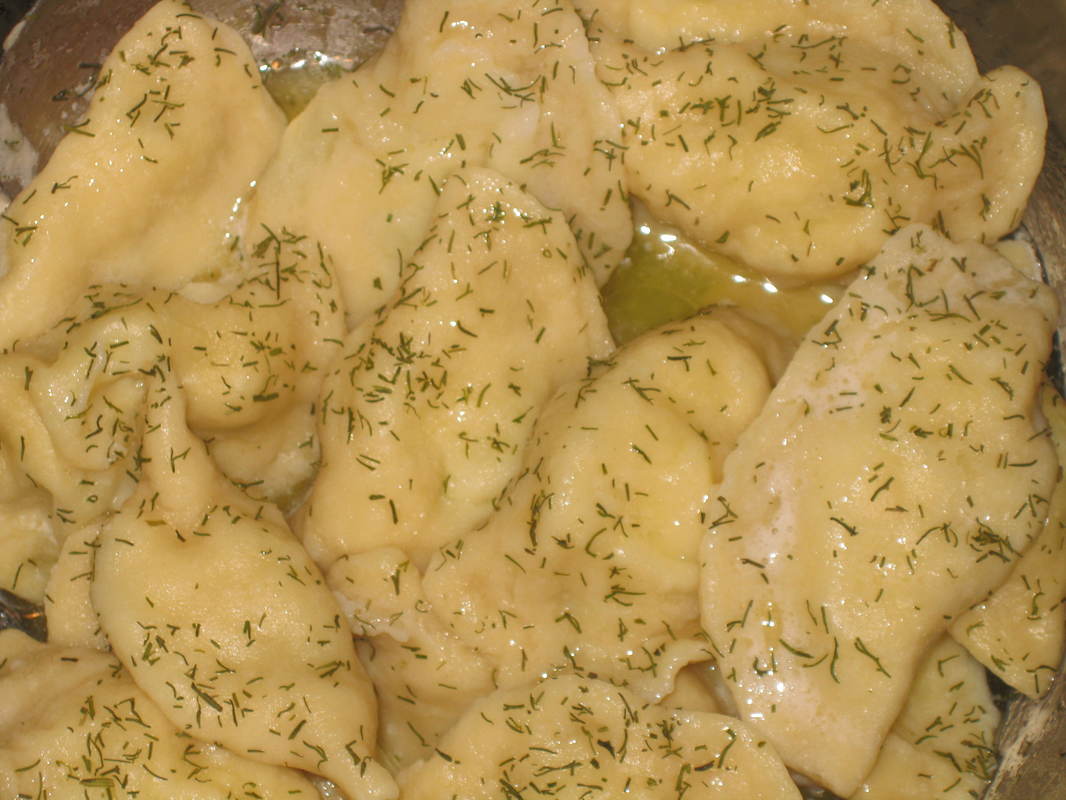
THANK YOU, THANK YOU, THANK YOU TO ALL WHO HAVE CONTACTED ME ABOUT YOUR OWN DEALINGS WITH LIZ MCCUSKER
Whether it was because you knew her from the Buxton school system, from walking the neighborhood, from old days at the marina, from business-dealings as a tenant, or if you are simply a family member------my gratitude to you for your support is unbounded.
I had no idea when I began writing the book (which led to this web site) that there were so many people who had also been affected by Liz McCusker's behaviour. I did not know that so many people feared her possible actions.
Thank you soooooo much for your constant support!
I had no idea when I began writing the book (which led to this web site) that there were so many people who had also been affected by Liz McCusker's behaviour. I did not know that so many people feared her possible actions.
Thank you soooooo much for your constant support!
But the one thing I can't figure out is why it is that so many of Liz's enemies/frenemies are crazy about pizza! Really!!
I get story after story after story about things she does and says; and then the writer concludes with, "And by-the-way, I love the pizza recipes on your web site". My recent posts about pretzel-crust pizza and Classic Pepperoni were in response to Liz's relations who contacted me to ask for those recipes!
So here comes another one------this request was for a "gourmet pizza" [this one did not come from one of Liz's family members, but from a Bates College/Roger Bill person whom Liz has in the past called a "good friend"]
Pear, Proscuitto, and 3-Cheese Pizza
Your best pizza crust (white-bread-style, please---not whole wheat)
1 tsp olive oil
kosher salt
fresh ground pepper
2 tsp fresh thyme leaves
one onion, sliced and sauteed in cooking spray (or a very minimal amount of oil)
3 slices proscuitto, rolled tight then thinly sliced
1/2 cup part skim mozzarella
1/2 cup smoked gouda
1/4 cup gorgonzola
1-2 anjou pears, very thinly sliced
Spread the pizza crust on the pan. Brush with olive oil, sprinkle with salt, pepper and thyme. Pile on everything else. Bake at 500 degrees for 12 or so minutes.
Enjoy, you wonderful Roger Billians [and hugs to our new, honorary one]!!!!
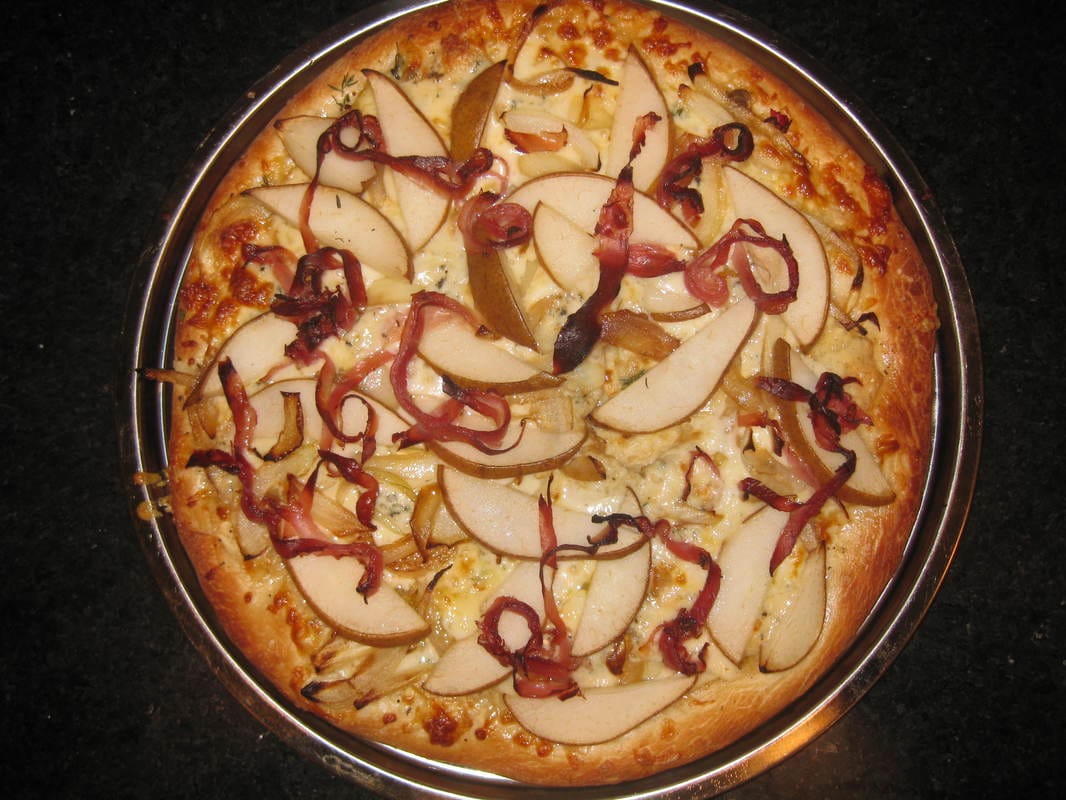
I recently heard that a well-known chef said, "Only grandmothers make Chicken Cordon Bleu"
Well, I'm still quite a few years away from becoming a grandmother (God, at least I hope so---I am not generally a fan of encouraging children to have children, as the McCuskers did). But I make Chicken Cordon Bleu every once in a while because we really enjoy it, and I DO believe it has stood the test of time for a reason.
"Cordon Bleu" in French of course means "blue ribbon". There was an order of knights in 16th century France who wore this blue sash. I am guessing that the dish, which is really a derivative of certain Swiss schnitzels, was named cordon bleu because of the blue apron strings that French chefs generally wore in 1940s, when the recipe first appeared in print. Perhaps the blue apron strings reminded someone of the 16th century knights?
In any case, "cordon bleu" has come to mean the highest order of food and cooking. The chicken dish is NOT in any way related to the Cordon Bleu cooking school (of which I am a graduate).
No matter. It's great stuff. And very easy to make!
For four people:
1/4 cup low-sodium chick broth
5 TBSP butter
1 large clove garlic, minced
Melt all that together in the microwave, set aside for a moment.
1/2 cup PLAIN dry breadcrumbs
1 TBSP freshly grated Reggiano-Parm
1 tsp sweet paprika
Stir all that together in another bowl.
To put it all together:
Take 4 boneless, skinless bosoms of chicken. Pound them to about 1/4" thickness.
Sprinkle them with 1/4 tsp salt, 1/4 tsp oregano (dried is fine), and 1/4 tsp freshly ground pepper (in other words, 1/4 tsp TOTAL for all four).
Top each bosom with a thin slice of proscuitto, and about a TBSP of shredded part-skim mozzarella. Roll each bosom up jelly-roll fashion.
Dip first in the butter/broth mixture, then in the breadcrumb mixture. Place in a baking dish that's been coated with cooking spray.
Pour remaining broth mixture over the chicken. Bake at 350 degrees for 30-35 minutes.
In France we usually find this served with mashed potatoes and peas. It's a very yummy dish....just like grandma used to make?
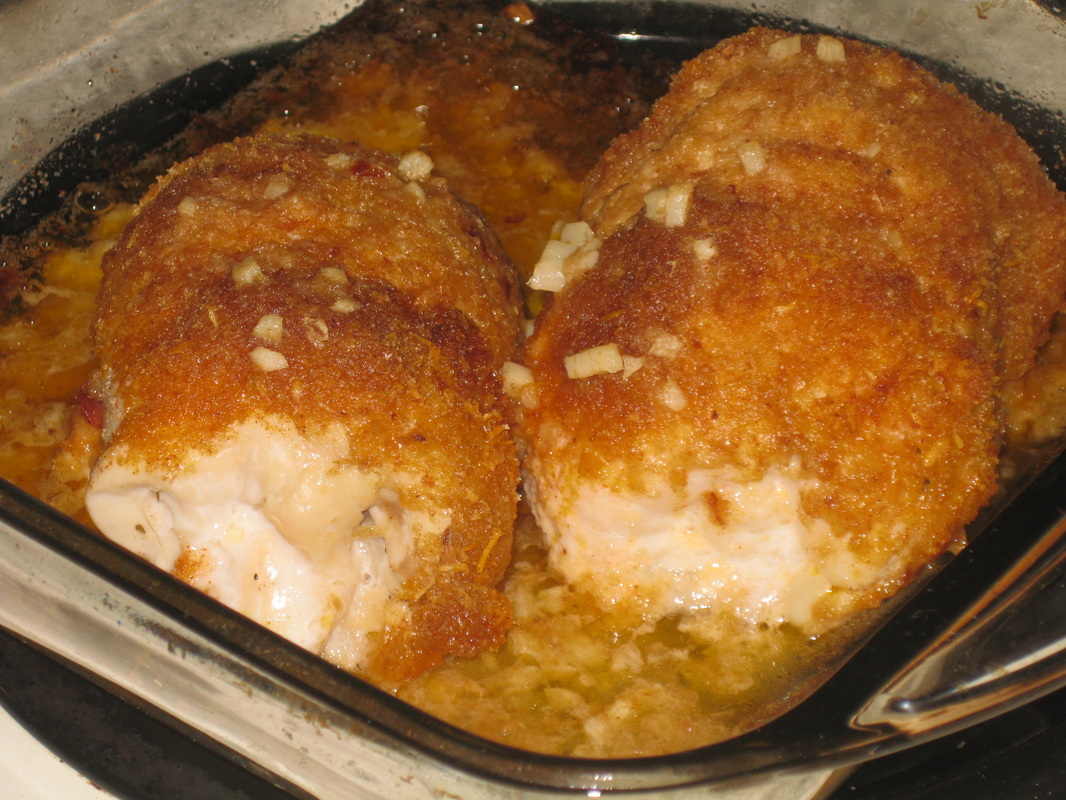
Best. Squash. Ever.
I was thinking the other day about how winter squash goes so well with Mexican flavours. While we love acorn squash cooked the classic way as a side-dish with a bit of butter, nutmeg, and brown sugar; I hadn't really found a stuffed-squash recipe that we liked. Most of the recipes I've found stuff the squash with rice and nuts, and so it's very starchy and there isn't a lot of flavour. (A lot of stuffed squash recipes are supposedly vegetarian substitutes when serving a Thanksgiving dinner).
Time to re-think the squash! This recipe is VERY easy to execute, and will appeal to family members who like Mexican food.
You will need:
1 acorn squash
1 TBSP olive oil
1/2 tsp chili powder
1/4 tsp salt
1 poblano
1 anaheim
2 oz dry chorizo (i.e. the COOKED kind; not raw)
1/4 cup golden raisins
1 oz crumbled cotija
1 TBSP chopped fresh oregano
1. Coat a baking pan with the 1 TBSP olive oil. Halve your squash, and remove the seeds. Sprinkle it with the chili powder and salt.
2. Preheat oven to 400 degrees. Bake, cut-sides down, for 15 minutes.
3. Add the two peppers to your pan, tossing to cover them with oil. Return to oven and bake another 10 or 15 minutes, until squash is tender. Remove from oven, cover tightly with foil, and let steam for 10 minutes.
4. Scoop out the squash, leaving a border of about 1/4 inch. Place those scooped-out innards in a bowl.
5. Peel, seed, and stem the two peppers. Chop ONE HALF OF EACH saving the other halves to use another night (delicious on salad). Add the chopped peppers to the bowl.
6. Add all the other ingredients to the bowl and mix well. Fill your squash shells with this mixture.
7. Bake another 8-10 minutes, just to heat through.
Even people who think they hate winter squash will eat this!
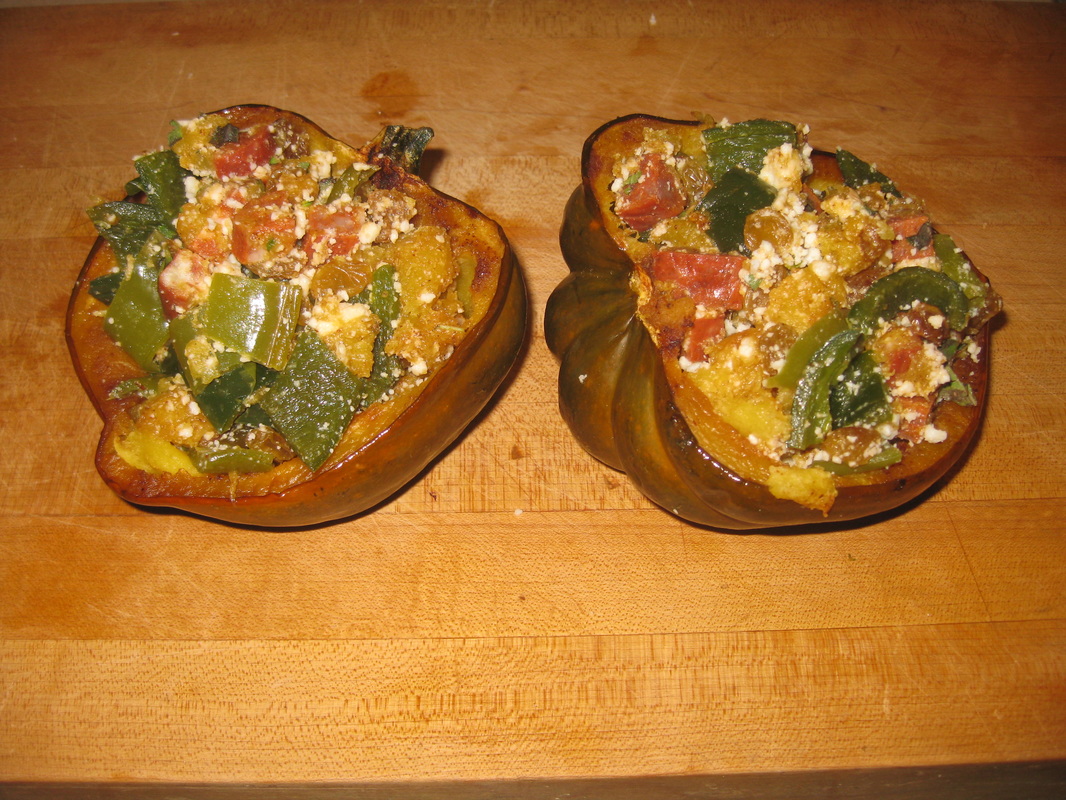
We LOVE Pappardelle!!!
Next to buccatini, pappardelle is my favourite pasta.
This recipe just takes the time it takes to boil the water and cook the pasta----a real instant dinner!
You will need:
about 1/3 pitted kalamata olives
zest from one lemon
one STRIP of zest from an orange
1 TBSP fresh thyme leaves (do NOT use dried)
1/4 cup flat-leaf parsley leaves
1/4 tsp crushed red pepper
2 TBSP olive oil
1/2 lb dry pappardelle
1. Whirl the first 7 ingredients in a food processor.
2. Cook the pasta in boiling salted water. Drain, reserving some of the water.
3. Toss the food processor contents with the pasta, adding at least 1/4 cup cooking water. (Pappardelle absorbs more water than other pastas, so be sure your dish isn't too dry).
Could this be any easier?
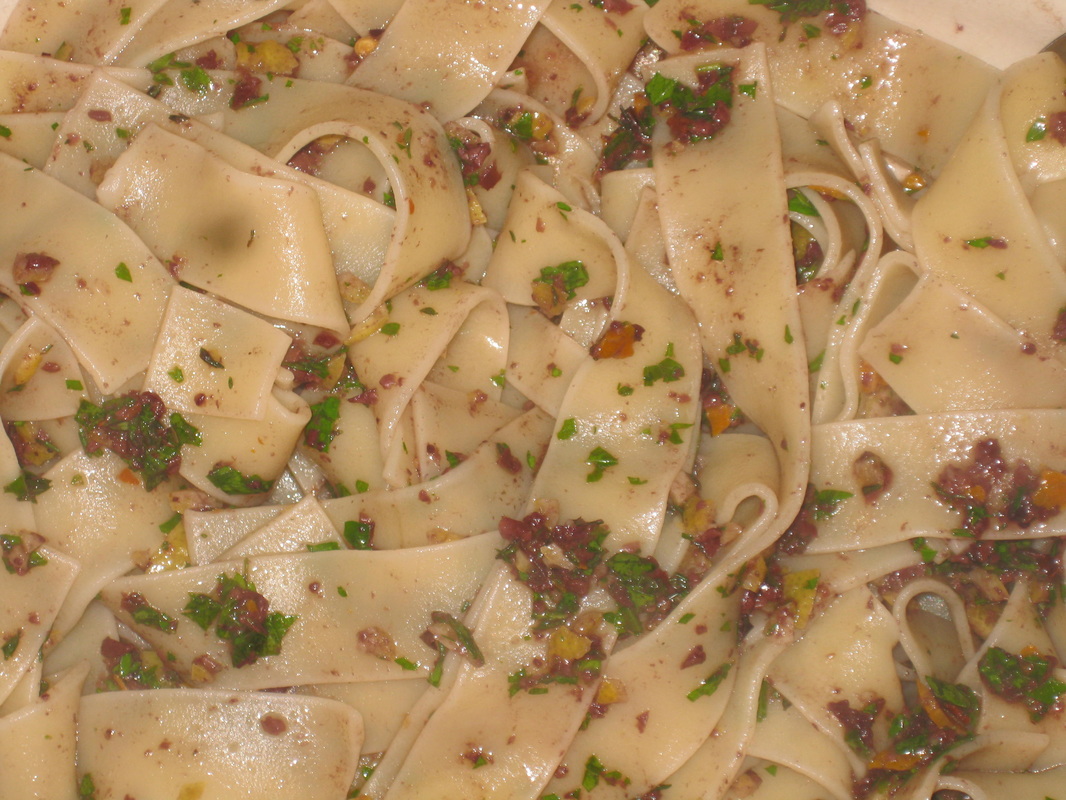
Judith Martin, who has been writing about etiquette for over 40 years including the iconic Miss Manners Guide to Excruciatingly Correct Behavior, knows a thing or two about how to act.
I strongly suggest that you look her up on Wikipedia, and then run....don't walk.....to the nearest bookstore. (I know at least one of my readers who, if she read the book cited above, would likely be shocked at what is done in civilized society compared to what she and her family do).
Miss Manners famously said that the worst etiquette problem in the world today is "blatant greed", an assessment I share.
But on another issue (one much more relevant to the Cooks' Corner!) Miss Manners said, "Civilized people NEVER put commercial containers on the table; not even if they are home alone with all the shades drawn". This is precisely what I was taught growing up. Now, I know I didn't have the advantage of growing up on Portland Maine's West End; where I could have been inculcated in the finer points of etiquette:
"Hello us [sic] West End girls have so much more class than you'll ever be able to learn about hahahahahaha we are one and your [sic] out of the loop......da" (Liz McCusker, 11/22/12)
Of course it would be impossible for a poor, uneducated girl like myself, who had the disadvantage of attending some of the best-known schools in the world and who grew up speaking 4 languages; to learn the advantages, and develop the class that Liz McCusker clearly has. I can only hope to emulate her fine example.
To that end---because given her self-described "classy" upbringing, I'm sure Liz knows all of the finer points of etiquette----I like to collect little serving pieces from around the world. Sometimes it's hard to find tiny serving pieces for things that are put on the table in minute quantities. But to solve that partcular problem, I have one word of advice: Japan.
The Kappabashi district in Tokyo has everything imaginable that has to do with food preparation and serving. I found these cool little cups and wee spoons there on my last trip. They are perfect to put on the table to serve a portion of, say, crushed red papper. Totally adoreable!
This picture shows one of the cups and its serving spoon, next to a lemon to show the scale:

Roast a whole chicken on a charcoal grill for juicy, succulent meat and a golden, crispy exterior!
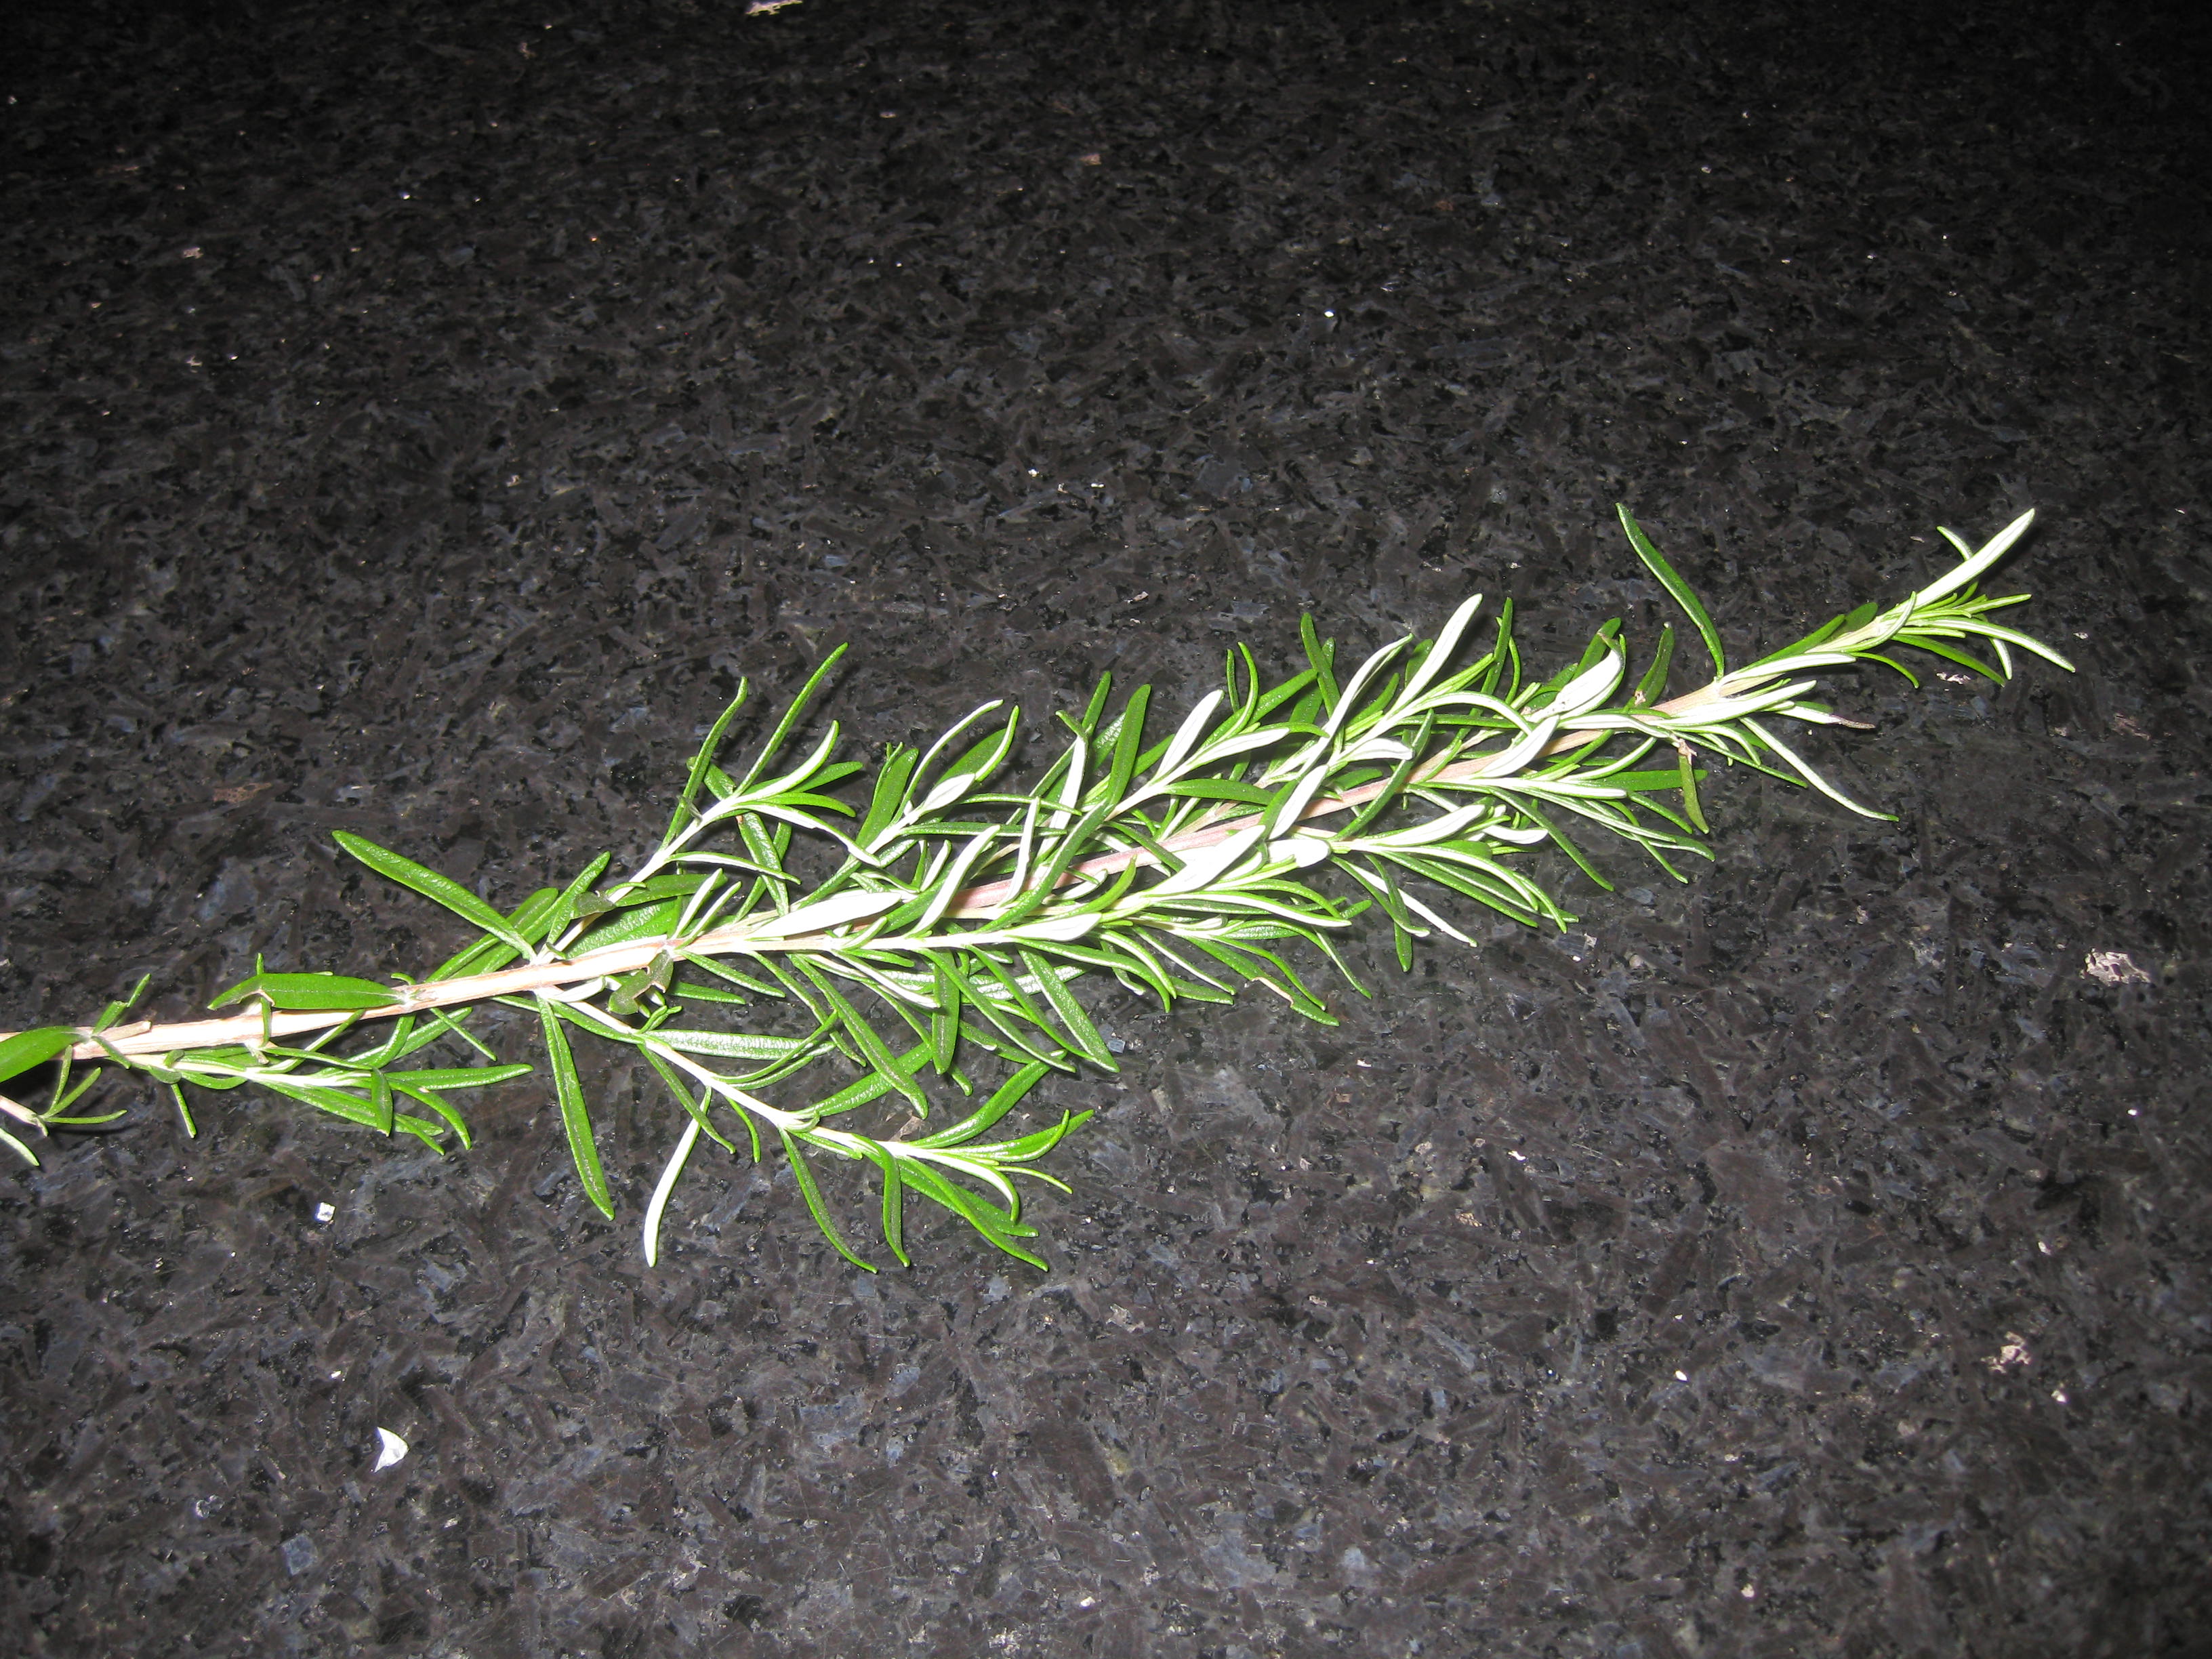
It's all about the method! I guarantee you, this will be one of the best roast chickens you've ever tasted.
First things first----light your charcoal for indirect heat. Here's how to do that:
1. Take a disposable foil pan, fill it with hot tap water, and place it in the grill-kettle.
2. Pile charcoal on either side of this drip-pan.
3. Light the charcoal and wait for white ash to form...20 minutes or so. When that happens, the coals are ready.
Meanwhile, back at the ranch.......
Prepare your chicken in the following manner:
1. Peel about 5 or 6 garlic cloves and put them in the cavity. Split a fresh lemon in half, and put that in there, too. Also stuff in a handful of fresh rosemary.......about 6 sprigs, or one big stem.
2. Rub the chicken with about 2 TBSP butter, and sprinkle with salt and pepper.
3. Place the chicken right on the grill, above the drip pan. Cover the grill.
Ok, we're done here......
You'll probably want to check the grill after an hour or so, and add a few more charcoal brickets. How long to cook it depends on the size of the bird ('natch). A little 4 pounder like this one took 1 1/4 hours to get this far.....but as you can see from the fact that the juices are still a little pink, it's not quite done and needed another 15 minutes for perfection to hit.
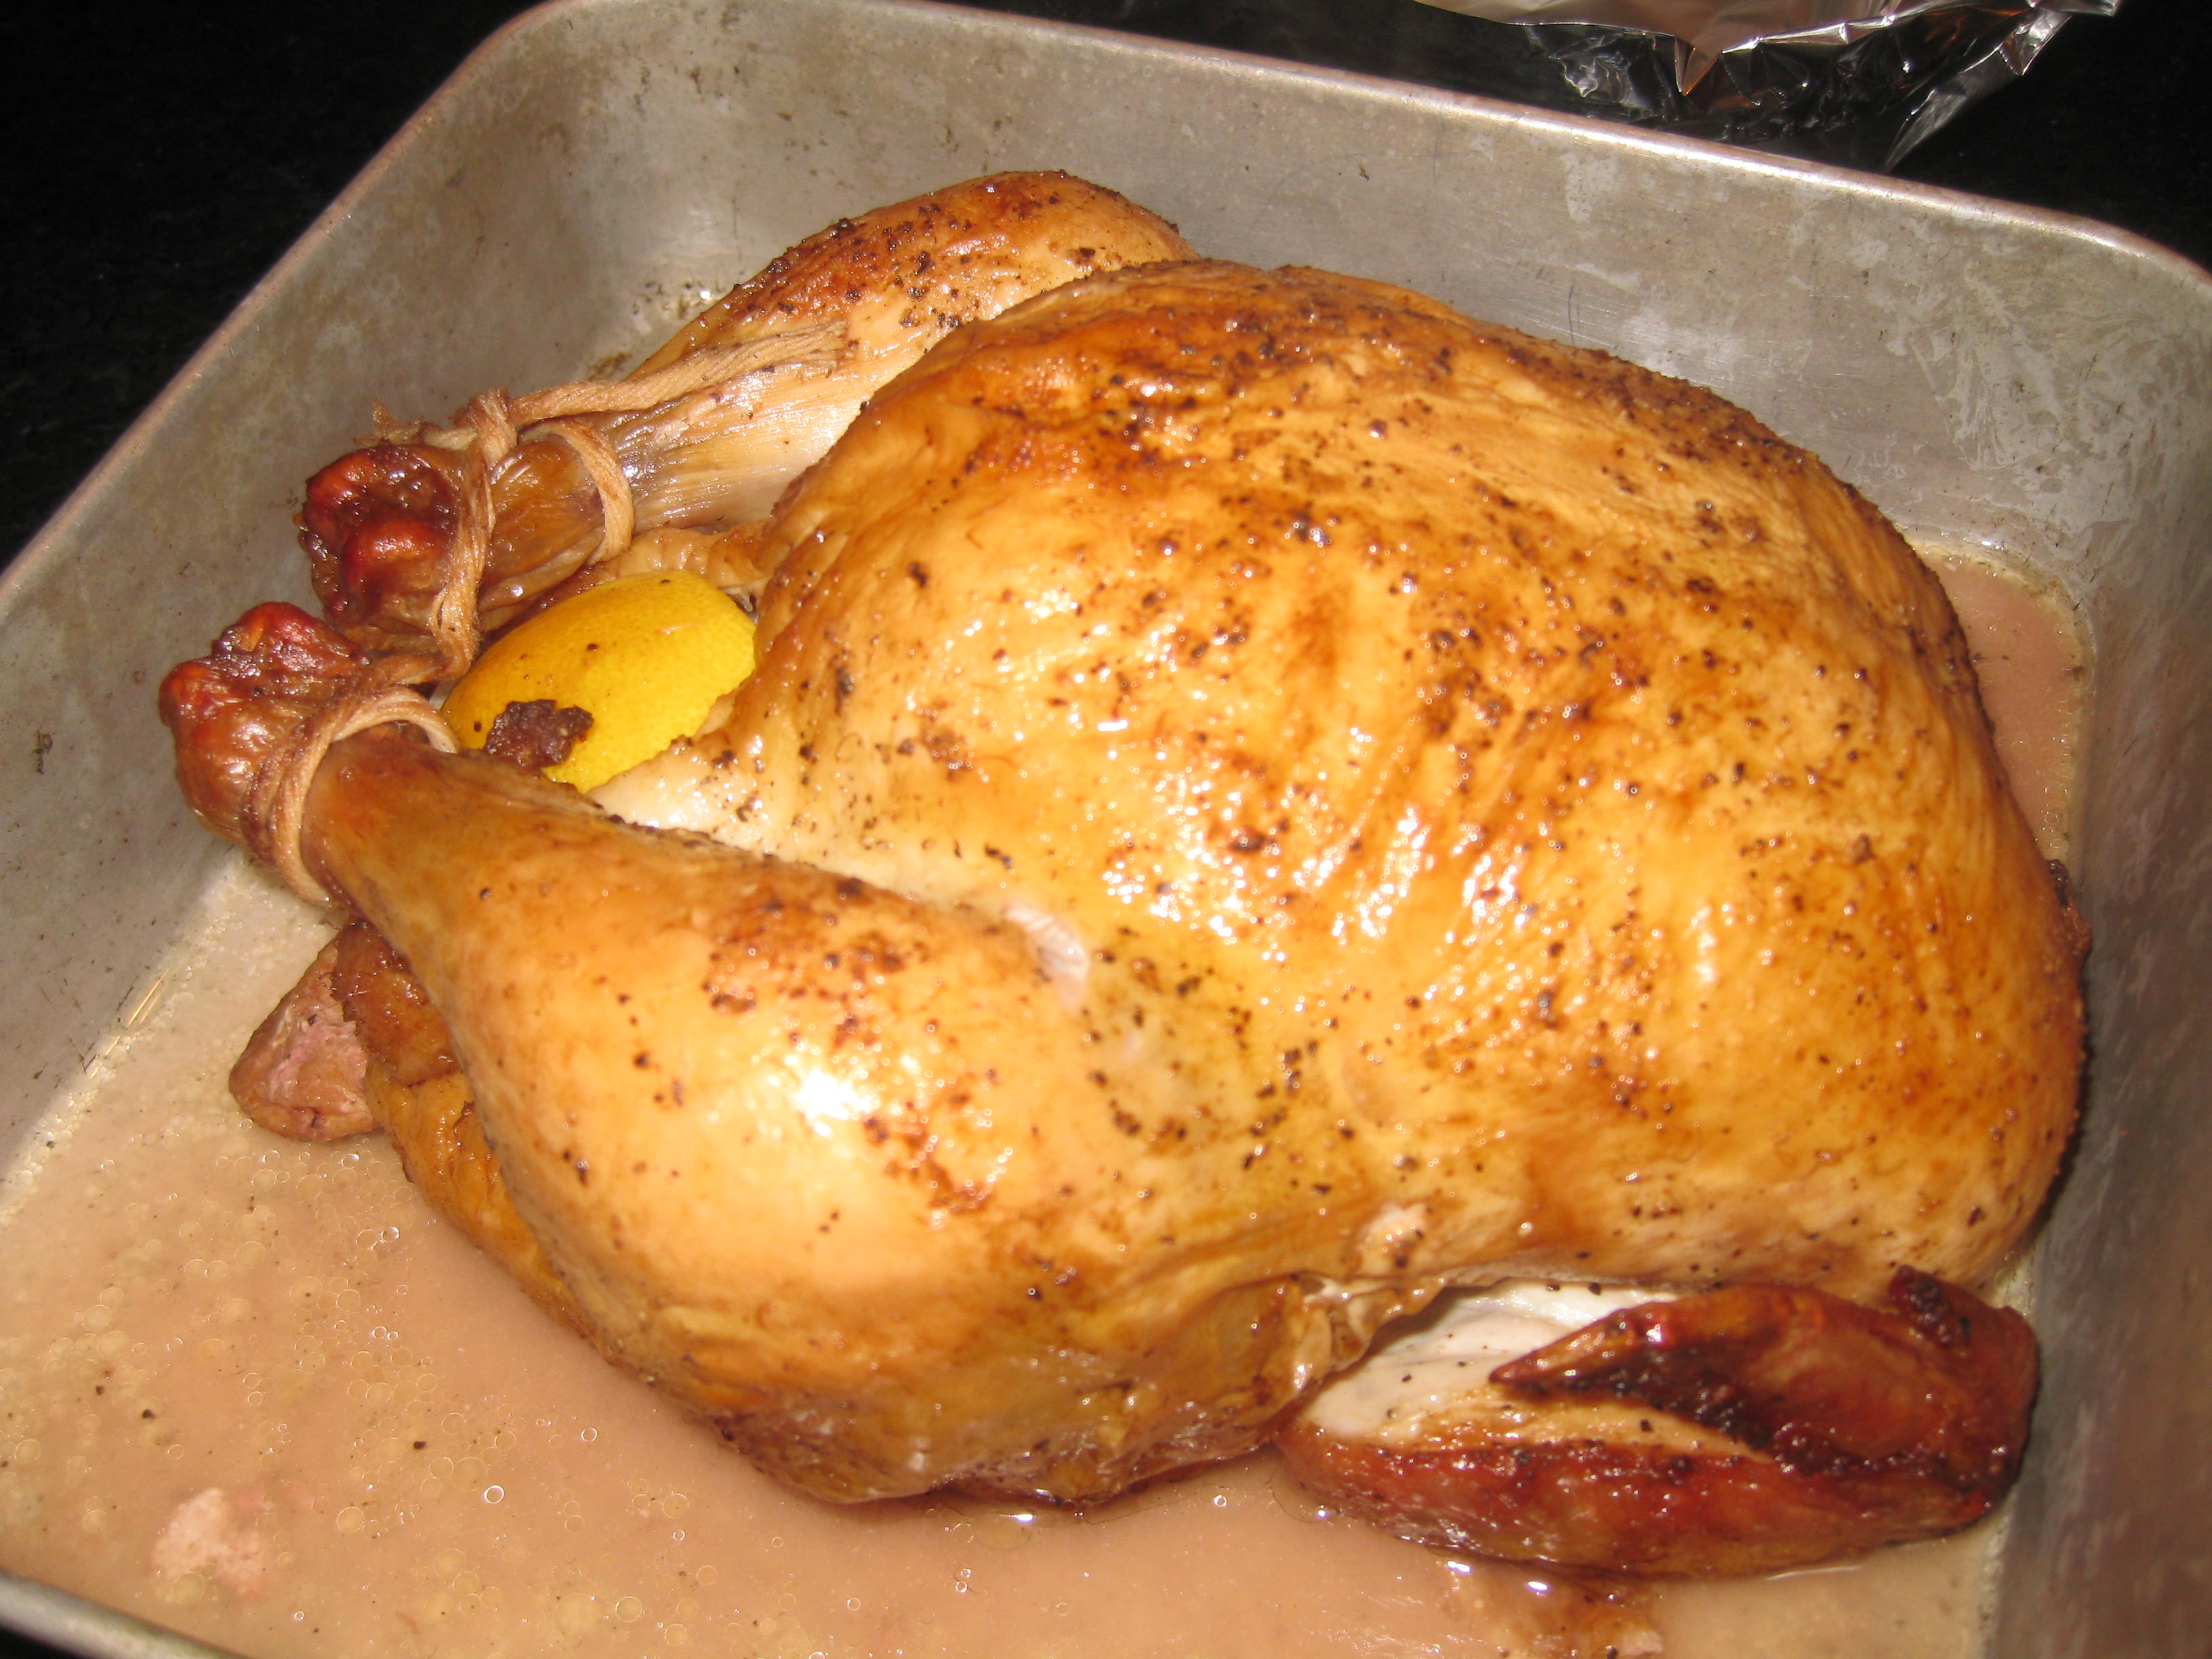
Here's an easy, delicious sauce to make while you're waiting for your bird:
1. Peel all the cloves from one head of garlic.
2. Saute these in 2 TBSP olive oil until they begin to colour.
3. Add one can low-sodium chick broth, 1/2 cup H2O, a few sprigs of parsley, and the zest of half a lemon.
4. Boil this down until it is reduced to about half what it was at the start.
5. Remove the lemon zest and parsley. Whirl the sauce in a blender (or use an immersion blender).
6. Whisk in half a stick of butter.
This sauce is SUPERB with the smoky, lemon/garlic/rosemary flavour of the chicken off the grill!
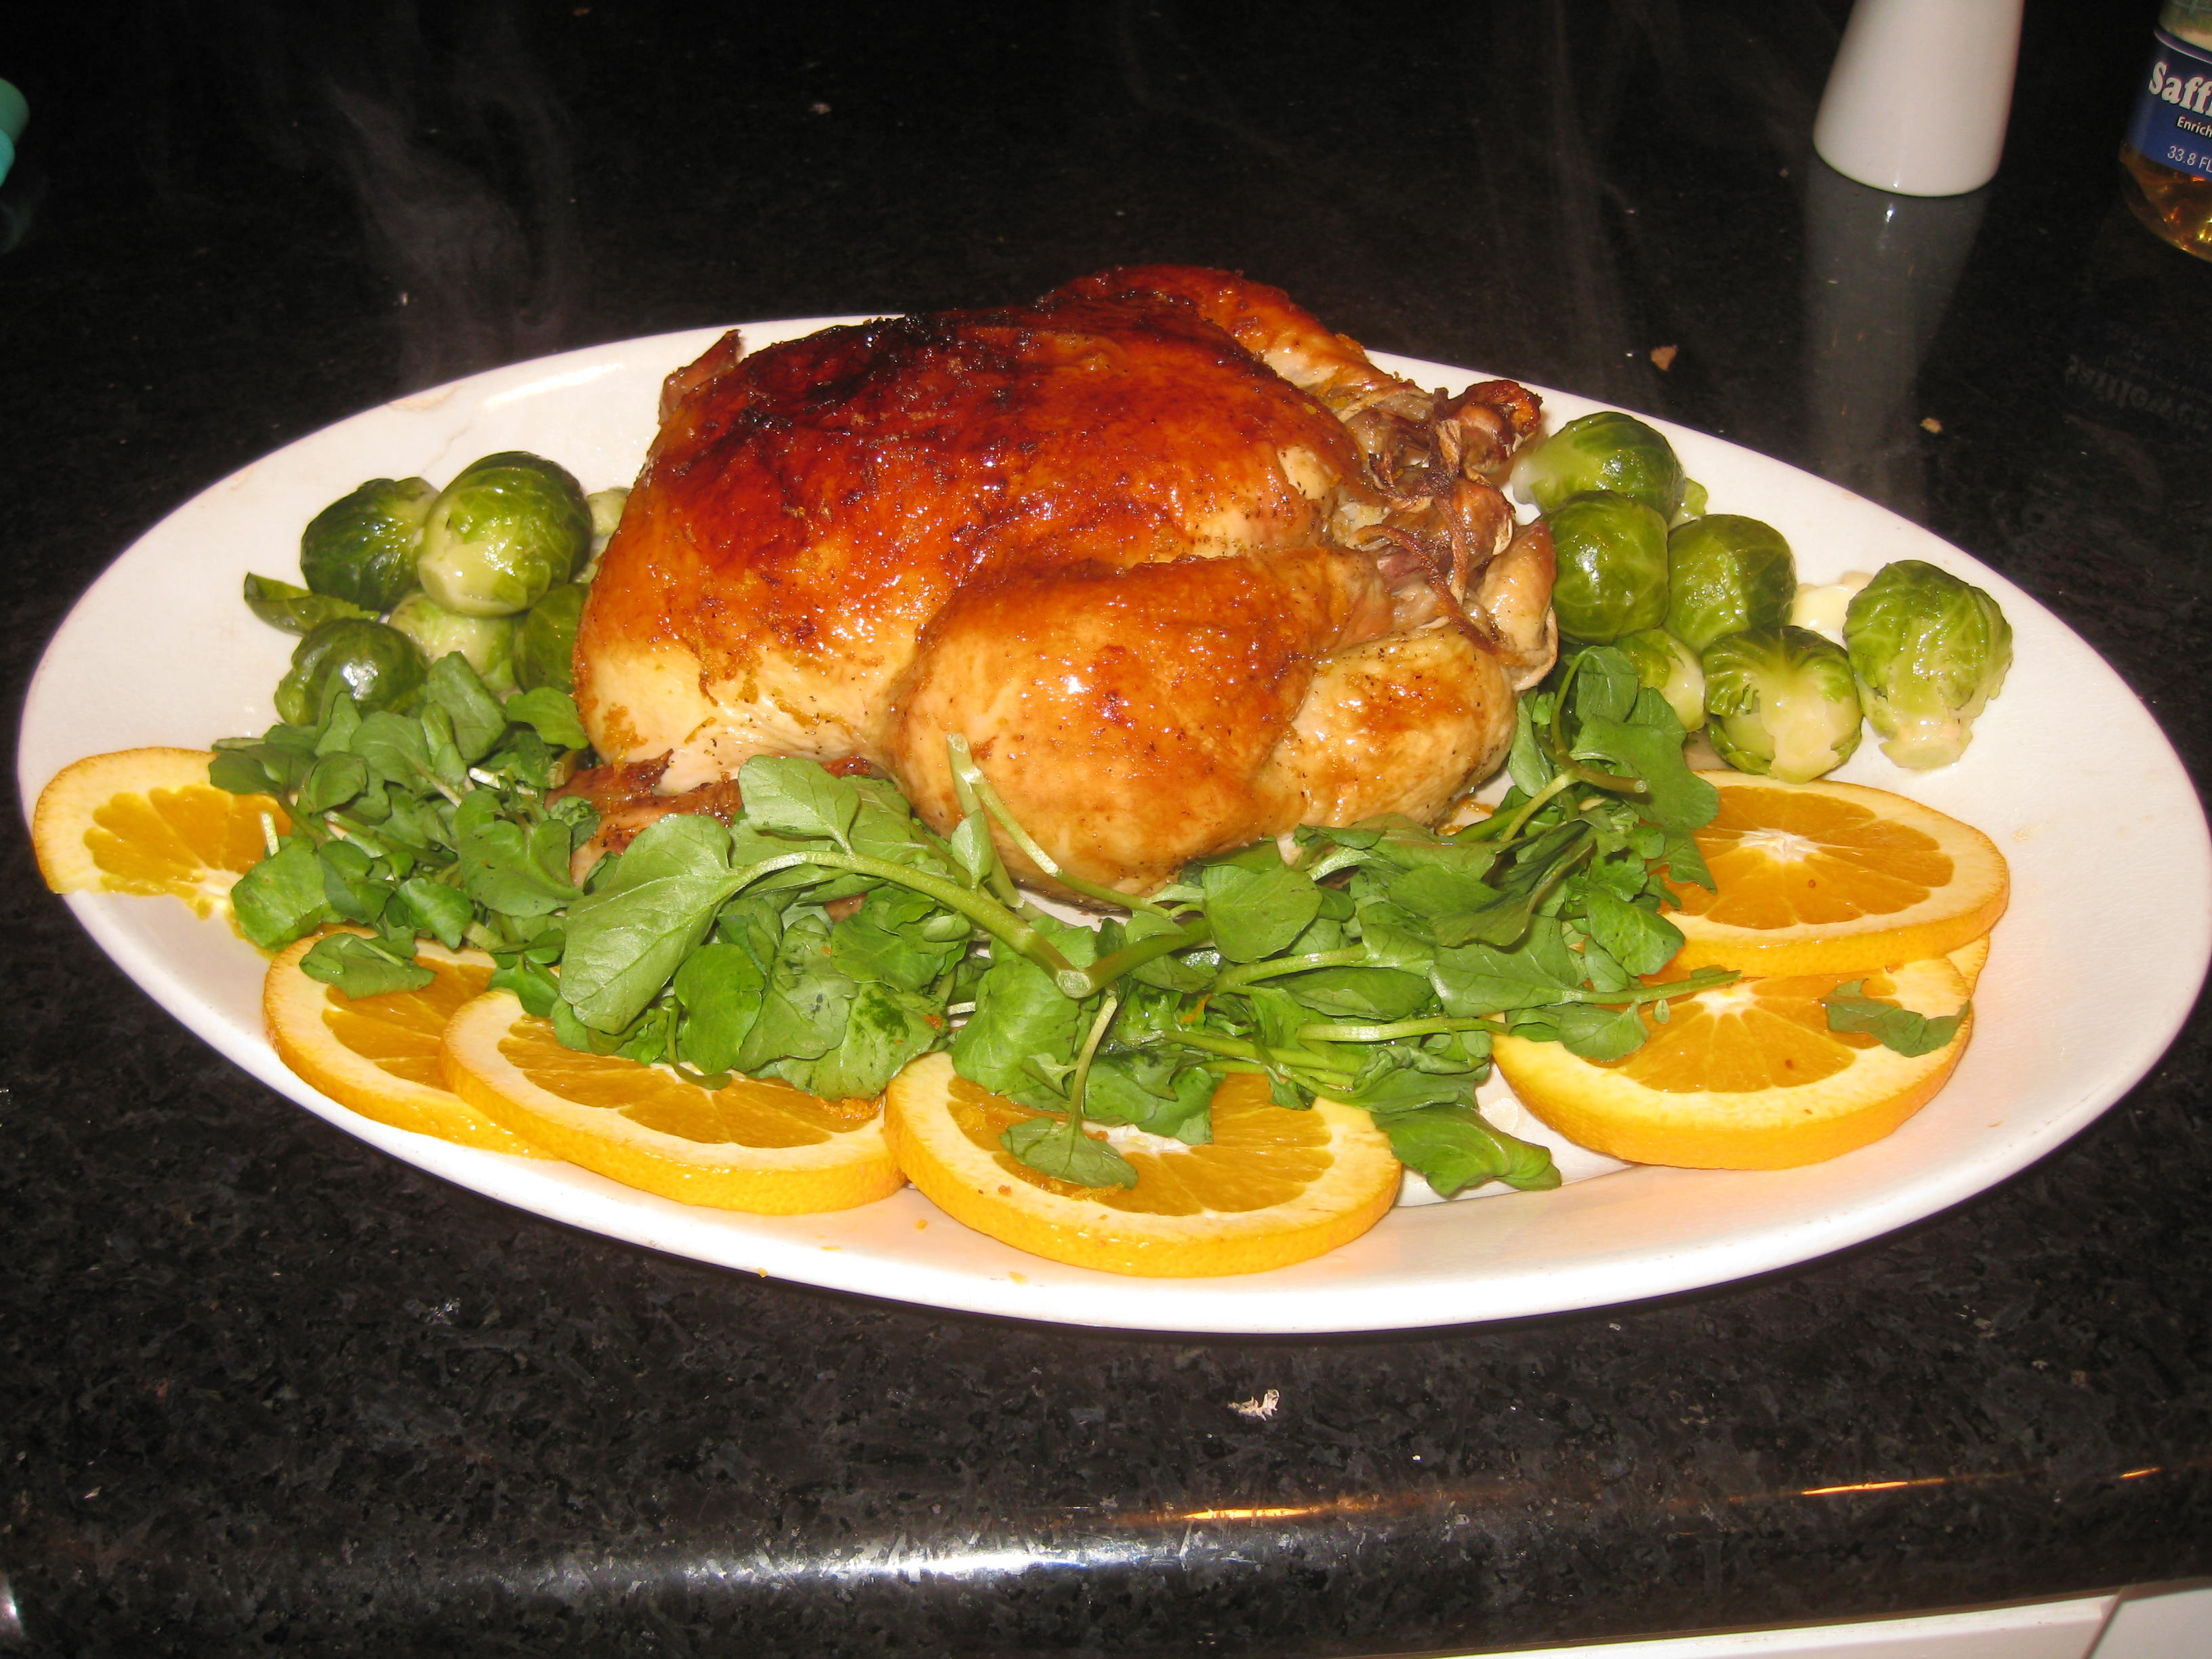
What I ate in Japan sometimes.....
Karaage and Kewpie mayo??????
I lived in Tokyo for several years back in the 90's. There were something like 80,000 restaurants in Tokyo at the time. Japanese restaurants tend to specialize in one kind of food (sushi, shabu-shabu, yakitori, etc) so you pretty much had to decide what you wanted to eat before you entered a restaurant. Kaiseki was certainly the highest form of Japanese cuisine, but unfortunately I am allergic to many types of seafood....and Japan was also wildly expensive back in the early 90s----our rent, for example, was the equivalent of U.S.$20,000 per month!!!!
So if I was just going out for dinner with a bunch of pals, we'd often find ourselves eating at an izakaya establishment. These are bars, more or less, that cater to people going out after-work for a drink with co-workers. These places are often likened to U.S. pub-style dining, but there are a few really important differences. For one thing, in Japan you'd be sitting on a tatami mat on the floor----and while beer has become very popular, you might instead be drinking sake.
Another big difference is that instead of each person ordering a meal, plates are ordered and shared throughout the evening. One of these plates that we always enjoyed was "karaage". When my Bates friends come to visit me now, they will often say, "Will you make karaage?". It's become a thing that my old friends from Roger Bill and I do together because sharing Japanese pub food is just so conducive to a good evening.
I love the stuff, but one can't make it on the spur of the moment as it needs overnight marinating (if not longer). It also REQUIRES two ingredients one might not have on hand.....Japanese mayo, and potato starch.
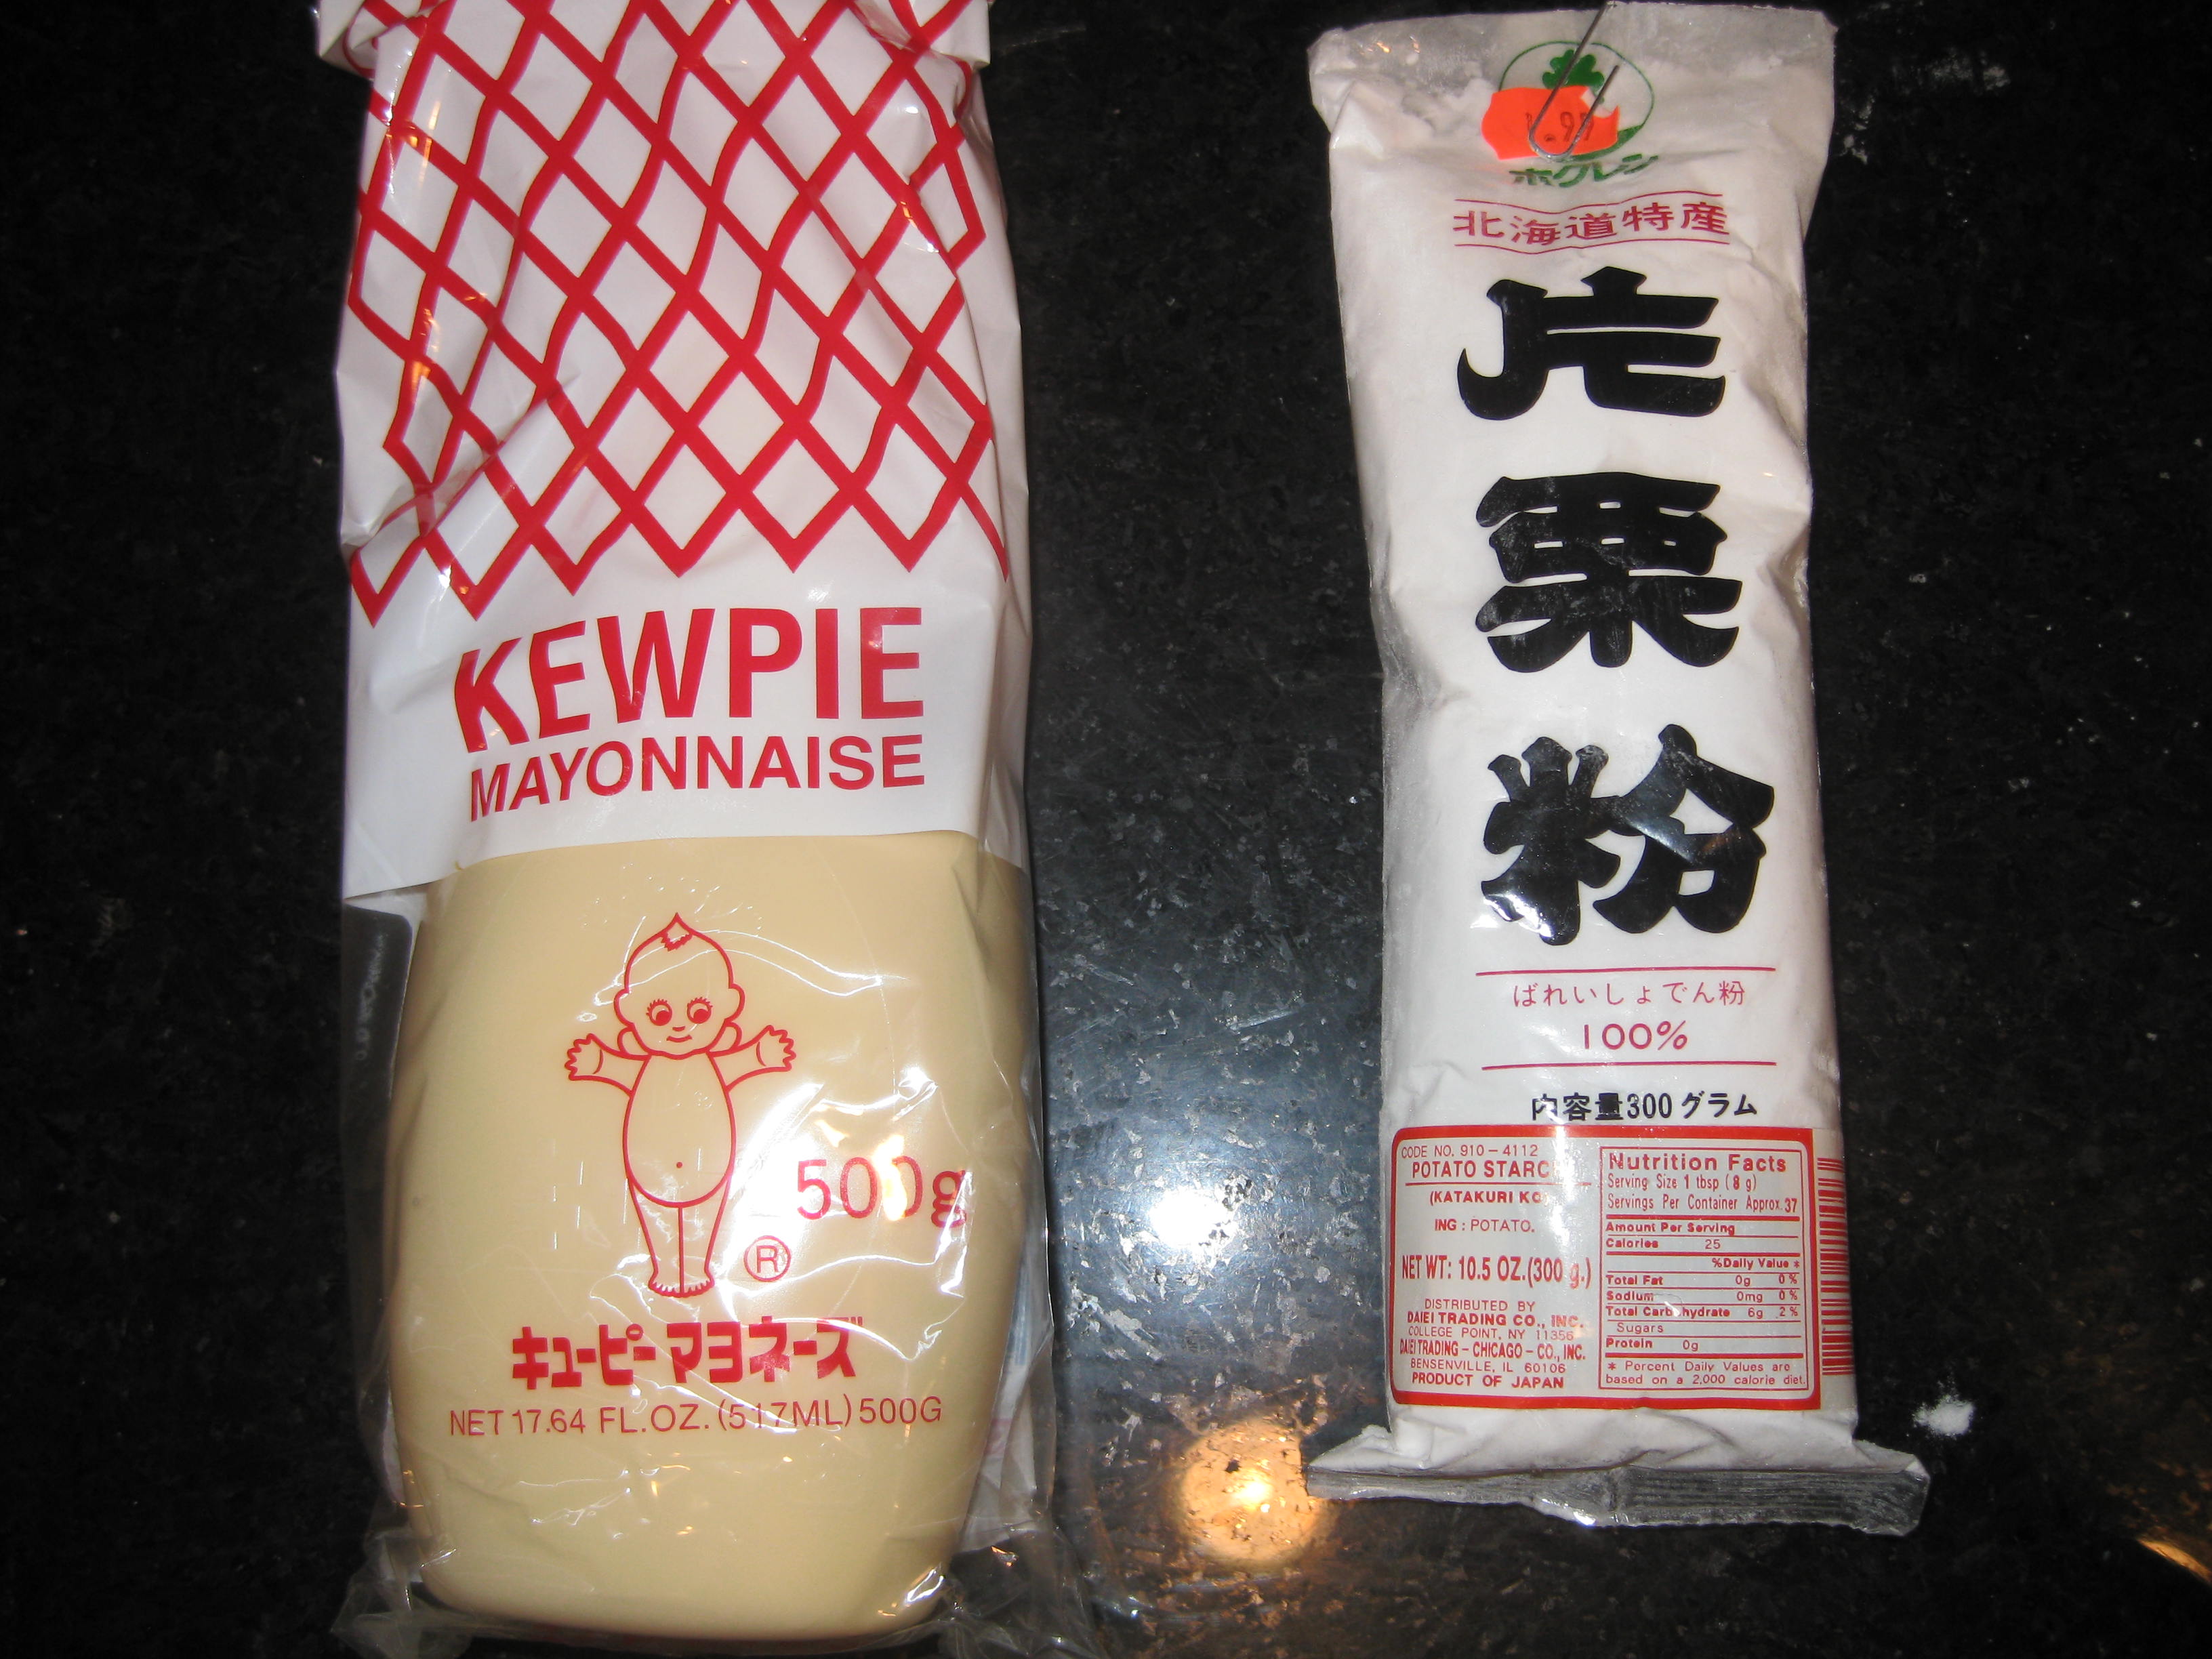
The Kewpie-brand mayo is the same stuff that I used to buy when I lived in Japan. And there really is no substitute for Japanese mayo-----it contains egg yolks only (American mayo has whole eggs) as well as almost no water (American mayo has a lot of water). So the whole flavour and consistency is different.
Potato starch is also essential to good, authentic, karaage. Don't substitute!!!!!
As my husband said tonight, "When karaage is done right, it's transportive"
....transportive back to Japan.
SO IT NEEDS TO BE DONE RIGHT------otherwise you've just made fried chicken!!!!!!!!!! THIS MEANS USING THE CORRECT INGREDIENTS, AND FRYING IT......THREE TIMES! YES, THREE!!!!!!
Here is how to make CHICKEN karaage-----squid, octopus, and other karaages are also popular in Japan and may be made by the same method:
12 ounces boneless chicken (thighs or breasts; your choice)
2 1/4 tsp freshly GRATED ginger (or more)
2 1/4 tsp GRATED garlic
1 1/2 TBSP Japanese soy sauce
2 1/4 tsp sake
2 1/2 tsp sugar
1. Cut the chicken (or seafood) into pieces that are about 2 inches wide and 3/8 inches thick.
2. Combine other ingredients. Place with chicken into a ziplock bag and mush around until all the meat is covered with the marinade. Refrigerate for 24 hours. [NOTE: Most American recipes will tell you not to marinate chicken for that long. Ignore them and trust me-----this is karaage. 24 hours is good; 72 is better].
When ready to cook:
1.Dump chicken mixture into a bowl. Add 1/4 cup potato starch and mix. Don't overmix----lumps are good.
2. Bring about half an inch of oil to 375 degrees in a solid saucepan.
Now very carefully:
1.Fry the chicken for 1 minute.
2.Take it out for 1 minute
3. Fry it again for 30 seconds
4. Take it out again for 30 seconds
4. Fry it again for 1 or 2 minutes
This will be one of the best dishes you have eaten, if you love Japanese food! Serve it with the mayo, some lemon wedges, and Japanese rice.
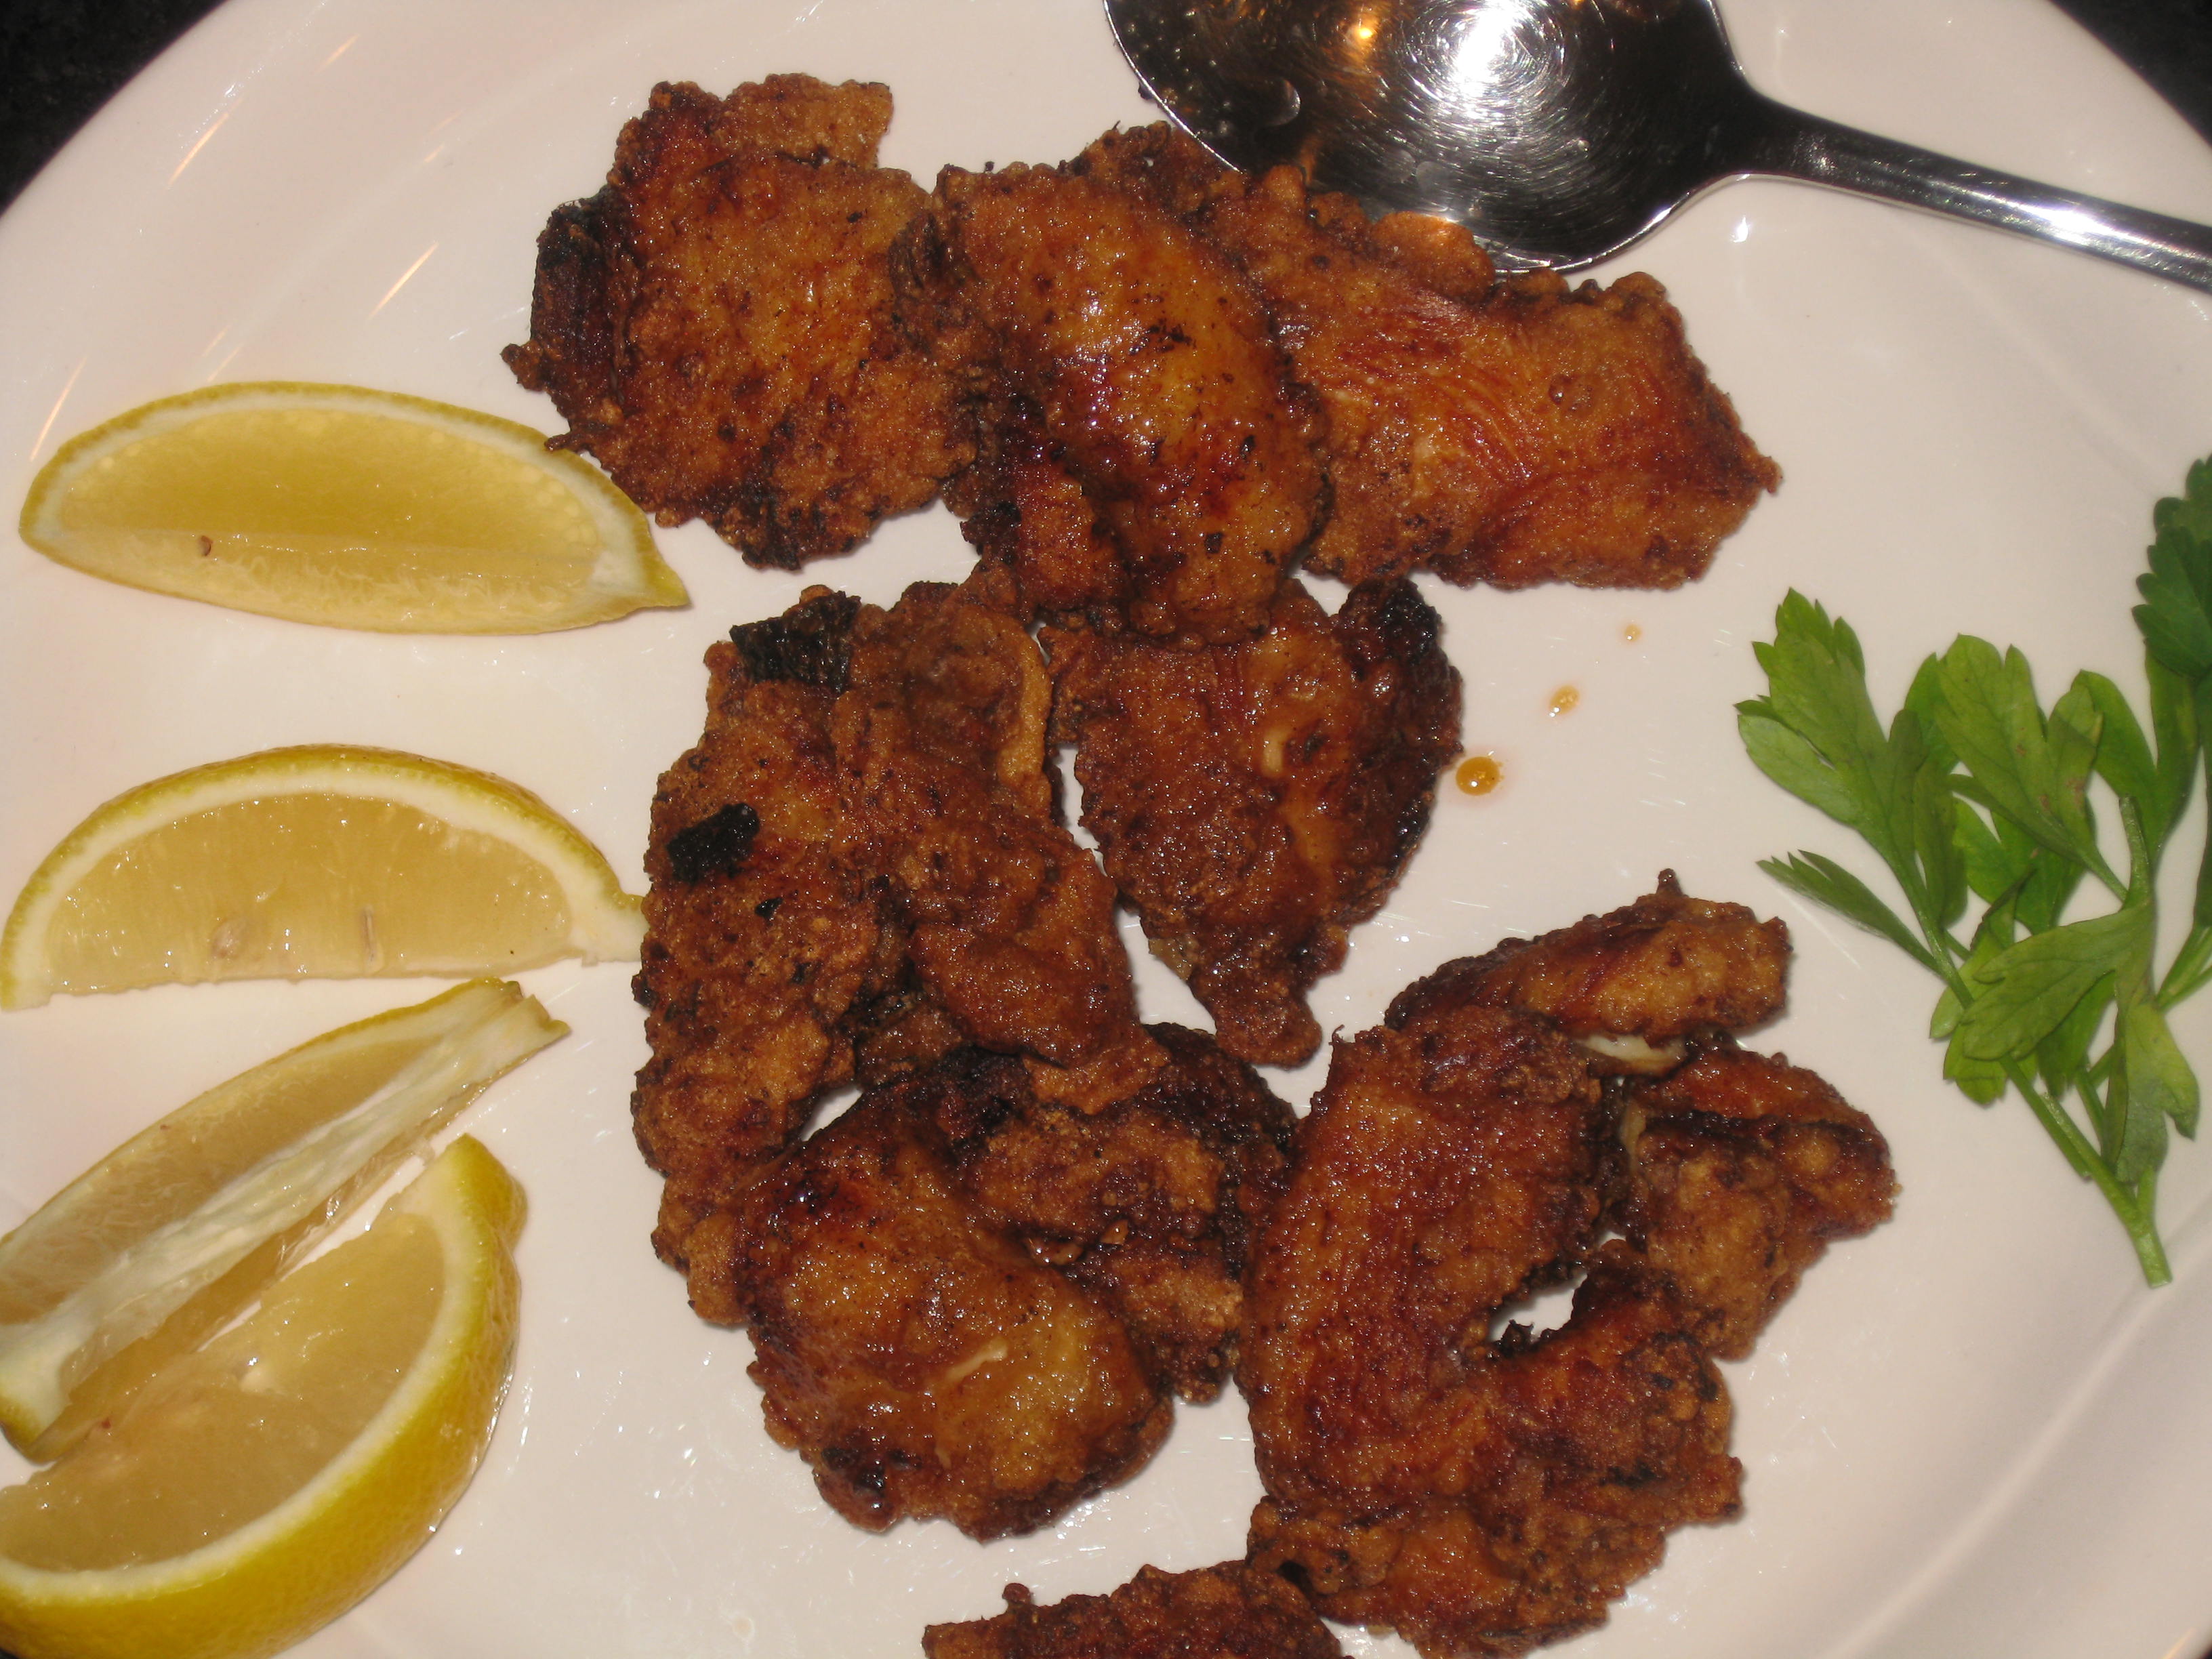
Good cooking often involves chemistry. Seriously.
Take for example "velveting"
The ultra-tender texture of the stir-fried beef found in upscale Chinese restaurants comes from a classic technique known as "velveting", which involves coating the meat and blanching it in a pot of oil before the stir-frying even takes place.
Well, that would certainly be a pain in the butt for the home cook-----so I was astounded to see that Cooks Illustrated had found a way to "velvet" beef that was easy to do.
First, the chemistry:
Like egg whites, baking soda raises the pH on the surface of meat, making it more difficult for the proteins to bond, and thus keeping the meat tender and moist. Cooks Illustrated found that just 1/4 teaspoon----yes, 1/4 teaspoon!!!!----made the meat 20% more tender. My own results yielded meat that was INCREDIBLY more tender------much more than a mere 20%. I was using a simple flank steak from Hannaford's grocery store, and even as I was slicing it I was thinking "ut-oh". It was hard to slice and I was sure was going to be awful.
But tonight's simple stir-fry, we both agreed, was possibly the best I ever made. We LOVED the velvety consistency of the beef, and the steak au poivre-like sauce was to die for.
I will not re-print Cooks Illustrated's recipe here; but you can find this incredible, incredible recipe in their March 2016 issue. I am happy to send it to you if you if you ask for it on the Contact Form-----please use the subject line, "Velveting".
Bon appetit!
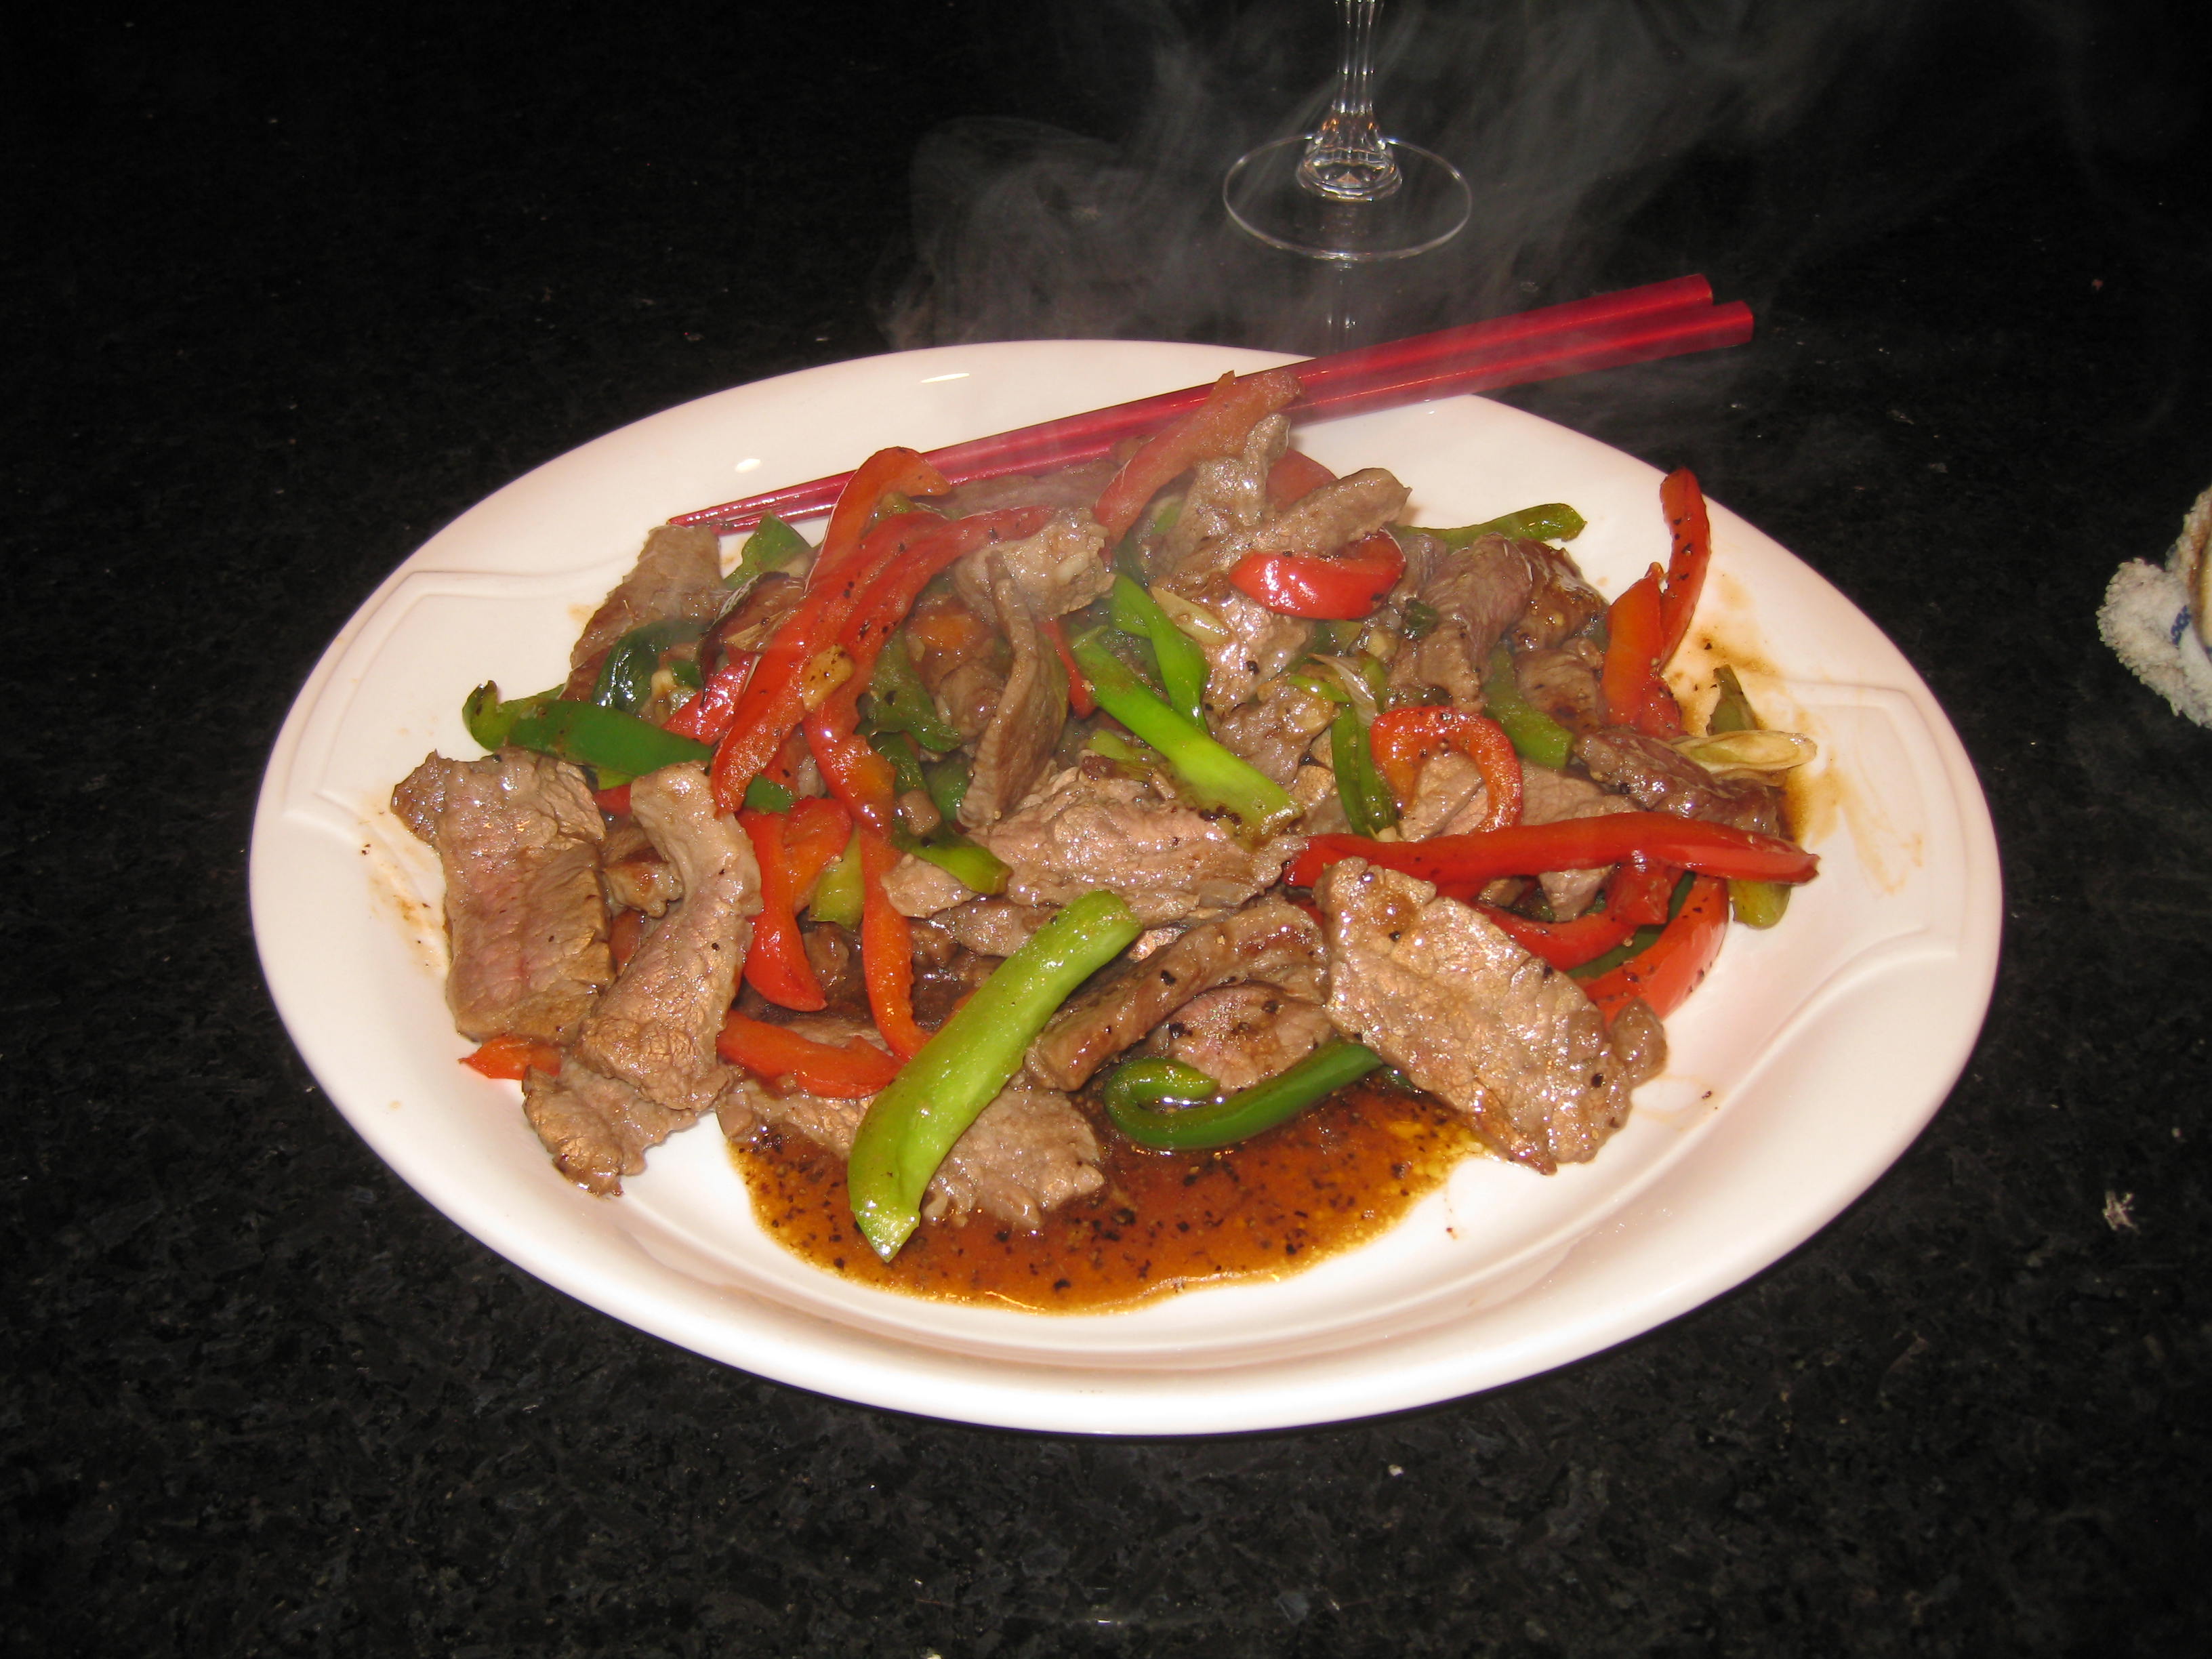
A protein-packed vegetarian salad:
This is a delicious salad that can easily be used as a main course for a light dinner. You'll have to freeze the beans overnight, and of course dried beans take a long time to cook, then chill, so plan accordingly.
You will need:
1 1/2 cups dry soybeans
1/3 cup honey
1/3 cup cider vinegar
1/4 cup vegetable oil
1 cove garlic, minced
14 tsp dried basil
1 tsp salt
dash of pepper
3/4 cup chopped scallion (the tops, too!)
2/3 cups chopped dill pickles
1/2 cup chopped celery
1/2 chopped green pepper
1/2 cup snipped parsley
Method:
1. Soak the beans for about 2 hours in enough water to cover. Drain. Put them in a freezer container, and freeze overnight.
2. The next day: Bring about 8 cups of water to a boil. Gently simmer the beans for about 1 1/2 hours, or until tender. Drain.
3. Combine dressing ingredients in a screw-top jar (Honey through pepper).
4. Combine beans with the other veggies, and add dressing. Chill for at least 4 hours.
We like this served with my homemade Dilly Bread, shown here:
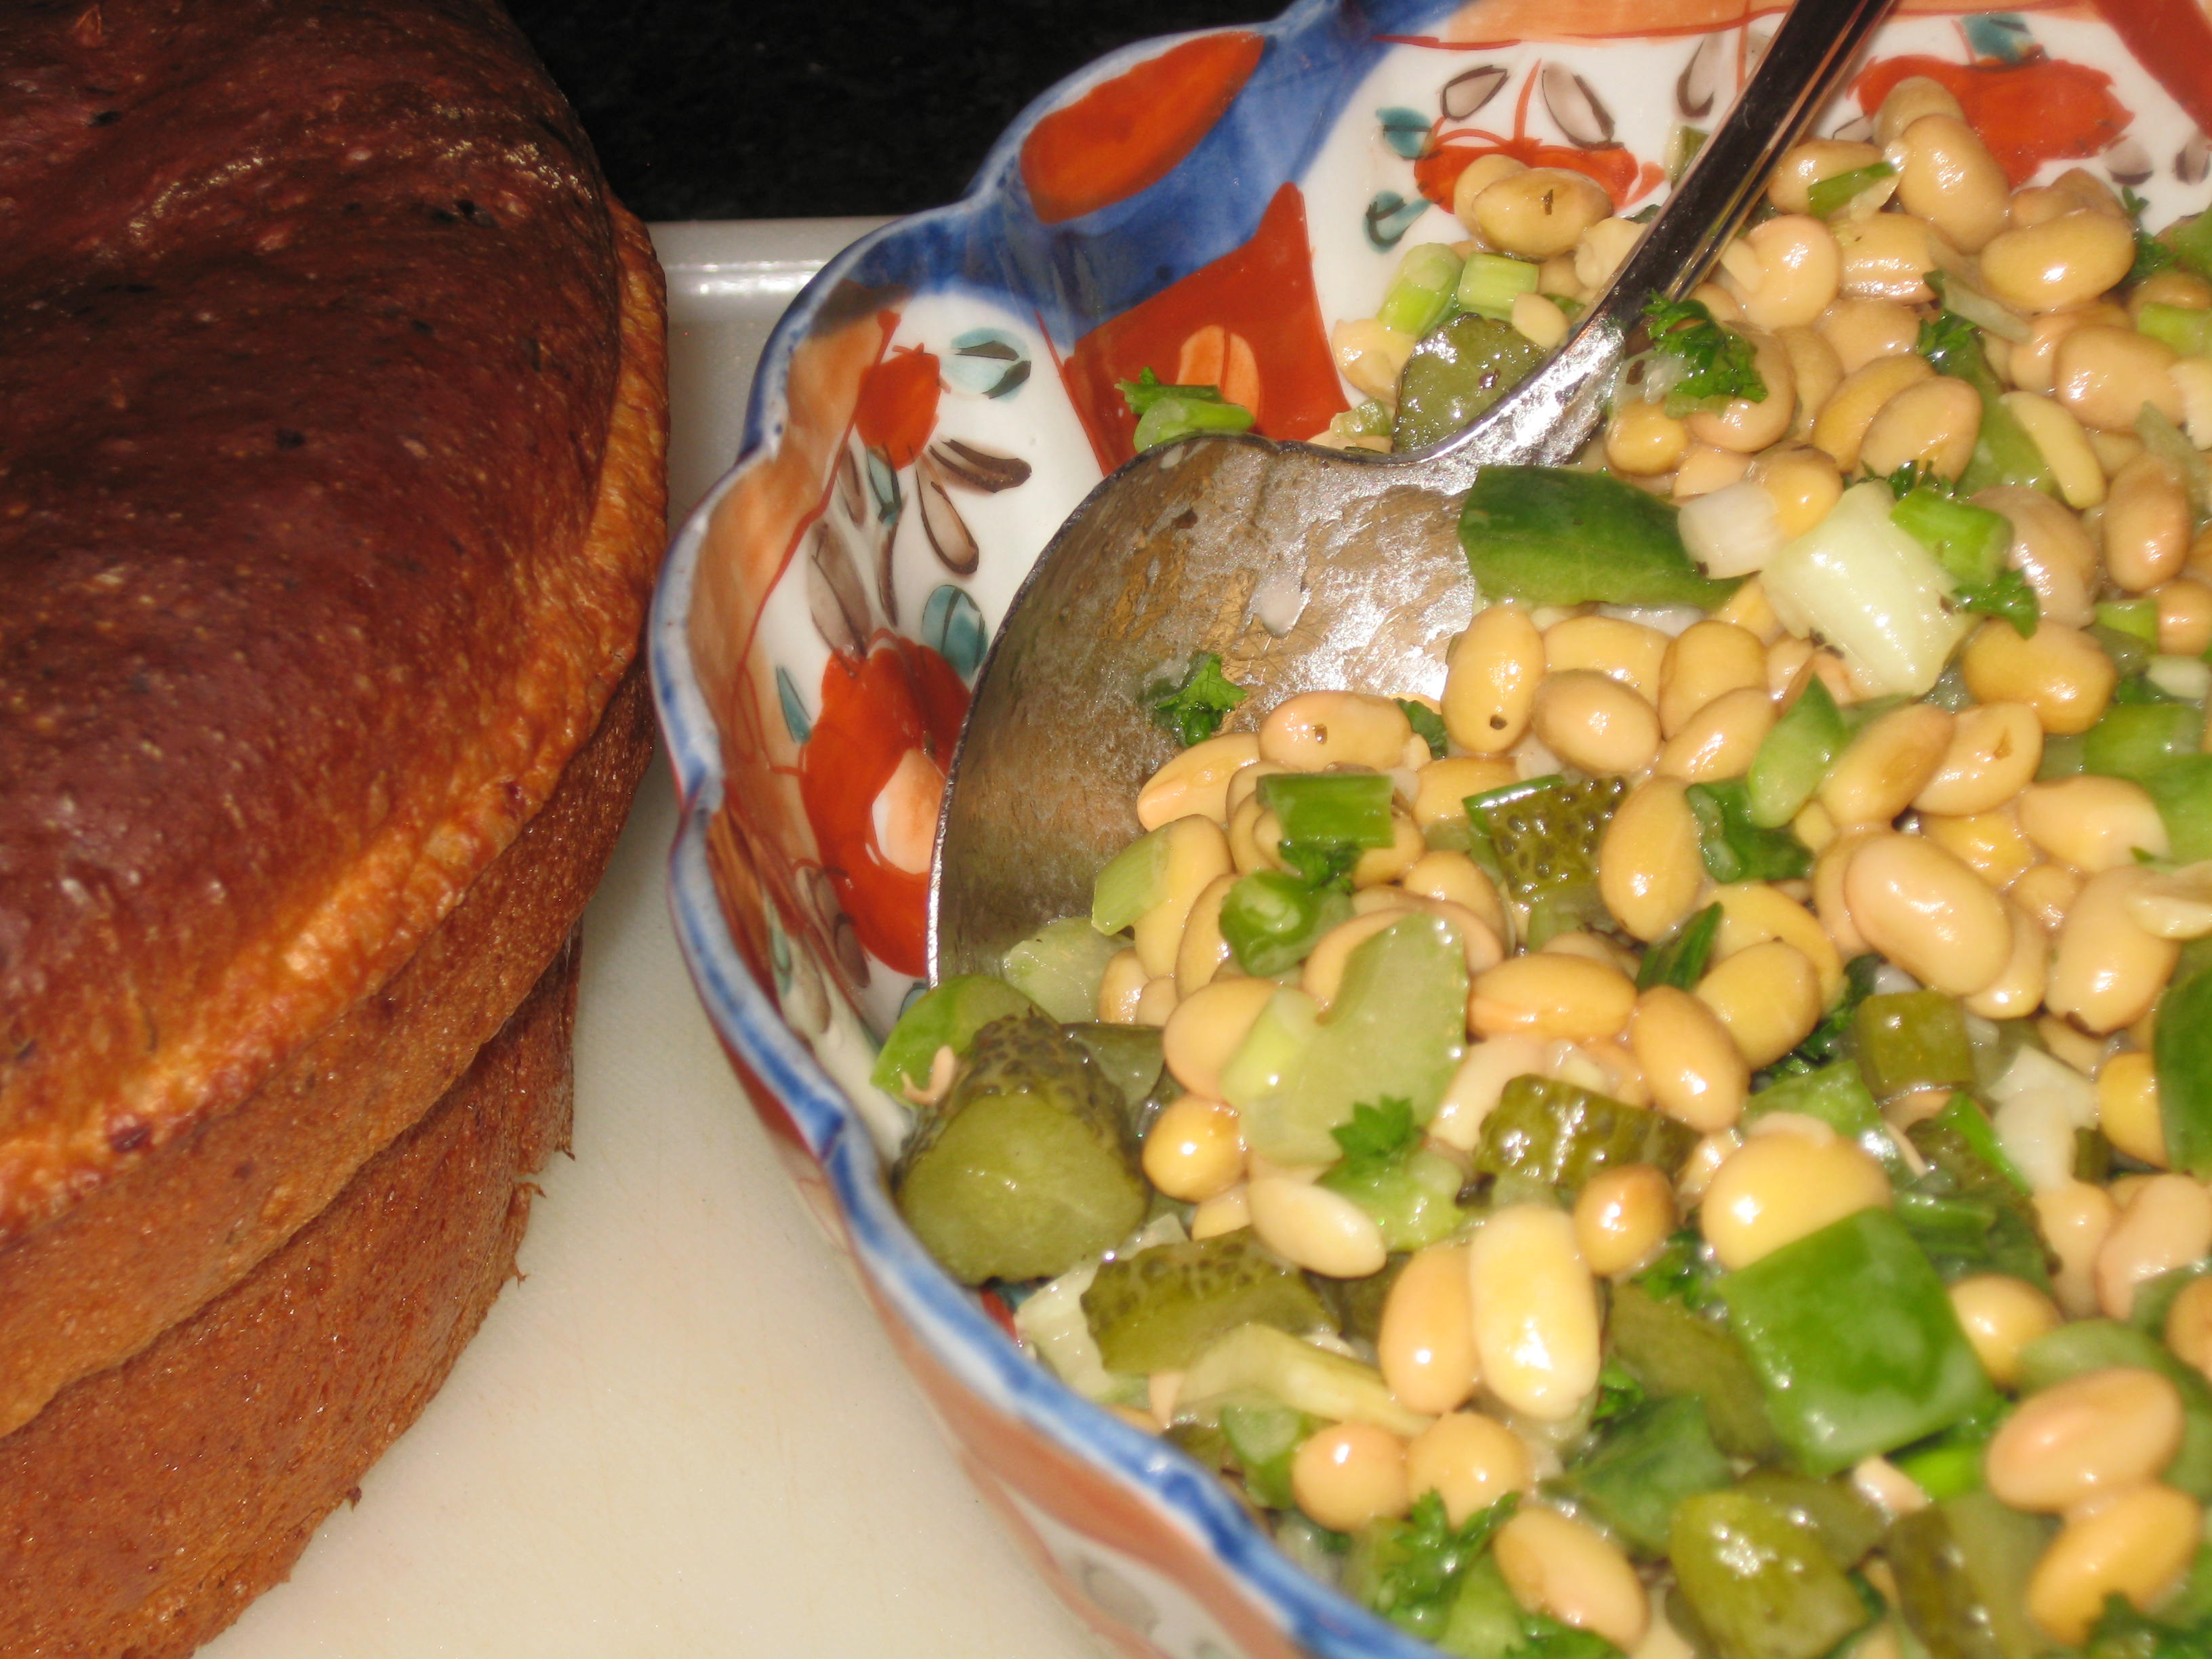
Here's another take on a cherry dessert---but this time using the real thing!
A cherry cobbler is a nice, old-fashioned dessert that is easy to make....well, if you have the patience to pit the cherries. I usually just turn on some music and watch the sea outside my window, pitting away.
For this recipe you will need:
4 cups pitted cherries
1 cup H2O
3/4 cup sugar
3 TBSP quick-cooking tapioca
2 TBSP butter
a few drops almond extract
Mix all of the above together, and heat until bubbly. Set aside. Meanwhile mix:
1 cup flour
2 TBSP sugar
1 1/2 tsp baking powder
1/4 tsp salt
Then cut in:
1/4 cup butter
1/4 cup finely chopped blanched almonds
Combine:
1/4 cup milk
1 egg, slightly beaten
Stir the egg/milk into the dry ingredients until just combined. Knead 8 or 10 times, then roll out to about 1/2 inch thick. Using a well-floured 2" cookie cutter, cut into 8 or so rounds.
Pour into a 2-quart casserole, and top with the biscuit rounds. Bake at 400 degrees for about 25-30 minutes. Serve warm with vanilla ice cream.
YUM!
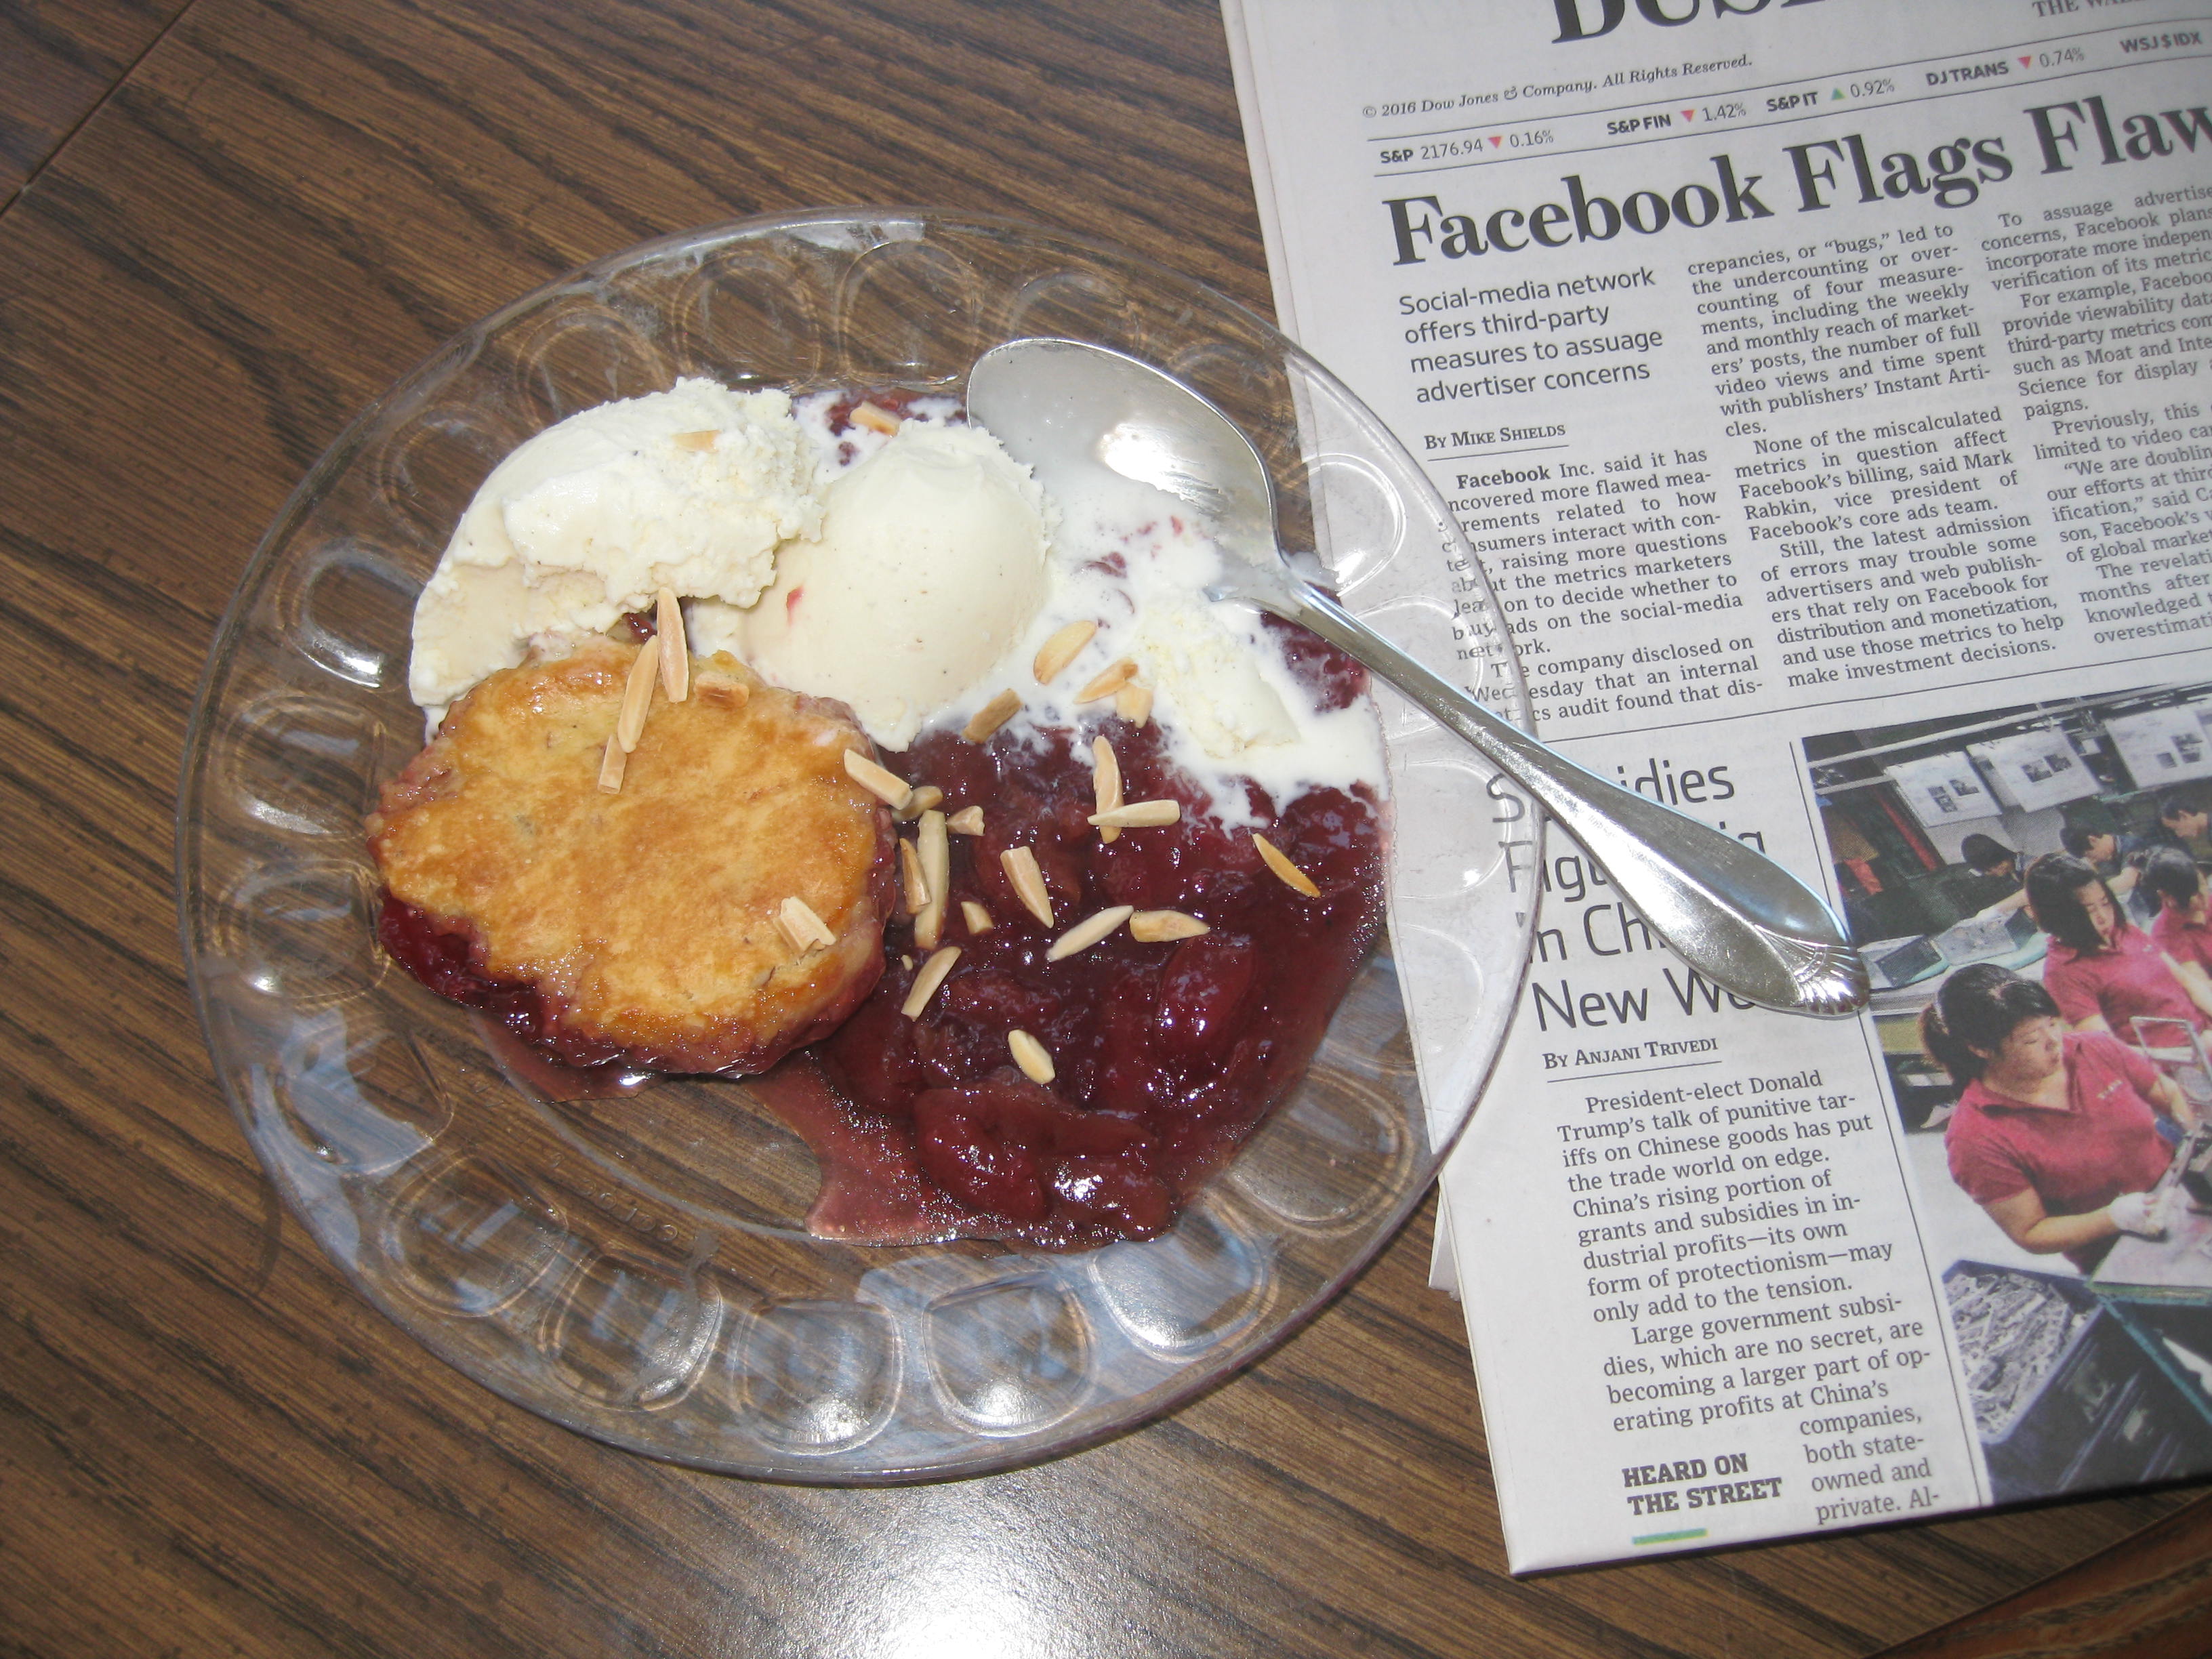
When there are THIS many ingredients----and this is far from all of them-----you KNOW it's going to be a complicated recipe!
But here's the thing----Curry by its nature, when done authentically, is a complex dish!
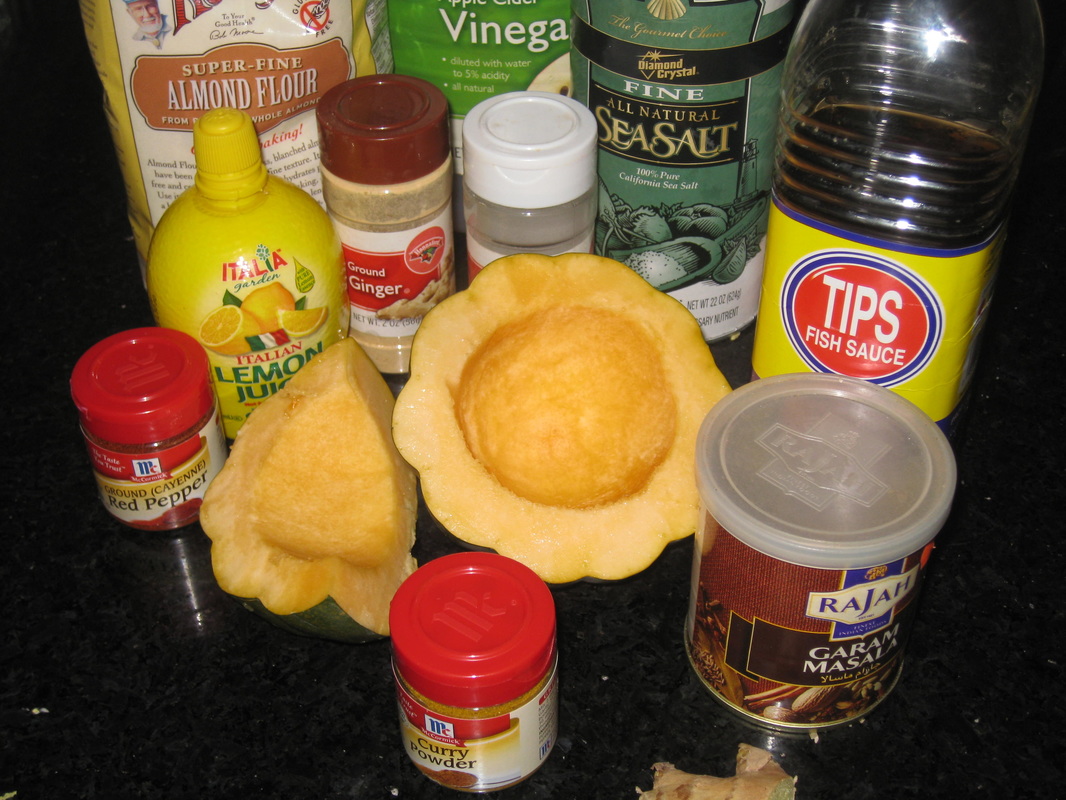
Curry done correctly is a complex, incredible dish. Done badly, its........well, ugh. No wonder so many Americans think they don't like curry, because they've just never had it prepared in the Asian fashion. I can say without a doubt that every curry I've had in an American restaurant has been worse than awful.
I usually prepare meat-based curries in the way I learned in Japan. While not authentically Indian, Japanese curry is indeed a good, complex dish.
Don't confuse "complicated" and "complex"!!!!! (Look them up, my dear, and improve your language-skills). "Complex" in this sense, is about flavours and how they mingle. "Complicated" is about how hard it is to execute the recipe.
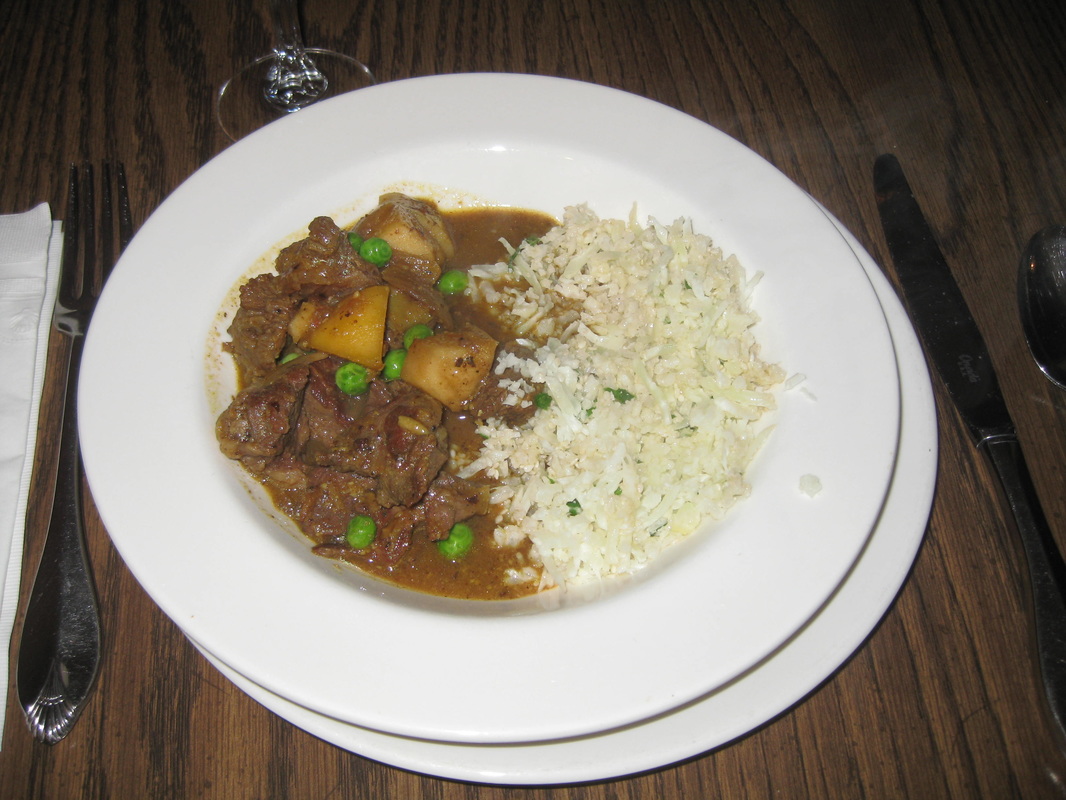
Also note that instead of rice I went with so-called "cauliflower rice", which we all know is trending here on the internet. Although certainly easier to make than regular rice, I can't say it set my taste buds on fire with joy.
It was REALLY good with the curry, simply because cauliflower is often found in curry, so they go together quite naturally. But as a substitute for rice?
No. This dish would have been better with it's regular accompaniment------an Asian "sticky" rice.
WAY better than take-out (and on the table in less than 15 minutes): Perfect Egg-Drop Soup
There are certain items that we get in Chinese take-out that are delicious but WAY overpriced. Egg Drop Soup is probably the poster-child for this. You can make an absolutely delicious Egg Drop Soup in less than 15 minutes-----probably with items you already have in your pantry.
Try this next time you are craving a Chinese soup:
6 cups low-sodium chicken broth
3/4 cup bias-sliced scallions
1/4 tsp salt
1/4 cup sugar
3 TBSP soy sauce
3 TBSP cornstarch
1/2 cup H2O
3 eggs, beaten with 2 TBSP H2O
1. Bring broth and scallions to a boil.
2. Mix together the next 5 ingredients, and add to broth.
3. Reduce heat to low, a s-l-o-w-l-y pour in beaten eggs, beating with a fork as you add the eggs.
That's it! This is a yummy, comforting bowl of Asian pleasure.

A New York Style Pizza with The Works------not for the faint of heart!
This is an authentic New York pizza that one can buy by the slice from a certain food cart near the corner of Wall Street and Broad Street.
And one slice is ALL you are going to need. This is a very substantial pie, that in spite of its 14 inch size can easily feed 4 people (probably with leftovers). In New York City when we talk about getting a bit of pizza for lunch, we talk about "going out to get a slice". Nobody ever needs to ask "a slice of what?"!!!!!!
I changed up the original recipe that was given to me by my friend (daughter of the cart owner) only to substitute a whole wheat crust. While I think this was a mistake, my husband LOVED it.
The sauce is also home-made. In this case my home-made sauce was EXACTLY the same as the pizza-cart's, other than we differ a bit on how much water by a TBSP or so. This is likely because of the difference in water-content of the tomatoes we each use.
The toppings include:
Italian sausage
Pepperoni
Pickled banana peppers (mild)
marinated artichoke hearts
Kalamata olives
and......drum roll please......1/2 pound of cheese. Yes you read that right. See why you can't eat more than a slice?
Please use the Contact Form for this exclusive recipe-----it's complicated but worth it!
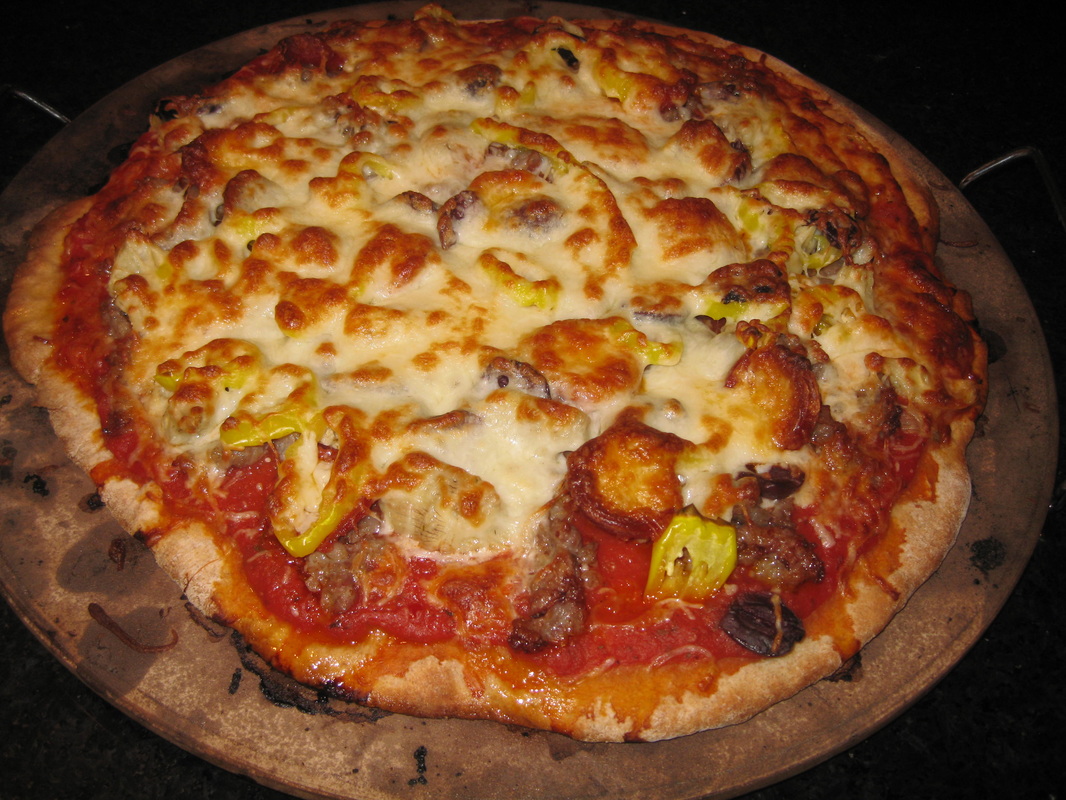
A (fairly healthy) one-skillet meal
This DELICIOUS one-skillet dinner comes together in a snap! It's loaded with things that are good for you, too!
You will need:
2 tsp olive oil
3 Italian sausages (hot or sweet, it's YOUR preference!)
1 large garlic clove (about 2 tsp minced)
1 1/2 cups low sodium chicken broth
1/2 lb fresh green beans
Most of a can of cannellini beans, rinsed and drained
6 oz cherry and/or grape tomatoes
Wide-leaf parsley, chopped
1. Heat the olive oil over medium heat. Add the sausages, and cook until well browned.
2. Add the garlic and cook about 30 seconds.
3. Add the chicken broth and bring to a boil.
4. If your green beans are very fresh, cover and cook the sausages for 5 minutes, then add both the beans and simmer for another 5 minutes;
OR
4. If your green beans are a bit out-of-season, add them NOW with the canned beans and cook, covered, for 10 minutes.
5. Stir in cherry tomatoes and parsley.
Voila! Another delicious and veggie-filled instant dinner!
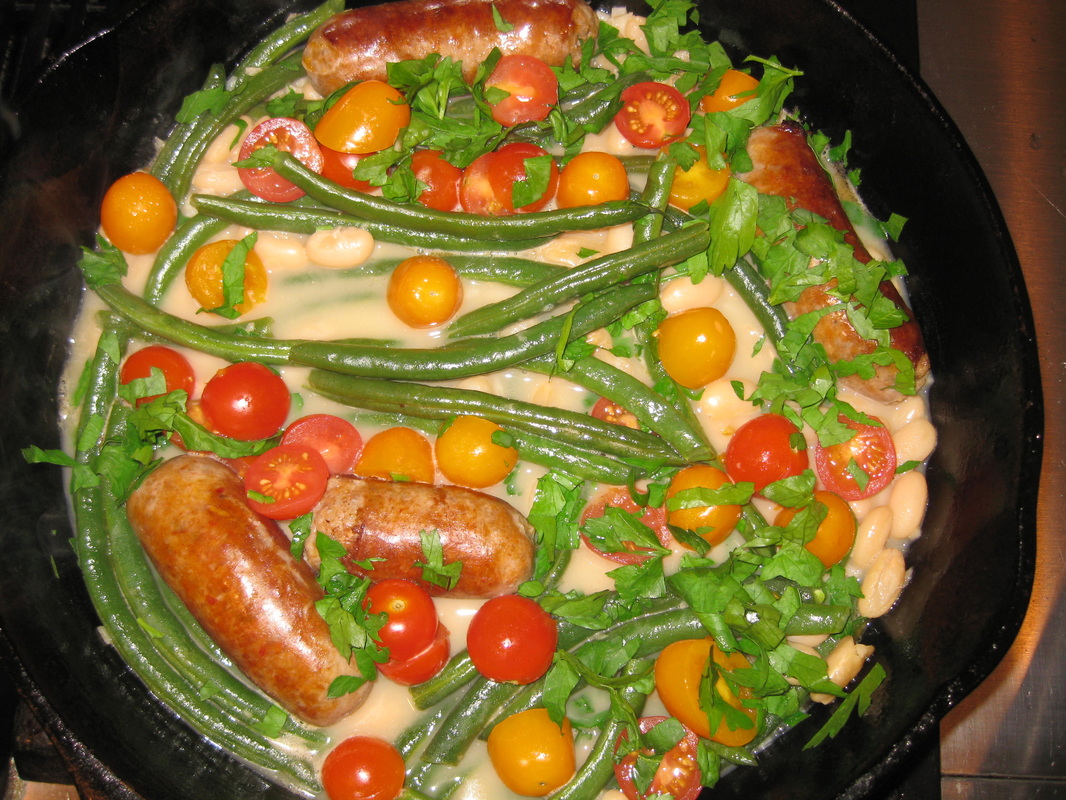
A lovely way to use Fall veggies in a savory pie
My family really likes this Three-Veggie Tart because rather than MIX the vegetables, as you can see from the photo I give each veggie its own opportunity to shine in 1/3 of the pie. So every family member can slice a piece of the vegetable they like best------or a sliver of each!
On the Fall day that I made this, I used carrots, beets, and broccoli. But use any veggies that your family likes!
Here is the basic recipe. I am not giving a recipe for the pie crust------make your own (or do what I did and let the Pillsbury Dough Boy help you out)!
FOR THE FILLING:
3 eggs
1 1/2 cups fresh breadcrumbs (about 2 slices)
1 1/2 cups grated sharp cheddar
1/2 cup milk
1 tsp salt
1/2 tsp pepper
Beat all this together, then divide into three bowls.
FOR THE VEGGIES:
Use 1 1/2 cups of each. All should be cooked to al dente (or more, if your family prefers softer vegetables).
Carrots are good tossed with a TBSP of fresh basil (or 1 tsp dried)
Beets are good tossed with 1 1/2 tsp tarragon (or 1/2 tsp dried)
Broccoli is also fabulous with 1 1/2 tsp tarragon (or 1/2 tsp dried)
Place one of these cooked veggies into each of the three bowls with the egg mixture.
Ripe Olives, sliced, are great when arranged on top of the pie before putting on the top crust.
GETTING IT TOGETHER:
1. Roll your bottom crust to fit an 11" quiche pan or a 10" pie pan
2. Lightly score the crust so that you can easily see three sections. Fill each section with one of the veggie-egg mixtures.
3. Arrange olives on top.
4. Arrange top crust. I like a lattice crust to show off each veggie. I then do use an egg wash to make it golden-brown.
5. Bake at 375 degrees for 30-40 minutes. Let sit 10 minutes before cutting.
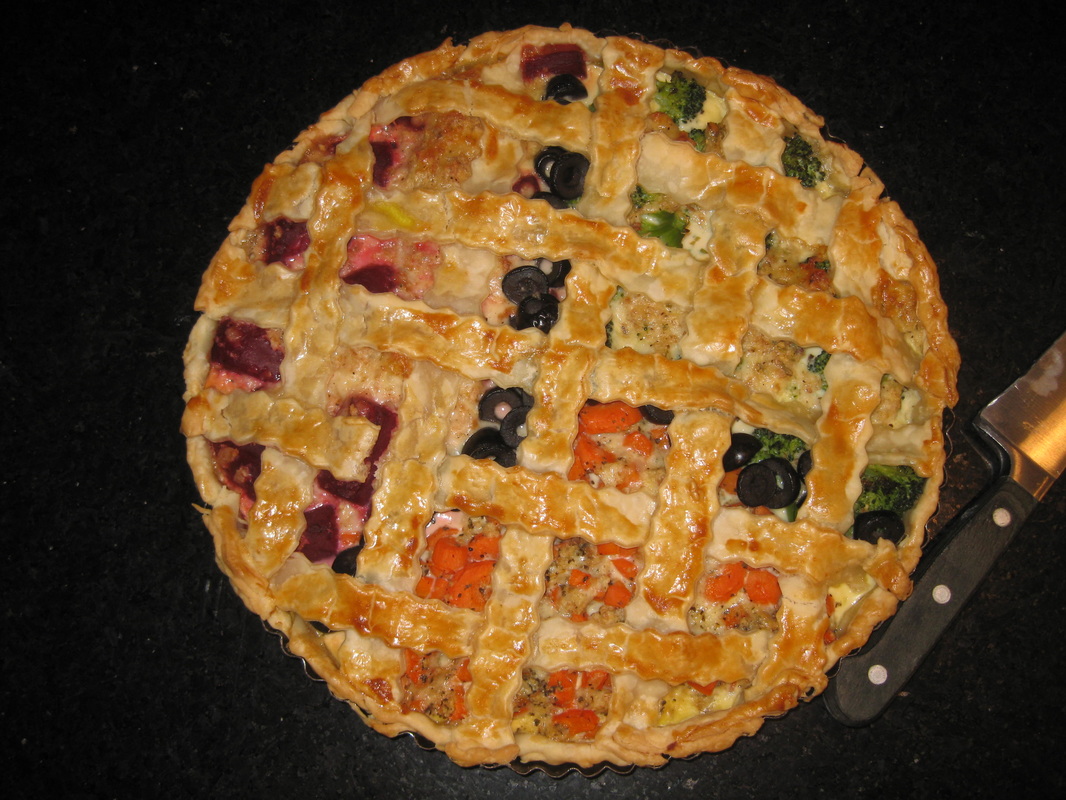
A quick and easy treat: Peanut and Chocolate Fudge
We aren't big on sweets in this house, but my husband mentioned that for some reason he was craving something sweet. He likes peanuts, and he likes chocolate, so I made these fudge treats in no time flat with things I already had in the pantry.
1 10 oz. bag peanut butter chips
1 14 oz can sweetened condensed milk
4 TBSP butter
1/2 cup chopped peanuts
6 oz semi-sweet choclate chips
1. Melt together 2 TBSP butter, 1 cup of the canned milk, and the bag of peanut chips. Stir in peanuts.
2. Once melted, pour into 8"x8" pan, lined with wax paper
3. Melt together the choclate pieces, along with the other 2 TBSP butter and whatever milk is left.
4. Spread over peanut mixture. Chill for at least 2 hours.
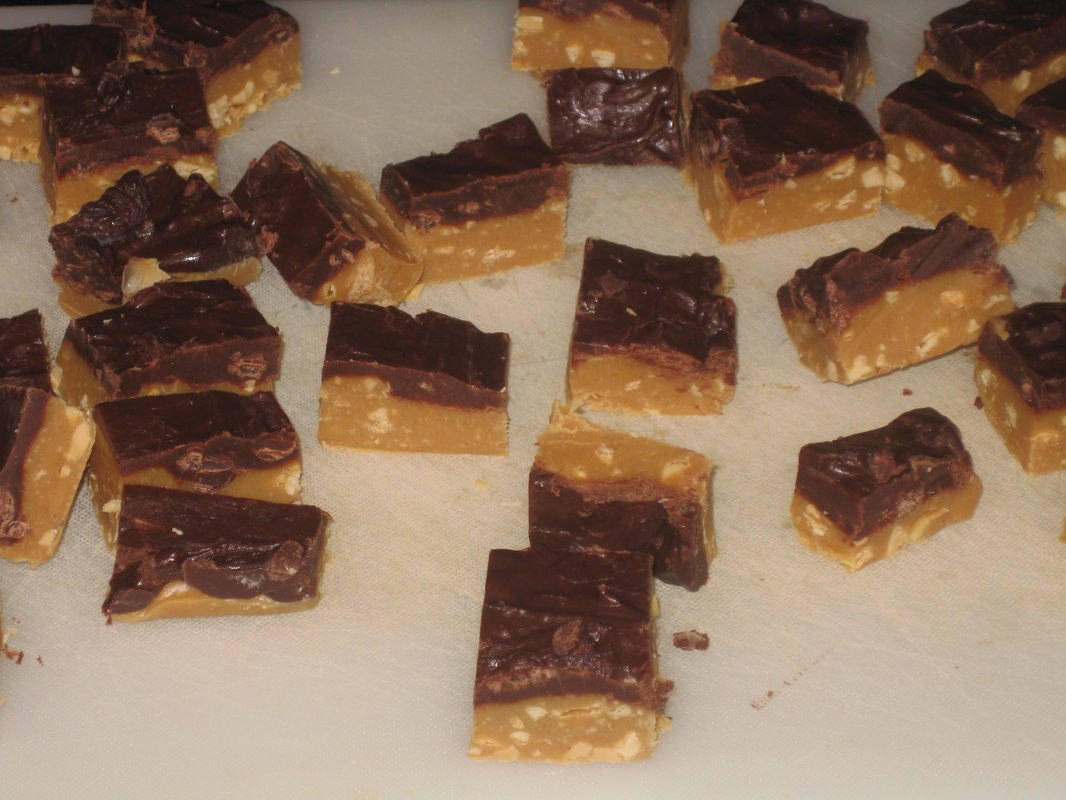
My husband saw someone eating this in a local restaurant the other day; looked at me and said, "I've got to eat that."
"That" would be what the restaurant called "Grilled Cheese Burgers". Please note it doesn't say "Grilled Cheeseburgers"!!!!!!
These things are a hybrid of grilled cheese sandwiches and hamburgers. It was pretty easy to figure out how to do them, and when I did make them they were swooningly good.......OMG great. However they are probably also what we call around here "Heart Attack on a Plate", so we certainly won't be eating them again in a hurry. I only ate a half, saving the other half for lunch today, and when I went to get it out of the fridge it was.....Gone! These things are totally irresistible.
Note: You really must use a cast iron pan for this, or your results will not be as good.
For TWO burgers use:
4 slices hearty white bread, cut about 1/2" thick (around here we use the locally made Country Kitchen Canadian White, largely because
when I was in college they hired me to sing their jingle for their radio-ads-----
more on this in a bit)
8 (yes EIGHT) slices American cheese....didn't I mention these things are a heart attack on a plate?
2 TBSP butter (see "Heart Attack on a Plate, above)
8 ounces ground beef
kosher salt and fresh ground pepper
1. Spread one side of bread slices with butter.
2. Preheat cast iron pan over medium. Grill buttered-side of bread slices until golden.
3. Place 2 slices of cheese on each bread slice. Pop into a medium oven (grilled side of the bread down) until the cheese gets melty.
4. Meanwhile, combine the beef with the salt and pepper. Form into two thin (about 3/8") SQUARE patties that will fit the bread slices.
5. Fry the patties in the cast iron pan over high heat, 2 minutes per side or less.
6. Blot the patties of excess fat with a paper towel (No, this probably won't save any calories, but will keep the sandwiches from getting gloppy)
7. Place the burgers on a slice of bread, and close with another slice of bread. Return to the pan and BRIEFLY grill (20 seconds or so per side).
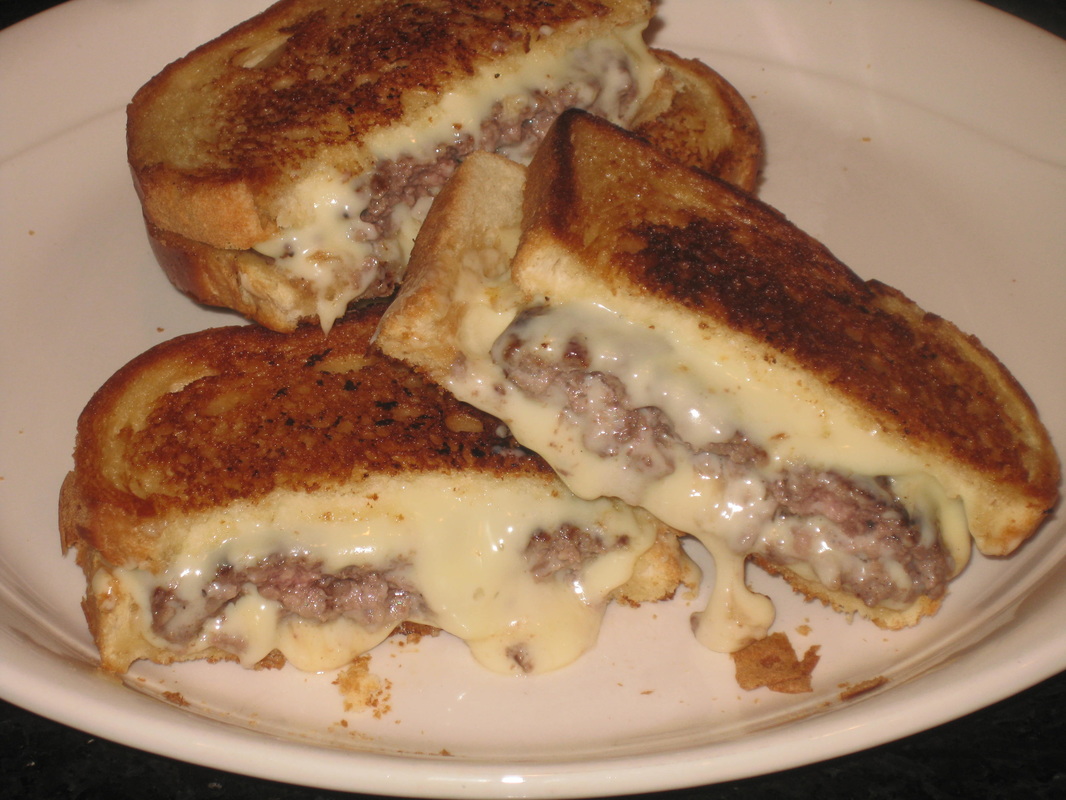
And here, for all my dear faithful readers in Maine, are the words to that jingle. If you lived in Maine in the 70's, you may remember hearing the ad on the radio. It was me singing it! I made enough money to pay for a whole semester of college!
Gramma Ames was made in Maine, so we knew when she moved in
You might as well argue with a tractor tyre, you'd have a much better chance to win
When Granny Ames moved in with us, the first thing that she said,
Was "The next time you go shopping, Dear, bring home Country Kitchen bread!"
There are things I make for dinner that I could make in my sleep: Crepes for sure, but also Risotto
I read somewhere recently that "The secret to good meals is a well-stocked pantry". And let's face it-----ALL of us who are in charge of feeding dinner to our families have occasions when we are exhausted and stare blankly into the refrigerator.
And that's when I make crepes, or risotto.
While crepes are French and risotto is Italian, both share the similar idea that if you've got the basics on hand, you're good to go with almost ANY add-in. With crepes all you need are eggs, milk, butter, and flour; with risotto all you need is arborio rice, a bit of butter, a little white wine, some cheese, and some canned broth. None of these ingredients are difficult to keep on hand.
Crepes and risotto can both be filled with just about anything that appeals. Tonight I made a risotto that used up a few things I had on hand------a bit of red onion, a bit of celery, and a bit of Thai chili (I've got WAY too many of those). I had fresh parm (though not particularly good parm, just some plain store-brand stuff), and some meyer lemons. And of course I'm trying to use that basil that's still in the garden-----I do plan to just let it die with the first frost as making pesto from it is just too much-----I'd have enough pesto to last the next hundred years. So I'm letting the basil go to seed, but there is still much that is usable.
There is also something soothing about standing over the stove, stirring, on a raw windy night on the coast. Risotto DOES take attention----but if you can stir, you can make it. Definitely not rocket-science.
Risotto is just such a "creamy bit of heaven", as my husband said tonight. For the uninitiated, it is NOT at all like rice! If anything, I'd compare it to pasta, but it's not like that either, it's just......well, as the man said, a creamy bit of heaven.
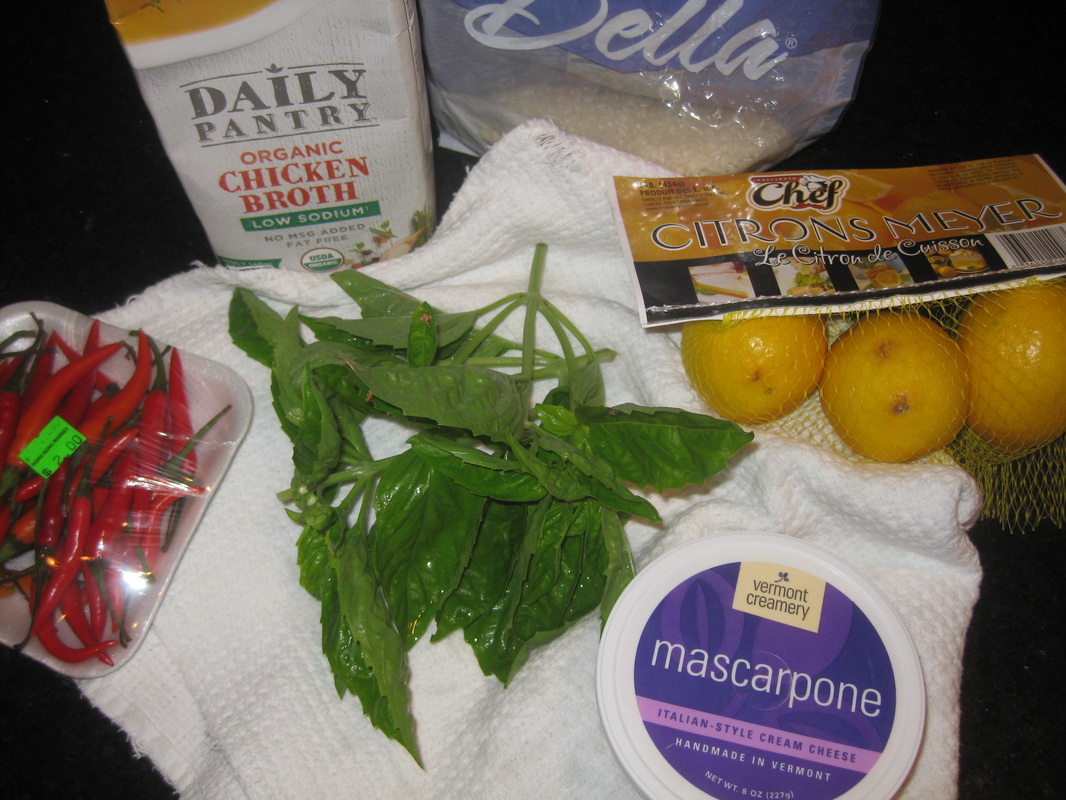
As I always say, it's not about following a "recipe". It's about TECHNIQUE. With that in mind, here is how to make a GREAT risotto......
To feed, say, two hungry people and have some leftover, use:
1-2 TBSP of butter or olive oil
Some mild onion, chopped------perhaps one small one (tonight I used about 1/3 cup red onion, since I had it on hand)
1 cup arborio
1/2 cup dry vermouth (or white wine)
4 cups low-sodium chick broth, heated to near-boil
1/2 cup fresh grated parm
Salt and Pepper (of course!)
Your add-ins
The technique:
1. Saute the onion in the butter or oil. If you are using other veggies, saute these too.
2. Add the arborio and saute briefly---about 2 minutes
3. Add the vermouth, and let it boil off----about 1 minute
4. Add the broth, one ladle at a time. After each addition, stir constantly. Don't add another ladle-full of broth until the previous one has been completely absorbed.
5. When the rice has absorbed as much broth as it can, and the rice-grains are creamy-delicate, add the cheese.
For tonight's meal, I sauteed a bit of celery and garlic, along with a tiny bit of Thai pepper, in Step 1. (and by "tiny" I mean it----perhaps 1/4 of a pepper, if that)
In Step 5 I added a lot of Meyer lemon-zest (about 4 tsp) with an equivalent amount of Meyer lemon juice. I also added about 1/3 cup of mascarpone, which made the dish even creamier. I julienned a bunch of basil, and also added that.
This was an UNBELIEVABLY good risotto. Basil and lemon have such a natural affinity; and my husband and I also felt the combination of the lemon/basil with the two cheeses was just super.
It's getting to be fondue season.......
My sister was educated in Switzerland, and back in the 60's when she was living the life of an impoverished graduate student I would often visit her there----largely to get away from my own boarding-school life. My parents were not believers in giving kids boundless spending money, and so our resources were pretty limited.
Cheese fondue (which is not really related at all to meat fondue) was pretty much invented to stretch budgets. Even 40 years ago, meat was pretty scarce and expensive in the Alps, but there was a lot of dairy (which holds true today).
(Scene from Murren, Switzerland; March 2016. High in the Alps and not reachable by car, it is the home of very fat dairy cows that are brought up there for summer pasturing! Beautiful spot, aside from the fact that I felt I almost needed supplemental oxygen when I hiked there (yes, I hiked to the town---contact me for more beautiful photos of Murren and my tips on hiking there from Interlaken).

Fondue was also a way to stretch day-old (or more) bread. In the late 60's it was cheap and could be found just about anywhere. Many bread-pieces were dunked, and cheap French wine drunk, with my sister's friends back in those days.
How things have changed! Last Spring my husband and I were to attend a party in Geneva and decided to drive there from Paris. Stopping in the little Swiss village of Altdorf, we must have walked to 20 restaurants and pubs before we found one that served this traditional Swiss dish.
I do make it at home in Maine, or in Paris on nights the cook is off, a few times a year. I do it in various ways, and with slightly different cheeses, depending on what's easily available......it's supposed to be a quick dinner, so I don't over-think it and neither should you.
But one thing sure has changed since those halcyon days of the late 60's----the price of cheese! I grabbed 12 ounces of raclette and comte at the supermarket, and they were $19.95 per pound! I almost fainted.
This is the basic recipe and method for a good fondue that serves 3 or 4 people:
1 clove garlic
1 lb cheese. Use a mixture of raclette and gruyere, emmentaler, and/or comte. The latter 3 are nuttier than the raclette, so it's a matter of taste.
1 TBSP cornstarch (not traditional, but it makes life easier)
1 cup dry white wine
fresh nutmeg
fresh ground pepper
Optional: about 2-3 TBSP kirsch
Optional: about 1/2 ounce whisky
1. Halve the garlic, and rub the inside of your pot with it. You'll be able to tell by the feel when the pot is coated with the garlic's oil.
2. Toss the cheese with the cornstarch
3. Bring the wine to a boil. Add the cheese, one handful at a time, stirring constantly until each handful has melted.
4. Add the nutmeg, pepper, and the kirsch (if using)
In Switzerland that bit of whisky is put on the side. One dips the tiniest corner of a bread cube in the whisky----just to get a few drops on the bread-----before dunking the bread in the fondue. It's quite delicious. Maybe this is an Altdorf-thing, because back in the 60's I don't remember doing this.
For dippers, I am very non-traditional. Of course I do serve a French baguette, but in my homes we really like apples (SO good right now in Maine), pears, and a tiny bit of charcuterie.
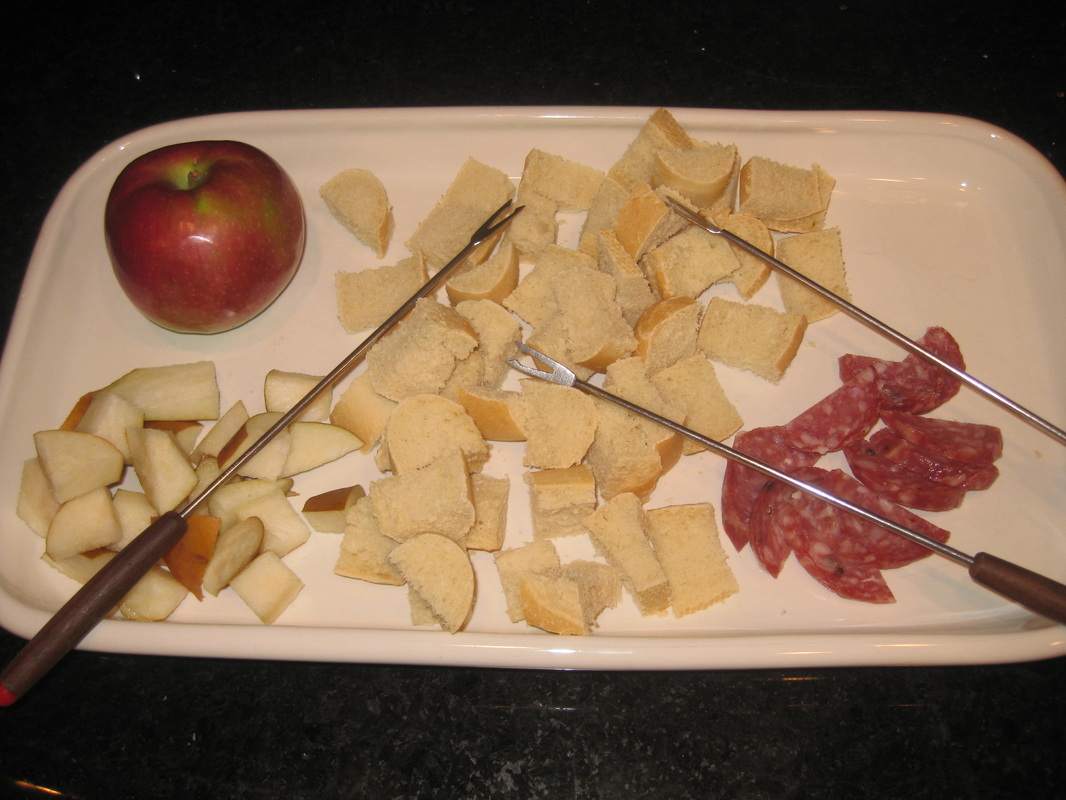
Of course this is a VERY rich dish (which is why I only make it a few times a year). But it is soul-satisfying.
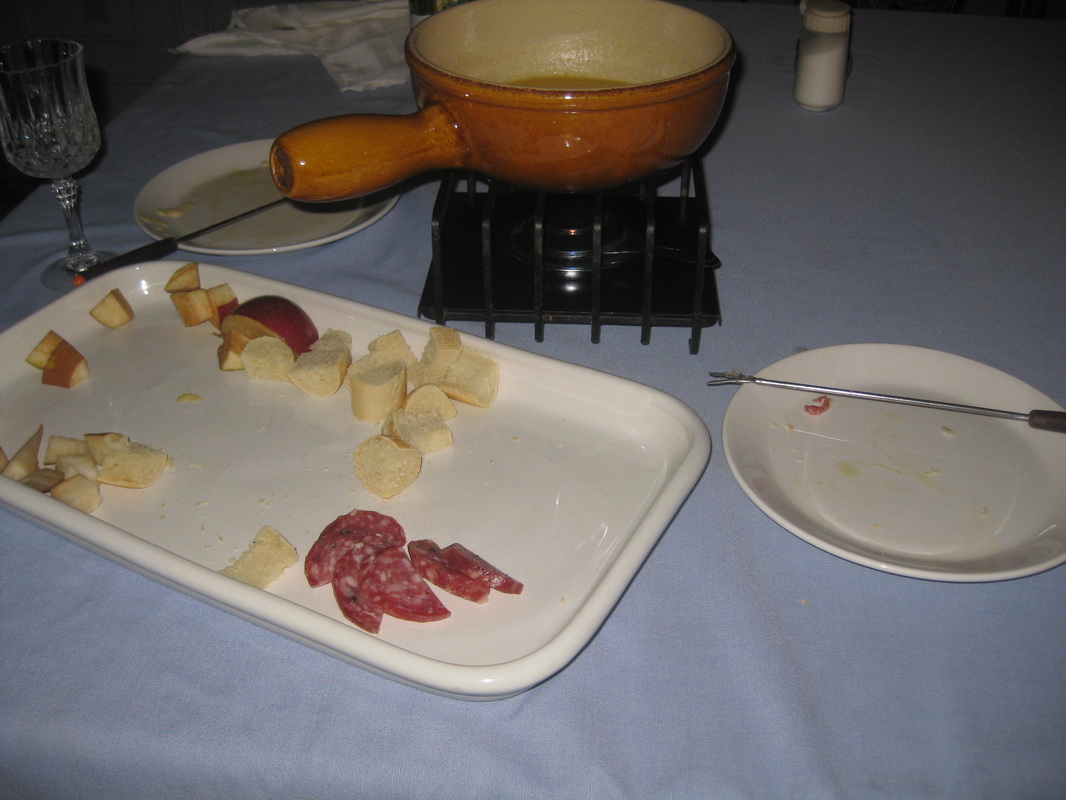
Canned soup combinations: a very easy Cheese and Vegetable Chowder
I remember one time when Steve McCusker came over to my house and found me reading some sort of pulp-fiction book------I suspect it was likely one of Robert Ludlum's, as he was my uncle. Whatever it was, it was true mind-candy. Steve lightly chastised me for reading such junk, and I recall looking at him and saying in all seriousness, "It can't always be Tolstoy".
Thus it is with cooking. Even people like myself who are obsessed with fresh ingredients don't ALWAYS have the time----or inclination----to cook from scratch.
I made this quick soup the other night. Call it "Souped-up Canned Soup". But be forewarned----because it uses canned ingredients, it is high in sodium. If this matters to you, avoid this recipe.
And whatever you do, don't omit the sherry. It really makes the flavour special, reminiscent of Newburg.
3 TBSP butter
1 1/2 cups chopped celery
1 cup shredded carrot
1/4 cup sliced scallions
2 cans Campbell's Cream of Potato soup (i.e., condensed)
1 14 1/2 ounce can chicken broth (ie., NOT condensed)
1/2 cup H2O
1/8 cup chopped parsley (yes, it's still in the garden)
dash of hot pepper sauce, such as Frank's
2 cups shredded sharp cheddar
1 13 oz can evaporated milk
3 TBSP dry sherry (NOT cooking sherry----actual SHERRY)
1. Saute veggies in the butter.
2. Add the soups, water, and parsley, and bring to a boil.
3. Add the rest of the ingredients and keep stirring until the cheese melts.
Voila. Instant dinner.
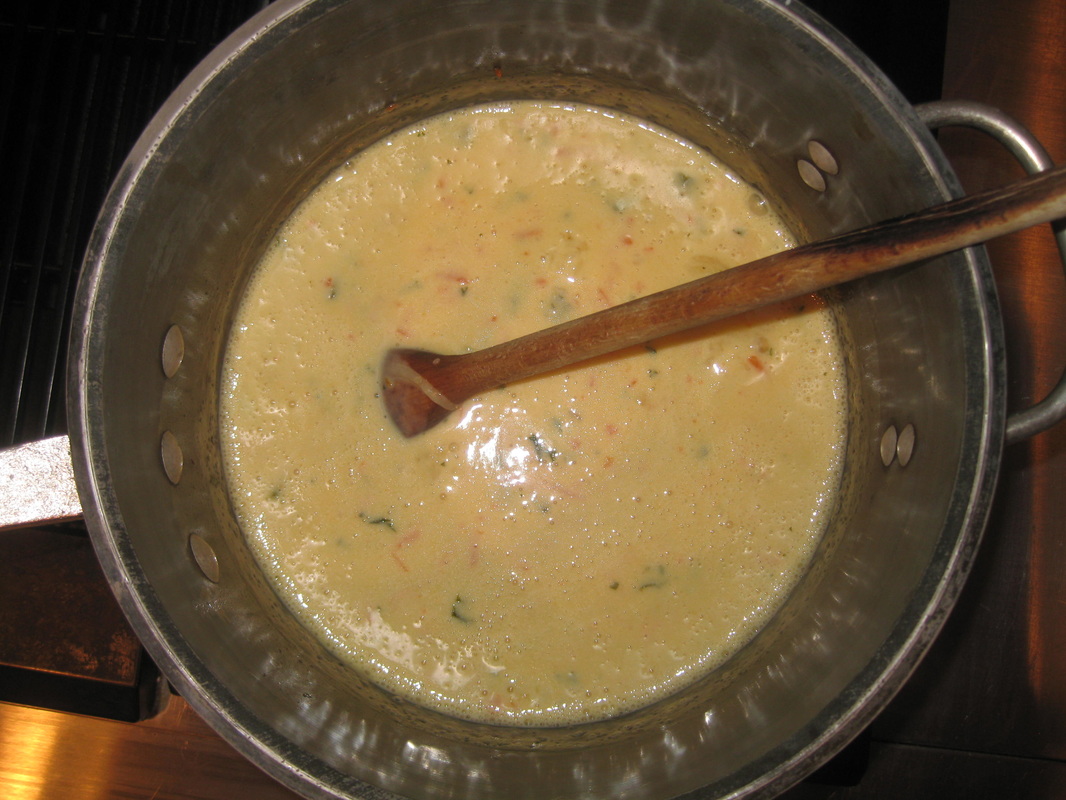
My husband and I just love flowers, and have them everywhere in the house
At my homes in the tropics keeping flowers all over the house, all the time, is easy. We pick masses of them every day, and the next day there seem to be even more growing in the places outside where we picked them.
But here in Maine, we have to have them delivered during the off-season, which we do just once per week by choosing blooms that last for a bit, like orchids and lilies.
I am so fortunate to have a husband who adores giving me flowers.....and also enjoys growing some himself, even though we employ a gardener. My husband is always giving me beautiful bouquets from the garden, which to me are more loving and beautiful than anything he could buy from a florist.
Here in Maine, our flower-season is coming to an end, and soon we'll have to start ordering them again. But in the meantime, my husband is cutting what's left in his garden, and giving them to me.
We always, always have flowers on the table at dinner. I thought this bouquet he made me today was just so pretty that I had to share.....am I married to a great guy, or what!

Antigua meets Raiatea: The simple, boozy beauty of Bananas Foster
I don't know how many versions of Bananas Foster I've eaten in my lifetime. Everybody seems to have a slightly different take on it----and I myself make it in a few subtly different ways.
This dish is all over the Caribbean, and is very popular in Antigua. Some people say it was invented in New Orleans, but I seriously doubt that-----I think it was the New Orleans version that caught on in the U.S., because it was in New Orleans that ice cream was added. But my grandmother remembered eating it in Antigua at the turn of the 20th century (although it obviously wasn't called "Foster"); and indeed it's elements-----bananas, rum, cinnamon, brown sugar-----are not Louisiana, but West Indies.
Remember Occam's Razor? (I know Liz McCusker doesn't, or she wouldn't have come up with some of the convoluted "theories" she's presented over the course of time). Well sometimes that applies to cooking, too. So put down that vanilla ice cream and concentrate on the essence of Bananas Foster.........OK, maybe with an itty-bitty tweak.
My tweak is in adding a Tahitian vanilla bean. I usually have a few hanging around, as I ALWAYS bring them back with me from my home in French Polynesia. I feel that Tahitian vanilla (which is actually grown on Raiatea or Tahaa) is superior to the Madagascar version.
That "1900" on the package is, unfortunately, the price in cfp. I agree it's a lot, but you get what you pay for. The farmers of La Vanillere are my neighbors and friends-----it is a family-owned and run operation.
So----vanilla bean in hand, and the ice cream safely back in the deep-freeze, here is
OCCAM'S RAZOR BANANAS FOSTER
I have actually heard some people call this a "healthy" dessert. Well it's not chocolate cake; but geez, people, it has rum in it! Having gotten back down to my slender college-weight of 110 (I'm 5 feet 7"), I'm still going to go easy on this decadence.
You will need:
a couple of bananas, halved lengthwise
1 1/2 TBSP unsalted butter
1/4 cup brown sugar (I think light looks a bit better than dark)
one Tahitian vanilla bean
1/4 cup rum (I prefer Jamaican black rum to Antigua's amber rum for this dish....but any port in a storm as they say)
1. Melt the butter and brown sugar together in a fry pan.
2. Add the bananas and saute for about 2 minutes.
3. Flip the bananas over, and scrape the vanilla seeds into the sauce, then toss in the pod. Saute for a minute or so.
4. Add the rum and ignite. NOTE: I DO NOT RECOMMEND FLAMBEING IF YOU HAVE AN ELECTRIC COOKTOP.
5. You can then serve the bananas still aflame, or wait until the alcohol burns off.
In the image below, you can see the orange flames reflected on the right side of the pan and on the backsplash. Carefully remove the bananas so they don't break, and pour the sauce (still flaming if you wish) over each serving.
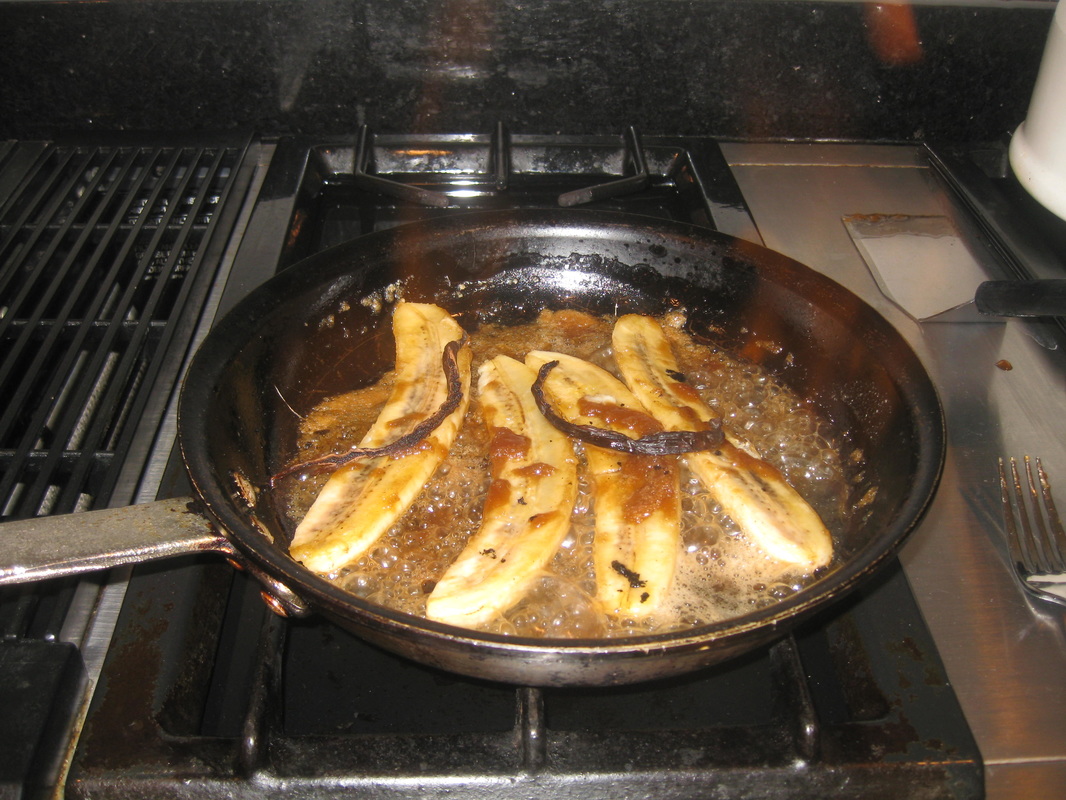
The "second planting" of green beans---they always need a little help!
The growing season is short here in Maine, but most farmers can get two plantings of green beans. The yield from that second planting is at the markets now. But this year (as with the first planting) the beans are a little thin and lacking some flavour. Green beans need a lot of rain, and we haven't had that this year.
This tart is a great way to use this bounty from the farmers' markets.......and as usual serves to use a tiny bit of meat for big flavour. Because this tart serves 4 people easily (or even 6 people, if rounded out with some rice as a side-dish) we are talking here about 1 slice of bacon per person, which won't kill you. There is extra protein from the eggs------I used 5, so depending on how you slice the tart, it's more or less one slice of bacon and (probably) less than one egg per serving.
The first thing to do is to get away from your thought that this is a quiche------it is far, far, from a quiche. There is no cheese or cream/milk whatsoever. It's all about the veggies.
The Pillsbury Dough Boy made my crust, except that I pressed 1 TBSP sesame seeds into it before I par-baked it (weighted) for 14 minutes.
I fried the bacon---just 6 slices and then briefly fried the 1 pound (Yes, ONE POUND!) of green beans in the same pan as the bacon. There was probably a tsp of bacon fat in the skillet-------if you have more than that, pour it off before frying the beans. To the beans (while they were frying) I added 1/2 tsp salt. Just 5 minutes is all the time this takes.
Off the heat, I added quite a few sliced scallions-----probably about 1/2 cup. Then I dumped it all into the par-baked tart crust. It should look like this:
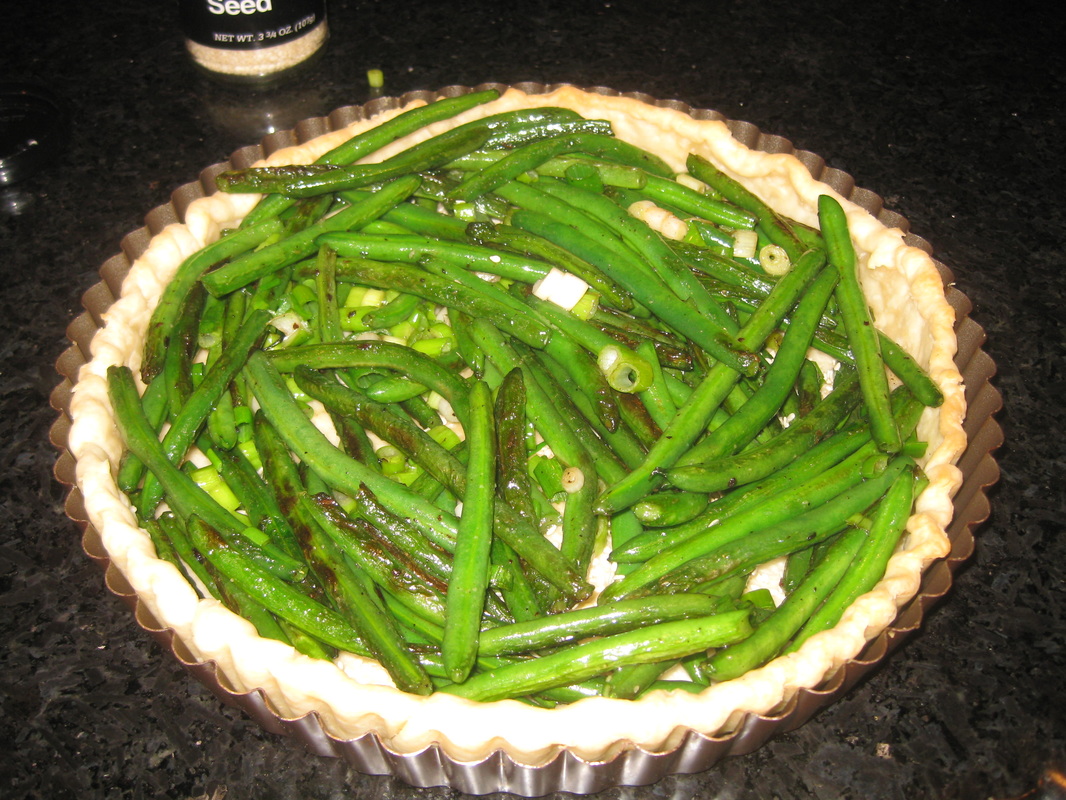
But one of the things that so much distinguishes this delicious tart is the addition of a bit of gochujang. That's a Korean fermented chili paste which is widely available at any Asian market (and even my local supermarket) and will keep for a scary-long time in your refrigerator. Seriously, a container of the stuff can last for years (if you keep the air out).
So the egg mixture is: 5 eggs, 2 TBSP gochujang, 2 TBSP water, and 1 tsp sesame oil.
Bake this at 375 for about 20-25 minutes. Pop it out of the oven, and top with the bacon, which of course you've crumbled, and a sprinkling of sesame seeds.
Yum! You've got an elegant, vegetable-forward meal with a bit of protein and very little fat.
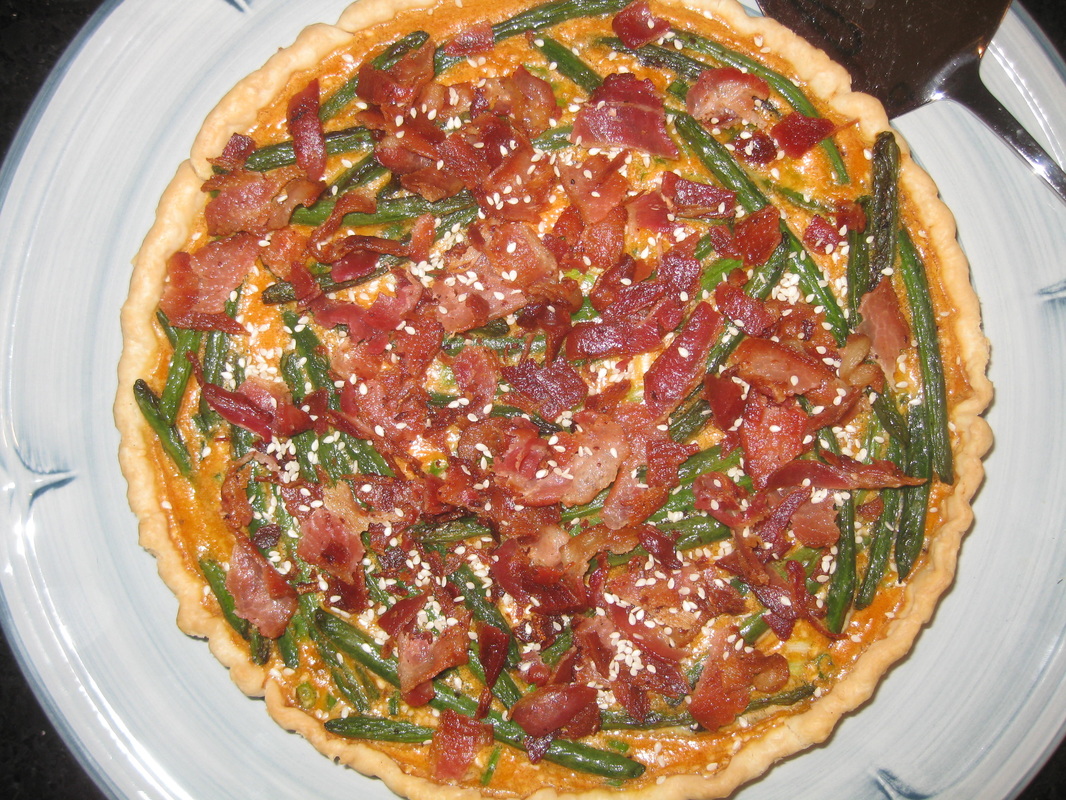
A bit of Asian-Mexican fusion tonight----and oh, was it good!
I knew I was going to have a really busy day today, and so at 8:00 this morning I put a very small (1 1/2 lb) pork shoulder roast into the crock-pot. Well, there's not much to do with pork shoulder other than turn it into pulled-pork----it's really not a great cut of meat. But a local farmer had given it to me, and I didn't want to waste it.
I can make pretty good pulled pork-----just like everyone else I know, because it's kind of a no-brainer. So I was thinking, "How can I do this in a way that's a bit different?", and thus I put it in the crock-pot with some Asian ingredients instead of the boring BBQ-sauce.
I used 1 cup coconut milk (I had an open can in the fridge), 2 TBSP red curry paste (again, I had an open jar in the fridge so used it up), 4 crushed cloves of garlic, about a 3-inch piece of ginger root (peeled and sliced), one small onion (simply quartered), 2 cups low-sodium chicken broth, and 1/2 cup brown sugar.
Pork shoulder takes a damn long time, and so I left all this in the crock-pot (on low) for 9 1/2 hours. After that I shredded the meat, and boiled down the broth very significantly----until it was thickened. At that point I mixed a bit of the broth with the pulled pork.
This recipe gives you a mild pulled-pork with a hint of Asian flavours. I decided to do the fusion-thing, and ramp it up by making taquitos.
Taquitos are of course by definition "little tacos" but that's not really accurate. If you make them bigger, they are called flauta. In this house we like the tiny ones. They are by definition always made with corn tortillas, and are fun to eat!
They are, however, a bit difficult to fry and require a really deft hand. I made two meals'-worth (they freeze beautifully) and even though I am accustomed to making them, even I lost two---the temperature and technique have to be exact.
I drizzled a bit of low-fat sour cream on these, and some chopped picked jalapeno (that I'd canned myself last year) a bit of scallion, and the real prize------some local radish.
These were INCREDIBLY good, and cheap to make------no TGI Friday's prices.

We had these with nice crispy lettuce wedges, with blue cheese dressing (My tacquitos contain no cheese, so the lettuce/blue cheese combo as a side dish works INCREDIBLY!
We've been in the mood for cheese lately....must be a Fall thing
Last week's Individual Souffles (see below) proved so popular that I made them again-----but this time used a good roquefort and about 1/4 cup of the garden's chives-----I added no meat at all. I also omitted the leeks, and amped up the eggs to 5, and did not use any cream of tartar.
This resulted in light-as-air souffles, with a strong roquefort presence. They were great, and quite different from last week's.
So it depends on what you are looking for-------last week's recipe resulted in a more substantial souffle; this week's is more for a light meal.
These browned so perfectly and rose so perfectly----beautiful souffles!
In either case, we are really liking the little individual ramekins (painted with a bit of butter and a dusting of reg-parm). They are just the perfect size for individual servings.
I served these with local corn, but they'd be great with a side-salad of baby greens.
Look at these perfect, lofty souffles!
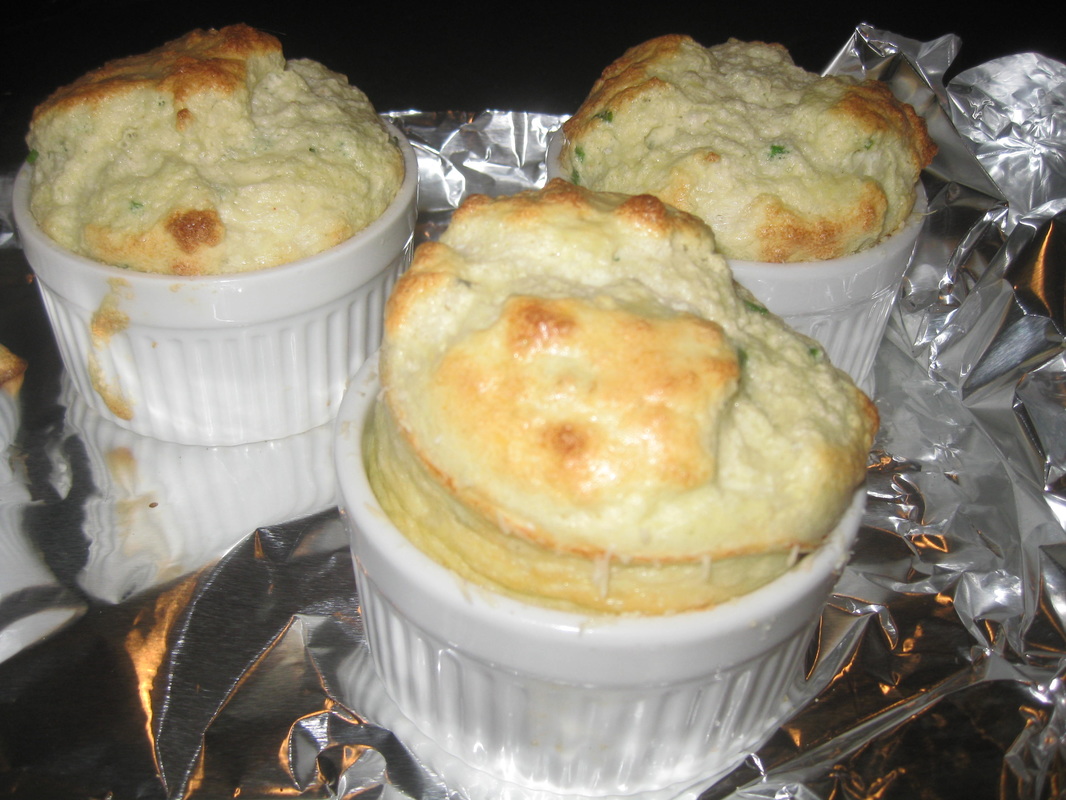
OK, so tonight we're not quite eating "local" (although I'd argue that Canada is pretty close to us in Maine). You wouldn't stand on "local" either if these berries were near you......
At this time of year, and only for about a week, here in Maine we get these amazing STRAWBERRIES from Canada. Just when we are about to give up hope that no more summer veggies and fruits will appear and that we're going to have nothing but winter squash for the next 8 months, these red beauties appear.
So sue me for needing to get one last summer-fix.
The salad I made is just mesclun, a bit of very thinly sliced red onion (yes, at least THAT's local), a local cuke, and the berries.
The salad dressing is MORE berries (YUM!!!!) along with sugar, cider vinegar, olive oil, and poppy seeds.....whirled in the blender!
I also sliced some chevre, breaded it with panko, and lightly fried it. Again using up things from the herb-garden, I tossed on some fresh dill!!
This combination was unbelievably good!!!!!!
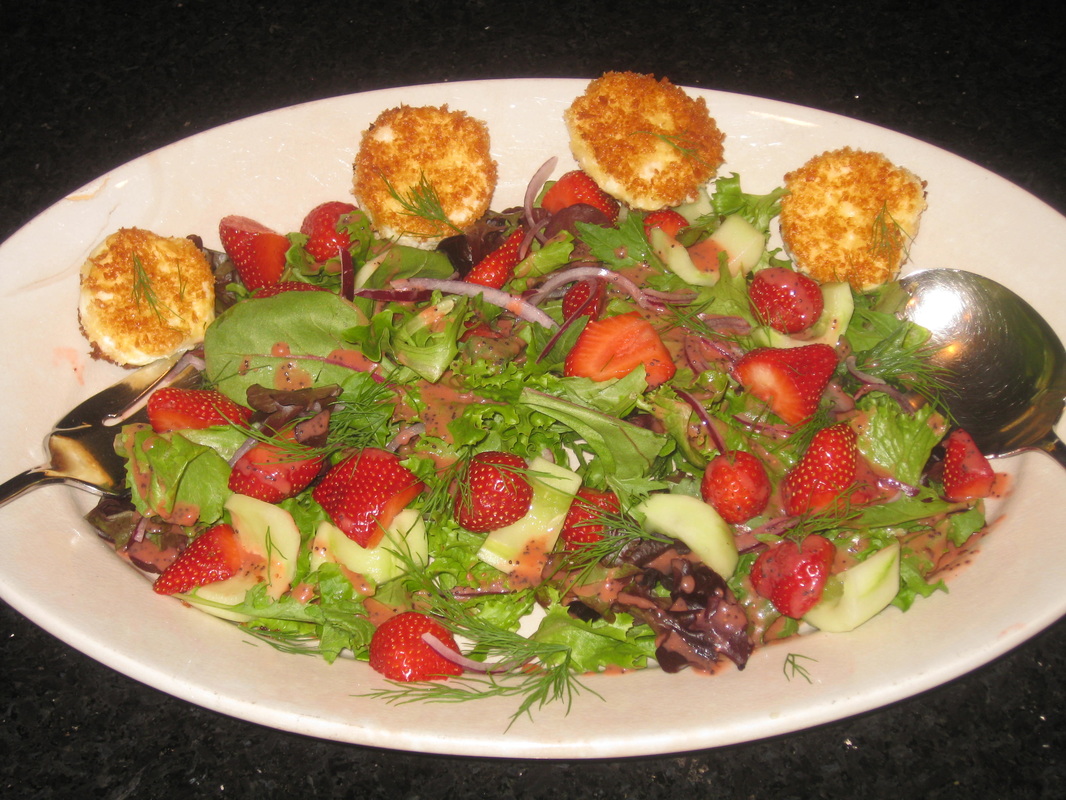
Well, this certainly qualifies as "First-World" problem.........
As my readers who are also my friends know, I am hugely fortunate to have several homes. In a few of these places, I do very little cooking and/or have staff who cooks for me (e.g. Paris, London, Antigua, and French Polynesia). But in the places that I DO cook I am careful to keep a very well-stocked kitchen, and I try to keep the same things in every kitchen I own.....because otherwise I would never be able to remember what I had stocked and where I had stocked it....because I'm too old to remember! (Of course there are local ingredients in each of my homes that I know are there.......just because they are local, so I wouldn't have them anywhere else....for example, I don't keep "Antiguan Sister Glo's" sauces in French Polynesia).
I do the same thing with my sailboat.....which technically is another home (Sail Magazine recently called the model of boat I have, "An amazingly spacious apartment that happens to sail fast"). But the boat is very slightly different, in that during the summer I am often moving between my primary home in Maine, and the boat.
So, for ingredients that I seldom use, I usually bring them from my home to the boat or vice-versa, rather than have (for example) two open containers of tamarind concentrate or palm sugar.
I'd brought a bunch of those esoteric ingredients out to the boat a few days ago, with the intention of making Pad Thai one night aboard. However I decided to come home a day early, and of course totally forgot to bring them home with me.
So there I was at home, starting to make the Pad Thai and suddenly realizing that much of what I needed to make this uniquely flavoured dish was sitting in the cabinets in the boat's galley. I was unwilling to drive back to the yacht club, and so improvised.
It came out fairly good, although it was a bit sweeter than I would have preferred and lacked a more strong peanutty flavour. But if you're in a pinch, here's my recipe for.....well, let's call it:
"Not Pad Thai"
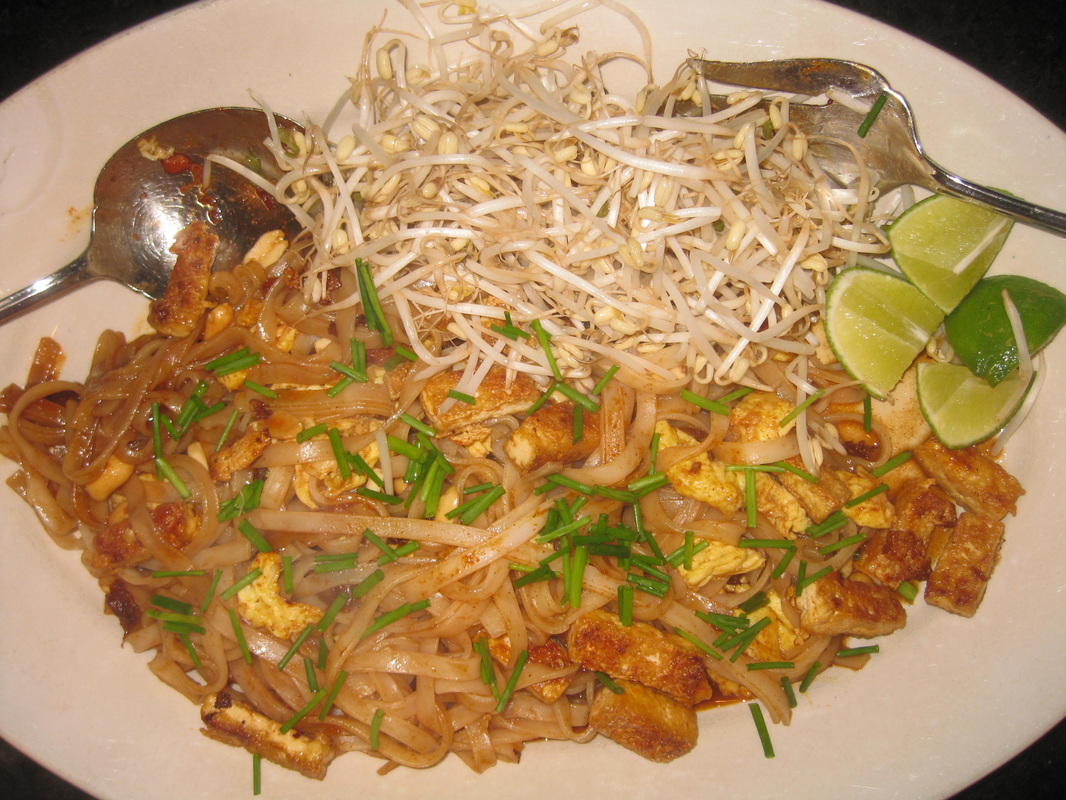
Make the Sauce:
1/4 cup palm sugar
1/4 cup strong vinegar (e.g. white vinegar)
2 TBSP soy sauce
1 1/2 tsp tamarind concentrate
And like Hamlet said, "Aye, there's the rub". I'd left the tamarind concentrate on board. I did have some ACTUAL tamarind in the fridge. But how much to use? I guessed at it , and didn't guess well. The concentrate is apparently REALLY concentrated. So my version of this didn't have enough of that unique tamarind flavour which is such a big part of pad thai.
I'd also left the palm sugar on the boat, so used white. Ugh, too sweet.
Anyhoo, get the right stuff, and boil this mixture just until the sugar dissolves. Set aside.
Make the noodles:
Using 6 ounces of pad thai noodles (i.e, the 1/4"-wide rice noodles), cover them with boiling water and let them sit until opaque-white and very pliable. This will take about 30 minutes. Rinse at least TWICE in cold water and set them aside in the colander.
Fry the tofu:
Cut about 6 ounces of firm tofu into bite-size pieces. Stir-fry in your wok in 1 or 2 TBSP of peanut oil until crispy on the outside, tender on the inside.
And that was problem #2----i'd left the peanut oil on the boat, so used regular vegetable oil instead. This omission made my version a bit less peanutty-------and I do prefer pad thai with a strong peanut taste.
Put it together:
1. Beat two eggs. Stir fry these in a bit of peanut oil (sigh) until scrambled, separating them into bite-size pieces as you scramble. Remove them from the wok and put them in the dish with your fried tofu.
2. Stir-fry 2 cloves of garlic for about 30 seconds. Add the noodles, 3/4 tsp salt, 3/4 tsp hot mustard powder, 1/2 cup roasted peanuts, 1 1/2 tsp paprika, the sauce, and the eggs and tofu back to the wok and stir-fry about 2 minutes until hot.
3. At this point you may add 2 cups bean sprouts, however we prefer ours on the side so each diner can do a "mix-in" and because we like the contrast of the very crunchy fresh bean sprouts against the other textures. We also like about 1/4 cup fresh chives from the garden, and some lime wedges.
Looking at the sea, contemplating Autumn's beginning
Each evening that we are still able to eat out on the terrace is a gift. We've had some wild seas lately----so much so that we can sometimes feel the spindrift on our faces when the waves break over the Point. But the other night was calm, though a bit on the cooler side----perfect for eating on one of the terraces, with just a sweater........
As my loyal readers know, when I have extra time, such as on a rainy afternoon, I'll often make things that I can put in the freezer and later use for fast meals. A while ago I'd made some Chili Meatballs which I'd then frozen. The recipe was adapted from one on Epicurious.com:
1 Ancho chili
1 slice hearty white bread, pulverized in a food processor
3 TBSP milk
1/2 lb ground beef
1/2 of a beaten egg (2 TBSP-----I give the rest to my dog!)
1 clove garlic
1/4 cup cilantro
1 tsp ground coriander
fresh ground pepper, to taste
sea salt (since I'm by the sea), to taste
small amount of olive oil
1. Put the ancho in about 1/4 cup boiling water, and allow to stand until soft (20 minutes). SAVE THE WATER. Chop the chili,
2. Combine the chili with all the other ingredients., then form into bite-size meatballs.
3. Cook the meatballs in a skillet in a bit of olive oil.
At this point you can freeze the cooked meatballs. Put the ancho-water in a jar and freeze that, too--------I used it in the following recipe, but it can be used to flavour many different kinds of Mexican and Latin dishes.
So because of the slight chill in the air the other night, I used the meatballs to make a Black Bean and Tomato dish:
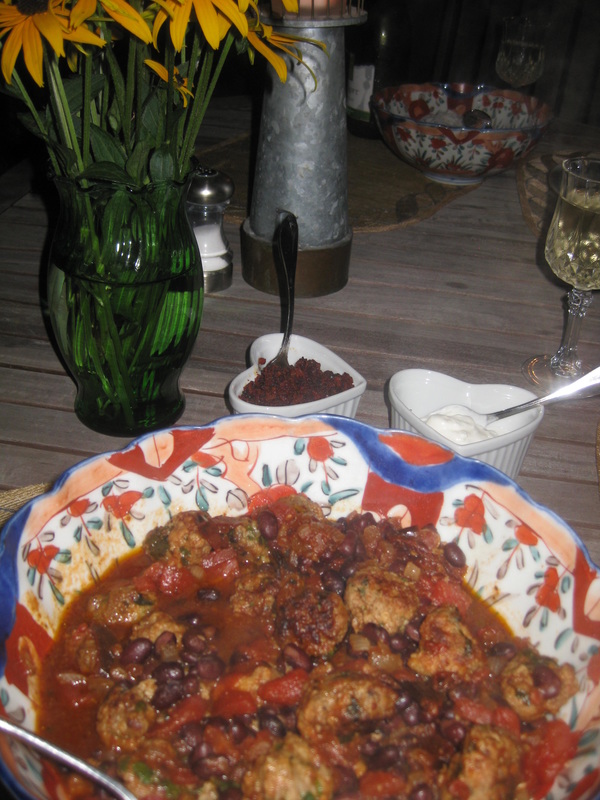
And no, that's NOT a pepper grinder! (though it surely would put my mom's former pal Rubiroso to shame, LOL).That's a candle shaped like a lighthouse. My husband and I find it amusing!!!
The easy sauce is made from 1 can black beans, 1 can diced tomatoes, a bit of onion and garlic (sauteed together until softened), a bit of brown sugar (perhaps 1 1/2 tsp), a bit of MALT vinegar (in an equal amount as the sugar), 1/4 cup beef stock, 1/4 cup ancho-soaking-liquid, 1 TBSP tomato paste (to bind things together) and 1 1/2 tsp SMOKED (that's important!!!) paprika.
Combine all with your cooked meatballs and bake at 400 degrees until the sauce is reduced .
I took Epicurious.com's suggestion and sauteed a little DRY Chorizo (DO NOT USE FRESH!!!!) which I whirled in the food processor That along with some sour cream made a super-duper garnish/topping. I served this with rice, and we both thought it was a fantastic, easy meal.
Can there be too much basil? I think the answer is "Yes"!!!!!!
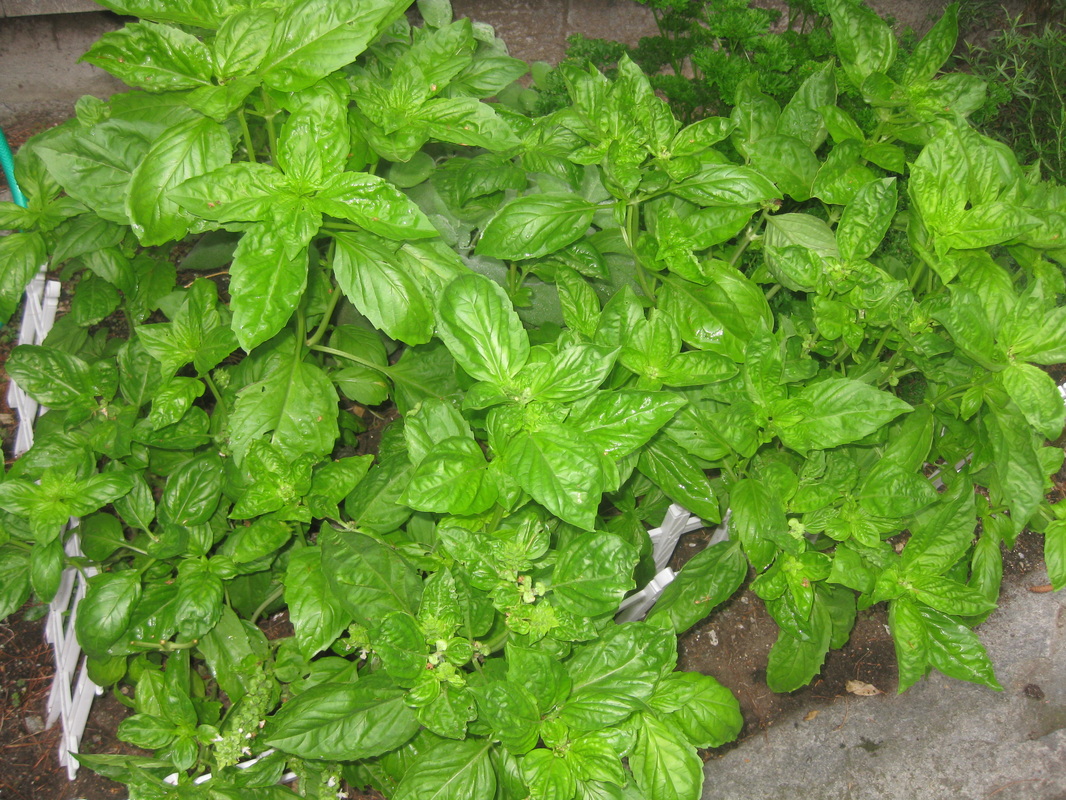
Not sure what happened here----I think my gardener went a little nuts last spring. And this is just what's outside my kitchen door! There's more in the vegetable garden.
Well there's only so much pesto a person can eat, so fortunately basil is a staple of Thai cuisine. Obviously this isn't Thai basil (which has purple stems and smaller, more pointed leaves) but it works pretty well in Thai dishes.
The other night I made another Thai noodle salad, but changed it entirely from the one I made a couple of weeks ago. This time I used pad thai noodles instead of ramen, and kept the whole thing much simpler by omitting the fruit, tomatoes, and cilantro. I changed out the arugula for romaine, and added a fresh-from-the-garden cuke.
I had a small piece of flat-iron steak, which I marinated in lime zest, nuoc mam, 1 1/2 tsp of sugar, and a TBSP of oil. I marinated it for over two days, so it was incredibly tender by the time I grilled it!
For the dressing, I used the juice of one lime (easily done as I'd used the zest for the marinade), 1 TBSP nuoc mam, 1 1/2 tsp sugar, 1 1/2 tsp water, and 1/8 tsp crushed red pepper. Flat Iron steak takes no time at all on the grill, and the noodles cook in 4 minutes. Easy, easy dinner (but you have to plan ahead!!!!)
A meal with a great story: Sweet and Sour Pork in Guangdong
I was so fortunate in 1994 to be part of a U.S. Trade Mission to China. I was living in Tokyo, and nobody was more surprised than I was to be asked to be part of the delegation to China------particularly because most of the people invited were FOB (as in "Friends of Bill (Clinton)"; something that as a staunch Libertarian I definitely was not.
The mission ended in Hong Kong, which was a great place back in the 1990s. After the FOB left, I decided to stay for a bit of R&R, since Hong Kong is such an amazing city. While doing so I got to thinking........what is China REALLY like if you're not there on the U.S. Mission? Literally while on the Mission, the Chinese stopped traffic to let us through intersections in our limousines.
So I booked a "tourist" trip to Macau. The trip from Hong Kong to Macau was via a fast (and to me, wholly frightening) jet-catamaran. After that I was on my own to find a bus and a sympathetic border-agent........the latter being pretty easy to find. Once in China I got on another bus.
It was an amazing trip (though I was always a bit frightened). And there is always something about food that brings people together.....and more than that, makes people remember a specific time and place.
[OK, This really doesn't work for...say, Ireland, where I have been over 50 times and can't remember one single meal. But it works for places like France or China, which are more food-oriented].
So, that's where I learned how to make this wonderful dish. Talk about being "better than take-out"!
Like so much of this "Cook's Corner", what I learned from the lovely Chinese lady who served me this in 1994 was that it's all about technique. She also told me that there is a saying in China, "The blacker the wok, the better the cook". Mine's not black enough yet!
So if you think you don't like sweet & sour pork-----because of what you've had at your local take-out place----I can only tell you that you've never had authentic Sweet and Sour.
Use the "Contact" page if you'd like the easy recipe!
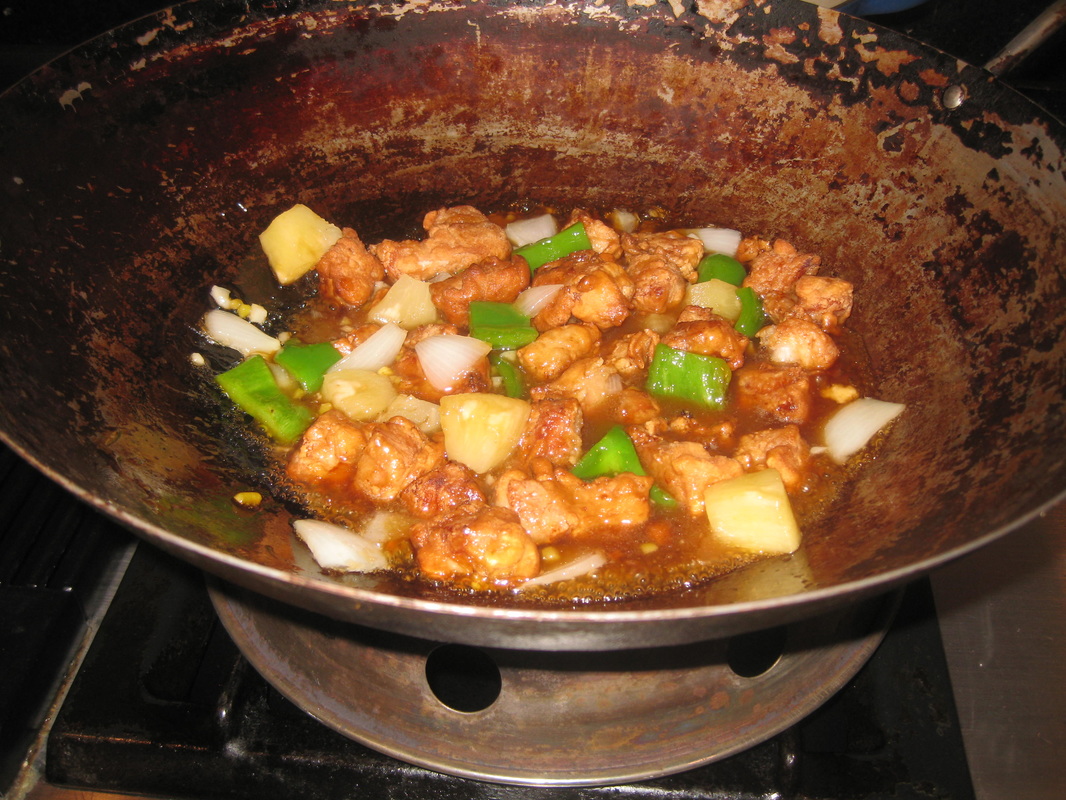
One of my loyal readers recently asked if I had any ideas for "stretching" ground beef......
As you know, my go-to burger is half ground chuck and half ground sirloin, with a good bit of kosher salt and freshly ground pepper.
As I started to think about the reader's question, I of course thought of adding a bit of beaten egg and some fresh breadcrumbs, both of which are good stretchers for ground beef.......however they really change the texture of the burger into something with a texture more akin to a meatball, so clearly I was going to have to address that issue.
I like Mexican food, so I started thinking about doing something along those lines. I also had some fresh carrots in the garden and a variety of peppers in the garden, which I felt couldn't hurt.
Voila! I give you Anaheim Chili Burgers!!
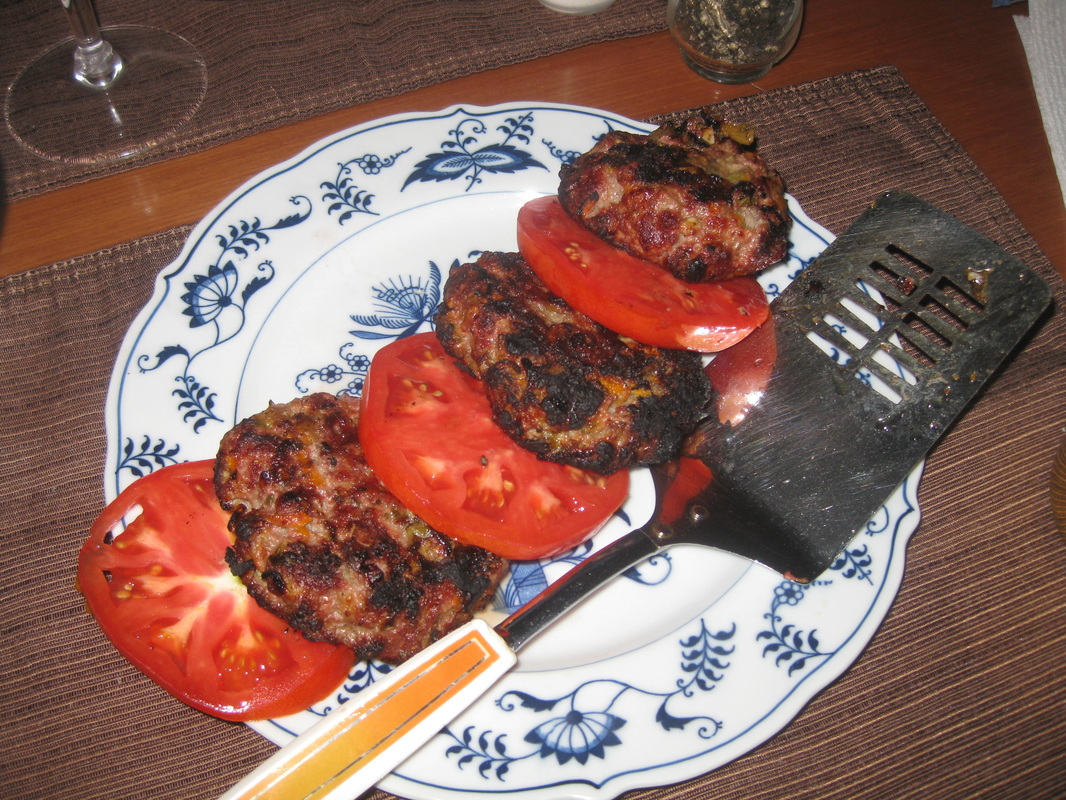
You will need:
2 Anaheim chilis
A small egg (3 TBSP beaten)
1 slice of bread, pulverized in a food processor
4 tsp water
3/4 tsp dried oregano leaves
3/8 tsp salt
1/8 tsp fresh ground pepper
1 large clove garlic, minced
3/8 cup shredded carrot
3/4 pound ground beef (half sirloin, half chuck)
1. Roast the peppers. There are several ways of doing so, so just use your favourite method. If you've never done it before, one way is to put them on a foil-lined pan in a 425-degree oven for 20 minutes, or until they are charred all over. Take them out of the oven, and fold the foil around them. Allow them to steam inside the foil for another 20 minutes.
After that, peel the charred skin off the peppers and then cut them up, removing seeds and ribs, and coarsely chop.
2. Mix all ingredients together, and form into 4 burgers.
3. Grill over medium heat until done----about 10 minutes. Note what a nice crunchy char these get on the outside!
We liked these with some guacamole, and of course the tomatoes which are now in season. I don't think they need buns at all, because of the Mexican flavour. They taste great with fresh corn on the cob!!!
Thai food----one of our go-to meals, particularly the salads!
In this house we love Thai food. As you faithful readers know, Thai....and Asian food in general......fits into my theme of using a small amount of meat to get big flavour.
This steak and noodle salad is no exception. In spite of using filet mignon (!) which was unbelievably tender, I used less than half a pound, keeping down both calories and the budget.
The salad includes a lot of stuff from the garden------basil, of course, since it's Thai food. I didn't grow Thai basil this year (which has smaller leaves and distinctive purple stems) but used the Italian variety I do have (and that's about to take over the garden). Mint of course is also essential, as well as our garden's cilantro. I used a carrot, which I shredded, and about a cup of shredded savoy......another thing I wish my gardener hadn't planted. I don't have arugula, so I bought that at a farm stand, along with a scallion. The cherry tomatoes (again...sigh.....we have too many of them!) are my own garden's. The mango and avocado were purchased at the grocery store.
I marinated the filet mignon with ginger, soy sauce, tubinado sugar, lime juice, nuoc mam, pepper, and sesame oil overnight, and quickly grilled it this afternoon (only 8 minutes!) on my gas grill-----then chilled it.
The dressing is a riff on a Food & Wine Magazine Thai dressing----I used lime juice, sambal oelek, peanut oil, nuac mam, sugar, honey, garlic, and kosher salt.
For this salad, you only need to turn on the stove for about five minutes------just to boil a bit of water and cook an ounce of ramen for about 2 minutes (please note: I mean ACTUAL ramen; not the stuff that's packaged in the soup aisle at the grocery store). Generally ramen should be quickly rinsed and tossed with a teeny tiny bit of sesame oil----1/4 tsp will do to keep it from sticking together.
A couple of TBSPs each of peanuts and flaked coconut are a perfect add-in when you toss the salad. I also cut up a lime, so that each diner could adjust the citrus to their own taste.
This is a fine, fine one-dish supper for a summer night. And of course we always eat Thai with chopsticks, shown in the photo on one of my sets of ohashi-iri----in this case, little ceramic bows.
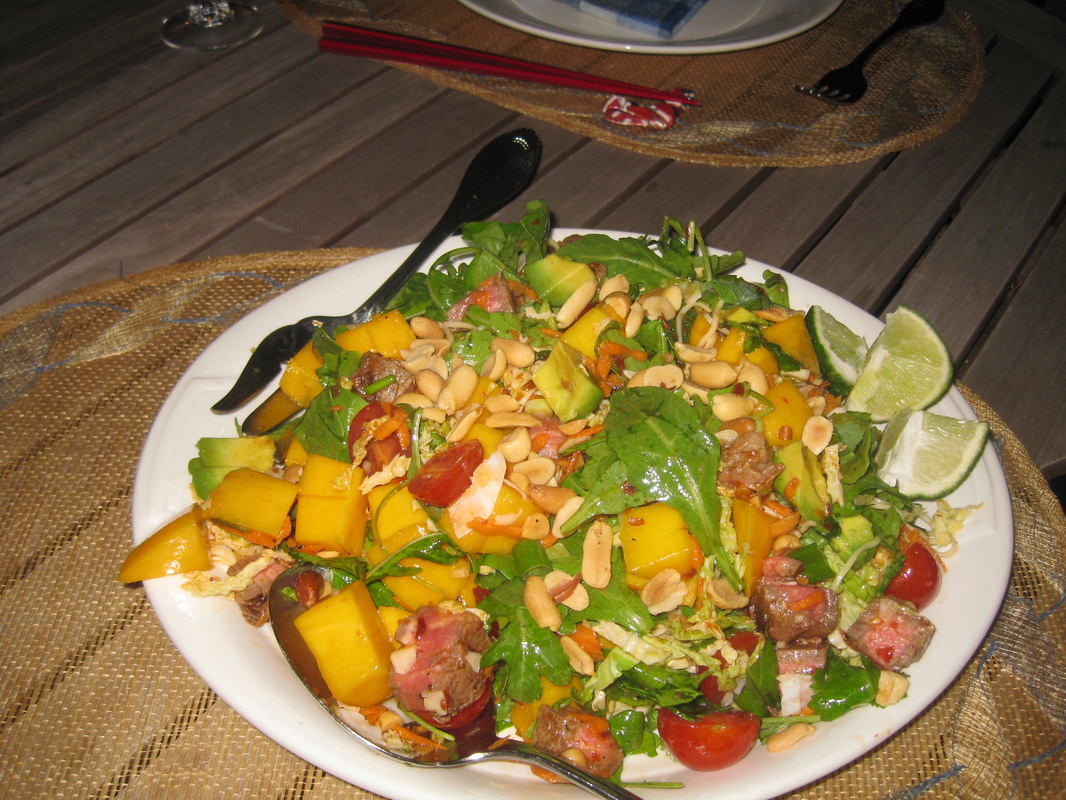
I also get asked a lot about hor d'oeuvres......so here's a not-so-easy idea......
I LOVE LOVE LOVE filo dough. I know that many of you find it difficult to use. To that I say, it's easy once you get used to it.........and yes, you may have some failures the first couple of times but after that it will become easy. Really, it will!
I made these little beauties on my boat, and they were a HUGE hit at a cocktail party. Filo dough, on a boat!
The stuffing is chevre, some chives, and diced-up dry chorizo. Don't confuse DRY chorizo with the fresh stuff! In my area of Maine, one can find tons of fresh chorizo. But dry chorizo works best for most recipes.....I have to go to a bodega in Portland to get it; but I suspect my readers in other areas of the country can find it more easily. Goya brand sells it.
Make these and prepare to have your friends swoon!

Over-the-top for brunch: Strawberry Cheesecake Pancakes with Nutella filling
A lot of you have been asking me to post ideas for breakfast and lunch, instead of just dinner. But the fact is I rarely eat lunch (unless I'm dining out with friends or for business); and breakfast is always just cereal, or if I'm at home in Paris, a croissant and espresso from the boulangerie across my little street on Isle St. Louis.
I do however make brunch at least once a week, and sometimes twice. Yet I tend to stick to the classics------Eggs Benedict (often with lobster if I'm in Maine), hash and eggs, steak and eggs, or various riffs on omelets. Today though I decided to try something seriously decadent.
I've made chocolate chip pancakes before. I've made strawberry cheesecake pancakes before. But then I got to thinking about chocolate-covered strawberries, and wondered if all these goodies could be combined.
Thus I give you Strawberry Cheesecake Pancakes with Nutella. This recipe makes about 7 pancakes, which easily serves 3 or even 4 people------these are very rich and one pancake is enough for me; my husband eats 2.
Like many recipes I post, this one is more about technique than exact ingredients. As anyone who has ever flipped a pancake knows, the key skill is getting the griddle at just the right heat (which can be hard if you only have an electric range) and this recipe is no exception.
For each pancake, pour the batter onto your hot griddle (about 1/4 cup is the right amount) and flip it over when you begin to see air holes. IMMEDIATELY spread some Nutella on the cooked side, and pour a bit more batter over the Nutella in order to cover the Nutella and seal it into the middle. When that second side of the pancake is done, flip it again to cook the extra batter that you placed over the Nutella.
For pancakes:
2 cups King Arthur unbleached flour
2 TBSP sugar
1 tsp baking soda
1 tsp baking powder
1 beaten egg
1 1/2 cups milk
half of an 8-oz bar of cream cheese
1 tsp vanilla
1 TBSP butter
Nutella
For sauce (simmer these ingredients together for about 10 minutes):
1 quart fresh strawberries
1/2 cup sugar
1/2 tsp vanilla
2 TBSP fresh lemon juice
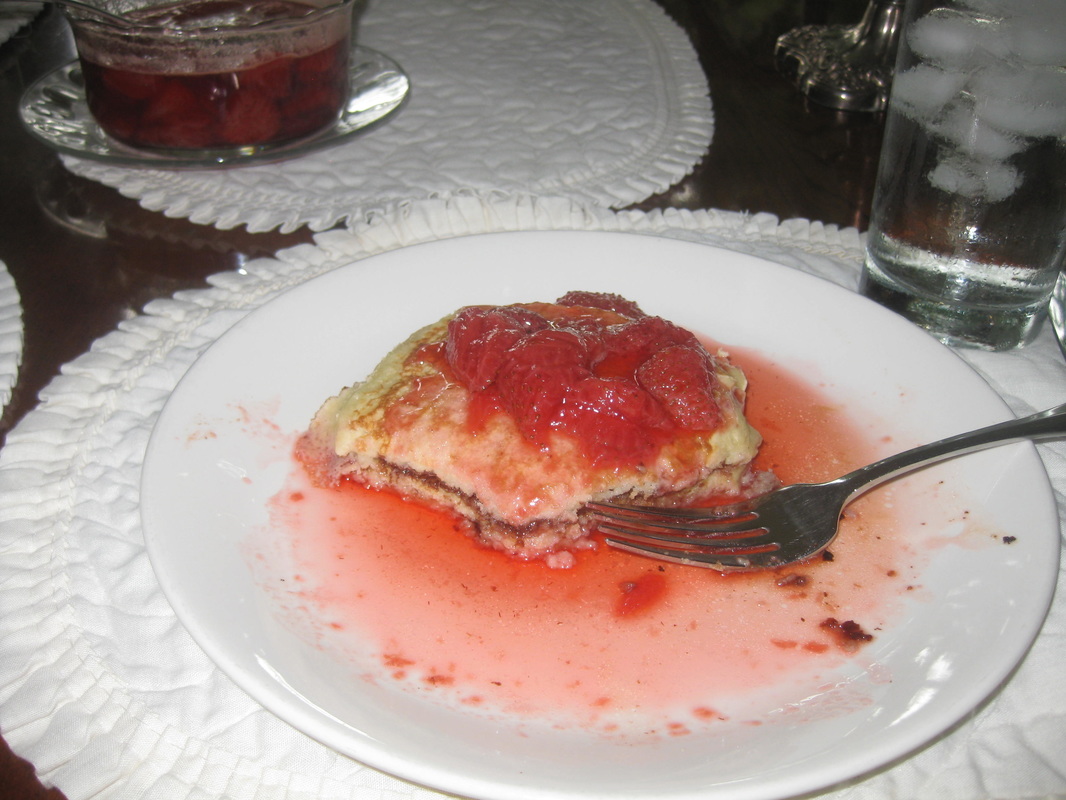
The perfect meal for a hot day-----Tropical Fruits Salad
This is something that I often make in Antigua. It's been very hot in Maine the last two days, even here on the beach. Thus it seemed like the perfect time to make an Antiguan-style meal. [It also gave me the opportunity to use up some of the mint that is taking over the garden].
In Antigua I use whatever fruit is on my trees-------this generally means mango, papaya, and sometimes banana. I ALWAYS add some melon, which my maid brings up from the village.
At this time of year in Maine, watermelon was the star of this salad. As you can see in the photo, I also got out my melon-baller and added cantaloupe and some really sweet honeydew. Those two melons do well even in the drought-conditions that we've had------in fact, drier weather makes their fruit even more sweet.
But the true star of this show is the DRESSING! It's incredibly easy:
1/3 cup lime juice (in Antigua I use fresh limes off my trees; tonight I used bottled)
1/3 cup honey
1/4 cup fresh mint
Whirl those 3 ingredients in your blender-----I know you have one, since I saw you using it in one of the 3500-plus pictures you've posted, particularly of Fort Hill------then toss it with the fruit.
My husband likes this served atop butter lettuce, which makes for a pretty presentation. A multi-grain batard was all that was needed to round out the meal.
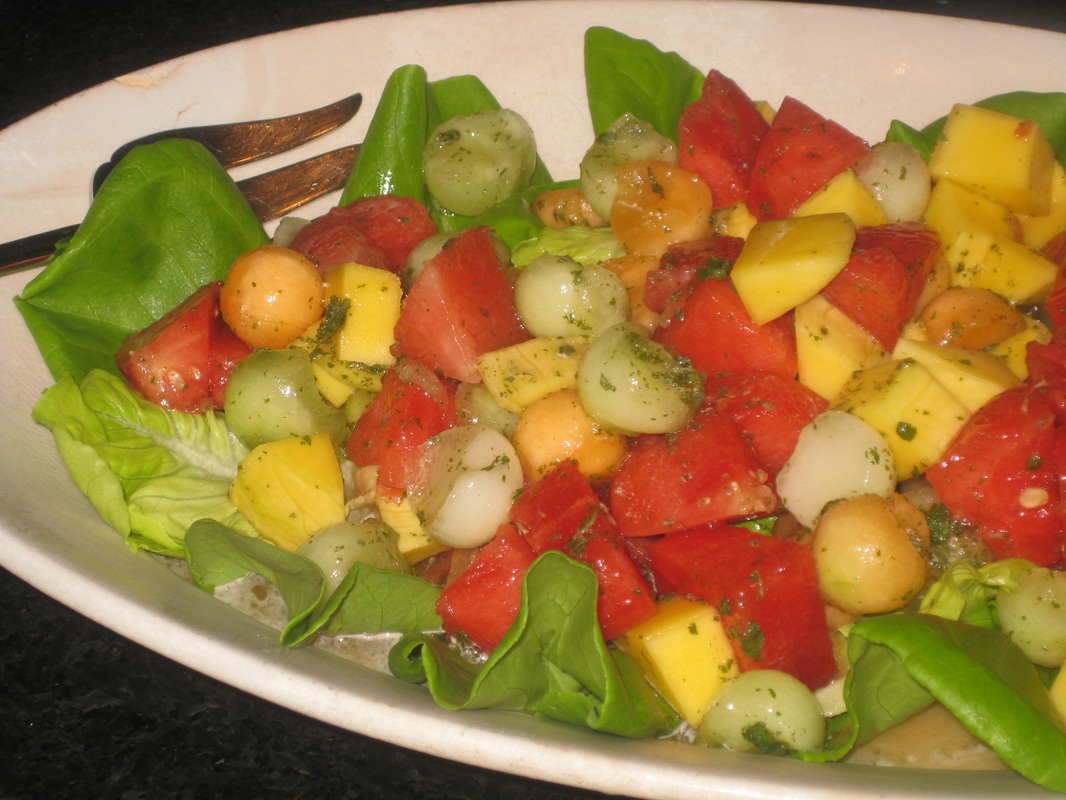
August is Caprese time!
Raise your hand if your garden is overflowing.....yup, that's what I thought!
While my husband and I love a classic Caprese salad (tomato, fresh mozzarella, and fresh basil) tonight we changed it up a bit and made a tart.
I did use the Pillsbury Doughboy's pie crust. Par-bake that (and at the same time roast a head of garlic), and then fill the par-baked crust with a mixture of ricotta, fresh parm, and whatever Italian herbs you have in the garden-----I used fresh oregano, marjoram, and rosemary. Moosh in the roasted garlic.
Top with your garden's tomatoes and bake at 425 degrees for about half an hour. Sprinkle some fresh basil on it. It's great with a drizzle of balsamic glaze (Boil two parts balsamic vinegar with one part sugar until it coats a spoon). I usually serve this with lettuce from the garden.

A lovely summer vegetable and ricotta gallette----as easy as (no, EASIER than) pie!
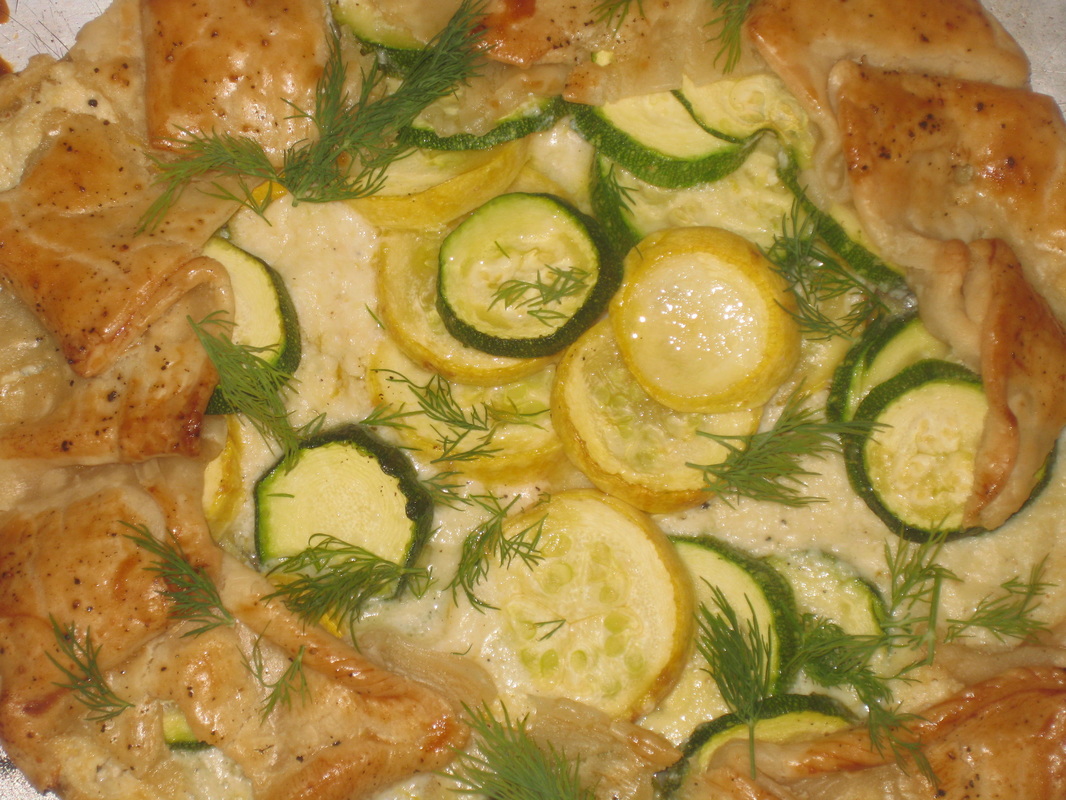
Gallettes truly are easier than pie. I made this one on the boat.
The summer squash/zucchini are around now at the farmers' markets, or perhaps in your own garden, and as you can see I garnished this one with my garden's dill.
It was absolutely delicious. Use the contact form for the exclusive recipe!!!!
Soft Tacos with "Crack" Chicken.....Oh Yummmm!!!!!!
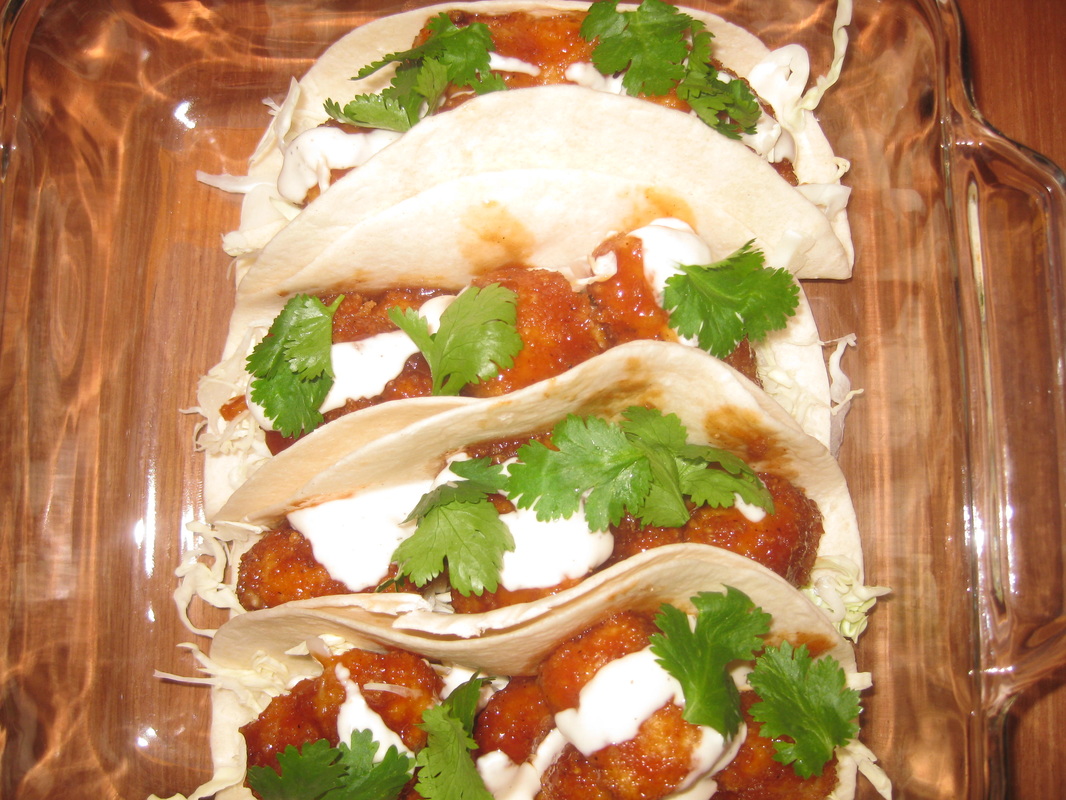
Not fried, baked. There are a lot of "crack chicken" recipes on the internet, and this one is a healthy one!
The chicken is baked. The tacos use fresh cilantro, and fresh green cabbage. They are unbelievably crunchy and delicious!!!
Use the contact form for the easy recipe!
The chicken is baked. The tacos use fresh cilantro, and fresh green cabbage. They are unbelievably crunchy and delicious!!!
Use the contact form for the easy recipe!
Shishito peppers! Not seen since I lived in Tokyo!
I was recently at Rosemont Market on Commercial Street in Portland. I saw a bin of little peppers and asked, "Are those shishitos?" and the answer was an incredible "Yes!".
I have not seen these little green bursts of flavour since I lived in Tokyo. They are just terrific-------particularly tossed in a tiny bit of olive oil, and cooked on the grill.
And, oh my oh my oh my, they are unbelievably good with steak.
I had a skirt steak in the freezer, so put that into a marinade for 2 days----all skirt steaks need a marinade in my opinion. They are so flavourful, but need a little help on the toughness factor. I marinaded the steak in grapeseed oil, but with quite a bit of garlic and quite a bit of rosemary and thyme, both of which are now going nuts in the garden. By the time it came out of the marinade, it was tender as could be.
I made a salad of frisee, watercress, and mint, all of which are also going nuts in the garden. I threw in a a stalk of celery (bias-cut) that I had in the fridge.
But the next thing was to fire up the grill.
I actually grilled the steak first, so that it could rest. After that I grilled the shishito peppers, along with a lemon.
Toss together the salad ingredients-----along with the grilled peppers. Add a TBSP or so of olive oil, and squeeze on your grilled lemon.
Toss this with a bit of GOOD STILTON cheese--------ahh, ambrosia!!!!!
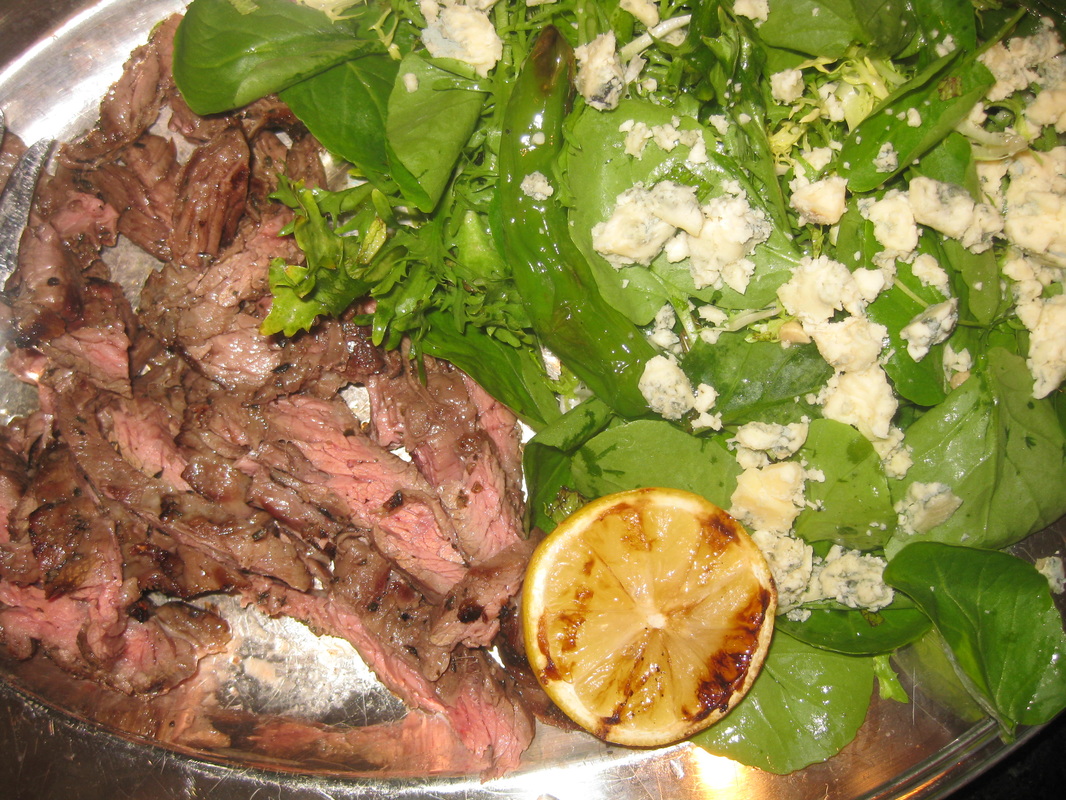
Liz McCusker may not think about Japan, since she hasn't seen many things beyond her beliefs about.....well, her deeply-held beliefs that she's right, which she stated under oath (e.g. "you will never change my mind")
So I'm guessing she doesn't know about Tonkatsu. This is a delicious dish that the Japanese are so fond of, there are restaurants in Tokyo devoted solely to it.
"Ton" means "pork", and "katsu" means....more or less....."cutlet". Liz wouldn't know that, because she has refused to study any foreign languages.......raise your hand if you find that odd in this day and age. Steve told me, probably scores of times over the years, that Liz just "doesn't think she needs to learn anything more".
In my opinion, that's not going to help her too much going forward.
So anyway, there are actual tonkatsu restaurants in Japan, that serve nothing but tonkatsu!!!!! Even Liz would be able to find these restaurants--------they always have a drawing of a pig outside!!!
Basically, it's deep-fried pork------a nice white loin cutlet, dipped in egg and panko. It is always always always served with finely shredded cabbage, slices of fresh lemon, and the extremely hot Japanese mustard......and of course, tonkatsu sauce which is made from fruits and veggies. And no need to make your own sauce-----it is widely available at Asian grocers.
This is a delicious dish!
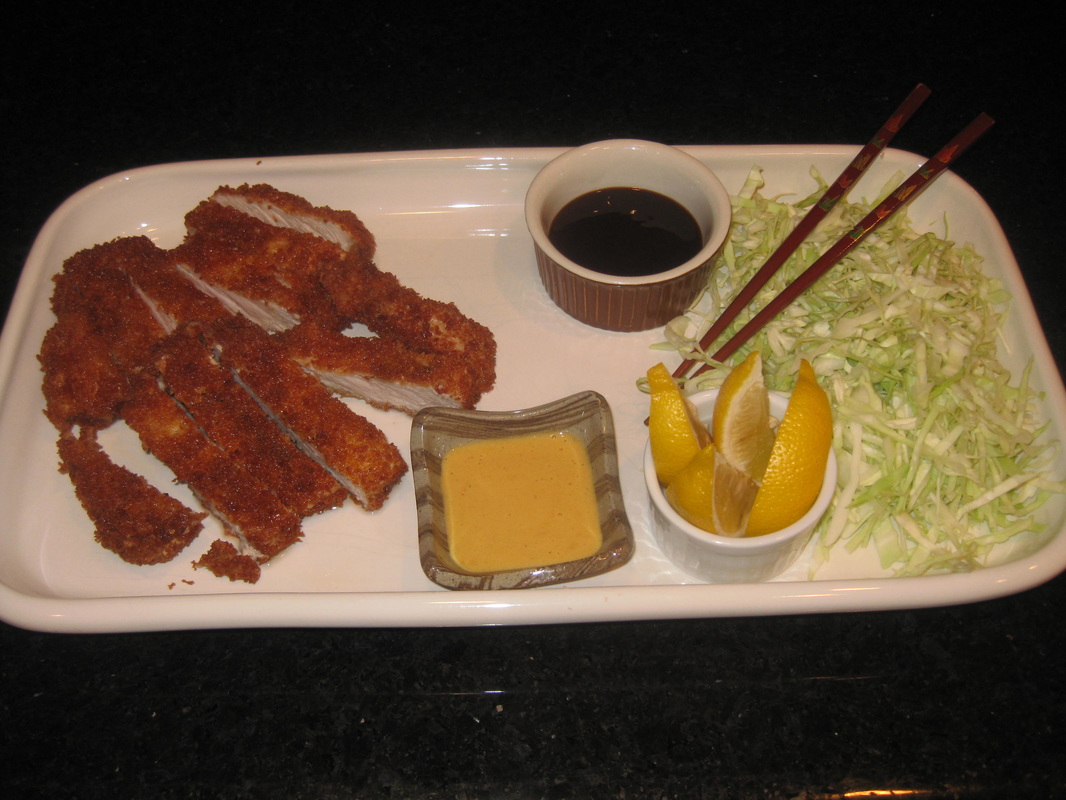
A classic Fresh Fruit Tart: You can make this beauty!
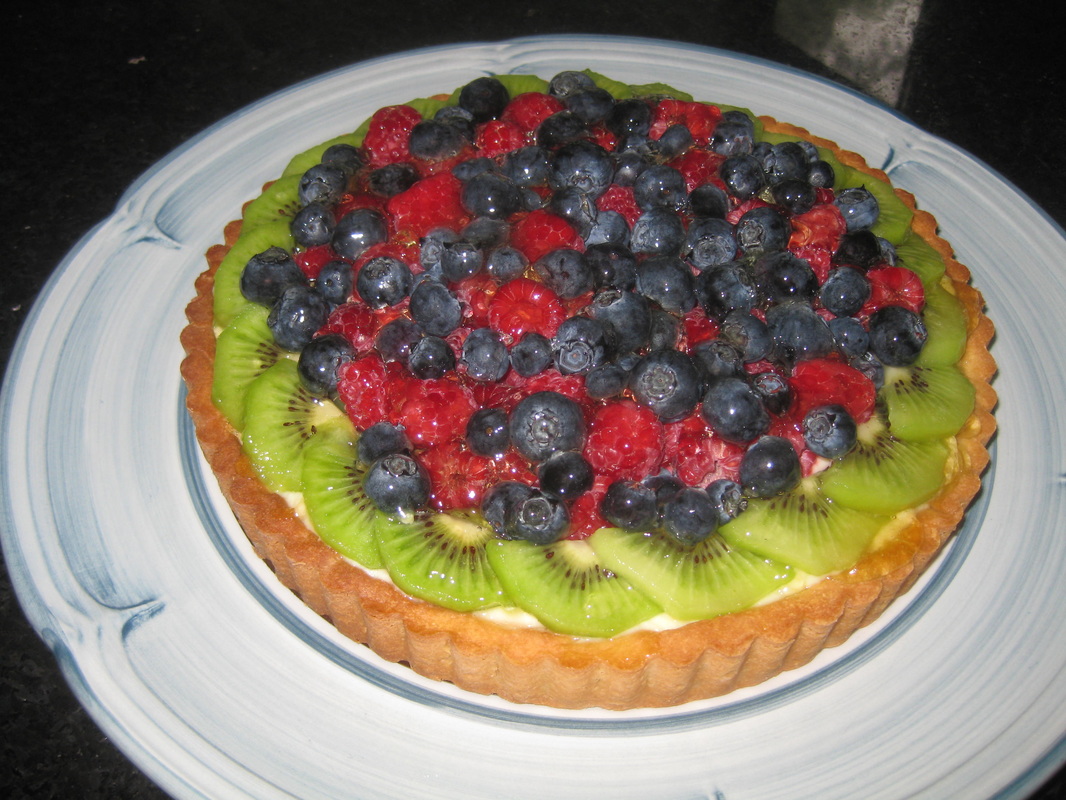
OK, it's not "instant dessert", but isn't this a worthwhile dessert to make for your friends? It's incredibly yummy---the crust tastes like a sugar cookie, the fruit tastes even better than it looks
There are three parts to making this dessert, two of which can be (and probably should be) made the day before:
1. The tart shell
2. The pastry cream
3. The fruit and fruit-glaze
Use the Contact Form to get my exclusive recipe for this beautiful tart!
I learned this in my new little town in Sicily. Got 15 minutes? You can have this indulgent, fresh-dough pan-pizza in that time....
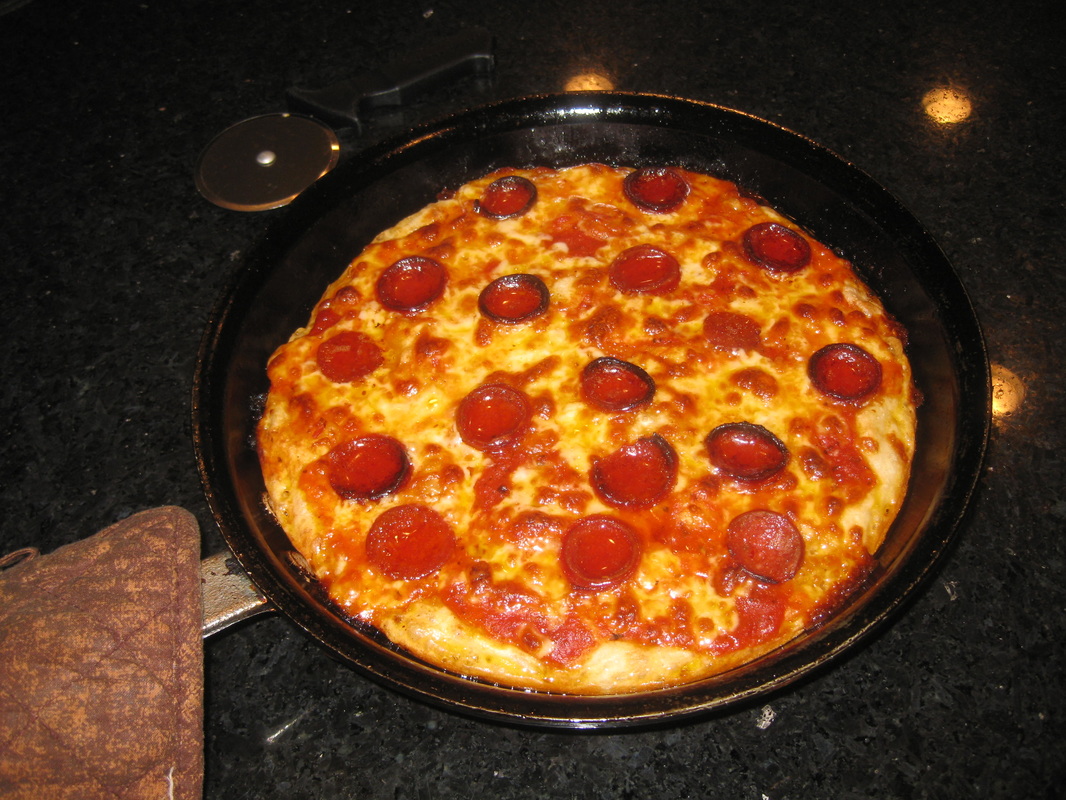
Yes, you must think about this the day before. But that "day before" prep takes literally less than 5 minutes. A cup and a half of flour, 3/4 cup water, and 1/4 tsp yeast. Yes, 1/4 tsp! Mix this up, and let it sit on your counter.
This is a bloppy dough......it's not a stiff bread dough like a regular pizza (though when cooked it's virtually the same if not better). After it sits on your counter for 24 hours, you are going to just blop it into your heated 10" frying pan.
Add your toppings-------I used a good-quality jarred sauce, along with a mix of mozzarella and provolone for the cheese. Cook it on the stove for 2 or 3 minutes, then pop it in a seriously hot oven (at least 500 degrees; more if your oven will cooperate). It will take 5-12 minutes, depending on your oven's heat. In Sicily this takes me 5 minutes because my oven there is so hot (it's Italy, so this should come as no surprise). In Maine it takes more like 12 minutes.
This is a stunningly good method of making pizza, and a 10" pie is more than enough for 2 people.
Well, that Irish tour-bus ("Have your luggage in the lobby by 8:30") can't get here......
This is truly just a pied-a-terre, so the kitchen is minimalist-----yet in true Italian fashion, has everything I need.
Babka? people actually MAKE that at home?????
The teevee show Seinfeld is mostly how I know babka---------you know, the episode wherein Jerry and Elaine miss buying a chocolate one and instead get the cinnamon, which Elaine considers "a lesser babka".
In a recent conversation with a Jewish friend from Bates College who was Captain of the football team, the friend expressed incredulity that I had never made a babka. He said, "Not only are you Jewish, but you went to Cordon Bleu!!!! How could you not have made this beautiful food of our people"?
OK, well....... I always like a challenge, and I had time on my hands this weekend..............and time on one's hands is a damn good thing when it comes to a babka. Holy cow, it's not for the faint of heart!!!!
But worthwhile???? Oh my, oh my, yes indeed. It seriously may be one of the top ten things I've ever made in my life. How great it was that my Roger Bill pals (most of whom wish to deny to the McCuskers that they socialize with me, because they feel split loyalties between me and Steve) were with us the next morning to enjoy it. Because man, this thing is huge and rich....and I had cut the recipe in half!!!!
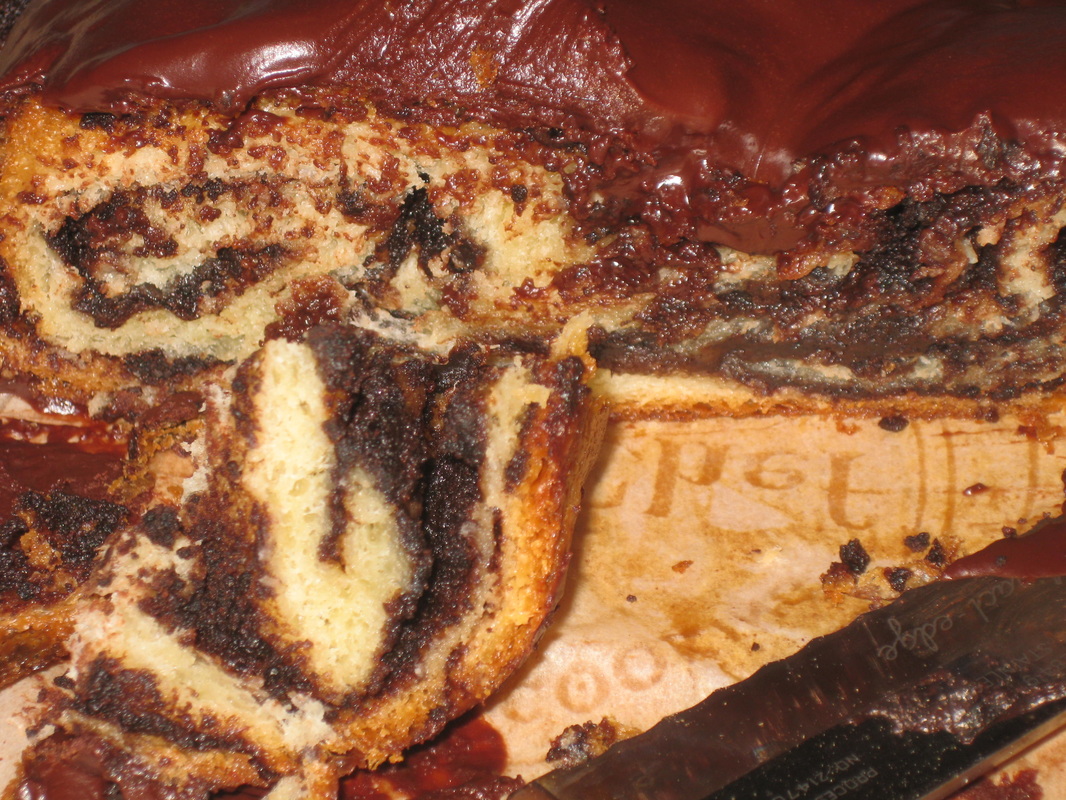
This is another recipe wherein technique is almost as important as ingredients. This makes it a REALLY long recipe. So to my loyal followers on this web site: Contact me on the contact form above if you want the recipe. Make sure you have a lot of time on your hands! This is an extraordinarily hard recipe to make.
But my Bates College dorm-mates said they'd never had anything so good. I don't generally eat sweet things, but even I'm addicted to this. My football-captain friend was right; I don't know why I haven't been making this all my life!!!!
But my Bates College dorm-mates said they'd never had anything so good. I don't generally eat sweet things, but even I'm addicted to this. My football-captain friend was right; I don't know why I haven't been making this all my life!!!!
Meyer Lemons-----Consider these sweet little beauties!
As a person who can walk out her back door to pick grapefruit, limes, bananas, and papayas off her own trees when I'm at at home in Antigua, I am not big on buying tropical fruits when at home in Maine. But everyone has been talking about these Meyer lemons, saying they are just as sweet as an orange. I finally bought a bag.
And frankly, I wish I didn't have to buy the whole bag. These things seem to go bad almost before your eyes. But the ones that survived? Mmmmmm, yum!
You eat these little beauties rind and all. They are delish!!!!!!
I used two of them to top this amazing pizza. It sounds crazy, doesn't it? But my husband and I agreed, this was one of the most incredibly delicious pizzas we've ever eaten. Here in Portland Maine we have a lot of craft-pizza places that have become nationally famous. But move over, Otto Pizza! I'll stack this pie up against your best!
Ingredients:
Your best pizza dough
Good mozzarella
Olive oil
Fresh spinach
a couple cloves of garlic
Prosciutto
Blue cheese
Meyer lemon slices
Maybe a bit of grated parm, if you must gild the lily